


 Here’s a quick Sunday tutorial. You know the big plastic laundry baskets you can get in the hardware or home goods stores? Have you ever felt they were incredibly uncomfortable to carry when returning the clean laundry to its home? Or what if you have it overloaded with sheets and towels and you can’t carry it with one hand? Try walking up two-and-a-half flights of stairs, carrying the basket with two hands and risking falling head over heels down the stairs?
Here’s your solution.
Taking your quilting ruler or whatever straightedge you’ve got handy, measure and draw a horizontal line about ½” above the highest circle. Turn the basket around to the opposite side and repeat. Now using heavy duty shears, cut the handles off along that line. I used my heaviest Fiskars shears that are intended for home decorating projects. Do not use any of your dressmaking shears or any scissors reserved for fabric.
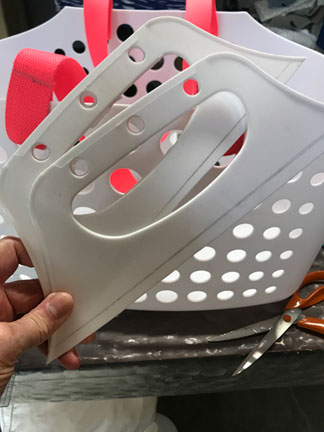 The leftover pieces will look like what you see in this photo. You can throw them in the recycle bin. I’ll put mine aside with my other odd things that can be used as a resist in fabric dyeing.
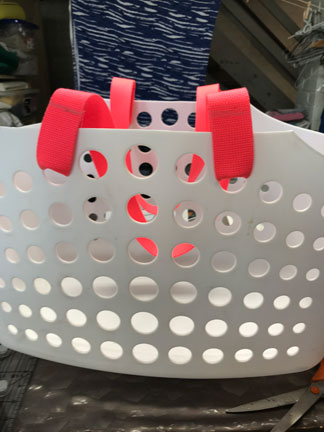
Now you need some webbing or belting in a width between 1″ and 1½”. Cut two pieces about 36″ long. If your webbing frays, coat about ¼” of each cut end with FrayCheck or glue and let it dry. Lace the ends of the webbing through two of the holes. I chose the second hole out from the center hole. I laced mine from the outside to the inside, and then turned the edges out so they matched the concave top of the hole.
Make sure you have laced each piece of webbing through the two holes on one side, not across the body of the basket. If this doesn’t make sense, look at one of your double-handled purses. (Or check out this cool Betty Bowler bag from Swoon Patterns – my favorite bag pattern designer.) You want to be able to carry the basket lengthwise, not crosswise.
Here’s the trickiest part of the project: Arrange your sewing machine in the middle of your table so you can balance the basket on the table.
 With the basket balanced to the left of your machine, turn about 3″ of the end up and stitch back and forth over the raw edge, attaching it to the webbing on the outside. I kept angling my presser foot to have about eight rows of stitching covering about a ¼ to ½” near the end.
Et voila! That’s all it takes to make transporting your laundry less painful. Okay, so you still have to deal with the washing, drying, and folding part. But isn’t this a great solution? You’re welcome.
Now I bet you want to know where I got the gawdawful neon coral webbing. My Portland sewist friend, Tina, and I are making duffle bags for our trip to Bali. Tina ice-dyed the canvas (exterior fabric) and cotton (lining). The bag needs handles and I wanted to use cotton webbing instead of sewing and folding the canvas into straps. It required shopping online and trusting the colors on my display to match one of the orange/yellow/pink shades in the dyed canvas. When I went to cut the straps the other night and held the webbing up to the fabric under good light, I realized I had misjudged the color. Grossly misjudged! So I ordered some undyed cotton webbing and a couple of colors of Procion MX dye to make new webbing that will match the fabric more closely.
And what to do with the old webbing? I realized I was sick of hurting my hands on the old laundry basket.
So there you go!