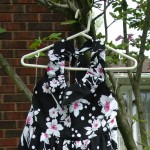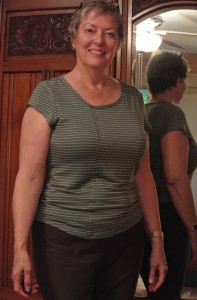
Something for a Hot and Humid Summer

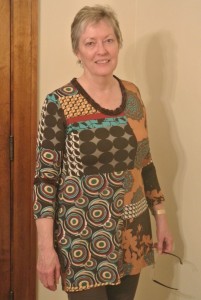
Stripe8671When I was in Santa Barbara in February, I picked up a bolt end that Marcy Tilton had on her clearance table. It was a cocoa-and-turquoise stripe—good colors for me—in a touchably soft cotton jersey. Ever since I finished the cocoa pants just prior to our vacation trip to France, I’ve been wanting to get this top made to go with the pants. The late-June/early-July weather in Northeast Ohio has been unusually hot and humid, and my wardrobe is low on cool tops. So here’s my cool top.

Pattern Description: Marcy Tilton T-shirt, Vogue 8671, View A

Pattern Sizing: Misses 8-22, I cut a 16

Did it look like the photo/drawing on the pattern envelope once you were done sewing with it? Basically

Were the instructions easy to follow? Yes, except for one omission that hampered me (see below).

What did you particularly like or dislike about the pattern? Easy, fast, flattering. I like the little bit of assymetricality.

Fabric Used: Cotton jersey stripe from MarcyTilton.com.

Pattern alterations or any design changes you made: I couldn’t figure out exactly what the pattern directions wanted me to do with the neck and front, so I just kinda played it by ear.

When Vogue copyeditors got their hands on the instructions for the neck finish, something got lost in the translation.

On the neck opening, you are instructed to pin the neckline band to the inside of the neck opening, right side of the band to wrong side of the neckline opening. The instructions say to stitch in place, then trim close to the stitching, and that the raw edge will be the neckline treatment. However, the illustration indicates a double needle is used (note depiction of zig-zag on wrong side and two topstitch lines on the right side). I didn’t notice the discrepancy between the written instructions and the illustration until I had already sewn the band onto the neck.

My solution: I stitched the band to the inside about 3/8″ from the edge, then trimmed and folded to the outside, pressed, and topstitched about 1/4″ from the edge. I finished by trimming the band fairly close to the topstitching. Because I’m working with a knit, it won’t ravel, and it looks pretty nice. (Going back after finishing and reading a couple of reviews on PatternReview, my method also prevents the potential problem that Madcap on PR mentioned: If you staystitch the neck edges first, then apply the band in the manner shown in the instructions and illustration, you’re going to have to go back and remove the row of staystitching to avoid have three lines of stitching—two straight and one not-so!)
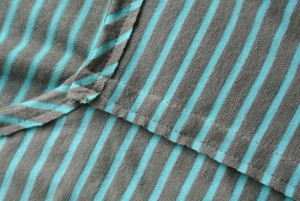
Stripe8671frontI overthought the side front seam. On my fifth reading, I realize it was perfectly correct, but at the time of construction, my brain wasn’t following. So I wanted to make it look as much as possible like what I had done on the neck opening.

My solution: I sewed that seam with a single needle, wrong sides together. I sewed with the right side on top, favoring the left side (meaning I could see about 1/16″ of the left side extending out from under the right side as I was sewing) to ensure I didn’t have to trim the right side and didn’t have any of the right side peeking out when I was done. I pressed the seam allowance flat, then pressed it to the right and topstitched about 1/4″ from the seam. I’m satisfied with the look, and it matches the neck.
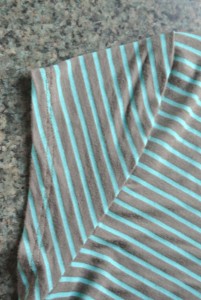
Stripe8671sleeveOne more change—because I was working with a 1-yard piece, I didn’t have enough fabric for the long sleeves.

My solution: I measured the length of my favorite RTW cap sleeve at the shoulder and at the underarm seam. I drafted a new pattern piece using the pattern sleeve piece. At the shoulder seam marking, I measured down the RTW length plus 5/8″ seam allowance for the top seam allowance and 5/8″ hem allowance. At the underarm (side) seam, I measured down the 5/8″ seam allowance plus whatever my RTW measurement was plus the 5/8″ hem allowance. After sewing the side seam, I turned up the hem 5/8″ and topstitched. Ditto with the garment hem, just folded and topstitched. (At this point in the construction, I was rushing to finish and didn’t take the time to change to double needle. #lazy)

Would you sew it again? Would you recommend it to others? Yes and Yes. Next time I’ll try following the instructions for the neck and front seam and the hems. :-/

Conclusion: I like the asymmetrical neckline. It’s a nice variation to standard round necklines. The fit of the shirt is nice and curvy – not boxy. Flattering. When I get rid of my five post-vacation pounds, it’ll look even better!

Here’s your reward for reading all the way through: We spend the 4th of July weekend every year at an old cottage at Madison Shores on Lake Erie, about 40 miles east of Cleveland. The weather wasn’t great this year, but Sunday evening we were rewarded with the best sunset I’ve ever witnessed in four years of weeks at the Lake. Enjoy!

LakeSunset

Knitting Update

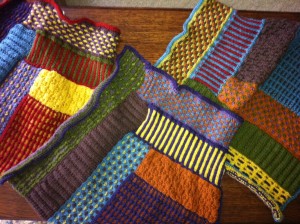
BlanketEarly this year, after living in my tiny home office for four months, my newly-separated son got an apartment. While trying to figure out what all he would need to make this new place his home, he selected a Lion Brand slip-stitch sampler throw as his blanket-of-choice to keep warm while reading or watching TV on the couch.

I bought the kit sold by Lion Brand and started work on this rather complex project. This summer I’ve had several extended periods of time that I was able to devote to this project. I’m now on the fourth block, and it gets easier with each passing row, log and block.

I have completed three of the six blocks. With the gift of more dedicated time, the blanket should be completed before it’s needed with the onset of cold weather in the fall. The more I work on this, the more I like the colors, and the more I think this is going to be a great cuddling blanket for my son and my grandchildren.

Poster City

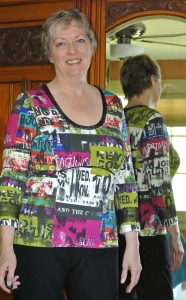
PrintingFrontYesterday I finished another version of Katherine Tilton’s Vogue 8817, View A. I am in love with this top. I think the neckline is one of the most flattering necklines I’ve ever worn. You may remember I made a top out of this pattern/view before the trip to France.

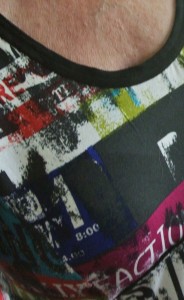
The fabric is another Emma One Sock delight that Linda calls “Poster City.” The fabric is a 96% rayon/4% lycra blend that feels like buttah. This print is a little out of the norm for me, and I absolutely love it. Would you believe that, prior to last summer, I didn’t own a print top?! My wardrobe is richer for the patterns Marcy and Katherine Tilton have been designing!

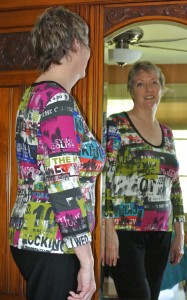
PrintingBackIf you look at the blog post about the previous making of this top, you’ll see the contrasting insert in the back. This time I wanted the back to be all made of the main fabric. I overlaid the two pattern pieces to cut out the back. Look at the image in the mirror here. That inset is what I was trying to do away with this time. Success!

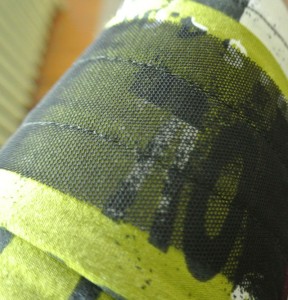
The contrast fabric is a great black mesh that I’m pretty sure came from Marcy Tilton’s fabulous fabric store. I used it for the band around each sleeve (I love how you can see the underlying print through the mesh.), for the trim on the neck, and for the little inset on the underbust seam across the front. (Cut a piece 1½” wide ((½” seam allowance times 2) + (¼” times 2 for the folded edge peeking out)), fold in half, then hold between the front and lower front pieces when seaming.) PrintingSleeveWhat you get is a ¼” piece peaking out of the seam. Just a nice little bit of seam definition.

PrintingCloseupInstead of sewing the folded neck band in a circle, sewing it onto the neck opening, then flipping it up and topstitching, I bound the edge. I cut a strip 2½” (⅝” x 4) wide and the same length as the neck band pattern piece. I seamed only the right shoulder, then stitched this neck band onto the neck opening with a ⅝” seam, right sides together, stretching it to fit the opening. Then I wrapped the strip to the wrong side and tucked the last ⅝” up under the “facing.” I hand-sewed it into place (because I love handwork – you wouldn’t have to do this…) and then topstiched ⅜” from the seam.

Since we believe summer may come to Northeast Ohio at some time in the next 14 weeks, I’ll make this top again, drafting cap sleeves for the hot and humid days. I do love this top!!

Me Made May ’13

imageFor wearable crafters, last month was Me Made May. I wanted to participate, but knew I was spending half of May away from home–eleven days in France and five days in North Carolina. So I participated in a quieter fashion than most.

If you’re a regular reader, you know I was obsessively sewing prior to my tour of France. If you scroll backwards through the posts written since the end of January, you’ll see the results of all that activity.

While in France, I believe there was only one day I didn’t wear something I had made. And on all days, I carried one of two tote bags I made for the trip. So I guess you could say I did, indeed, wear something I made every day.

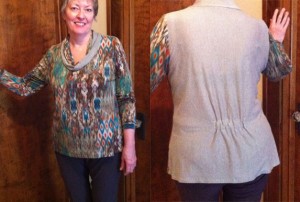
AfterLikewise, on my North Carolina trip to celebrate my mother’s 100th birthday, I wore something I made every day. On the first day, when I arrived at her assisted living facility, she looked at me and said, “That’s a funny shirt.” It was Katherine Tilton’s Vogue 8793, a stripe for the back, an abstract stripe for the front and sleeves, and a mixture of the two for the double collar. I love it. My mother thinks it’s strange. Oh, well.

So I missed MMM’13 this year, but you can bet I’ll be there next year–especially now that I’ve got my Me Made wardrobe built up.

Here’s what I wondered last night while putting away the laundry: If all your handcrafted tops and pants won’t fit in your available storage, do you have too many clothes or not enough storage?

This Project in Use

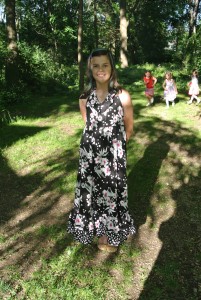
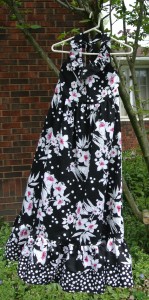
DSC_1566A few days before leaving for France, I finished a long, flounced halter dress for my granddaughter, Ridley, who would turn 10 at the end of the month. Ridley’s mother’s family has a lot of height genes, so this child was wearing size 9 shoes and girls’ size 14 clothes when she was 9. I believe I”ll be making clothes for her for years to come.

As I said in the blog post about the dress construction, I had cut the dress too large, but was able to alter it in such a way that I will be able to make it larger in a few months when she hits another growth spurt.

RCandECShe loved that the skirt included pockets. I noticed, as she was walking onto the stage with her Upper Elementary (grades 4-6) class for the end of year performance, that she had her hands in the pockets and was using them to flip her skirt around even more. Loves the pockets! Loves the flounce! Loves the twirly girly skirt!

The best part of the construction project? She’s so appreciative. She is such a sweet not-so-little girl with such a big heart, and she is appreciative of everything I do for her.

Go ahead, Darlin’, wrap your grandma around your little finger.

(P.S. That’s her brother, over her right shoulder, in the red and cream striped t-shirt. My other darlin’.)

Geometric Goodies

GeoFullI was bored early one morning before leaving for France, and started exploring Mood Fabrics’ website while lying in bed, waiting for the Jazzman to wake up. Bad move. I found several things I had to have.

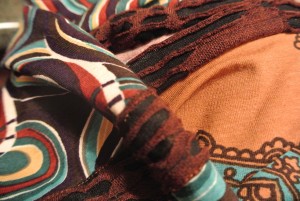
This one is called “Bright Multi Geometric Jersey Prints” and is a whole bunch of colors that look good on me. GeoNeckI knew I would use it for one of Marcy Tilton’s or Katherine Tilton’s tops they’ve designed for Vogue Patterns. So I wanted a complementary fabric to bind the neckline. Lookee here! The photo doesn’t do it justice. Look at how look it looks used to wrap the neck edge and ring the sleeves! That, my friends, is cool!

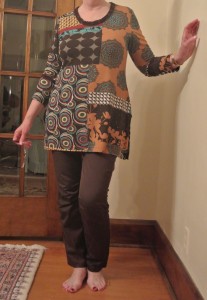
GeoPantsgeometricI decided to make Marcy Tilton’s Vogue 8582, which you saw previously described here, along with the brown pants described in that same post.

The thing I love about how this pattern merged with the fabric is the seeming under-bust seam. The way the pattern drapes is, in my opinion, very flattering to my figure. And of course I love that!!

The top took about 4 hours, start-to-finish, to make. And this great new outfit is going into my suitcase for my quick trip to NC to help celebrate my mother’s 100th birthday.

Sidebar: Got a haircut today. And notice the pretty toenails in the picture. My brothers and I are hosting brunch on Sunday. In attendance will be: my mother’s best friend’s daughter, who was like my little sister as we were growing up; my daddy’s associate in his medical practice (He’s 85 now. That means he was about 33 when I first met him!); the friend across the lake my brothers used to waterski with; the mechanic who souped up my older brother’s race car, a ’56 Chevy, with which he won hundreds of drag race trophies; and on and on. People I’ve known since I was 5 years old or so.

My sister-in-law planned the whole event. I owe her, big time!

I think I’ll wear this to brunch.

A Travel Tote

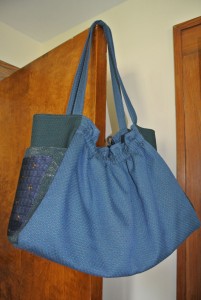
MarcyBagOn the evening before wheels-up to France, I finished the tote bag to keep me sane on this trip!

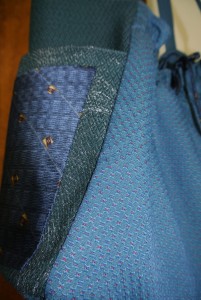
My friend and fellow fiberphile, Mary Lou Alexander, recently destashed and transferred some goodies she no longer needed to my stash. I wanted a new bag for this trip and started digging into her upholstery fabric remnants. Voila! (as they say in France).

Marcy Tilton has designed a number of great handbag patterns for Vogue, but Vogue 8590 fit my needs. My small travel purse doesn’t carry enough things to get me through a long plane trip, so I always like to have a tote large enough to carry my travel purse, along with my carry-on that holds things I won’t need until I arrive but don’t want to put in checked baggage. (Camera, jewelry, adapter cables, etc.)

MarcyBagDetailI’m not going to say a lot about this bag, as I’m still not completely packed. But it’s perfect. It’s Very Big without feeling or appearing to be Very Big.

There’s one glitch in the pattern instructions, if you’re making the bag. The illustration for attaching the straps is incorrect. Look at the pattern envelope picture and the illustration on the pattern back and apply your own brilliant logic. I also didn’t quite get the pleat in the inside pocket. Next time I make this bag, I’ll add more and different pockets, but time was of the essence on this one.

The exterior is two upholstery fabrics. The interior is a remnant of lightweight silk noil that was lying around. The cord to tie it shut and the patch on the side pocket is one of Jas’s old ties I cut up. Why did I put that patch on the pocket? (No, it’s not a secondary pocket. It’s just a piece of silk handsewn into place.) I tried silkscreening a cool design on the pocket. Nope, the upholstery fabric was too bumpy to take it. So I decided to stencil a design over it. Again, nope. So how could I hide the mess of paint now sitting on the pocket? Why, put a patch over it.

I carried the bag with me last night to my son’s dress rehearsal for “Legally Blonde, the Musical” at the Youngstown Playhouse. What a great bag! Pockets on each end just the size for a water bottle. If I want to drop my phone into that pocket, it’s down deep and no nasty European pickpocket can get his hands on it.

And a final note: That bag I made of French-themed fabric? It felt too light for me, like it wouldn’t hold things I wanted it to hold. So I laid it over the end of the plastic-covered ironing board and painted it with diluted Crafter’s Pick Fabric Stiffener. Now it’s great and is being folded and tucked into my suitcase.

Au revoir!

P.S. After walking around Pittsburgh International Airport for a couple of hours: That exterior side pocket is the perfect height for one’s passport and boarding pass. Inspired!

But Not for Me

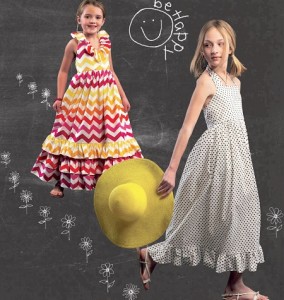
RfrontIn preparation for our upcoming vacation in France, my recent sewing frenzy has been totally focused on moi. But, ever the devoted Grandma, I saw a cute new McCall’s pattern and decided DGD needed a new dress for her upcoming end-of-year festivities.

Ridley will be 10 in a few weeks, but she got her height genes from her mother’s side of the family. She’s probably about 5’4″ and wears a girls’ 14 (although there are items in her closet in Misses Small). I did not ask her mother to measure her before cutting out the pattern–oops. I looked at RTW size charts, compared them to the pattern measurements, and cut a 14. The resulting unsewing and resewing could have been much worse!

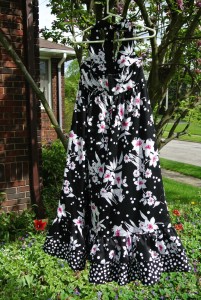
imageI found a pretty 100% cotton sateen border print at Jo-Ann’s and bought all they had. I cut the widest ruffle out of the border so two ruffles would be floral with random dots, and e bottom ruffle would be all dots. This fabric was a dream to work with.

Before attaching the three ruffles, I had Ridley come over and try the dress on. Smart move! The bodice was a little roomy. The length–if I had used all three ruffles, as in the pattern, the dress would have dragged the floor.

imageI unsewed the bodice side seams and took each side seam in ⅝” at the armhole, tapering out to nothing at the raised waistline. I did not cut the excess seam allowance, figuring that in a year she’ll love the dress and I can redo that seam back out to the size 14.

RbackThe ruffles are attached in a new-to-me way. The top ruffle is attached to the skirt (note the shorter dress in the pattern illustration). Then the middle and bottom ruffles (bottom is several inches longer than middle) are basted together and gathered together onto a skirt extension. The extension is then sewn over the top ruffle gathering. (Picture a sandwich of skirt right side, ruffle wrong side, extension wrong side.)

RnecklineAs I needed less length, I omitted the top ruffle and the extension. I gathered the middle and lower ruffle to the skirt. The top ruffle and extension are being sealed into a plastic bag for next year. She’ll have another five inches on her by then, I’m guessing, and will still be able to use this cute dress once I redo the ruffle.

(Click the last photo to see the halter neck with ruffle treatment.)

She’s a dancer and a spinner, so this dress totally suits her personality. And she grinned when she saw the skirt has pockets. It doesn’t take much to please this sweet girl!

Now back to my personal frenzy. Three days to lift-off.