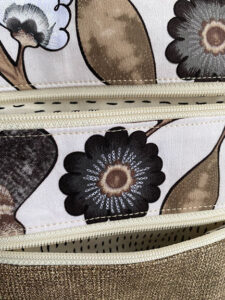
 In the “How Time Flies” post a few weeks ago, I mentioned some bags I promised to make for my cousin’s wife and her two sisters. I was auditioning the Sallie Tomato “Zippy” crossbody bag for that purpose. But then I learned there was a similar bag to the Zippy, a little larger and with boxed corners, so it carries a little more. That pattern, also from Sallie Tomato, is “Myrna.”
<Sidenote On>
 If the term “boxed corners” is foreign to you, it’s a method used in sewing bags and home decor to add dimension to a flat rectangle. Where the Zippy is constructed somewhat like an envelope, in the Myrna you sew a bottom rectangle between the front and back, then rotate and sew across the corner of the front and back. This results in a bag that is about 2″ deep. Instead of just slipping your wallet and your phone into the Zippy, with the Myrna you can also fit your sunglasses case and a checkbook and pack of tissues. Make sense? If you want some pictures to make more sense, this page may help.
<Sidenote Off>
 I think the more I make this bag, the easier it will get. It’s really not a difficult pattern—I just have to pay attention to what I’m doing.
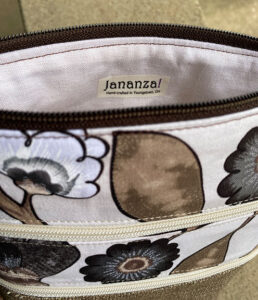
 For the sample Myrna, I used some more of the fabulous Richloom vinyl which is designed by my nextdoor neighbor for Richloom’s RV and Manufactured Housing line. This particular fabric looks sort of like a nice heavyweight linen. It comes in a number of rich shades. I chose a brown that goes beautifully with the accent fabric, “Floral Philosophy” designed by Maria Kalinowski for Kanvas Studio. I love that print. It’s been in my stash for several years, waiting for just this moment. The front pocket lining is another high threadcount quilting cotton that’s been whiling away its time in my stash—I have no idea when or where I purchased it. And the interior lining is a lightweight white linen, Limerick Linen from Robert Kaufman Fabrics. It’s 3.51 oz. per square yard. I bought it to make curtains, but changed my mind. For this project, I tea-dyed it and fused it with Pellon Shape Flex to give it the body that I believe a bag lining requires. I love this combination of textures and prints.
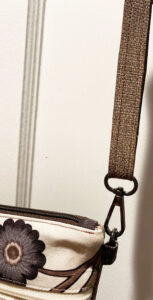
The bag front has two zippered pockets. The back has a slip pocket that closes with a magnetic snap. This is a crossbody bag with an adjustable vinyl strap.
 I treated the vinyl strap differently than instructed in the pattern. It said to cut a 1½” strip and fold it in half, then topstitch at ⅛” along both long edges. But if I used the Sallie Tomato method, I would have had one side folded and one side with raw edges. I could have folded both sides to the center, but then I would have had to topstitch the raw edges with zigzag stitch, and I didn’t want that look. Instead, I cut two ¾” strips the width of the fabric—just under 60″. I used Wonder Tape and clips to hold the two strips together and topstitched the length on both long edges. But I now had two long raw edges. I dug around looking for my bottle of Edge Kote, but it didn’t want to be found. So I remembered a set of Sakura Micron Brush Pens, found the set and pulled out the brown pen. I then sat with an episode of “Maine Cabin Masters” streaming on my little sewing room TV while I painted over the almost 120″ of raw edges with my brown brush pen. Zen! I am very pleased with the finished look of the strap.
 My only complaint about this pattern is the construction of the boxed bottom. The size of the bottom insert creates a nice depth to the bag, allowing you to carry more than just your wallet and phone. But it’s an awkward method. Instead of the size of the bottom matching the size of the side where the seam creates the box effect, there is excess fabric on the side. And neither the pattern instructions nor the video available on YouTube address this inconsistency. What is a sewist to do with that extra fabric? If I were to decrease the size of the bottom insert to make the bottom and the side match in length, then the depth of the bag would be smaller, and the bag user wouldn’t be able to carry as much, comfortably, in the bag. Something has to change here, and I may have to make one more sample before I dig into the special, vintage fabric my cousin sent me.
 Would you like to see the lengths a perfectionist will go to in trying to solve a mental puzzle? Here were my notes yesterday morning when I was trying to understand the difference in the seam lengths between the bottom insert and the side. Too bad my Health app can’t see all the whirring in my brain and award me steps for that work!!
Am I pleased with this bag? You bet I am! Now to go cut out my cousin’s vintage fabric to make three more.


