


 Just finished: A new pattern from Sara Lawson of Sew Sweetness Patterns. She sponsored a sewalong for this wonderful new crossbody bag. The event took place over four weeks. I was late starting as we were in Texas visiting my Amarillo son and daughter-in-law in their new-to-them home, and then in Lewisville (northwest suburb of Dallas) with my elder son. After we returned, I was able to push through and finish the bag a few days before the end of the sewalong.
 I don’t believe I’ve mentioned here that my 20-year-old granddaughter is living with us now while she’s job hunting. Once she’s back on her feet, I imagine she’ll find an apartment. But I’m sure enjoying having her here now. She’s very artistic and it’s been fun collaborating on bag fabrics. She’s quick to say she doesn’t think a particular companion fabric enhances the overall bag. I love her participation.
 So, what do people do in a sewalong? The moderator, who happens to be one of the admins on the FB fan group for Sew Sweetness, studies the pattern and breaks it into logical groupings of steps, which are each assigned a week for completion. That way people who are working full-time, or have babies, or have a short attention span can sew along with the rest of us. There’s always someone online when you are who can throw you a lifeline if you get stuck. There is also a video available for each bag Sara designs, so visual learners have help to supplement the [very well] written instructions. (Says the former technical writer and legal writer and editor.)
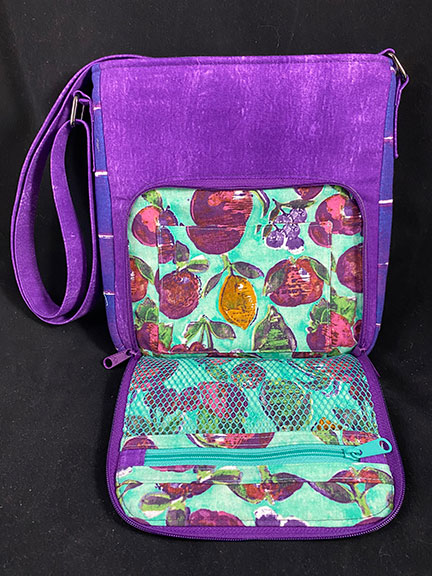
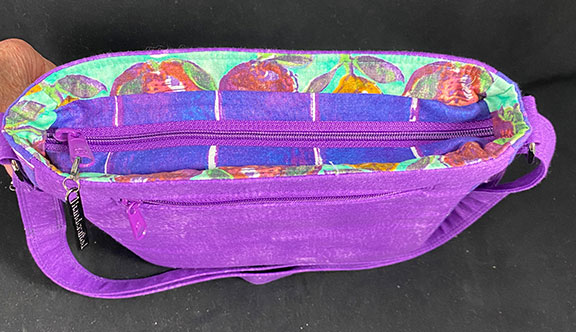 The first week is assigned to preparation: cut out your pattern pieces, fuse or baste the interfacing to the fabrics, make sure you’ve got all the hardware and supplies you need, and read the pattern through. Then make the two zipper pockets where the pocket itself is hanging behind whatever fabric the zipper is sewn into. Finally, post a photo of the work you’ve accomplished that week to the Sew Sweetness blog post with that week’s assignments. The second week was twelve steps, which allowed you to make the mesh zipper pocket and assemble the front pocket—that oval-top insert on the front of the bag.. The third week took us through assembling the exterior of the bag and assembling the lining, a total of seven steps. And in week four there were nine steps, attaching the lining to the exterior and making and attaching the adjustable strap. When a large task is divided into bite-sized piece, it’s really no big deal to complete. (I’m sure Confucious could have said it better.)

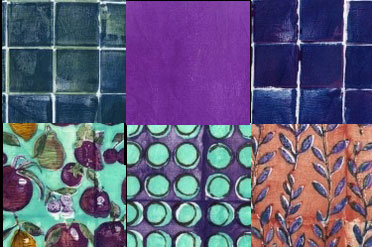 The fabric I used is from Windham Fabric. The designer is Melanie Testa, and the collection is called Meadowlark. I first saw it in a quilt magazine several years ago and thought it was beautiful, so did some searching and found it in an online fabric store. I bought half a yard of each of these six prints. The three I used were the upper right grid (on the front pocket, the side gusset, and the zipper panels); the sorta hand-dyed-looking solid in the top row, center; and the floral print on the bottom left. What I was originally going to use instead of the grid was the abstract dots on the bottom center. And now that it’s all done, I’m happy that I listened to the voice of the artist. 💜
 Do I like this bag? Yes, I absolutely love this bag, and love how easy it was to make. I do believe I will be making more of the Blazingstar Bag.
You are nailing it girlfriend! Good work, directions and music too! Inspiring! xoxoDiane
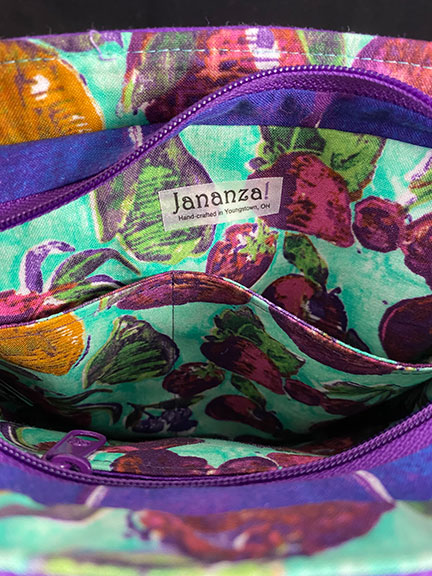
Aw, thanks, Diane. I’ll actually start on the bags for my cousin next week. The culmination of all this testing and learning.
Much love to you.