


Click any photo to enlarge
 As I mentioned on this afternoon’s bag post, I’m making a few Metro Double-Zip Pouches from the Sew Sweetness Minikins 2 collection.
Bag #1
 The bag, as designed, calls for SF-101 interfacing on the exterior and lining fabrics and the wristlet handle. I wanted it a little thicker, as we travel a lot and I like the idea of having a quick place to stash my phone and/or my passport.
Interfacing:
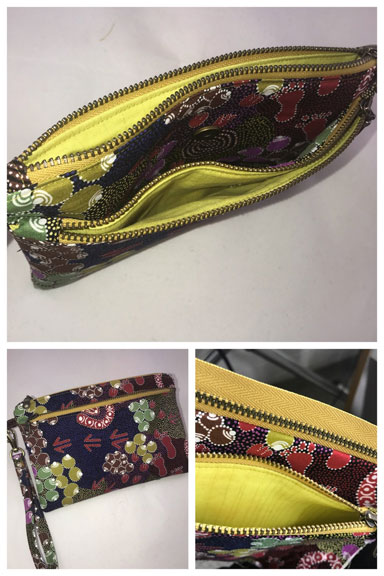
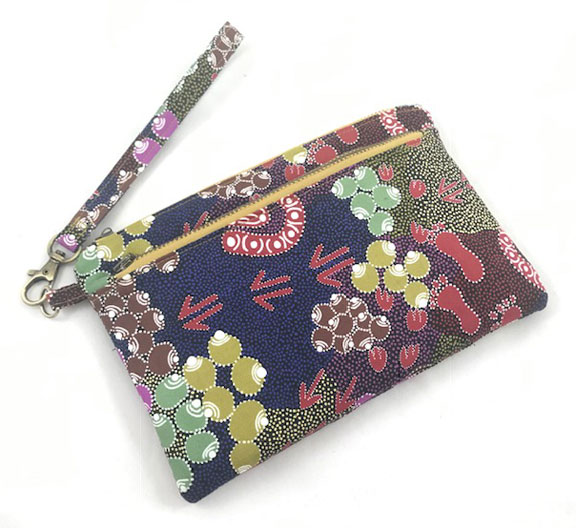
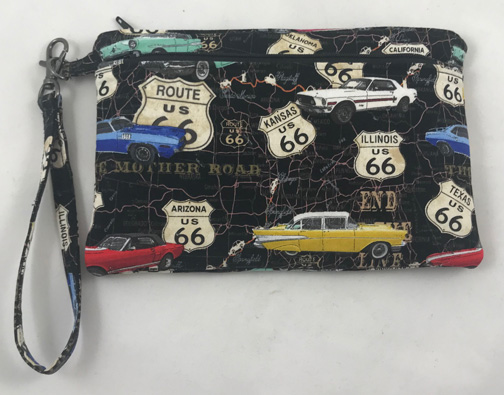
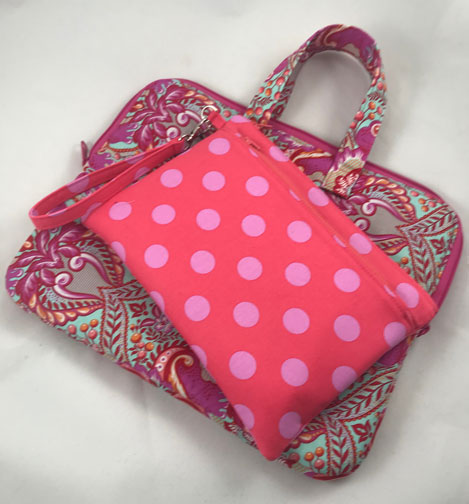
I made the medium size bag—the main pouch pattern piece is 9″ wide and 6″ tall; the pocket piece is 9″ wide and 5″ tall. I cut fusible fleece interfacing for the exterior pieces, and cut them without the seam allowance, i.e. I cut two pieces of fleece 8″ x 5″ and two pieces 8″ x 4″. I centered those on the the wrong side of the exterior pieces and fused them in place. Then I cut SF-101 the same size as the pattern pieces—9″ x 6″ and 9″ x 5″. I fused those to the exterior pieces, further securing the fleece in place.
Attaching the pocket to the bag:
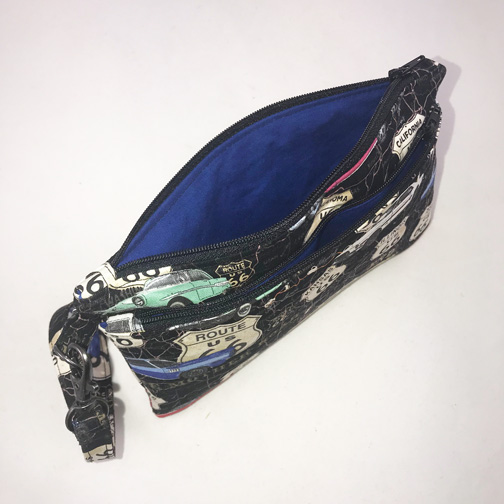
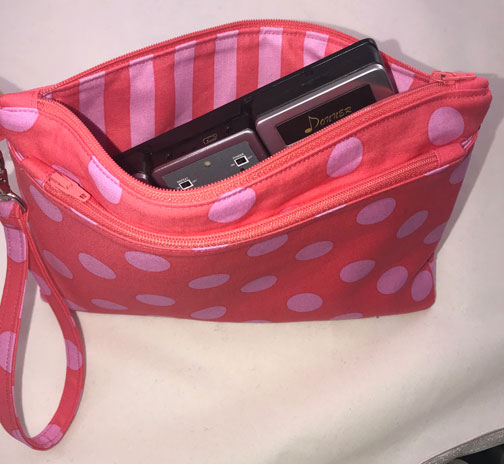
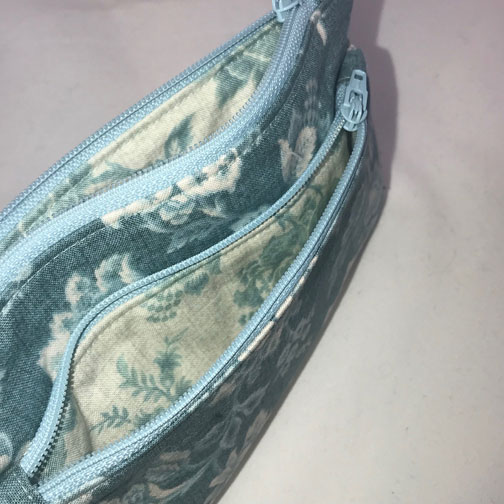
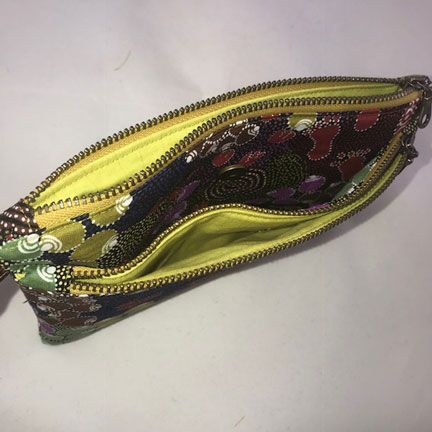 The pattern, as designed, only uses one exterior piece for the pocket and secures the back of the pocket, just inside the zipper, to the main front pouch piece. I made the pocket with both a front and back exterior piece and only secured it to the main front exterior at the sides and the bottom. By doing so, I created an open pocket between the front pocket and the main pouch. Before sewing the pocket closed, I attached the male side of a magnetic snap to the back of the pocket, and the female side of the snap to the main front exterior piece. Now I have a wonderful secure pocket in which to stash my phone or passport when traversing the airport. It’s the perfect size to tuck into my underseat carry-on once I’m in my plane seat. Perfect for our midwinter flight to Cancun!
Compare the picture of this bag to the picture of the bag that follows. I hope you’ll be able to see the difference between the middle open pocket and the pocket that’s attached to the bag.
Zipper size:
The pattern calls for a #3 zipper, which is the standard dress zipper size. I used a #4.5 zipper with antique brass metal teeth. This made for a much bulkier closing, and made it more difficult to sew the closing. I like the look of these zippers on this bag, but I don’t know that I’ll do it again. I have my second Metro cut out, and I have #3 zippers set aside for that bag. We’ll see what I think when that bag is finished.
Fabrics:
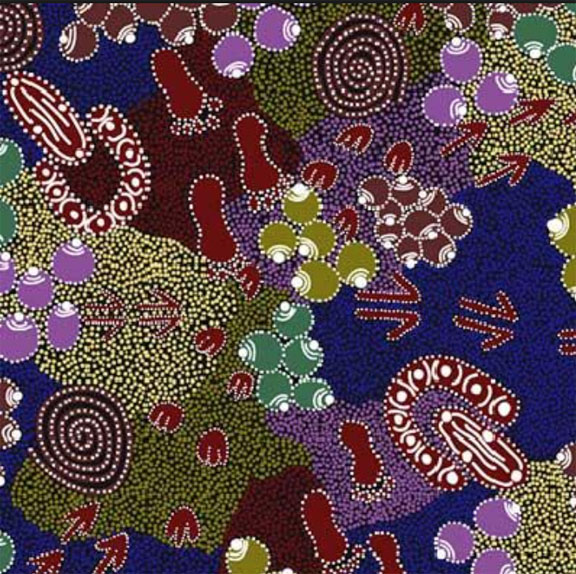
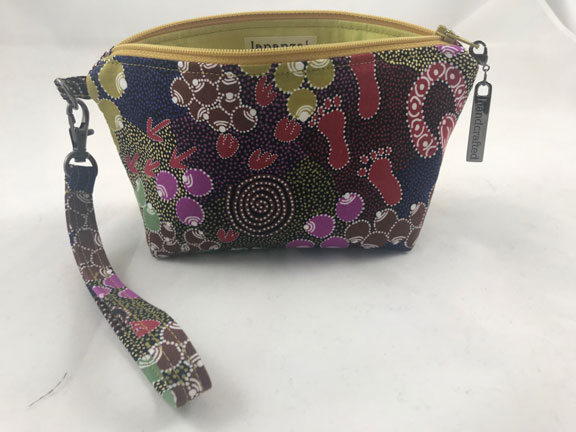
 The exterior fabric is Australian Aboriginal designer fabric, “Bush Plum Dreaming” in blue, designed by Juliette Nakamarra Morris for M & S Textiles Australia. The lining is Carrie Bloomston’s “Scratch” in color Olive Oil from her Collage collection for SUCH Design. The zippers are YKK Antique Brass Donut Pull size 4.5 in Monster Snot (really!) from ZipIt on Etsy.
Bag #2
 The second Metro pouch has the same double interfacing—fusible fleece and SF-101 for the exterior pieces as the first—but it has one fewer exterior piece. I made it without the extra pocket between the pocket and the body. That is, I cut it as directed in the pattern, adding the three pieces of fusible fleece.
Zipper size:
I used the #3 zippers, as recommended in the instructions. The sewing is much easier with the thinner zippers.
Fabric:

 The exterior fabric is from Blank Quilting, their American Dream collection, showing Route 66 and classic 50s American-made cars. For the lining, I wanted a solid in the same color as one of the cars in the print. When I dug through my stash of hand-dyed fabric, I found an intense blue that was exactly the shade of blue as the Dodge Charger. I dyed it about 15 years ago and it’s been just hanging around waiting for the perfect project. And I love how it looks.
So #2 is complete. Now I want to make one more, without the fleece, just to see how different the three are.
Stay tuned.
Bag Almost-#3
 I had started a different Sew Sweetness bag with this Tula Pink Stripes and Pom Poms in Foxglove, but my Bernina 330 and I were having an argument that day, and she was being obstinate (something my adoptive mother used to accuse me of being…). I unsewed everything from the 12″ square of the stripe and set it aside.
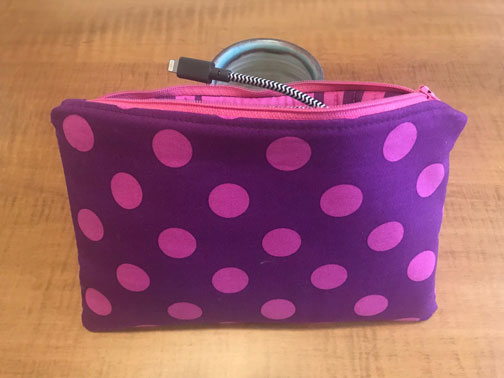
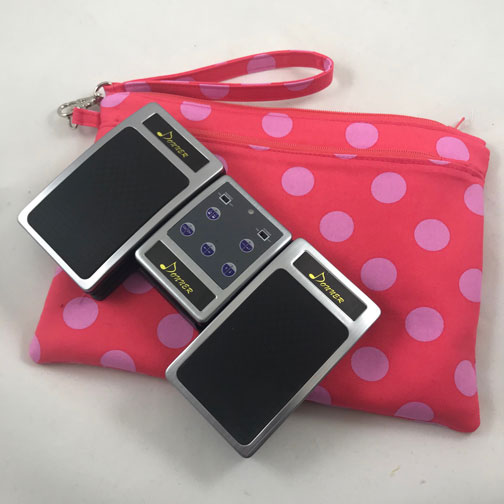
 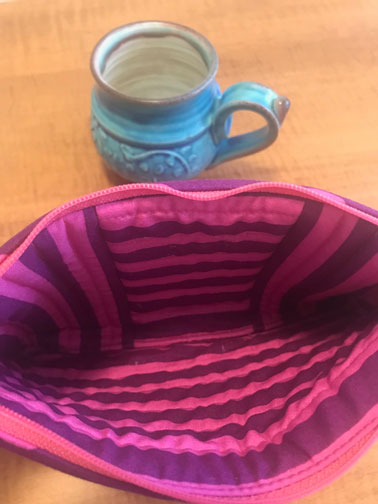 A few days later I decided to quilt it to the piece of Pellon Foam Flex and make another foam-interfaced Metro pouch. But the unsewing from the previously attempted bag had left too many loose and snagged threads hanging out. So I thought I’d use it as the lining for a Metro (after piecing it to have enough lining), using the Pom Poms as the exterior fabric. And I decided to leave the pocket off, just making a single pouch to hold my page turn pedal. Despite my measuring twice and cutting once, the pedal wouldn’t fit into the pouch. But the pouch was cool—very cushy and protective for something that needed protecting. Ahhhh. The charging cables I carry with me to lessons and rehearsals.
So on to the real bag #3.
Bag #3
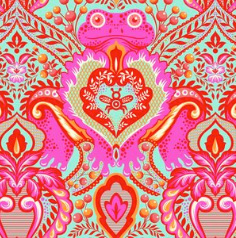 My second try at a bag to hold my page turn pedal turned out beautifully. I cut the Large size of the Metro Double-Zip Pouch, and the pedal fits as if the bag were made for it. Oh, haha, it was. The Stripes and Pom Poms, in Poppy, coordinate with the Tula Pink All Stars Frog print in Peony. The zippers are Coats “Flamingo” and I love these shades together.
 The most time consuming part of this project is the cutting and interfacing. Sara Lawson offers acrylic templates for many of her bags. These can be used with cutting machines such as the Cricut. (I know nothing about these machines, so can’t even tell you the various machines these templates fit. But if I’m going to continue making these bags and move forward to selling them, I’ve got to invest in one of the machines and the templates. It will make a big difference in the construction time!
 Nothing extraordinary to say about this bag, except that I’ve got this pattern down now. Oh, this bag used fleece, as did numbers 1 and 2. I have two more bags cut out downstairs, that use just Pellon SF-101 rather than the fleece. It will make a thinner bag without all the cush.
Now, rather than sitting here and watching the snow fall, I’m going to go back downstairs and see how quickly I can finish these two bags.
You might be wondering what a “page turn pedal” is. I’ll share with you the answer I gave this morning to a couple of women on the Sew Sweetness Facebook group, who asked just that question.
I’m a collaborative pianist at the local university. I accompany musical theatre students in their voice lessons and am in rehearsals for the April production of “Into the Woods.” I play from my iPad and no longer carry books and binders of sheet music around with me. The app I use to manage my music is ForScore, into which I load a PDF of an opera or a musical or the repertoire the singers are working on in a given semester. (I also load bag patterns into forScore so I can refer to them on my iPad rather than on paper.)
Some genius invented a pedal that is Bluetooth-enabled. When I need to turn a page on the iPad, I tap the pedal with my left foot and the page in the music turns as if by magic. 😳
You’ll see in the picture that the device has two pedals. The right one turns the page forward and the left one turns the page back for repeats or in the event of my accidentally tapping it twice and turning two pages. Because of the pedal, I don’t have to miss notes in the score to turn pages.
The pedals are used my many instrumentalists and conductors – not just pianists. It’s truly a stress-preventing tool for me.
Bag #4
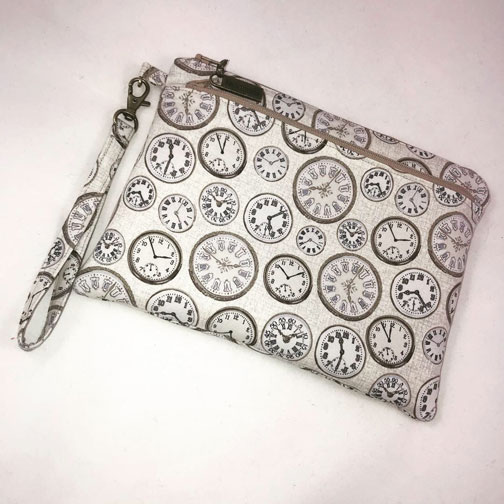 The Metro Double-Zip Pouch comes with instructions for three sizes. The Large is 10-1/2” x 7-1/2”; the Medium is 9″ x 6″; the Small is 7½” x 4¾”.
 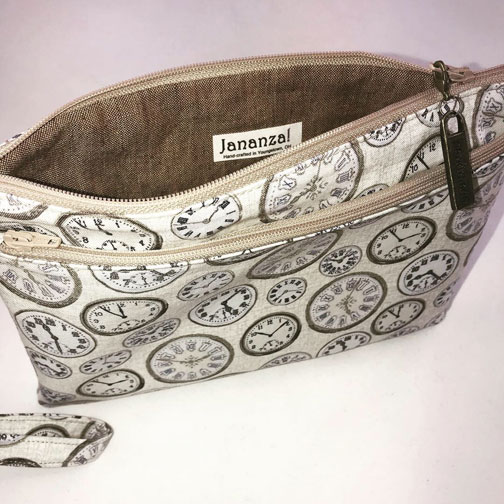 My next Metro exercise is to make the three sizes in similar fabrics with SF-101 interfacing so I can see how they compare. Here’s the Large in Makower Vintage Clocks. The lining is a top-weight linen in Tobacco from Jo-Ann’s. The hardware is from Dritz, purchased at Jo-Ann’s. The “Handmade” zipper pull is from Emmaline Bags.
Bag #5
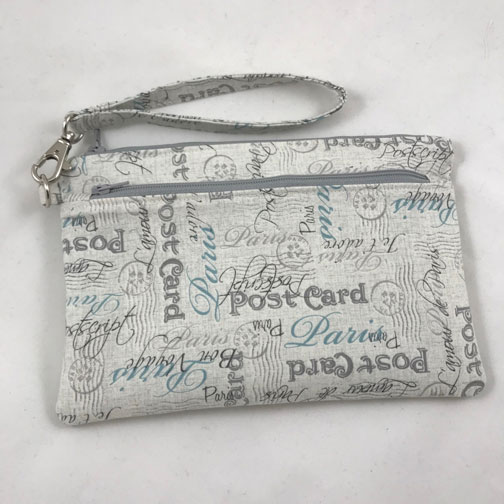
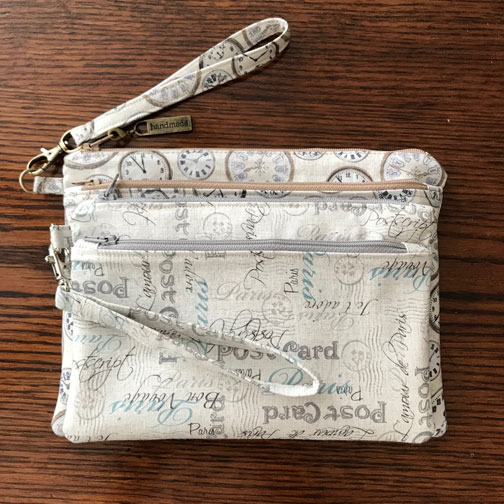
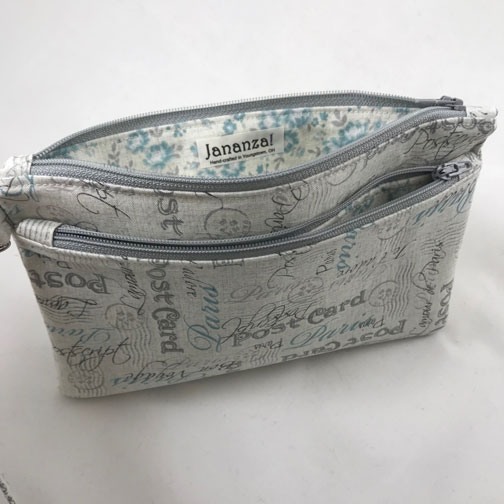 Truly nothing new and different to say about this Metro Double-Zip Pouch in size Medium. Read the description of Bag #4 and switch “Vintage Clocks” to “Vintage Postcards.”
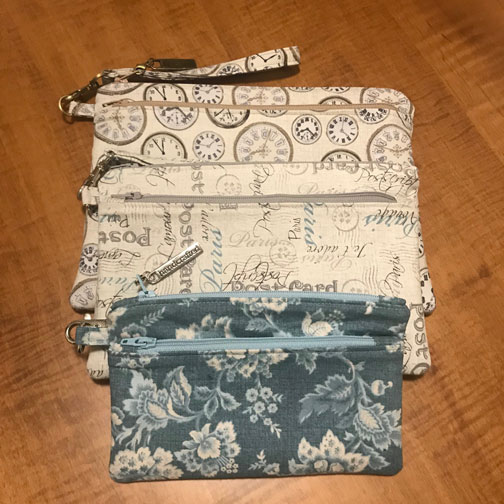
 This picture shows the Medium laid on top of the Large to clearly show the size difference. The Large is 10-1/2” x 7-1/2”; the Medium is 9″ x 6″.
I’ve cut out the small in Vintage Floral. Will fuse the interfacing in tonight and start the construction and hope to finish the small tomorrow. Then you’ll see a third size-comparison photo.
On this Martin Luther King, Jr. federal holiday, the high in Northeast Ohio is 13° (it was 2° when I got up at 6:00 a.m.). At least right now there are blue skies and some sun. I hope it’s warmer where you are.
Bag #6
 Here’s the small Metro. It’s 7½” x 4¾”. What would I use it for? Probably to keep little stuff together in my purse. Or to carry my debit card and a credit card, some folded up dollar bills, and a lipstick when out and about. Oooh, to give a gift card to your favorite niece or sister for a gift occasion. Or a soon-to-be mom with a gift card for her baby shower. It would then become her favorite tuck-into-the-diaper-bag baglette to carry her ID when out on a walk or outing with the baby. So many possibilities.

 Now you want to see all three together, don’t you? I did! I couldn’t wait to be able to shoot this picture.
I highly recommend this bag pattern. The Minikins Season 2 set of bags from Sew Sweetness costs $80 for 13 patterns and videos. It’s great for stash-busting. (If you’re not familiar with that term, that means using up all the small pieces of quilting fabric that have been mounting up in your sewing room.) When you see how quick and easy these bags are, and how much the videos help you quickly master the pattern, you’ll see how worthwhile that $80 expenditure is. I’ve already had several friends request to buy the bags. Tonight I’ll be putting together a page with photos and prices and will quickly earn back the amount I spent on the Minikins.
Bag #7
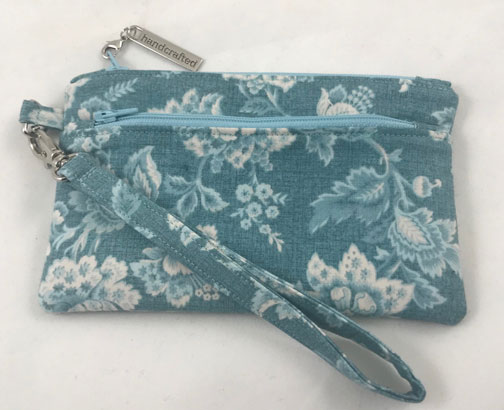
 Just when I thought I was finished with the Metro Double-Zip Pouch, I realized I wanted to duplicate Bag #1 with a cross-body strap rather than a wristlet strap. Bag #1 is one at the top of the page in the aboriginal print from Australia. The plan was to put two of the D-rings above pocket #1, one on either side. I have a skinny faux leather cross-body strap that I purchased from U-Handbag in the United Kingdom. Her shipping prices are reasonable, and I was surprised at how quickly the strap arrived. The skinny strap will attach to the two D-rings and I’ll wear the bag crossbody to hold my phone and passport while we’re traveling to a Mexican resort in two weeks.
 I cut all my pattern pieces and the interfacing last night, including pieces of fusible fleece an inch smaller lengthwise and crosswise that the pattern dimensions. This morning at 7:00 I went downstairs and fused everything. After breakfast I started sewing. (Schools were closed yesterday and again today for the Polar Vortex. It was -1° when I woke up. Sew Day!) I made the first pocket, then reached for the 6″ high piece to attach the first pocket to. Oh. No. I had used the 6″ piece for the first pocket. All that was left was the 5″ high piece. There were two options for me: I could grab a seam ripper and undo everything, or I could start over. I chose the start-over option, but first I used the perfectly made “pocket” to make a boxed-bottom pouch.
I cut a 1½” notch out of the bottom corners of the two exterior and two lining pieces, sewed up the sides, boxed the bottom, turned the bag, pressed, and sewed up the opening. Love.love.love this little bag. I had had a long text exchange with my sewing partner, who lives 2,500 miles away in Portland, OR. This bag will go off to her tomorrow, along with a two-yard piece of silk for her to use in her shibori dyeing. Everybody wins.
So that’s it for this edition of “Can a Sewist Have Too Many Bags?” (The answer is a resounding “No!”. I won’t add the Metro crossbody to this blog post, but will give it its own page so I can fully document the steps.
Thanks for reading – or scanning. I know this was a lot of words. I hope you enjoyed seeing the pictures.
Pingback: A Pineapple for You – Exploring Creativity, One Project at a Time