


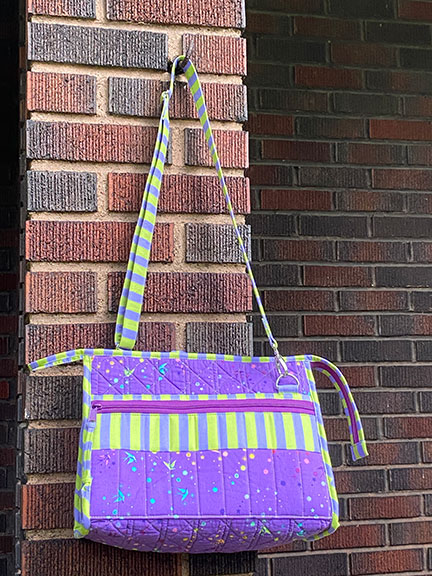
 Every so often I just have to take a break from making masks and do some fun sewing. This week’s break involved the Take A Stand tote in size Small, from byAnnie patterns. This zippered tote has exterior zippered pockets and interior mesh pockets. It’s ideal for carrying sewing supplies to a class or keeping them organized in your sewing space. I actually think my Spousal Equivalent would like one in a denim or heavy duty fabric to hold some of the tools from his workbench for when he goes to do handyman tasks for friends.
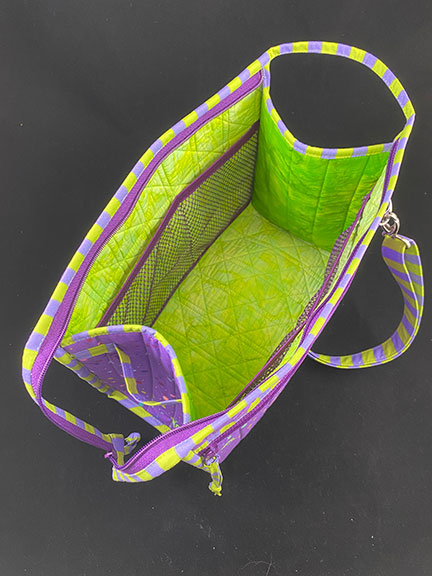
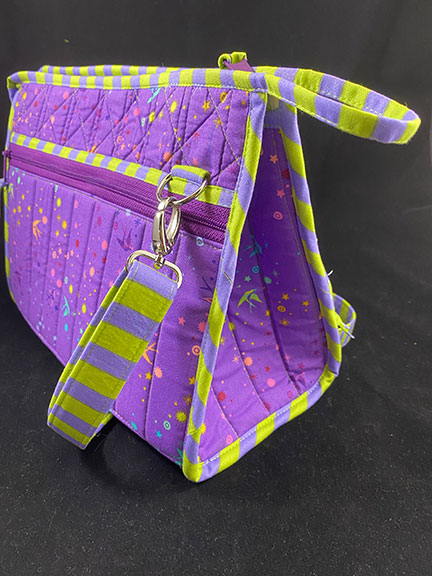
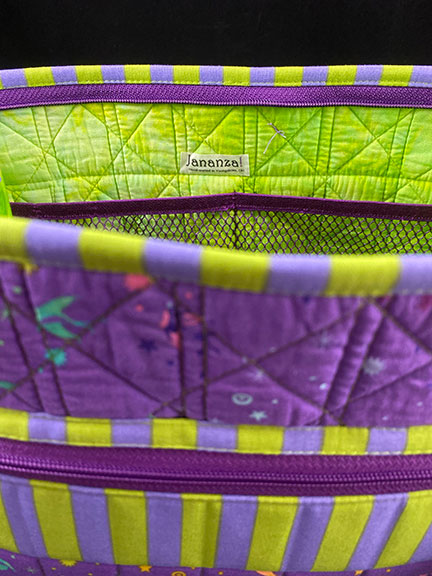
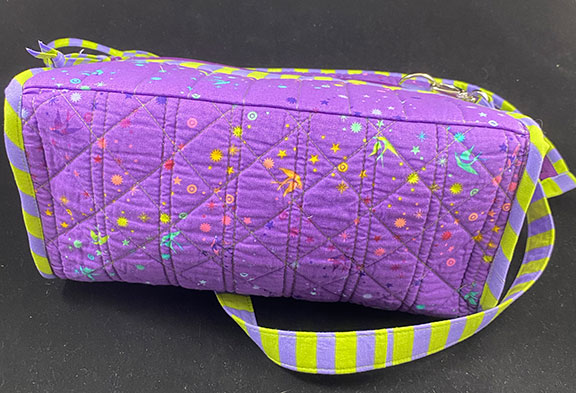
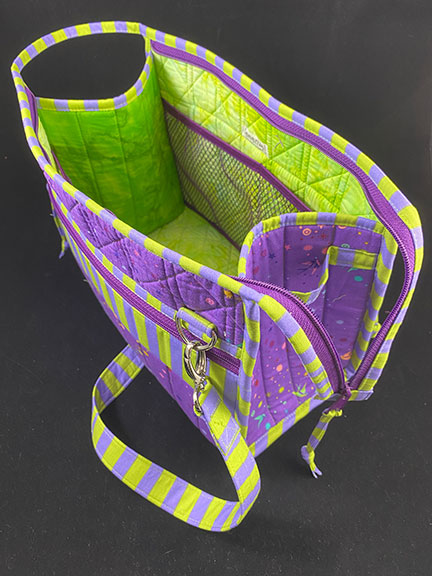 The zipper used to close the bag is about six inches longer than the actual opening. That means that the stand-up bag can be opened fully to enable you to access all the contents. When the zipper is closed, the 6″ zipper tail can tuck out of the way in the little strap on the right side exterior. The body of the bag is made with byAnnie’s great foam product, “Soft and Stable.” This stand-up tote is no slouch!
 The adjustable shoulder strap makes it easy to carry the bag. You can carry it crossbody while your hands are busy schlepping something else. (I’m always carrying too much stuff, trying to avoid multiple trips.)
 But this tote bag isn’t limited to use as just a class bag. It would make a great purse. It could carry my iPad Pro and my page-turn pedal and Apple Pencil for piano gigs. I could tuck my knitting supplies and yarn inside for road trips. The uses are only limited by your imagination. The Large can be enhanced with a clear acrylic stabilizer for the base of the bag.
The finished dimensions of the two sizes are:
Small – 8¾”H x 12″W x 6½”D.
Large – 12½”H x 16″W x 8″D.
 Here’s the cool thing about the Small version of this tote: It’s got a companion pattern then adds to its organizational ability. The companion pattern is the Running With Scissors tool case which works fine on its own, or balanced over the Take A Stand tote. Measuring 9½”H x 12½”W x 1½”D when closed and 12½”H x 20½”W when open, decide what you want to store in the Running case before you start the project, and size your pockets accordingly. Then, when you get to class or are working at your sewing machine, open it and turn upside down over the Take A Stand bag, and you’ve got easy access to all your tools. This is one brilliantly designed bag!
 But back to the Take A Stand tote. Annie Unruh, the byAnnie designer, makes construction easy by providing short videos for the most challenging tasks of this tote. I also like that her printed instructions include checkboxes by each step of the process so you can mark each task off when complete and always know where you are in the construction. The instructions also include small labels for each pattern piece so you can label them as you cut the pieces. You never have to hold a 3″ x 12″ (or whatever) strip of fabric and ask yourself what on earth that piece is to be used for.
If you’re a regular reader of my blog posts, you know I like to share my dos and don’ts after finishing a sewing project. So what did I like? I love the size of the bag; I love Annie’s standards in her design presentation—her patterns are doable, makeable.
 What don’t I like or what do I wish I had done differently? The exterior, the lining, and the Soft and Stable are quilted together. I marked my quilting lines with chalk, and then was pretty sure the only way those chalk marks were going to come off was if I washed the quilted piece. I was pretty sure it was going to shrink but decided to do it anyway. I was sure I’d like the look. And I don’t like the look. I wish I had either marked with a marker that would have disappeared with heat a a drop of water. It’s not terrible, but it’s not up to my standards. (Perfectionism rears its ugly head again.) And I will tell you that the curved edges of the end pieces are challenging. They’re not impossible—obviously—but they’re not easy.
 One other thing. If you’re going to use a stripe for the accent fabric, as I did, pay attention to the upper border and binding pieces on the front zippered pocket, Pocket A. My stripes didn’t match from the bottom side of the zipper to the top side. I can never unsee that! So either don’t use a stripe, or make sure you’re cutting the 2″x12″ Pocket A Binding so that the stripes match the 2½”x12″ Pocket A Border.
I highly recommend byAnnie’s patterns. Go for it, and have fun. I think you’ll be very pleased with your resulting bag.
Fabrics –
Designer: Tula Pink;
Exterior fabric – Collection: Pinkerville; Fabric: Fairy Dust in Day Dream
Accent fabric – Collection: All Stars; Fabric: Tent Stripe in Orchid
Lining – a hand-dye in lime from my stash.