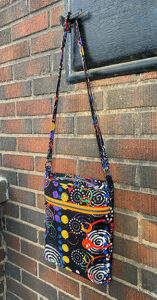
 My search continues. If you’re a regular reader of my blog, you’ll know I’m making tester bags trying to find just the right pattern from which to make three bags from vintage fabric that belongs to my cousin, Diane. This pattern is not
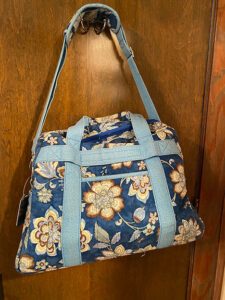
Knowing that I wanted some exterior pockets and some straight horizontal seams in the fabric that I showed you in the previous post, I turned to Annie’s “Daytripper II” and bought the pattern.
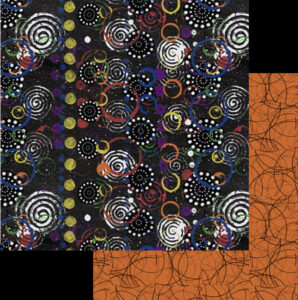 I receive way too many marketing emails from quilt and fabric shops. I had, within the past couple of weeks, received an email from “My Favorite Quilt Store” showing a new fabric collection from a quilt teacher I have long wanted to study with. Her name is Katie Pasquini Masopust, and the collection is called Game Day. The multi-colored print is called “Life”, and it also comes on a white ground, which Katie calls “Candyland.” The orange print is “Twister.” There’s a story about the orange, which I thought would go great with the Life print. Unfortunately, when I was shopping this fabric collection, I was on my iPad and didn’t have the screen brightness turned all the way up. So I thought this print was more of a rust color, and bought my zipper-by-the-yard in a darker orange. When the fabrics arrived and I saw how bright the orange was, I wasn’t sure what to do. After posing the question on one of the sewing FB groups I frequent, I went ahead and used it. But I wish I had gone for a blue coordinate rather than the orange.
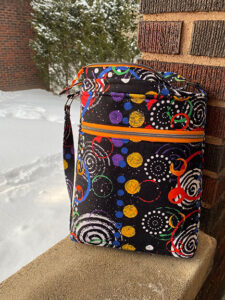 Daytripper was first published in 2015, and both designers and bag sewists have learned a lot about bag construction since then. I was not really pleased with the zipper technique used on this bag. As the bag developed, I loved the exterior fabric more and more, and decided it would become mine when it was finished. I would use it to carry my iPad back and forth to school for all the voice lessons I accompany. However, the iPad is not all I carry. I took it one day, and tucked in my iPad, along with my page turn pedal, iPad charging cord, iPhone charging cord, and Apple Pencil with case. Nope. The bag may be tall, but it’s not big. Hence the title of this post. Now what?
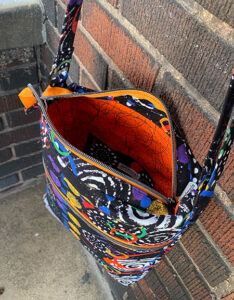 I really struggled with the zipper insertion method on the top of this bag. There is no instructional video to accompany this bag, and the illustrations in the instruction sheet did not make it clear to me exactly how to make this zipper happen. I put it in once, and could barely get my iPad into the case. So I unsewed the zipper, cut a new zipper, and tried it again. I was successful in finishing the bag, thanks to all my bagmaking experience, but I didn’t love it.
One thing about byAnnie is she used her specially designed foam, called “Soft and Stable” for many of her bags. Instead of having a separate lining, she sandwiches the lining, the foam, and the exterior fabric, which she has cut larger than the required dimension for the pattern pieces. Then she quilts the three together and cuts to size. The Daytripper doesn’t use this technique, but has the exterior and foam layered together and basted around the edge before constructing the bag. This is not obvious on the front of the bag because of the large exterior pocket. But it’s very obvious on the back, where the exterior fabric and the foam are loose from each other—very obviously loose.
If I were to make this bag again, which I won’t, I would quilt these pieces together and finish the interior with binding.
And now what do I do with this bag? What I know is I’m moving on to a Sew Sweetness bag, which you’ll read about next.


Hi, just found your comments regarding the byAnnie.com Daytripper II Crossbody Case. I’ve been making bags for years and this one is stumping me when it come to the inside. I’ve used Soft’n’Stable in the past with good results, but this time I decided to do something else from the start as I wasn’t sure I wanted all that foam on this particular bag. I’ve used a thin layer of felt and quilted the outer, long piece of fabric and the same with the outside pocket with the piece on top of the zipper.
I’m now ready to tackle the INSIDE of the bag and am not pleased with the instructions here. So I will have to wing it the best I can. I plan to use this more as a purse and not to carry an iPad. I’ve also made the bottom of the bag 3 INCHES wide. I don’t like any back with a 2 INCH bottom. I’m making this bag to me because I wanted to see if it is one I would make for one of my best friends. NO, that isn’t going to happen. I will go back to my other favorite bag for her. It’s one she and I both really like, but this time I’ll make hers larger as the first one I made to the pattern and it really is too small. That 3 inch bottom is what she needs, too, on her bag. Sorry this is too long. HAPPY SEWING!