Love at First Sight

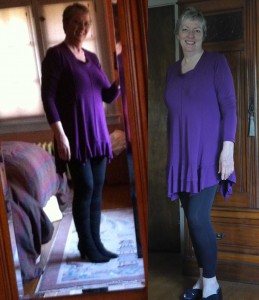
PurpleAbstractYou’ve seen two versions of this pattern so far (1, 2). Those were all View C/D of Katherine Tilton’s Vogue 8817. While I was in Santa Barbara for Design Outside the Lines, I saw two women wearing tops out of View B. It was very flattering on them, and I wanted to try it for myself.

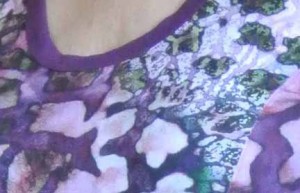
PurpleAbstractDetail

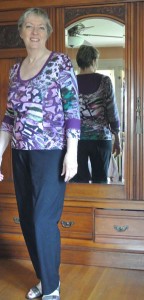
I had seen a gorgeous stretch rayon/lycra knit on the Emma One Sock site. The print is a mix of large abstract and small marbelized pools. Just gorgeous! The colors called my name. When the fabric arrived a few days later, I almost purred as I stroked it. It is incredibly soft, yet stable. I didn’t have the layout issues that I have with a softer, lighter-weight knit. It cut easily, sewed easily, and finished up like a dream.

The way Katherine designed the front, it cups nicely, making a form-fitting—rather than boxy—top. The minute I sewed in the sleeves, basted the side seams and slipped it on, I wanted to shout for joy. This, my fellow sewists, is one nice t-shirt pattern.

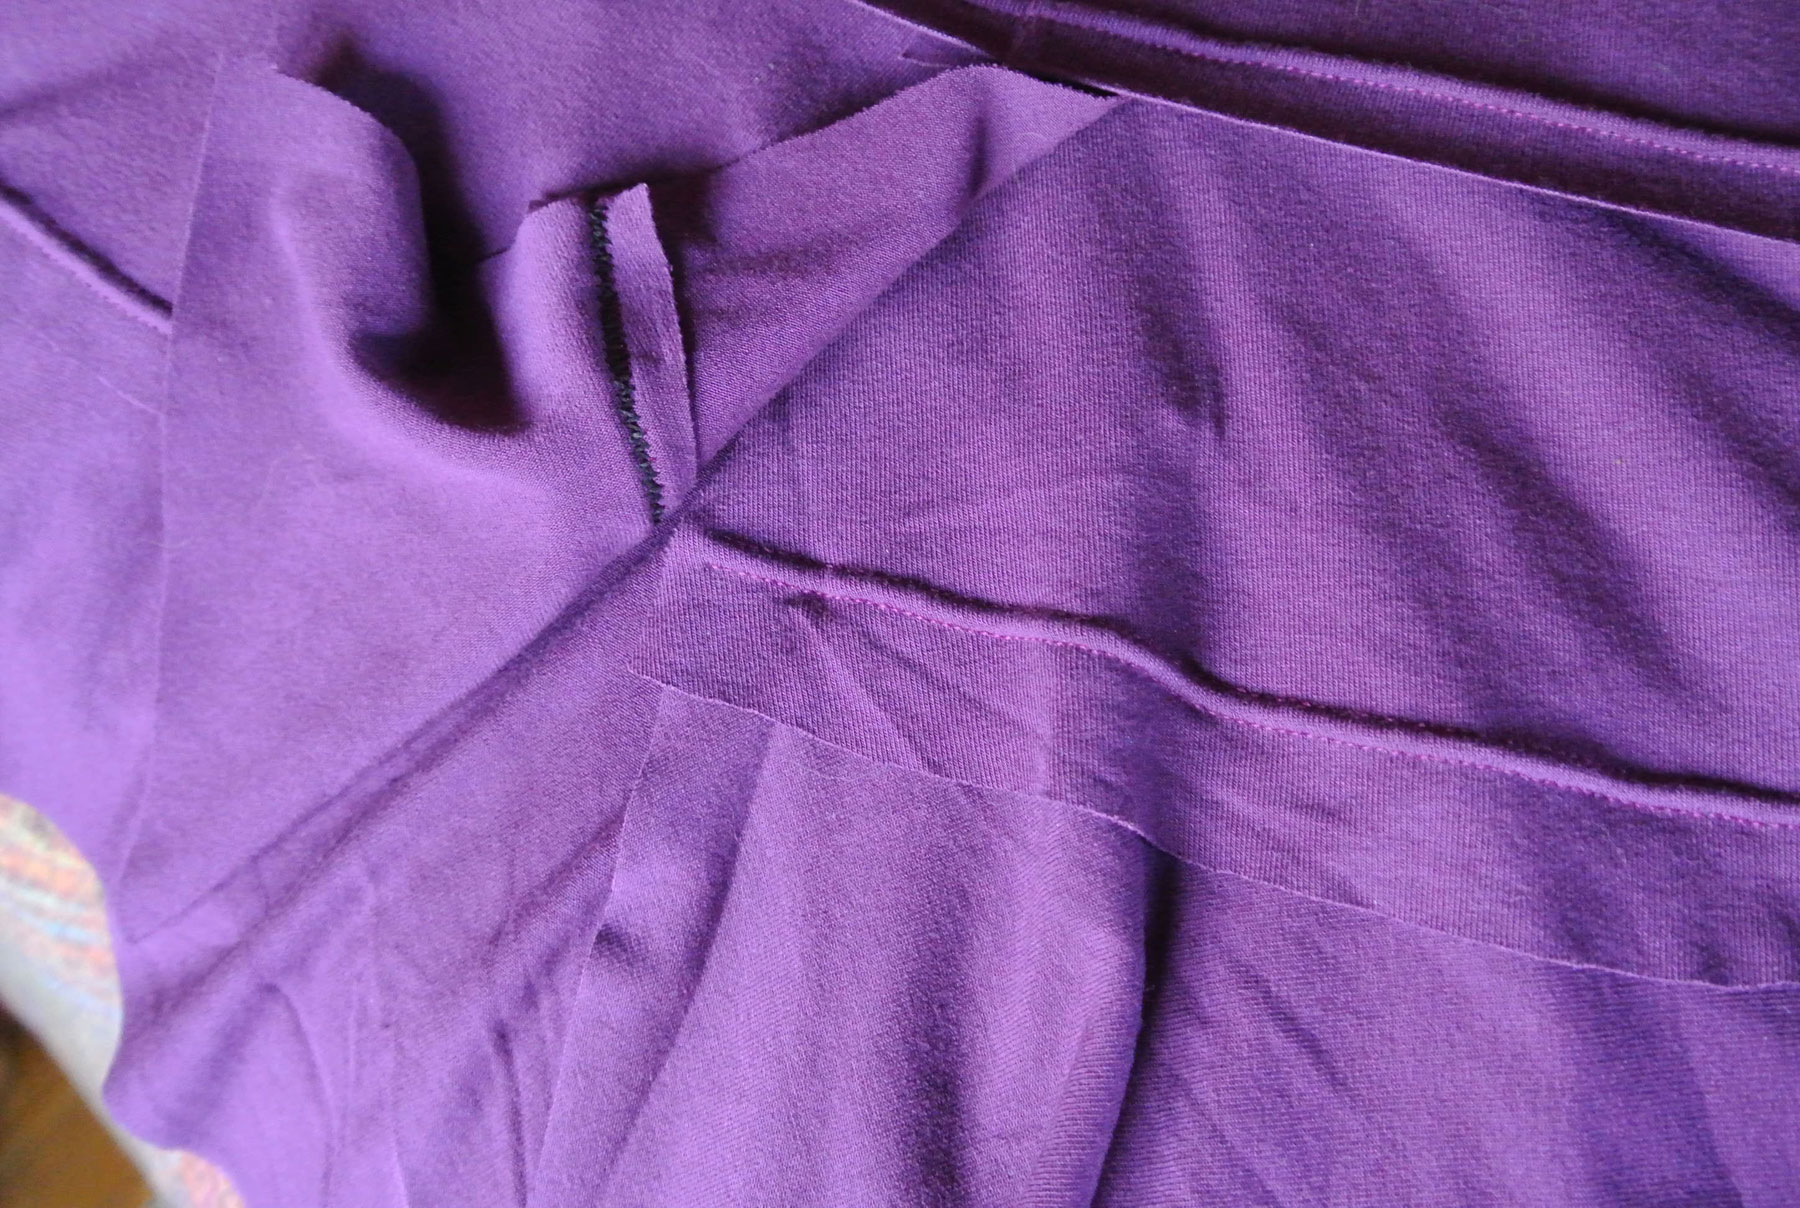
Notice the inset in the back (in the top left photo). One could use a coordinating sheer or a knit lace, or a contrasting knit of the same weight as the body. Emma One Sock kindly posts virtual swatches of coordinating fabrics on each of their detail pages. So of course I grabbed a couple of yards of the mulberry rayon jersey. (No, I didn’t need two yards for that little inset, but tomorrow you’ll see the yummy tunic-length top of Katherine’s that is coming off my sewing machine today.)

I inserted a folded strip of the mulberry in the under-bust seam so that a ¼” peeked out. I used it also for the back inset and the neck binding, then zigzagged a band, per pattern instructions, about 2″ from the bottom of each sleeve.

Where the three tunics from this pattern will all go with leggings or skinny pants, this top looks perfect—to me—with my Eileen Fisher straight-leg stretch crepe pants.

Yes, it will be going in my suitcase.

And yes, I will be making more of this top. Another tip of the beret to Katherine Tilton for a design very well executed.

Gym Bags Aren’t All Big!

I spend Tuesday and Thursday mornings in the pool at the JCC Fitness Center around the corner from my house. First I take the class that’s designed for arthritis sufferers, then I stay afterwards for an hour of water volleyball and laughter. This is a volleyball game unlike any other. There are three beachballs in play at all times, and every so often someone will call out, “What’s the score?” Someone will shout back, “87 to 13”, or some other random set of numbers. We have great fun, and we get darned good exercise.

I don my swimsuit with shorts and a t-shirt before leaving the house, but need something in which to carry my underwear on the way to class, and then my damp swimsuit and swim gloves on the way back home.

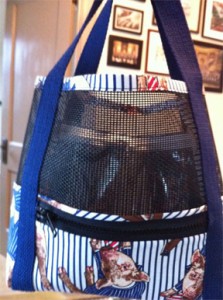
I have made many, many of Nancy Ota’s Screenplay bags over the past ten years. I buy a roll of the screening at Home Depot or Lowe’s and dig into my stash of high quality quilting cottons.
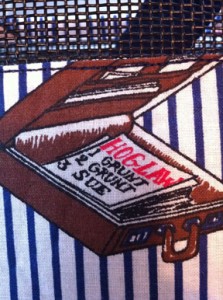
I have had this “hog law” fabric since midway through law school. Its tongue-in-cheek sense of humor delights all my senses. I made a cute little pair of knockaround shorts back in about 1989, and stuck the leftover fabric in my stash, where it’s sat for 24 years!!

I was looking for a project one morning before I got on this vacation-garment kick, and saw those scraps. Voila! A new little bag. For me—for a change!
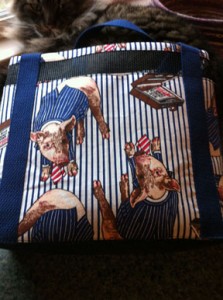
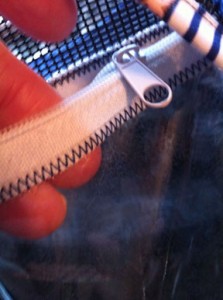
This bag is about 9″x9″x3″, has an outside pocket with a big black sport zipper, and has sturdy belting straps.

The unique feature to this bag, a feature I haven’t tried before, is a clear plastic inside pocket. The sewing room straightening project, which unearthed this piece of fabric, also unearthed one of those plastic bags that new sheets come in. I cut the existing zipper and seam binding off the bag, then cut two rectangles, zigzagged on a new sturdy zipper, and topstitched the pocket inside the bag. I love it! Why didn’t I think of this feature ten years ago?!
Of the dozens of these bags I’ve made, most have gone to friends or charity auctions. Only three or four, in various sizes, have remained for my use.

Every time I pick up this bag and look at that hog lawyer with his striped suit and red tie, I relive a piece of the joy of having achieved a Very Big Goal.

And I smile.

A Stripe Obsession

Have you noticed all the stripes in ready-to-wear these days? Every time I click on a website or open a magazine, I see a plethora of stripes, with lots of variations in placement and alignment.

I picked up this soft little gray and pale aqua stripe while in Santa Barbara at Design Outside the Lines. It’s out of stock now, but look at all the other sweet stripes Marcy has ready for your sewing pleasure.

As I’ve probably mentioned here before, I’m a tad busty. I always have a hard time getting darts to aim properly, even with an FBA, so I am in love with Vogue’s “Custom Fit” patterns. (Several other companies carry them also, and Silhouette Patterns carries an entire line of patterns where you can choose your cup size.)

When I saw Vogue 8831, this cowl-neck princess seam top, I quickly ordered it, thinking it would be great for the stripe fabric. I set out to make a mixed horizontal/vertical top.

<Note to self> The next time you ask DBF to take a picture of a top, don’t have him point up at your bustiness. Not attractive!<Note off>

My goal was to have the stripes on the center panels run vertically, while the side fronts and side backs ran horizontally. But I had to interrupt my cutting to go tend to some then-urgent issue, and when I got back, I was less focused. Oops. Once I started the assembly, I realized—to my HORROR—that only the side fronts were horizontal and all other pieces were vertical. As you know, the stretch runs horizontally, so I had robbed myself of the comfort of the stretch that is the reason we wear knits!

How could I save this? I felt I needed to build in a little give, so I cut narrow strips of the fabric with the stripes running horizontally. Then instead of seaming left and right backs to the center back, I seamed these strips in between the pieces, as a little extra bit of comfort. (Click on the photo to the left for a close-up view.) When all was said and done, I had given myself a little too much comfort, and had to take in the side seam/armhole for an extra 5/8″ at the armhole, gradually tapering out to the original seamline about 4″ down.

One other adjustment was to the cowl. I didn’t really have enough fabric for this top, so the cowl collar had to be cut about half its designed depth. When I put the top on, I was showing a little too much cleavage for my comfort. And the knit is so soft that the collar just flopped. Major décolleté! Since designers are doing so much pleating and tucking lately, I just made two little box pleats in the edge of the collar in front, stitched them down, and now I’m comfortable. It’s not a brilliant solution, but it’s a solution. And a learning exercise.

I have one more piece of a similar striped knit in a cocoa and pale aqua. I’ll make another little T to go with the cocoa pants when they’re done.

I don’t think France will be warm enough to wear this top, but summer’s a-coming!

A Successful Pants Attempt

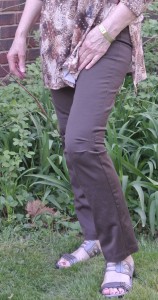
After seeing these pants, Vogue 8859, worn by several friends, I wanted to try them. I’ve been investing heavily in Eileen Fisher pants over the past few years, but about $150 per pair, on sale!, is a lot for me to pay for a pair of pants. It limits the size of my wardrobe – heaven forbid!

I wanted gray pants for my upcoming vacation, so picked up a lovely piece of gray stretch cotton from Marcy Tilton’s brilliant online fabric store.

I was very anxious about fitting the pants, as I typically have a love-hate relationship with pants patterns. I love the look, the pattern illustration, but once I get it made up, I am disgusted with the fit on my body. So I took several measurements and compared to the pattern before cutting, and was bolstered by the fact that the fiber content included lycra. I cut the side seams at 1″ rather than 5/8″, just to give myself some room for alterations.

The pattern goes together so quickly. I love the tucks at the knee in front, and the seam at the knee in back. I think I left the elastic a little loose in the waist, but as they are going to be used first on vacation (a food and wine tour of Burgundy and Champagne), maybe I’ll want a little tummy room.

The pockets are a nice touch, although I don’t anticipate ever using them. I had the opportunity to do a little of the handwork that I love so much on the pockets, as I had already fused them in place for topstitching when I realized I had not sewn the top hem. So I cut some of the Cosmo embroidery floss I had picked up at Olive Grace Studios on a little road trip a couple of weeks ago. As the owner had said, the floss was a joy to stitch with, and now I have a little personal touch on the pants that (probably) only I will know about, as I will always wear these pants with hip-length tops.

One of my favorite teachers, Nancy Shriber, says you should always have a personal touch on the inside of a garment you make, a little treat only you know about. And, she continues, you should always have some special touch on the back, because you not only leave enter a room, you leave a room. I think my pocket embroidery counts for both!

Will I make up this pattern again? You bet! I’m waiting for my order of Cocoa Canyon Stretch Woven to arrive. And then I want to try Katherine Tilton’s Vogue 8837. Could it be that my dependence on Eileen Fisher is waning?

If you’re curious about the top I’m wearing with these pants, that’s the next blog post. Gotta take advantage of Designated-Photographer Boyfriend’s day off!

Stars and Stripes

Another piece of yardage I brought home from California made it to the top of my list this week. When I bought the fabric, a luscious double-layer fabric that’s comprised of a sheer black knit and what looks like your favorite old comfy gray t-shirt gone all wabi sabi on you (thanks, Nancy Shriber, for the term), I had no idea what it wanted to be. When I first picked it up off the counter, I thought it would make a great extended front for an old Eileen Fisher boiled wool jacket I had dyed black. But the more I gazed at the fabric and the jacket, I was having no epiphanies.

I’ve never seen a fabric like this. The two layers appear to be fused together. Random three-pointed stars are stitched through the two layers and the top layer pulled away and cut around the stitching. The t-shirt fabric then rolls a little to the right side. It has a mola or Alabama Chanin stitch sense to it. I got the fabric from Marcy Tilton—alas, it appears to be sold out.

©2013 Katherine TiltonA week or so after I got home, Katherine Tilton blogged about the wardrobe she was compiling for her week at Puyallup. (Photograph—at right—©2013 Katherine Tilton) Guess what was at the top of her list. Yep, that fabric. Katherine chose to use her Vogue 8793 (which I made up while I was at DOL Santa Barbara and blogged about recently). But the fabric Katherine paired with the stars blew me away. I had a bit of that fabric left over from my first take on Katherine’s Vogue 8817, and already knew I loved the burnout stripe. So I jumped over to Marcy Tilton’s fabulous fabric store and grabbed some more.

The pattern I chose—Vogue 8817. Again. Without a second thought. I love the shape of this top. Where I made the first one with the curved hem (short in front, longer in back), I wanted this hem straight, so I cut both front and back to the center back length. I dropped the neck opening by an inch in the front, and cut a rectangular cowl collar. Because of the size of the neck opening, this cowl ends up being almost more of a portrait collar, which—again—I love. (Man, I’m throwing that love around a lot in this post, but maybe that tells you something.)

I wanted something different from the stars for the middle neck piece in the front, but didn’t want to use the burnout there also, so thought I’d search for a nice black jersey that would blend well with the stars. I recently discovered The Cloth Merchants on Facebook, so searched their site, where I hit the jackpot on a piece of black viscose knit

Once I got the various pieces cut out and assembled, I was almost finished with the top. However, I had looked at the topstitching on Katherine’s top, and longed to add a bit of that to mine. I love delicate and precise handstitching, but when I did a couple of test samples, I wasn’t pleased with how mine was coming out. For me, the double-layer knit didn’t lend itself to my topstitching.

Did that lessen my love for the top? Not on your life. I put the top on, slipped on a pair of black leggings and my little Eileen Fisher ballet flats, and out the door I went to take granddaughter to dance class.

Another winner from the brilliant team of Katherine and Marcy Tilton.

Final note about these t-shirt patterns Marcy and Katherine have available on the Vogue website. They are simple and elegant, and go together in a jiffy (or gypsy, as my now-adult sons said when they were little). I started this one Easter Sunday morning hoping to get it finished in time to wear to the matinee of “The Book of Mormon” in Pittsburgh that afternoon. I missed by less than an hour. You just can’t go wrong with these patterns.

Photo disclaimer: Today was the first really spring day we’ve had, and the wind was trying to prove a point. My photographer thought you’d enjoy seeing the crocuses.

Match Those Stripes!

Another of Marcy Tilton’s “Cool Combos” that came home from California with me was a bundle of gray and black stripes—one with the stripes about ¼ inch wide, one with narrower stripes, and one with sheer black stripes and abstract gray stripes.

The pattern I chose was another of Katherine Tilton’s tops—this time Vogue 8817. I liked the sheer stripe so much I decided to use the sleeve from view A/B, but without the trim strips. For the body I used view C. On the middle stripe on the upper front, I used the sheer, but doubled it (cut two of the pattern piece and layered them) so my bra strap wouldn’t be so visible through the fabric.

Laying the pattern pieces on the fabric to try to make the stripes meet on the side seams took me a long time. I need to figure out a better way to make sure the stripes are straight on the fabric. But my work paid off—I was very pleased with how they matched.

But the part of this top that I am the most excited about is the binding on the neck opening. I had heard Marcy talk about this treatment, but had never tried it. I cut the binding strip along the selvedge, which had a rough, fringy edge. Instead of sewing it on the outside and wrapping to the inside, I sewed on the inside, wrapped to the outside, and topstitched a ¼ to an ⅛ inch from the selvedge edge. Because I’m working with a knit, I don’t have to worry about fraying. I have a decorative edge at no extra cost.

I’ve been sewing since I was 13, and it’s great fun, almost 50 years later, being able to draw upon a lifetime of experience to quickly and easily make a new top that would probably cost me $100 in a high-end boutique.

Broken Wrist Knitting!

I just completed my first knitting project since I broke my wrist on 11/30/2012 and had surgery to install plate on 12/7/2013. I follow The Buffalo Wool Company on Facebook. A month or so before my Fateful Fall, Buffalo Wool Company posted a picture on FB of a skein of their hand-dyed “Tracks” in a color they call Black Bunny 2, a wonderful mix of shades of blue, aqua, and lime. Tracks is comprised of mostly superfine superwash merino, with a little bison for warmth and strength. This yarn is soft!!

I ordered a hank of the yarn, 400 yards. It was placed in my mental knit queue to follow the ruffle scarves I was knitting for my grandchildren’s Montessori teachers’ Christmas gifts. And then I fell and wondered if I’d ever knit or play piano again.

In January, during my two-month stint of sitting on the couch all day every day, I received my weekly email from nearby Wolf Creek Yarns. They posted a photo of the Madelinetosh Honey Cowl, and I thought it might be the perfect pattern for my hank of Tracks.

In early February I cast on the cowl. I tried for several days—my wrist still in a brace—and could only knit 50 or so stitches before the pain would be too great to continue. I would try again every few days, but could never get much more than 50-100 stitches completed before I had to quit. Then in mid February I graduated from the brace and began physical therapy. Well, guess what — my doctor considers knitting to be good therapy for strengthening a broken wrist. Yea!

I knitted five or so rows every night while watching television. Last week I made a big push to get this thing done so I could move on to other projects. Over the weekend, I finished my new cowl. It perfectly complements the cashmere sweater given to me for Christmas by DBF.

This cowl will be to me—forever—a symbol of progress and accomplishment.


Why “Honey” Cowl? The pattern is knit one row; [purl 1, slip1 wyif] for one row, knit one row, [slip1 wyif, purl 1] for one row. The slipped stitches give you a pattern that looks like honeycomb. Love it!

Katherine Tilton’s Vogue 8793

Pattern Description: T-shirt with interesting collar options and suggestions for mixing fabrics. Designed by Katherine Tilton

Sizing: XSM-SML-MED/LRG-XLG-XXL

Fabric Used: Purchased from MarcyTilton.com, it is now sold out and I am not positive about the fiber content. I believe it is rayon/lycra. It’s absolutely yummy with great stretch. The companion stripe has less stretch, so has to be cut accordingly. Marcy and her team frequently post “Cool Combos” – a yard or so of several fabrics that they like together. Kudos to the team, all of whom have great eyes for the mix!

Needle/Notions Used: Standard 10 or 12. A little 1″ strip of fusible knit interfacing to stay the shoulders.

Tips Used during Construction: I made this shirt during one of Marcy Tilton and Diane Ericson’s Design Outside the Lines workshops and was bulldozing my way through to get it done before the end of the workshop. It goes together quickly.

Did it look like the photo or drawing when you got through? Yes – considering my modifications.

How were the instructions? The only instructions I referred to were for the double collar. I changed these as noted below. Everything else was straightforward T-shirt construction. Shoulder, sleeves, neckline, side seams including sleeve, hems. Ta-daa.

Construction Notes: Collar – First, I skipped the references to zippers. (I didn’t have any zippers with me nor any way to get to a store in the available time.) Because of the weight/thickness of the fabrics, I offset the inner collar (the one next to my neck) to avoid having nine layers of fabric to sew through. I put the smaller collar (next to the body fabric) with its overlap at center front, then rotated the inner collar so that its overlap was just to one side of the overlap on the smaller collar. (This sounds confusing, but will make sense when you’re making the garment.)

Post-completion alterations: Fabric – I made one sleeve out of each of the two companion fabrics. (See first photo, above.) But when I put the shirt on and wore it a few times, I didn’t like it. The different sleeves—at least this combination on this shirt—just weren’t me. So I unsewed the right sleeve, cut a new one from the front body fabric, and now I love it! Cuff – The sleeve is cuffed. I’m not a fan of sleeve cuffs, but when I turn the cuff up to have the fold meet the seam – a 1¼” cuff instead of a 2½” cuff – I like it much better. I probably like it enough to cut the piece to that width next time. (See the picture to the left—which cuff do you like?)
Body shape – I’m top-heavy (38D3, which measures about 42-43″ at fullest point). Based on measurements, I believed I needed to cut XLG. Wrong! I ended up taking extra wide seams and trimming shoulder in before attaching the sleeve. Next time I’ll cut a LRG. Once it was completed, I felt the top was too boxy, thus making me look bigger than I already am. I put a casing in the back and inserted some elastic. I like the look from the front much better, but will remove the casing and move it up a couple of inches to just below my bra strap. Oh, to have a sewing buddy to help me with fitting!! (I probably don’t need to confess to you that fitting is my nemesis.)

Likes/Dislikes: I love the interesting collar and adore the fabric! Will be making more of these.

Conclusion: This is another very good, flexible top from the sisters Tilton. You could make this top ten times and no one would recognize they’re all from the same pattern.


Oops! So glad I wrote this post and had the Jazzman take the pictures for me. Now I realize that the fabric on the back is thin enough for my black bra to show through. Won’t make that mistake again!