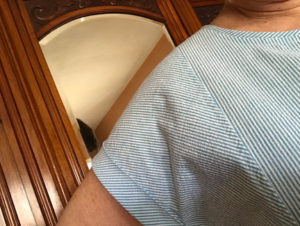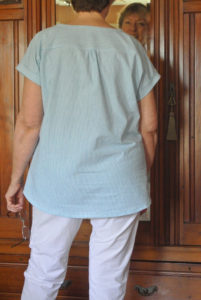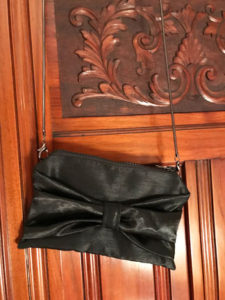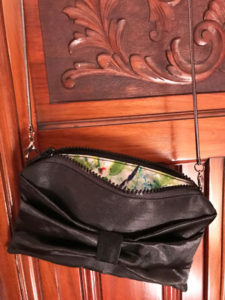
Swoon Ramona #4

About two years ago I made a Swoon Ramona crossbody bag for my younger grandchild. I don’t think they have taken it off except to sleep in all the time since receiving it. With that much use, it’s now threadbare. And all the ScotchGard in the world cannot guard against that amount of wear. It’s feeeeelthy!!

I begged and begged for my babe to take it off and give it to me so I could wash it. When they refused, I just ordered fabric to make another. Happy grandma, happy teenager.

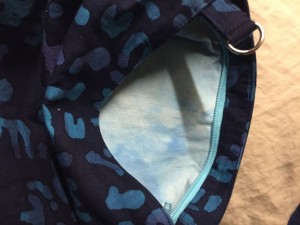
Ramona #1, in a madras batik with cloud-print lining.

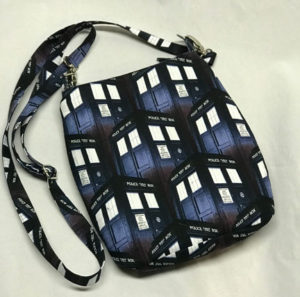
This is the third Ramona I’ve made. Number 1 was made for myself, during my 2015 summer working at Interlochen Arts Camp. Number two was the one Cody is carrying in the first picture. Number three was for a close friend of Cody’s, who is also a devoted Whovian. That was blogged here.

So, on to number four. I forgot about the quilting I did on the base of #3. Wish I had read that again before making this one, but every make is about the learning for me, so that’s fine.

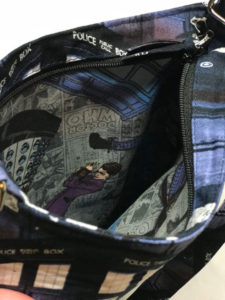
Bag liningFor this bag, I used SF-101 interfacing on the lining and fusible fleece on the exterior. I made the strap connectors wider by folding in thirds rather than fourths. I felt that held the ring better and gave me less bulk to have to sew over. And the adjustable strap was a little shorter than designed. Somebody forgot to think carefully about how she was laying the pattern pieces out and didn’t leave enough width at the top of the fabric to cut the two 4″-wide strips.

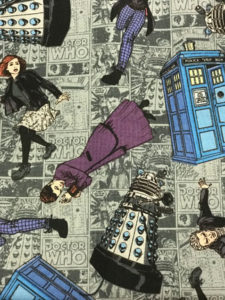
Clara's AdventureThe fabric, purchased online at eQuilter.com, is from the Doctor Who line – the exterior is Infinite Tardis and the lining is Clara’s Adventure.

I prewashed the fabric, then sprayed with Mary Ellen’s “Best Press” and ironed until it was crisp and oh-so-easy to work with. After I dropped the bag at my babe’s house, I texted, “I hope you love it.” Here is the response I received: “I do! It’s so sturdy (and clean lol)”

There’s a teenager who knows the way to Grandma’s heart.

Happy Accident

I blame my tendency not to read and re-read instructions on the four years I spent in law school and all the reading I had to do there. That’s my story; deal with it. 😉 This happy-accident story is a result of my not carefully reading the instructions for this little bowl.

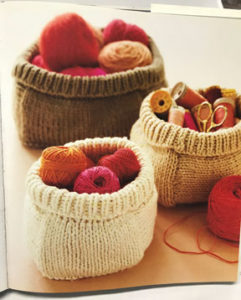
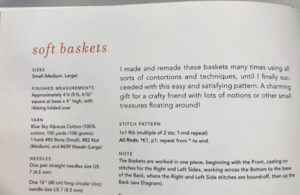
A year or so ago, I had a nice leftover ball of merino wool in a beautiful rich blue shade, enough to make into something small. For years I have loved flipping through Joelle Hoverson’s “More Last-Minute Knitted Gifts” and dreaming of making each one of these darling projects. (Yes, I do also own Joelle Hoverson’s “Last-Minute Knitted Gifts.” One can never have too many books.)

<Aside On>
While writing this, I read Joelle’s bio on the back of the book, then googled her. I never knew she was one of the co-owners of one of my favorite shops in the world, Purl Soho. If you’re a knitter or quilter, you must visit Purl Soho on your next visit to Manhattan, or just click over to see their sleek site. I receive their newsletter on a regular basis and greatly admire its understated elegance. Go visit!
<Aside Off>

Knitted Bowls

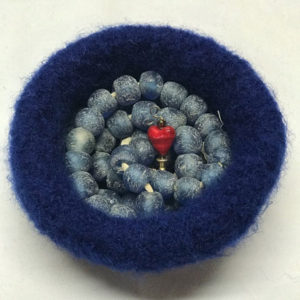
The bowls, as they’re supposed to look.

So, a while back, like a couple of years ago, I quickly knit up this little bowl. But I never wove in the ends. (If you have no idea what that means, it’s the final step in finishing a knitting project. All the strands of yarn that are left hanging at the beginning and the end and anywhere you changed yarn in the middle of the project must be woven into the knitted “fabric” so they don’t come loose during its life.) And in my mind, this bowl was to be felted. (Again, if you don’t know … to “felt” a 100% wool project, you throw it in very hot water and beat it up in a washing machine or in a pot on the stove. This causes the wool strands to join themselves to each other and it becomes a much denser fabric.) Here’s a better explanation, with pictures.

Of course, if you read the description of the bowl in the book, you might notice right away that not only is the bowl not to be felted, it’s not even suggested for knitting in wool!!!

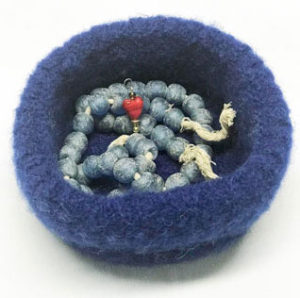
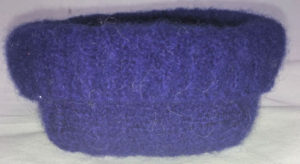
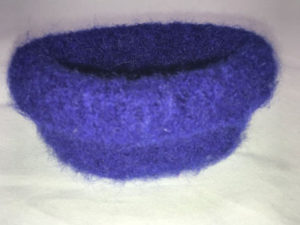
Felted Bowl side viewWhen I pulled the little bowl out of my antique wringer washer, I was a little disappointed that it didnt felt up very well. The individual stitches in the fabric are still visible. Now as I’m explaining things here, I realize I forgot an important aspect of the process: soap. Dang!

So how can I make this soft little bowl (which I truly do love, even if it’s a misfit) more useful. I’ll start by spraying a little Aleene’s Fabric Stiffener Spray on the base and see if that gives more of the effect I want. If you’ve read much of what I do here, you’ll recognize that I’m all about experimentation and learning. Next step: ordering some high quality cotton yarn to try these bowls the way Joelle envisioned them.

And in the meantime, what else might I do with the bowl, besides hold cool African trade beads that I bought at the Tucson Gem & Mineral Show fifteen years ago? Well, it could be a hat for an American Girl or other 18″ doll.

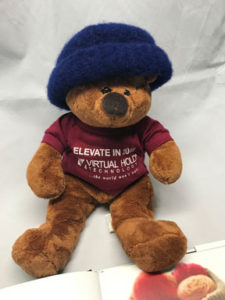
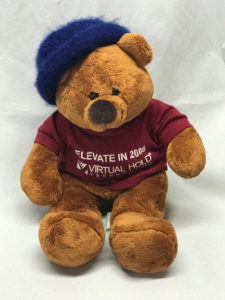
Or a teddy bear.


Smaller felted bowlUpdate after lots of soapy thoughts:

Felted Bowl side viewThe more I thought about this floppy bowl and its lack of true felted texture, I decided I wanted to try it again. I put hot-from-the-tap water in the wringer washer, then added a teakettle full of almost-boiling water and a scant teaspoon of Dawn dish determent. I coiled two accidentally-felted wool socks into the center of the bowl and slipped a rubber band around the entire bundle. I slowly submersed it in the hot water until it was completely wet. Bear with new hatThen I closed the lid, engaged the agitator, and walked away for thirty minutes. When I came back, I was amazed and thrilled. It was really and truly felted this time.

And if you want proof of its shrinkage, look at its new place as teddy bear hat. Now that’s the right fit for a hat! 😉

Put Some Cork In It

Cork and cotton bagToday was a snow day and in my neighborhood, the snowplows come around infrequently. I had a “Music at Noon” performance scheduled with a Dana School of Music musical theatre student, but morning classes were cancelled, and the head of the musical theatre department wisely cancelled the Music at Noon performance. I was supposed to go to an activity with my granddaughter, but knew with the six or so inches of snow we got last night and the dearth of snowplows, I’d never get out of my neighborhood. So snow day = sew day.

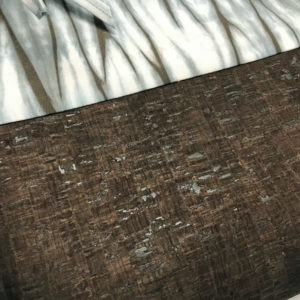
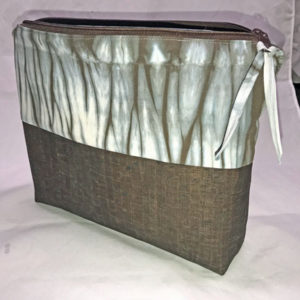
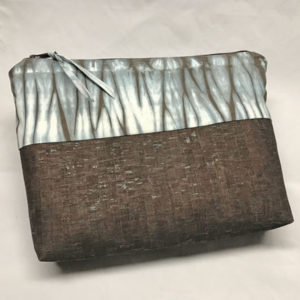
Cork and Shibori BagHave you seen the cork fabric that’s become available over the past eighteen months or so? I really love the feel and the look of it. The bulk of the world’s cork forest is in Portugal and Spain, and I believe the fabric I’m able to get my hands on is from Portugal. Sewing with cork is really no different than sewing with leather and not as expensive. But it is more expensive than fabric, so treat it carefully. If you’re thinking about experimenting with cork, read this blog post first. Or google “sewing with cork fabric.” There are lots of hints and tips out in the sewing world.

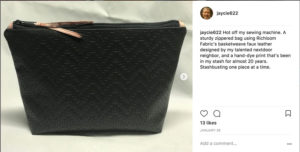
Faux Leather BagI’ve made one or two small cork bags before, but I wanted to experiment some more, so I did another modification of the “My Favorite Zipper Pouch” that I’ve made a dozen or so of already. In fact, the most recent one only got shared to Instagram and never made it to the blog. That was made of a faux leather designed by my talented next-door neighbor. A good-sized piece was gifted in my direction, and after the success of that bag, you can bet that more will follow.

My goal with that bag was to be able to fit a spiral-bound notebook inside. I cut the pieces 10″ tall x 13″ wide. But I forgot to take into account that the bottom is boxed with a 3½” seam, so it was not nearly tall enough for a notebook.

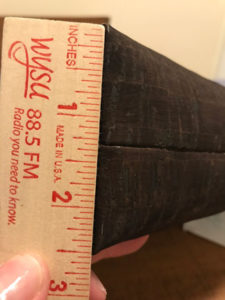
Box Bottom of Cork BagToday’s effort was cut 11″ tall x 14″ wide, with only 1¼” square cut out of each bottom corner, rather than 1½”. I fully expected to have a 2″ depth to the box bottom. Alas, the finished depth is in excess of 2½”. The finished size is about 9½” tall, 11″ wide, and 2½-3″ deep. Maybe I can put a 5″x8″ spiral notebook in this, but an 8½”x11″ notebook is not going to fit. If I analyze the math on this bag and the previous one, maybe I can figure out how to translate the flat cut proportions into the finished bag size.

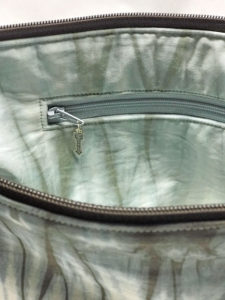
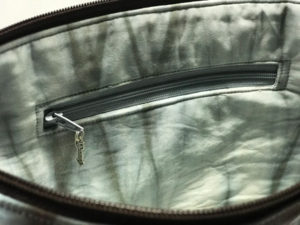
Inside Zippered PocketAnother thing I did with this bag was to add an inside zippered pocket. And trying to stretch my brain, I thought I could do it from memory, as I’ve made so many bags with zippered pockets like this. After screwing it up and unsewing several times, I dug through my pattern drawer and looked at the directions on the Swoon Patterns “Ethel Tote.” (a free pattern!) That zippered pocket was much easier than I was trying to make mine, and in 45 minutes or so, the pocket was complete and I was ready to finish the bag.

The other lesson I learned is that a 5½”-6″ opening is insufficient for one’s hand to be able to dig around in the depths of a pocket for some desired little doodad. Next time I’ll make the opening 7″.

Finished BagFor the first time in making these bags, I pieced the front. My goal was to marry the cork fabric with some of my friend MaryLou’s shibori scraps she gifted to me. The cork was cut 6½” tall, with top and bottom ¼” seam allowances. The shibori, then was cut 5½” tall. The zipper takes a ¼” seam allowance; the join between the two fabrics takes ¼” on each piece; and the bottom seam takes off ¼” from the front and back pieces. The lining to the bag is all MaryLou’s hand-dyed fabric, in a little lighter colorway. I’m so lucky to have such talented and creative friends!

So there you have it. Do I know what I’m going to do with this bag? Will I use it myself, or offer it to one of MaryLou’s and my mutual friends—her fabric and my sewing. I don’t know. But I learned a lot making it, and that makes me happy.

So that’s my snow day. I didn’t push myself on this project. I just had a leisurely day, watched a couple of movies while plodding along, thinking and doing and learning. I can’t ask for a better day than that!

And the hot fudge topping on this icy day? When the Jazzman got home from his 12-hour workday, spent outdoors in weather that didn’t exceed 24°, he fired up the snow blower and took care of the driveway and the sidewalks. I feel guilty when I don’t get out and do it myself, but the gas fumes give me migraines, so he indulges me and freezes some more so I don’t get sick.

It’s now 10:00 p.m. As I’m typing the final paragraph, the weather app tells me it’s 16° and feels like 8°. The snow is starting again, and it looks like we may get another inch tonight.

You think maybe I’ll get another snow day tomorrow?

A Little Box Pouch

Box PouchWhat to do when you realize you have all the necessary Christmas gifts for the family gathering except for one—your [virtual] sister-in-law? You dig into your treasured shibori stash, find a tutorial you like, and whip up that one last gift.

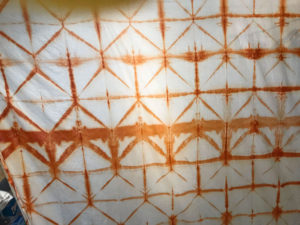
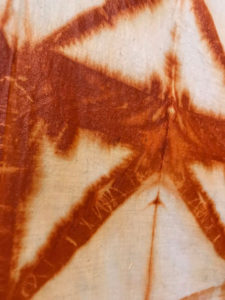
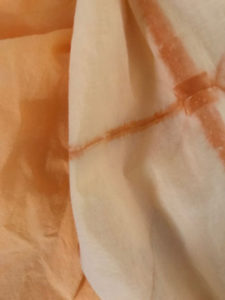
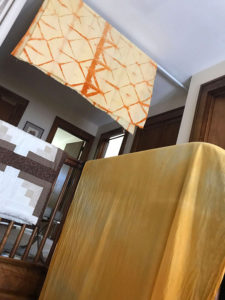
The treasured shibori fabric was destashed by my friend, quilter MaryLou Alexander. MaryLou’s quilts all begin with high quality undyed fabric, which she scrunches and folds and stitches and dyes with either MX dyes or natural dyes, before cutting and piecing and machine quilting. (She’s currently in her natural dye period. Everything in my treasured stash comes from the MX time period.) And she ends up with incredible works of art that are exhibited around the world and on all our friends’ walls.

Box PouchThe tutorial I like is from Leslie Rutland’s “DIY Zippered Box Pouch Tutorial” on her “The Seasoned Homemaker” blog. This is a sweet little bag with lots of uses. The finished dimensions are 7″ W x 4″ D x 3″ H. Box PouchAdjusting the beginning measurements will give you a larger or smaller bag. I think my next make of this pattern will be a larger bag, similar to my guy’s Dopp kit.

It’s an easy, quick make. I highly recommend.

Who has too many bags? Not I!!

A Second New Top for Vacation

Butterick 5954Our flight to Mexico was scheduled to leave early on the morning of January 2; we would drive to Cleveland on the afternoon of New Year’s Day to stay in a hotel near the airport. I had packed on New Year’s Eve. Side viewThat meant I had the entire morning of New Year’s Day to sew one more top for Playa Maroma.

I dug into the stash and grabbed a poly knit I had picked up several years ago at Fabrix in San Francisco. It was not a “me” print, although I’m not sure the real “me” print exists. I’m ambivalent with prints. But it would easily slip on over a pair of black leggings and take me to one of the restaurants at the resort.

I had been wanting to make Butterick 5954 for myself for years. I had made it four years ago in a luscious purple velvet print for my younger grandchild. The pattern had sat in plain view ever since then, and everytime I got in the mood to make a new top for myself, I’d eye it and ask, “Now?” And “now” finally arrived.

Here’s my review:

Pattern Description: MISSES TUNIC: Close-fitting and flared, pullover tunic has front variations, shaped hemline and narrow hem. Wrong side shows on back hemline. C and D: collar.
Designed for lightweight Two-way Stretch Knits. I chose View A, with the short sleeves from View C. I’m normally not a short-sleeve gal, but I loved these sleeves and will use them again.

Pattern Sizing: Combinations: Y(XSmall-Small-Medium), ZZ(Large-XLarge-XXLarge) After adding 2″ to the length of the front and back, I cut a Large.

Did it look like the photo/drawing on the pattern envelope once you were done sewing with it? Y

Were the instructions easy to follow? I hardly used them.

What did you particularly like or dislike about the pattern? Liked everything. Disliked nothing!

Fabric Used: Some random poly print from Fabrix in San Francisco.

Pattern alterations or any design changes you made: I always add 2″ to the length on Butterick patterns. I’m 5’8″ and have a long torso.

As I haven’t blogged a top like this in a while, I’ll remind you that I always use a tricot interfacing cut the depth of the hems. Fuse it to the fabric edge, then fold and press for a clean hemline. Sew the side and underarm seams, then double-needle stitch the hems with wooly nylon in the bobbin. Love this method, that I learned from Marcy Tilton. No sloppy hems in my closet!! ☺ And I always interface the back shoulder seam allowance with a ½” or ⅝” strip of tricot interfacing to stabilize that seam.

See Liz’s comment and my response below. I couldn’t make the hyperlinks work in the comment, so here are resources for fusible tricot interfacing:
Pam Erny’s shop (Just noticed Pam’s site says the tricot will be restocked mid-February 2018.)
Pam’s blog
NY Fashion Center Fabrics

Would you sew it again? Would you recommend it to others? Yes and Yes.

Conclusion: Need a quick and easy make? This is it!!!

Tiny Treasures Tray

A few days before Christmas, I realized I needed a gift to put under the tree for the Jazzman. I buy him this and that throughout the year when I see something he needs or could use, so there was nothing I could think of to get him so he would have something to open at the family gathering.

I had seen this Tiny Treasures Basket & Tray pattern a year or so ago on the Noodlehead website. I knew I wanted to try it sometime. Now I had an opportunity, and I had two coordinating fabrics in my stash that were perfect for this gift. And the pattern was free!

When I met him, the Jazzman was learning to play guitar. It was something he had wanted to do for years, and he was taking action on that desire. And then he met me. I had been been playing piano since I was 3½ years old. And over the course of my life I had also learned to play accordion and organ and clarinet and oboe and guitar and even dabbled with vibraphone and banjo. Shall we say that, without even trying, I can be intimidating to beginner musicians. His guitar went on the shelf. And that was eight years ago. He loves music—old metal and blues—and still dreams of playing guitar. So this little tray would be perfect to sit on his chest of drawers and hold the contents of his pocket.

When Christmas morning arrived and he opened his gift, he loved it. And now, three weeks later, it’s sitting on the corner of his chest of drawers. Each night he unloads his pockets into it.

I posted the finished tray to my Facebook feed. When my elder son, who lives in the Dallas area, saw it, he asked if I’d make one for him. That’s never happened before. Of course I did, and the review below incorporates what I learned from both makes.

Tiny Treasures TrayPattern Description: Small fabric tray and basket with handles.

Pattern Sizing: Finished basket is 10″ x 10″ x 4¼ tall; finished tray is 8″ x 6″ x 2½” tall.

Did it look like the photo/drawing on the pattern envelope once you were done sewing with it? Yes.

Were the instructions easy to follow? Yes, with the exception of the binding. It took me a while to figure out that I was going to open out the binding to sew it to the inside. Once I treated it like so many necklines I’ve bound, I was fine.

Tiny Treasures TrayWhat did you particularly like or dislike about the pattern? Heavy-weight interfacing on a concave surface is difficult to keep smooth in the finished product. And I needed a third hand to sew the binding around those curves!

Fabric Used: Quilting-weight cotton from Exclusively Quilters. It’s their “That Funky Jazz” collection. A scrap of ultrasuede from my stash for the tabs/handles.

Pattern alterations or any design changes you made:

The hardest thing was to sew the binding around the top edge. The instructions say to start the binding at one of the corner seams. NO! That was very difficult and unwieldy for me. When I made the second tray, I started the binding in the center of a side so it would be hidden by the tab/handle.

The other issue for me was working with the heavy-weight interfacing (Pellon 71F) on the inside. This is a concave surface. Once it’s curved, the “darts” sewn, and finished, it’s almost impossible to try to press out those puckers and bubbles. (I was working with a quilting-weight cotton. Using a heavier textile might make a difference.) The next time I make this tray, I will use the heavy-weight on the outside, a convex surface.

This was my first time using rivets. Yea for new skills. Love the finished look.

Would you sew it again? Would you recommend it to others? Yes, already did. And will do so again! I would not advise a beginner to start with this. It would be better to make a couple of simple bags first so you’re used to working with the interfacing. The pattern is better for an advanced beginner, IMO.

Conclusion: Great little gift for your friends who already have enough of your zippered bags. There are a hundred uses each for the tray and the basket.


If you’re wanting a copy of this free pattern, here’s the link to the pattern.

Courtney Top for Mexico

Courtney frontVacation plans always make me want to sew. Surely I have some nice piece of fabric in my stash that will make me feel chic on vacation. And this trip was no exception.

We’re on a week’s snow escape vacation, and judging by all the weather reports from NE OH, we timed it perfectly!

Courtney backTwo nights before we were to fly out, I dipped into my stash and found a silky rayon I purchased several years ago at Fabrix in San Francisco on a shopping trip with Shams. Then I dug into my StyleArc pattern stash and Courtney called out to me.

Here’s my review:

Pattern Description: An everyday top with interesting design lines

Pattern Sizing: Sizes 4-30. I cut a 16, but think I could have cut 14 as I was using all knit. In the future, I will save 16 for the linen versions.

Did it look like the photo/drawing on the pattern envelope once you were done sewing with it? Yes

StyleArc CourtneyWere the instructions easy to follow? Typical minimalist instructions. I had one moment of confusion when sewing the sleeve band on. I thought maybe I wanted the seam allowance to be on the outside, if I was going to fold the band up and tack, as it would be invisible and the finished edge might be smoother on the inside against my arm. After reading Jean’s review on her blog, it made sense to sew the band on so the seam allowance went to the inside. I tacked the band into the folded position, as it’s very soft and I knew I wanted to wear it folded up.

What did you particularly like or dislike about the pattern? Quick sew. Cute, versatile top.

Fabric Used: Rayon knit from Fabrix in SF.
Pattern alterations or any design changes you made: I added 2” to length. I might have added two more for the coverup, but it’s fine to wear to lunch at the resort if I slip shorts on under it.

Would you sew it again? Would you recommend it to others? I will be sewing it again and I highly recommend this pattern.

Conclusion: Easy sew. Easy wear. Great swimsuit coverup for vacation.

Returning from the Piano Bench

Yes, it’s true that I haven’t posted in a very long time. I’ll tell you another time what all I’ve been up to.

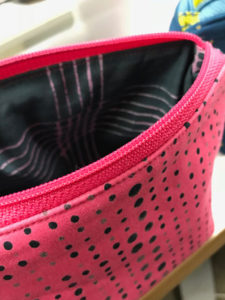
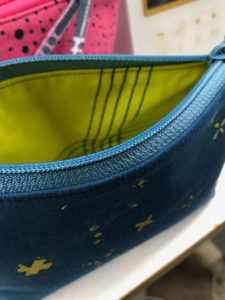
One thing I’ve done is take Joan Hawley’s “Zip It Up: Easy Techniques for Zippered Bags” class on Craftsy. If you’re just getting interested in crafting cool bags for yourself, friends, and craft shows, I highly recommend this class.

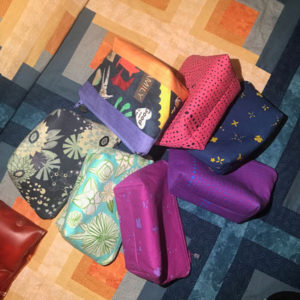
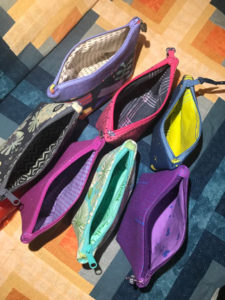
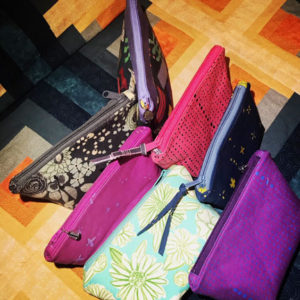
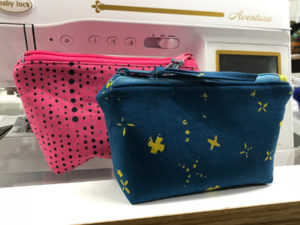
The fabric is hand dyed using Shibori techniques by my friend, MaryLou Alexander. You can see the beautiful art quilts she makes with her hand-dyed fabrics on her website. Aren’t I lucky that she calls me when she’s overloaded with scraps? This bag is one of the results.

The bag will be a holiday gift to my travel pal, Marilyn, when we go to dinner with MaryLou and our guys tonight.

Happiest of Holidays to you and yours, whatever you celebrate. May you make wonderful memories.

And thanks for reading.
Jan