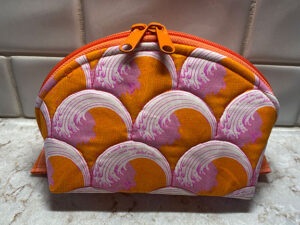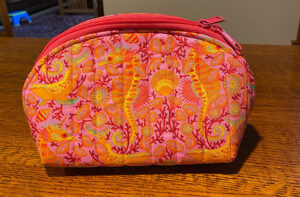
Blazingstar Bag Sewalong

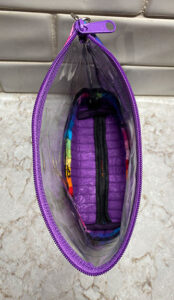
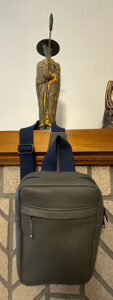
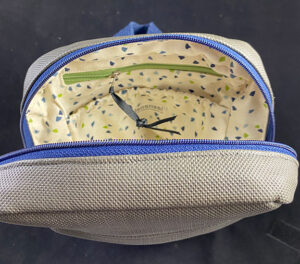
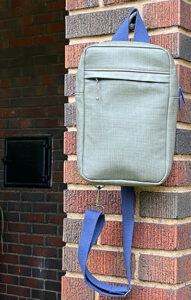
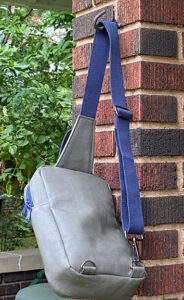
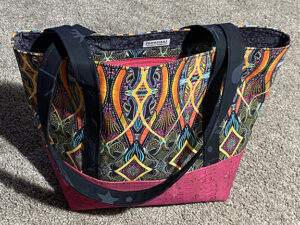
Just finished: A new pattern from Sara Lawson of Sew Sweetness Patterns. She sponsored a sewalong for this wonderful new crossbody bag. The event took place over four weeks. I was late starting as we were in Texas visiting my Amarillo son and daughter-in-law in their new-to-them home, and then in Lewisville (northwest suburb of Dallas) with my elder son. After we returned, I was able to push through and finish the bag a few days before the end of the sewalong.

I don’t believe I’ve mentioned here that my 20-year-old granddaughter is living with us now while she’s job hunting. Once she’s back on her feet, I imagine she’ll find an apartment. But I’m sure enjoying having her here now. She’s very artistic and it’s been fun collaborating on bag fabrics. She’s quick to say she doesn’t think a particular companion fabric enhances the overall bag. I love her participation.

So, what do people do in a sewalong? The moderator, who happens to be one of the admins on the FB fan group for Sew Sweetness, studies the pattern and breaks it into logical groupings of steps, which are each assigned a week for completion. That way people who are working full-time, or have babies, or have a short attention span can sew along with the rest of us. There’s always someone online when you are who can throw you a lifeline if you get stuck. There is also a video available for each bag Sara designs, so visual learners have help to supplement the [very well] written instructions. (Says the former technical writer and legal writer and editor.)

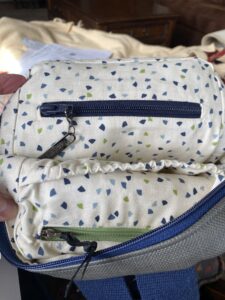
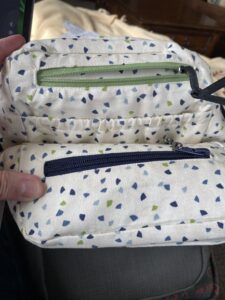
The first week is assigned to preparation: cut out your pattern pieces, fuse or baste the interfacing to the fabrics, make sure you’ve got all the hardware and supplies you need, and read the pattern through. Then make the two zipper pockets where the pocket itself is hanging behind whatever fabric the zipper is sewn into. Finally, post a photo of the work you’ve accomplished that week to the Sew Sweetness blog post with that week’s assignments. The second week was twelve steps, which allowed you to make the mesh zipper pocket and assemble the front pocket—that oval-top insert on the front of the bag.. The third week took us through assembling the exterior of the bag and assembling the lining, a total of seven steps. And in week four there were nine steps, attaching the lining to the exterior and making and attaching the adjustable strap. When a large task is divided into bite-sized piece, it’s really no big deal to complete. (I’m sure Confucious could have said it better.)

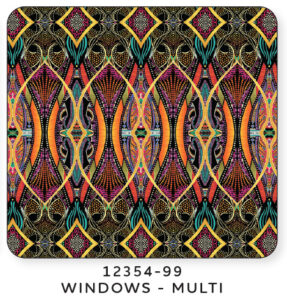
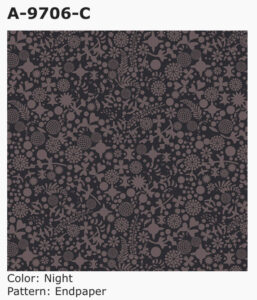
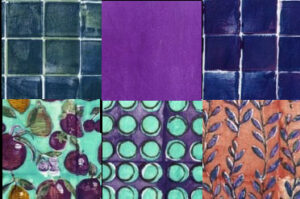
The fabric I used is from Windham Fabric. The designer is Melanie Testa, and the collection is called Meadowlark. I first saw it in a quilt magazine several years ago and thought it was beautiful, so did some searching and found it in an online fabric store. I bought half a yard of each of these six prints. The three I used were the upper right grid (on the front pocket, the side gusset, and the zipper panels); the sorta hand-dyed-looking solid in the top row, center; and the floral print on the bottom left. What I was originally going to use instead of the grid was the abstract dots on the bottom center. And now that it’s all done, I’m happy that I listened to the voice of the artist. 💜

Do I like this bag? Yes, I absolutely love this bag, and love how easy it was to make. I do believe I will be making more of the Blazingstar Bag.

Llamas and a Lazy Girl Bag

The next pattern I tried in my seemingly never-ending crossbody quest was the Lexi Carryall from Joan Hawley’s “Lazy Girl Designs.” I believe I finished the bag the weekend of May 7. It was such a busy time with the final week of classes, then exams/juries week. And while I was snatching time from my schedule to work on this bag, I read on Facebook that Joan Hawley had died, suddenly, on May 3 of a brain bleed. This was the first of her patterns I had worked on in five or more years, and it just felt eerie to learn of her passing while I was working on one of her patterns.

[ I want you to see the other two patterns of hers that I’ve made, back when my grandchildren were in elementary school and I made teacher gifts at Christmas and at the end of each year. These are sweet little bags. If you make the first one carefully, stretching your brain, the rest will come together easily. Here’s the link to the Lazy Girl Designs pattern catalog. (It’s not set up to link directly to each pattern.) The two I’ve made are Sweetpea Pods and the Bendy Bag. Both are cool little bags, quick sews, and great gifts for teachers or your gal pals. A few days ago, I noticed the Casey Quick Cases, which should solve my problem of all the tiny holes in the front of my t-shirts and (horrors!) sweaters from hanging my beloved sharp little trimmer scissors around my neck! Or I could just remember to put the case back on the scissors when I’m finished trimming some threads. 😳 ]

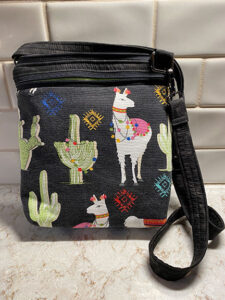
Back to the Lexi Carryall. I chose this bag because of all the pockets. The fabric I chose is from Richloom Fabrics, from the line that they make to sell to JoAnn’s and other fabric stores (per my next-door neighbor, who designs for Richloom’s mobile home and RV collection). I found it on fabric .com several years ago and loved the llamas and the various cacti (having lived in Tucson for eight years). The fabric is a canvas weight. When I laid it out to cut, I noticed some marks that wouldn’t wipe off, so I threw it in the washer and dryer. It came out of the dryer looking a little less black—as if some of the surface dyes had rubbed off in the process. It just looks a little antiqued to me. But that does nothing to diminish what a nice bag it is. If I were using this or a similar dark fabric for home dec, I would just spray it with a fabric protector, e.g. Scotchgard®, and wipe it clean with a damp cloth. I finish all my bags that way.

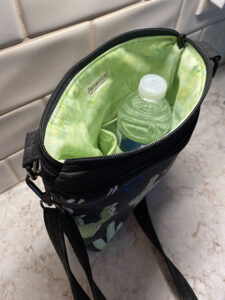
I followed the pattern very closely. This was not a difficult bag to make, and turned out nicely. It uses fusible fleece for the interfacing on some of the pieces. It feels a little bulky to me, even before I’ve loaded any belongings in it. But I guess that means it will protect your glasses and phone well. Here’s a picture showing a 16.9 oz. water bottle inside to demonstrate the size of the finished bag. The dimensions are 9″ x 9″ x 2½”. This bag has a true boxed bottom—nice! However, I don’t think I’d want it for a travel bag because of the weight. I tend to like smaller bags with just enough room for my small card/cash zippered pouch, my phone, and a lipstick and pack of tissues. (But I also carry a larger handbag, which I throw my tiny crossbody into, pulling the tiny bag out when I want to go to dinner and just need the bare necessities.)

Fabrics: Richloom cotton canvas. There is no more on fabric .com, but I found some on Etsy. Here’s that link. I didn’t even consider it Christmas fabric, as lots of places in Tucson keep lights strung around their saguaros year ’round. But then, I’ve been known to be less than observant of things around me. 😲 Go to any online fabric store and search on “llama” and you’ll see lots of cute fabrics. This bag has the following fabric requirements: ⅔ yard Feature fabric for Front Zip Pocket and Back Slip Pocket; ⅔ yard for Adjustable Strap and Inside Pockets; ½ yard for Back of Bag and Front ip Pocket Lining; and ½ yard for the bag lining.

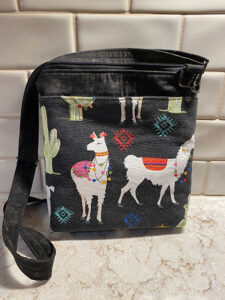
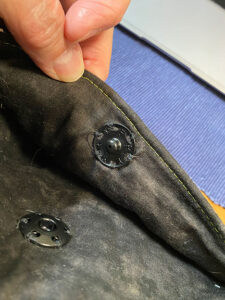
The pattern does not specify a magnetic snap on the back slip pocket, but I always carry my crossbody bags with the slip pocket next to my body to safeguard my phone and whatever else I’ve tucked in there. Once the back slip pocket was finished, I realized I wanted a snap there and dug into my stash of closures to find a ¾” black sew-in snap. I was glad I added that modification.

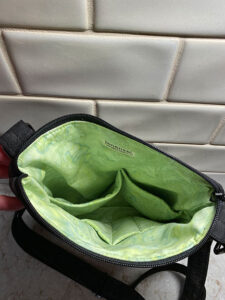
I used a black splotchy sorta mock-hand-dyed fabric for the piece that’s called the “front top” and for the back and the inside of the back slip pocket. I used another mock-hand-dye in the spring green for the lining of the front zip pocket, for the lining, and for the interior pockets. (I like my pocket linings to be light colors so I can find things.) So I used a total of three fabrics, plus two black handbag zippers You can use a zipper by the yard, or a 30″ or longer double-pull handbag zipper. (These are both size #5 zippers.) My hardware (two rectangle rings, two swivel hooks, and a slide for the adjustable strap) was Gunmetal to go with all the black.

If this is a “thing” for you, Joan’s instructions detail how to alter the construction techniques if you always wear your crossbody bag on your left side or always on your right side. You would want your zipper to pull from one side or the other depending on how you wear it. I am inconsistent, just throwing the strap over my head and whatever arm is available!

I think that’s everything. I love the fabric and think it’s a very cute bag. But this Bag Lady thinks it’s rated “not for me.” I doubt I’ll make it again. But a lot of people would love it, I believe.

Jan of All Trades

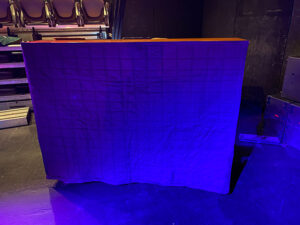
Today’s Me-Made item is something you don’t see often. It’s a sound-dampening blanket for an upright piano. The first picture shows it in use in Youngstown State University’s black box theatre, the Spotlight Theatre.

Blanket Front

When one plays for musical theatre productions or performances of singers who deal primarily in musical theatre, there is rarely the issue of an imbalance of sound between the piano and the singer. The singers are almost always fitted with a microphone that broadcasts their music through the house sound system. But when playing for classical music singers, they are usually not mic’d. They are taught to rely on their ability to project their voices rather than use the microphone to do that.

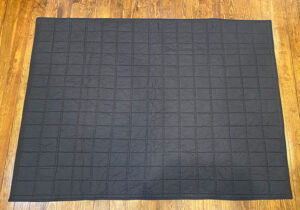
Blanket Back

This past Tuesday evening, I accompanied Adam Dominick, a lovely young man whom I accompanied pre-pandemic. As we were getting ready to come back in person to school in August of 2021, he asked if I would accompany him for his senior year lessons and his Senior Showcase, the capstone project that musical theatre students plan and perform. His Showcase was to be performed in a small theatre, so there was no need for him to be mic’d. But there was a need for me not to overwhelm his sound with mine.

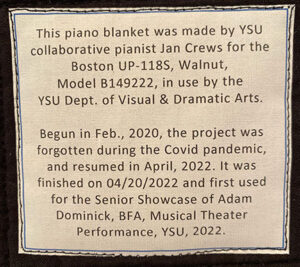
When I knew how soft I’d have to play one song, his professor/vocal coach and I remembered the blanket I had started making in the spring of 2020. I knew right where it was hiding in my sewing room, dragged it out, and finished it during my spare time in a couple of days. We used it for dress rehearsal on Monday afternoon, and then for the performance on Tuesday night. Perfect! It did exactly what I wanted it to do, and looked fine while doing it. 😜

The fabric is 100% cotton in a quilt backing weight—a lightweight fabric that is 108″ wide. I cut the fabric the size of the piano back. I made a “quilt sandwich” with two or three layers of 100% cotton quilt batting and the front and back of the quilt. I did horizontal and vertical quilting in about 3″ blocks, then bound it with ½” straight-cut (not bias) binding. There were a number of pieces of Velcro®, the hook side, adhered to the top of the back of the piano. Rather than measure where these Velcro holders were placed and how long they were, I just took several long strips of Velcro, the loop side, and sewed them to the top binding, about ¼” from the top edge of the quilt. I butted their raw edges so I had one continuous strip. The blanket grabs those Velcro strips perfectly.

The finished dimensions are ~69¾” wide and ~43″ high.

It fits the back of the Boston upright piano perfectly, and gave us the balance we wanted between piano and singer.

Jan for the win!! 😇

This May Be It!

I may have found The Pattern for the bags for my cousin.

I’ve admired Noodlehead bag patterns for years, but have never made one. As I was reaching the end of my test bags for Diane, the wife of my cousin, Ken (link to the blog posts about the test bags) and taking one last pass through all the patterns of the indie bag pattern designers whose work I admire, I came upon Noodlehead’s Hillside Tote from designer Anna Graham, and realized it was the perfect candidate. And now, with the bag finished and having eyed it repeatedly for several weeks, I absolutely love it.

Why do I love thee? Let me count …. Where each of the test bags I made, written up in the link above, had some idiosyncracy or lack of a significant feature, there’s nothing about this bag that I don’t like.

I have a limited quantity of the vintage fabric to use. The Hillside uses a base fabric, and then a feature fabric for the exterior pockets. It will use less of the vintage fabric, enabling me to make more bags for Diane and her sisters, or to return the extra to her when I’m done, for whatever else she’d like to do with the leftover fabric. I like the exterior pockets—I like the magnetic snap closure on the wide slip pocket. The other is a slip pocket with topstitching vertically down the center to form two smaller pockets. If I were going to change anything about these pockets, I would make the divided pocket be a full zippered pocket. I may try that on one bag and see what I think. One of the fabrics I’ve ordered for the base fabric is waterproof, which I think could be nice.

I inserted the main zipper in the normal way I do on my Sew Sweetness bags, with a small piece of fabric enclosing the raw zipper ends. I like how that has come together.

I like the internal pockets—a nice big zippered pocket (which is my addition to the pattern) and a divided slip pocket, to which I’ve added a secondary small slip pocket that measures about 5½” by 3¾” and holds my proof-of-vaccination card and my driver’s license.

I love the hardware I chose, a gunmetal shade that I love with these fabrics. That, of course, is not a facet of the pattern. It’s just what I liked and am so glad that I chose.

And I totally love the double-sided strap. This is the Sew Sweetness video that Sara Lawson created to demonstrate a double-sided strap. I don’t know how many videos Sara has made since starting to design bag patterns, but she is excellent at explaining what she’s doing and how her bags go together. She gives her followers the knowledge they need to produce professional-looking bags. The skills she teaches on her YouTube channel (125k followers) and in her Facebook group (68.6k members) have enabled me to take most any bag pattern and successfully complete the project. And I do know that I’m writing about another designer’s bag, but the video is everything. There were a couple of places I could have used a video about the Hillside construction.

And finally, I love the base of the bag. If you have read all my other posts about the bags I tested, you’ll know that having a cleanly sewn base that enabled room for a small water bottle or a big sunglasses case was important to my choice. This, I think, is just a lovely base. You can see in this picture how the outside pockets are topstitched to the bottom of the sides. It just feels nice and secure. I don’t believe this is a bag that would ever be returned to the maker for repairs.

So, if you’ll excuse me now, I’m going to go down and take my first cut into the vintage fabric. It’s time!!

Traveling Again

Everyone I know is hungry to travel. I snuck in a quick trip to Orlando at the beginning of YSU’s Spring Break, flying on Friday and Monday, enjoying the warmth and sunshine on Saturday and Sunday.

<Jan, I don’t care who you saw or what you ate. I’m only here to see the Hackney Pouch.>

I stayed with the elder of my two brothers and his lovely wife, whom I have admired since I first met her when she was 17 or so. The middle brother and his wife drove up from Tampa on Saturday morning and we all went to lunch at Seasons52. Now I’m wishing there were a Seasons52 anywhere near me. We (minus the Tampans) ate several meals at Broadway Ristorante & Pizzeria on 434 in Longwood. This is my elder brother’s “Cheers.” Everybody knows their names. Sunday morning, while my brother was waiting for the screen repair guy to arrive, his wife and I drove up toward Heathrow and ate at Peach Valley Cafe. That’s another place I’d like to visit again. “Two orders of Very Berry Stuffed French Toast, please.” I’ve never eaten mascarpone cheese and known what it was. Now I want to research recipes using mascarpone. That was one delicious breakfast. And on the other end of that scale was the breakfast I had the next morning and didn’t enjoy at Bahama Breeze in the Orlando airport. Really, how can one kitchen screw up avocado toast and scrambled eggs?! Oh, and the meal the night before at Bar Louie near my airport hotel. I jump at any opportunity to eat at Bar Louie in Beachwood when I take a shopping trip to Nordstrom on the east side of Cleveland. But in a situation where trying to hire any experienced waitstaff during Covid times is probably to blame, there was no hostess when I entered. The person I flagged down said, “Just sit anywhere.” Bad idea. I sat on the patio to enjoy the Southern breezes before heading back to frigid Northeast Ohio the next morning. And I sat. And I sat for over 15 minutes before going inside to try to find anyone to take a drink and appetizer order. I was so disappointed in the service, I don’t even remember what I ordered, except a large glass of chardonnay.

By the way, the whole trip wasn’t made just to hang out with family members, although I hadn’t seen the middle brother and his wife since our mother’s memorial service in the summer of 2016! That’s just too long. So why this trip at this time?

I went to a Seventh-day Adventist elementary school. We attended from first through eighth grades, and had one teacher (plus band, choir, and 6th grade home ec) for each of the eight grades. My class was lucky enough to have Mr. George Pickel for both seventh and eighth grades. Then the class behind us, who graduated in 1965, had him for eighth grade after my class of 1964. He was young and energetic and loving to us. What a great teacher! After the graduation in May of 1965, he and his wife and two small sons (one of whom was delivered by my daddy), moved to California where he became the principal of an Adventist school. In the past year, one of the members of the class of ’65 happened to learn he had been widowed some years back and was currently living in south Florida with one of his sons. She spoke with him at length and was touched to learn how well he remembered all the students in his two classes at Orlando Church School. And a party was planned, which coincided with my university spring break. I bought plane tickets and consulted with my brother about playing the piano for the Sabbath service at the small church he attends near my high school, Forest Lake Academy. And I arranged time for a quick glass of iced tea with a college suitemate who lives in Lady Lake. I packed a lot into that short visit, and had a ball. And, as an added bonus, I got warm for a change! On my way from the party, in Mount Dora, to my hotel, I stopped by Greenwood Cemetery to visit my birthmother’s grave. When I visited there four years ago, I was surprised to see that neither her nor her husband’s graves had headstones. My sister, Debbie, and I arranged for a headstone for Gertrude’s grave, and I contacted the Department of Veterans Affairs to have a marker made for the grave of her husband, a United States Navy veteran. This was my first trip back to Orlando since the markers were put in place. It was an absolutely blue-sky gorgeous day. I finished my nostalgic trip by driving around Lake Eola, and remembering many walks in that space.


During the week I was preparing for this trip, I made time each day to sew. Here’s the report of that project:

As I type this on my laptop, I have FlightAware.com open on my iPad, watching the progress of my younger son and daughter-in-law, for whom this pouch was sewn, as they head back home to Amarillo from spring break in Germany.

All my kids love to travel as much as I do, and take every opportunity to do so. My DIL, a university dance professor, travels frequently for work, when she is asked to come choreograph for a dance company or present at a conference. And then there are her summer gigs at Interlochen Arts Camp. She has need for pouches such as this to store her small travel items so nothing gets lost. One of the things I love about the Hackney Pouch is the zippered mesh pocket in the lid. See how I’ve tucked Aveda Foot Relief and Hand Relief Moisturizing Lotion tubes into the mesh pocket? And how about that little dispenser of Stress-Fix stress-relieving concentrate. For me, this pouch would be a stress reliever all on its own.
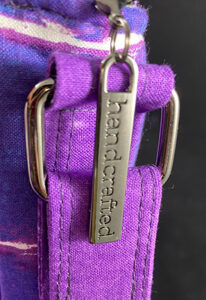
When Leslie and Tyler came to visit over New Year’s, she was carrying her daughter’s Hackney Pouch, size medium, which she had borrowed for the trip. That’s when I knew she needed her own—size large. And because it was to be a travel bag, I knew exactly what fabric I would use. The exterior fabric comes from DearStella. This map print, Va Bene, is available from several Etsy sellers. The lining is Thatched, designed by Robin Pickens for Moda. The color is “Meadow.” This is a fabulous lining and coordinate fabric available in a wide range of very matchable shades. I had a beige zipper that would match the beige mesh yardage in my stash, and not detract from the beautiful map fabric.

This is the third Hackney Pouch I’ve made. It’s part of designer Sara Lawson’s Minikins Season 3 collection of patterns. The minikins series all contain easy pouch and bag patterns that require a minimum of hardware pieces, so they’re less expensive to make. They’re all great as gifts or donations to charity events. And the patterns can be purchased with a tutorial video. Perfect for visual learners like myself.

This make was straightforward to me, as I had made it before. But one big change occurred to me, and I’m so glad I was paying close attention at the appropriate time. The center back panel, the top, and the bottom all have a piece of stabilizer inserted after they are sewn, but before the opening for turning is sewn closed. I tend to stock up on stabilizer, foam, fleece, and interfacing that I use on bags, hopefully avoiding a last minute rush to JoAnn’s when I want to crank out a quick gift. Years ago I had bought a couple of yards of Pellon’s Peltex stabilizer and had used it in the previous two Hackneys I made. But this time I watched the video and read the instructions carefully, and realized Sara Lawson seems to prefer Pellon’s Deco Bond or Decovil heavyweight fusible stabilizer to give the right inner support to the top, bottom, and back of this little bag. I made a quick trip to Joann’s and got the Decovil. Once I had cut out the pattern pieces, inserted and fused them in place, I was so glad I had really read the instructions this time. What a difference! What a nice finish to this gift.
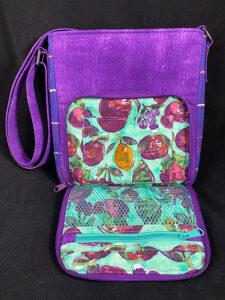
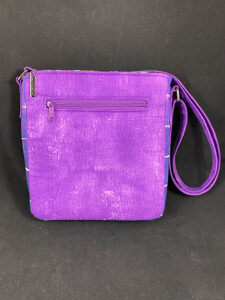
I had hoped to have this pouch finished before Tyler and Leslie left for their trip to Germany. That would have worked if they lived here. Alas, travel time to Amarillo for a travel bag is not overnight without wasting a ton o’ money. I’ll ship it to her on Monday, and she can tuck it away, ready for her next trip.

I’ve been looking for an opportunity to cut into this Va Bene fabric, and so happy this project came along.

Promises and Expectations

Why can’t I find what I want?! It’s like the Perfect Man; Maybe the Perfect Bag doesn’t exist?

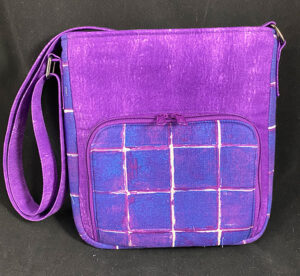
I have heard sewists in the Sew Sweetness FB group talking about the Tower Crossbody Bag since the day the pattern was introduced in 2020. It’s a free bag from Sew Sweetness, so it’s very popular. Who doesn’t like a free pattern?! I’ve wanted to make it, but it never reached the top of my Next Make list. So I decided to make a test bag out of the pattern and, while I was at it, make it out of a fabric I thought my BFF would love. She’s all about purple. In my stash, I found Tula Pink Pinkerville Gate Keeper in Day Dream for the exterior; Moda Fabrics Grunge Basics—I think the color is Freesia—for the lining; and In the Beginning Fabrics Dit Dot Pale Aqua for the exterior pocket lining.

I really thought this was going to be The One, until I got to the zipper. What’s with me and zippers in these test bags? I’m great with zippers. I’ve never had a problem with a zipper, until this round of bags.

But honestly, the issue is not my sewing of the zipper. It’s the method the designer has chosen for the insertion technique for this particular bag.

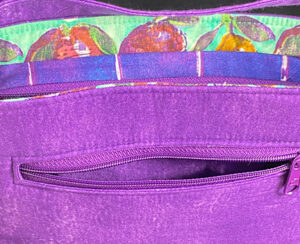
The #3 (apparel size) zipper on the front exterior pocket was perfect.

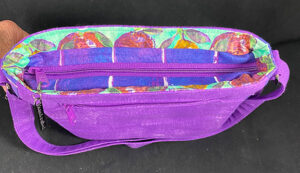
The goal of the designer, as I see it, is to insert the zipper in such a manner as will enable the user of the finished bag the greatest access to the contents of the bag. So the zipper is sized and inserted to have the zipper’s opening space be larger than the bag’s opening space. Then the bag can be opened as wide as possible for easy access. That means you’re going to have a zipper tail hanging over the end of the bag. But if you’ve also got an adjustable strap attached to both ends of the bag opening, and the strap is fighting for real estate with the zipper tail, well, you’ve got a problem. You’ve got a fight on your hands.

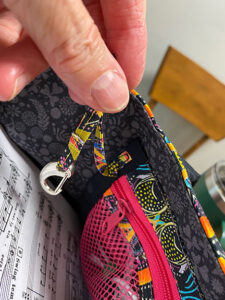
This is how the top zipper looked when I finished the bag. I had a tail that was several inches long. I tucked it inside the bag between the end of the zipper and the outside of the bag.

And here’s what’s inside the bag, underneath the zipper: the tail. When you want to open the bag as wide as possible, you can pull the zipper tail little further out of the bag and unzip it all the way. Remove what you want from the bag, close the zipper an inch or so, then reach inside and pull the zipper tail back down and close the zipper fully.

I went to Instagram and searched on #towercrossbodybag. Some of the photos show no sign of the zipper tail. Others show a 4″ tail hanging out. That’s not what I want for these bags. So I’m back to trying another bag.

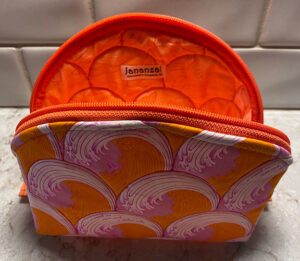
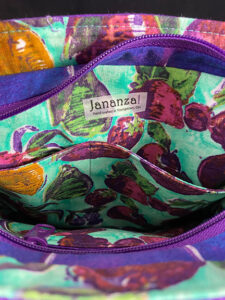
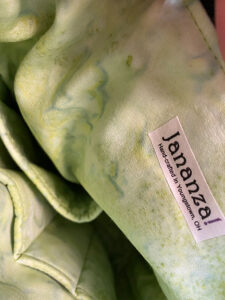
I’ve explained to my BFF the details that I don’t like about this bag. She doesn’t care about my perfectionism. She’s excited to have a new bag in her favorite color. So I’m going to pack it up tomorrow and deliver it to the post office, after I fuse one of my “Jananza!” labels inside.

And next I’m going to dive into the Sew Sweetness Dot Dot Dash bag. With crossed fingers that I can make this The One.

What To Do With This Bag?

My search continues. If you’re a regular reader of my blog, you’ll know I’m making tester bags trying to find just the right pattern from which to make three bags from vintage fabric that belongs to my cousin, Diane. This pattern is not It.

ByAnnie’s Ultimate Travel Bag

After the Sew Da Kine bag, I thought I would turn to designers whose patterns I had used more frequently than Sallie Tomato and Sew Da Kine. So I looked at byAnnie, the patterns designed by Annie Unrein. I’ve made several of her bags, including my very favorite, the Ultimate Travel Bag. Another of my favorites is her “Take A Stand!”, which I made up in some Tula Pink fabrics that I love. (While looking at byAnnie’s bags, I also considered some Sew Sweetness bags. Sara Lawson, the creativity behind Sew Sweetness, is another favorite designer, but that’s another blog post, two days hence.)

Knowing that I wanted some exterior pockets and some straight horizontal seams in the fabric that I showed you in the previous post, I turned to Annie’s “Daytripper II” and bought the pattern.

I receive way too many marketing emails from quilt and fabric shops. I had, within the past couple of weeks, received an email from “My Favorite Quilt Store” showing a new fabric collection from a quilt teacher I have long wanted to study with. Her name is Katie Pasquini Masopust, and the collection is called Game Day. The multi-colored print is called “Life”, and it also comes on a white ground, which Katie calls “Candyland.” The orange print is “Twister.” There’s a story about the orange, which I thought would go great with the Life print. Unfortunately, when I was shopping this fabric collection, I was on my iPad and didn’t have the screen brightness turned all the way up. So I thought this print was more of a rust color, and bought my zipper-by-the-yard in a darker orange. When the fabrics arrived and I saw how bright the orange was, I wasn’t sure what to do. After posing the question on one of the sewing FB groups I frequent, I went ahead and used it. But I wish I had gone for a blue coordinate rather than the orange.

Daytripper was first published in 2015, and both designers and bag sewists have learned a lot about bag construction since then. I was not really pleased with the zipper technique used on this bag. As the bag developed, I loved the exterior fabric more and more, and decided it would become mine when it was finished. I would use it to carry my iPad back and forth to school for all the voice lessons I accompany. However, the iPad is not all I carry. I took it one day, and tucked in my iPad, along with my page turn pedal, iPad charging cord, iPhone charging cord, and Apple Pencil with case. Nope. The bag may be tall, but it’s not big. Hence the title of this post. Now what?

I really struggled with the zipper insertion method on the top of this bag. There is no instructional video to accompany this bag, and the illustrations in the instruction sheet did not make it clear to me exactly how to make this zipper happen. I put it in once, and could barely get my iPad into the case. So I unsewed the zipper, cut a new zipper, and tried it again. I was successful in finishing the bag, thanks to all my bagmaking experience, but I didn’t love it.

One thing about byAnnie is she used her specially designed foam, called “Soft and Stable” for many of her bags. Instead of having a separate lining, she sandwiches the lining, the foam, and the exterior fabric, which she has cut larger than the required dimension for the pattern pieces. Then she quilts the three together and cuts to size. The Daytripper doesn’t use this technique, but has the exterior and foam layered together and basted around the edge before constructing the bag. This is not obvious on the front of the bag because of the large exterior pocket. But it’s very obvious on the back, where the exterior fabric and the foam are loose from each other—very obviously loose.

If I were to make this bag again, which I won’t, I would quilt these pieces together and finish the interior with binding.

And now what do I do with this bag? What I know is I’m moving on to a Sew Sweetness bag, which you’ll read about next.

The Search Continues

In my previous post, “Kissin’ Cousins,” I told you about my search for just the right bag pattern to use for three bags I’m making for my cousin’s wife, Diane, and her sisters. So far I’ve made the Sallie Tomato “Zippy” crossbody bag, followed by its big sister, Sallie Tomato’s “Myrna” crossbody bag.

When I finished the Zippy, I felt it was too flat to be able to throw more than a thin wallet and a phone into. The Myrna, with its boxed bottom, was thicker. You could also tuck sunglasses and a few other essentials into that bag. Maybe something a little deeper front-to-back would be better.

I searched through the websites of my favorite bag designers, and decided to try the SewDaKine crossbody bag the designer named “The Triple Zip.” I dug into my stash of beautiful Richloom vinyls designed by my neighbor and found a piece that went beautifully with a piece of batik I purchased on my 2018 textile tour of Bali.

Where the Zippy was a flat bag, and the Myrna had a boxed bottom, the Triple Zip used small darts in the bottom “corners” to increase the depth. Click the picture with this paragraph and you can clearly see those darts. And the Triple Zip is tall. The photo at the top shows the bag standing next to a full-size 16.9 fluid ounce water bottle. The pattern cover states the finished dimensions are 12″ tall, 11.5″ wide, and 2″ deep.

This is the first Sew Da Kine pattern I’ve made. I do know that she makes beautiful bags, which she sells on her website and in various boutiques in Hilo, Hawaii, where she lives. Those bags are from her line of bag patterns, which she encourages buyers to make at will. Many bag designers restrict the number of bags the sewist can make for sale or gifting. Not this designer. Knock yourself out, she says. Make all the money you can selling them. To me, that’s generosity.

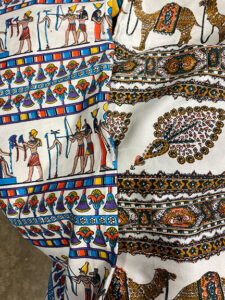
As long as we’re talking about the bags I plan to make for my Diane and her sisters, I should show you the two vintage fabrics. Then you can understand why I keep looking at patterns with horizontal sections on the front of the bag. It just seems natural to me to want to accentuate those graphic strips.

I think all the crossbody bags I’ve made to this point have had the adjustable strap attached to the bag with swivel clips. This is the first one where the strap was constructed as part of the bag construction. In turning a long strip of fabric into a strap, one end was folded over so there were no raw edges, and the other end was left unfinished. The unfinished end was sewn into the top seam, while the finished end, was looped through the D-ring and sew in place. So that was interesting to me. I love learning new things. (If you don’t know how to make adjustable straps and are curious, there are lots of videos on YouTube. Just search “crossbody” or “adjustable strap.”) I don’t know that I like this technique better than the swivel clips, but it does save the sewist a couple of dollars on hardware. And you’ll see this technique again in a post yet to be written.

The other personalization I used on this pattern was to add a slip pocket in the back of the exterior. I used the technique I learned in the Zippy bag, three posts earlier, and made a pocket that will be protected, next to your body, when you’re “wearing” the bag.

I purchased my zipper-by-the-yard for this project from My Handmade Space. There has been some controversy on a couple of social media groups about this vendor posting something not politically correct somewhere. I try not to get into politics on social media except when it comes to Covid. (I hate that masks and vaccines have become politicized!) But I wanted these star zipper pulls on this bag, so bought them on this site.

The fabric is a Richloom RV and mobile home upholstery fabric designed by my generous nextdoor neighbor. JoAnn’s carries some Richloom products. If you happen to purchase some for a project, whether a bag or pouch or a chair cushion, you will be one happy sewist. The fabric is wonderful and sews like buttah. Some of the vinyls my neighbor designs look like cotton fabric. The lining for this bag is a batik I picked up in Bali three years ago. I had enough to use for the exterior inset, the lining, and the pocket linings, along with the strap. I always love the hand of a Bali batik. The zippers, which are nylon coil, crafted to look like metal. The link to My Handmade Space is above.

The more I look at this finished bag closely, the more I like it. This may be The One for Diane. I’ve got to closely examine the necessary yardage to make three of these, and ensure I’ve got enough.