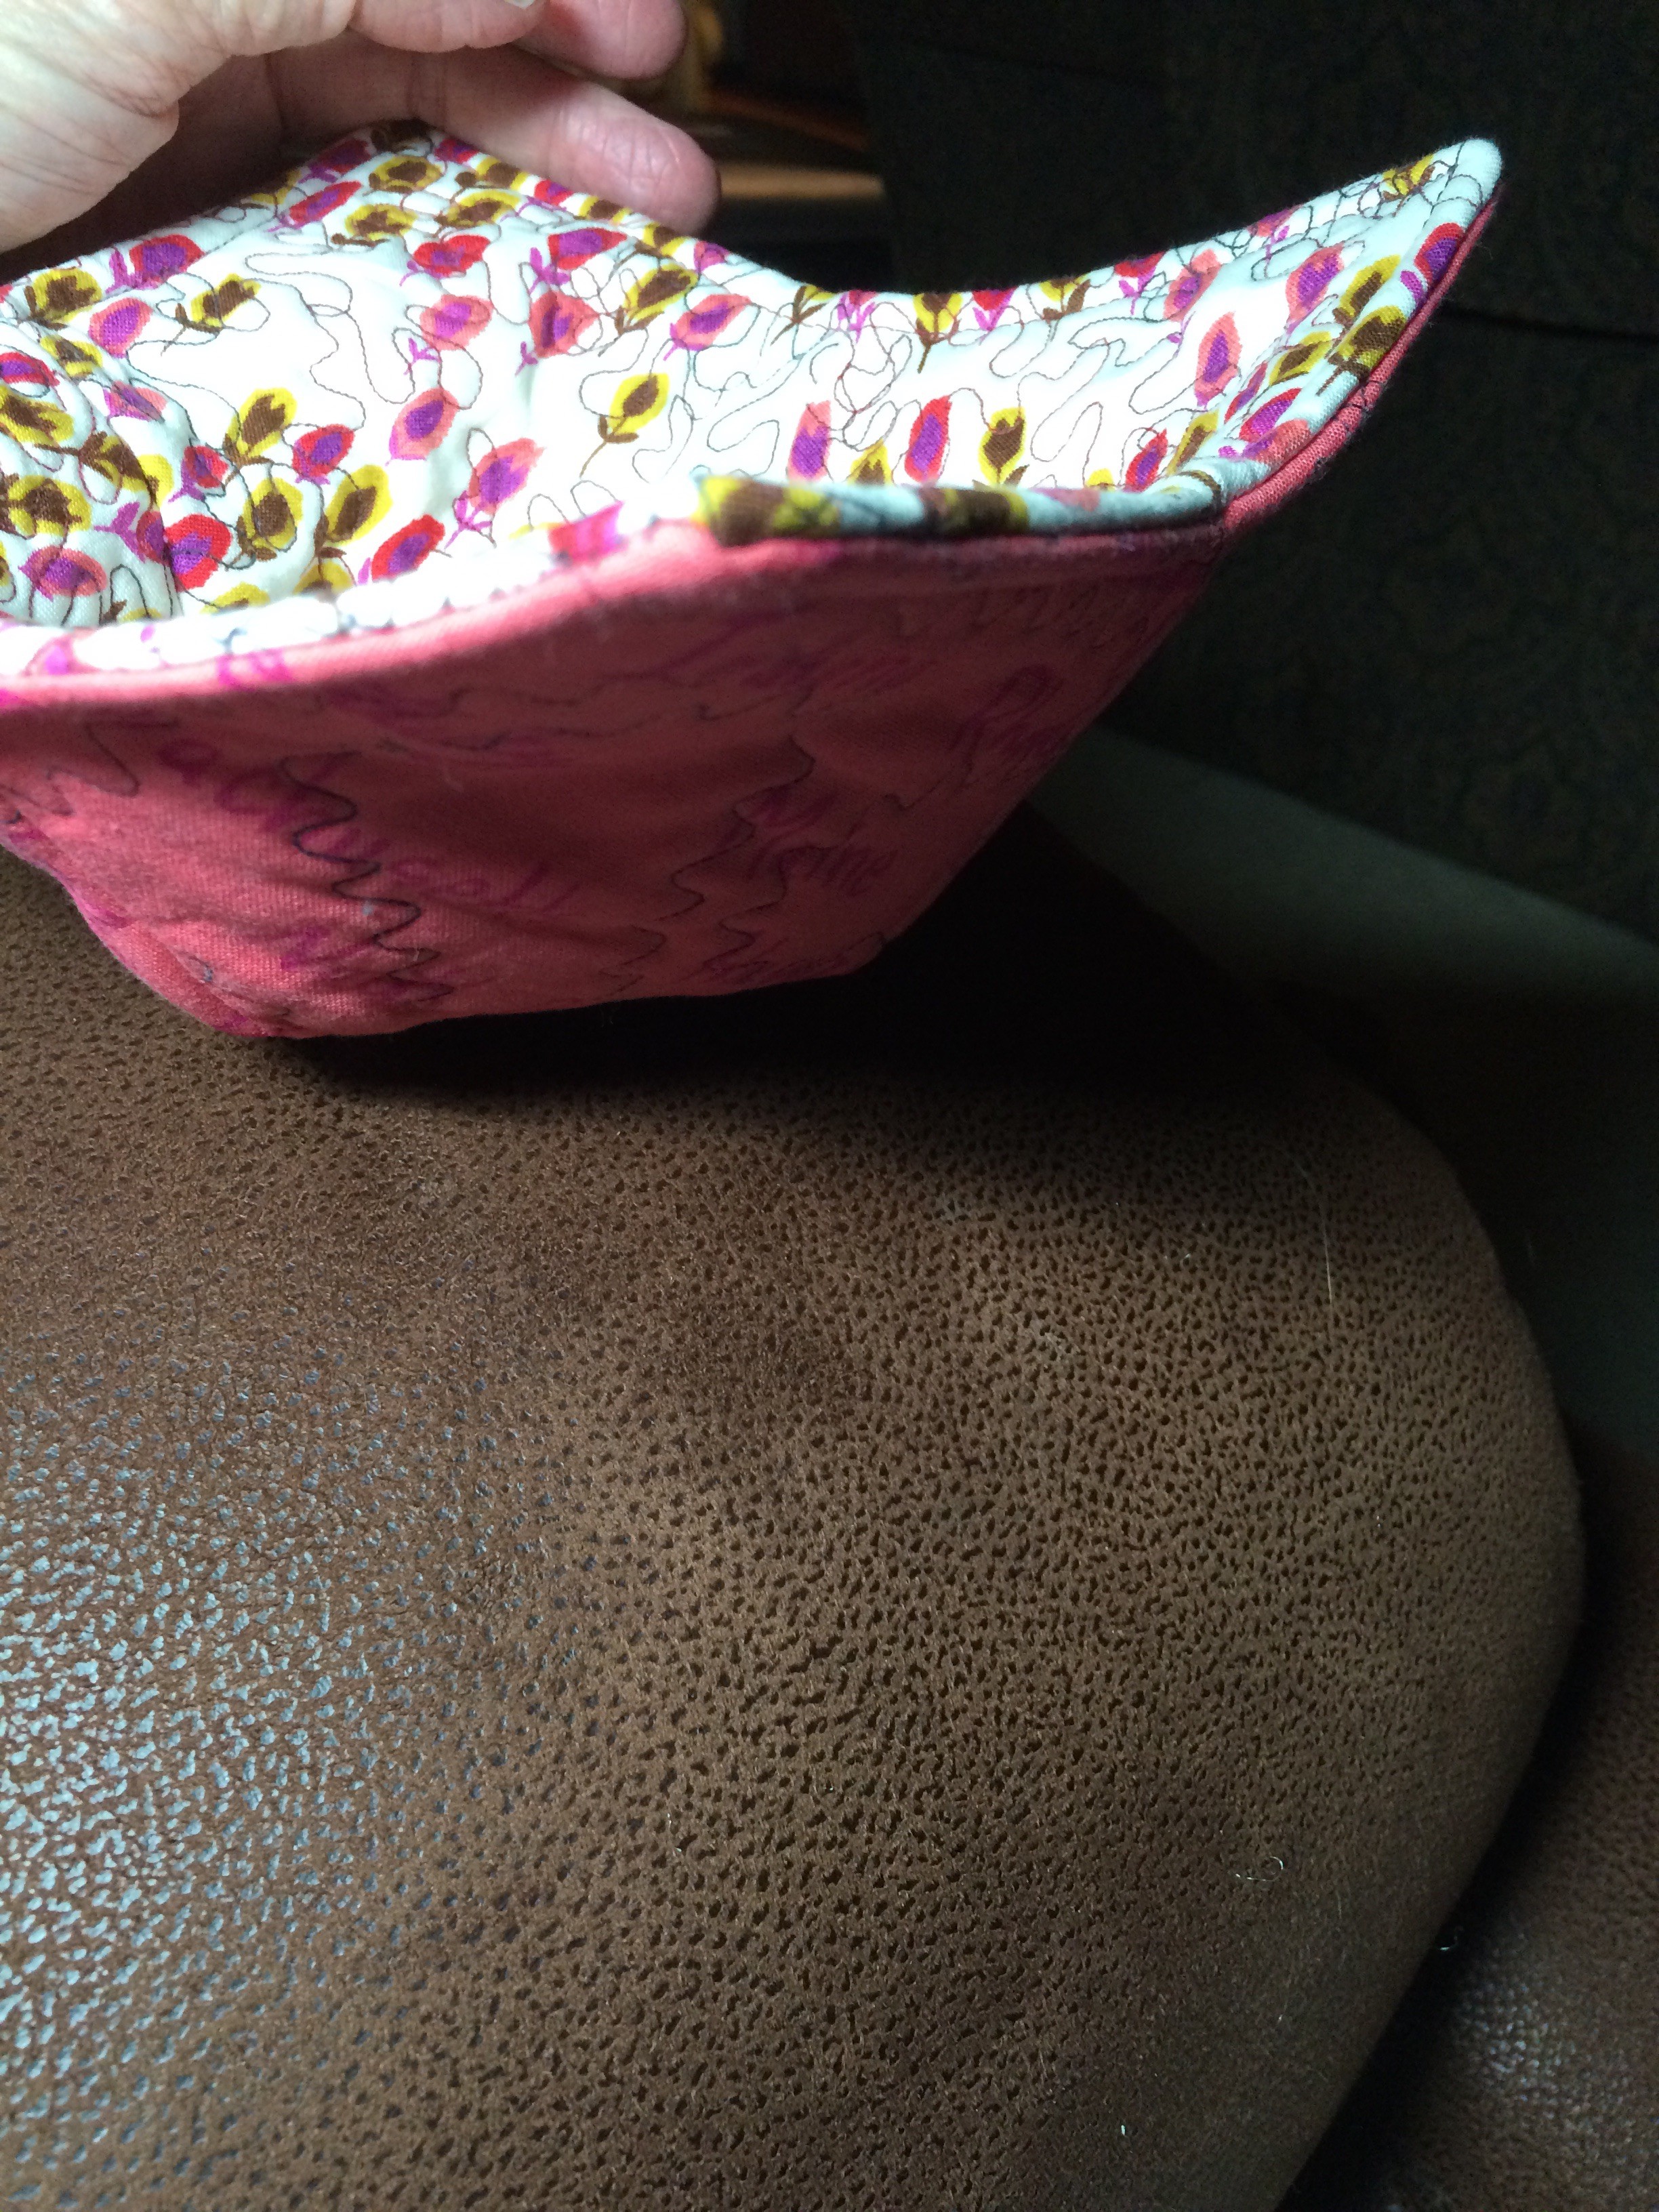
 We have some bolts of fabric at work that have been around for a few years. The shoppers who come in somehow don’t envisage these fabrics as quilts or bags or any other sewn item. So they sit.
I’ve been making it my mission to get all of these fabrics photographed (or find the pic online, although for older fabrics, that’s not an easy task), and make them available to potential online purchasers. In a sentence: what a shopper cannot see does not get sold.
 When I arrived at the store on Monday, eight bolts of Moda cotton twill were stacked next to the cutting table. Balanced on top was a handwritten note from the store owner: “Put in computer and label. Make something.”
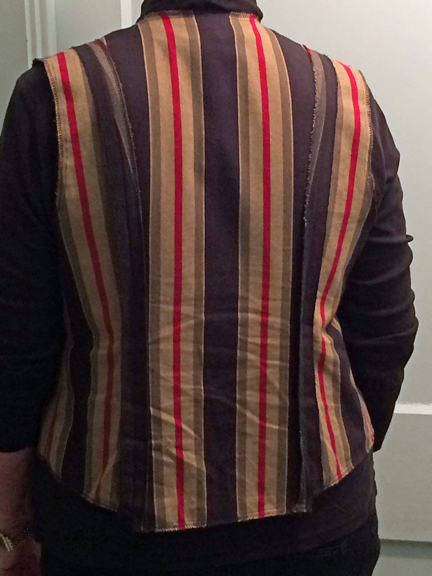
When I went to American Sewing Expo in Novi, MI, a couple of months ago, I saw an Indygo Junction vest that I loved. In fact, many shoppers loved it. One of the woman associated either with IJ or with the store booth that was featuring IJ was wearing a denim vest from the pattern. She got so tired of stopping to answer the question, “What pattern is that?”, that she pinned a copy of the pattern to the back of her vest so she could just point! I purchased the pattern, but also bought some of this beautiful, soft denim IJ has developed. My intention is to make the long vest from the soft aqua denim. But I’d been eyeing this olive/black/red striped twill ever since I saw the vest. Wouldn’t that go together nicely? And it did!
Here’s the review:
 Pattern Description: The Modern Silhouette Vest is styled with subtle shaping for a flattering fit. Only four pattern pieces combine with an array of construction options to create a variety of looks. Three lengths are offered: a cropped, upper hip number, a mid-hip variation and a lower hip adaptation with a decidedly free-spirited point of view. All have staggered hemlines that taper gently to the back with a concealing extended center back panel. Stitch your pieces together with exposed, serged seams or overlap and topstitch your pieces for an out-of-the-ordinary rendition. If you don’t have a serger or prefer an alternative finishing technique, use your zigzag stitch to cover and accent the raw edges of your garment. The pattern showcases a self-fabric tie option, an easy, single button closure and a vest unhindered by closures of any kind. You’ll also find instructions for deconstructing denim jeans to repurpose as a smart new vest.
Pattern Sizing: Offered in sizes S – 3XL.
Did it look like the photo/drawing on the pattern envelope once you were done sewing with it? Yes
Were the instructions easy to follow? Yes
What did you particularly like or dislike about the pattern? Easy peasy! Construction time probably under two hours.
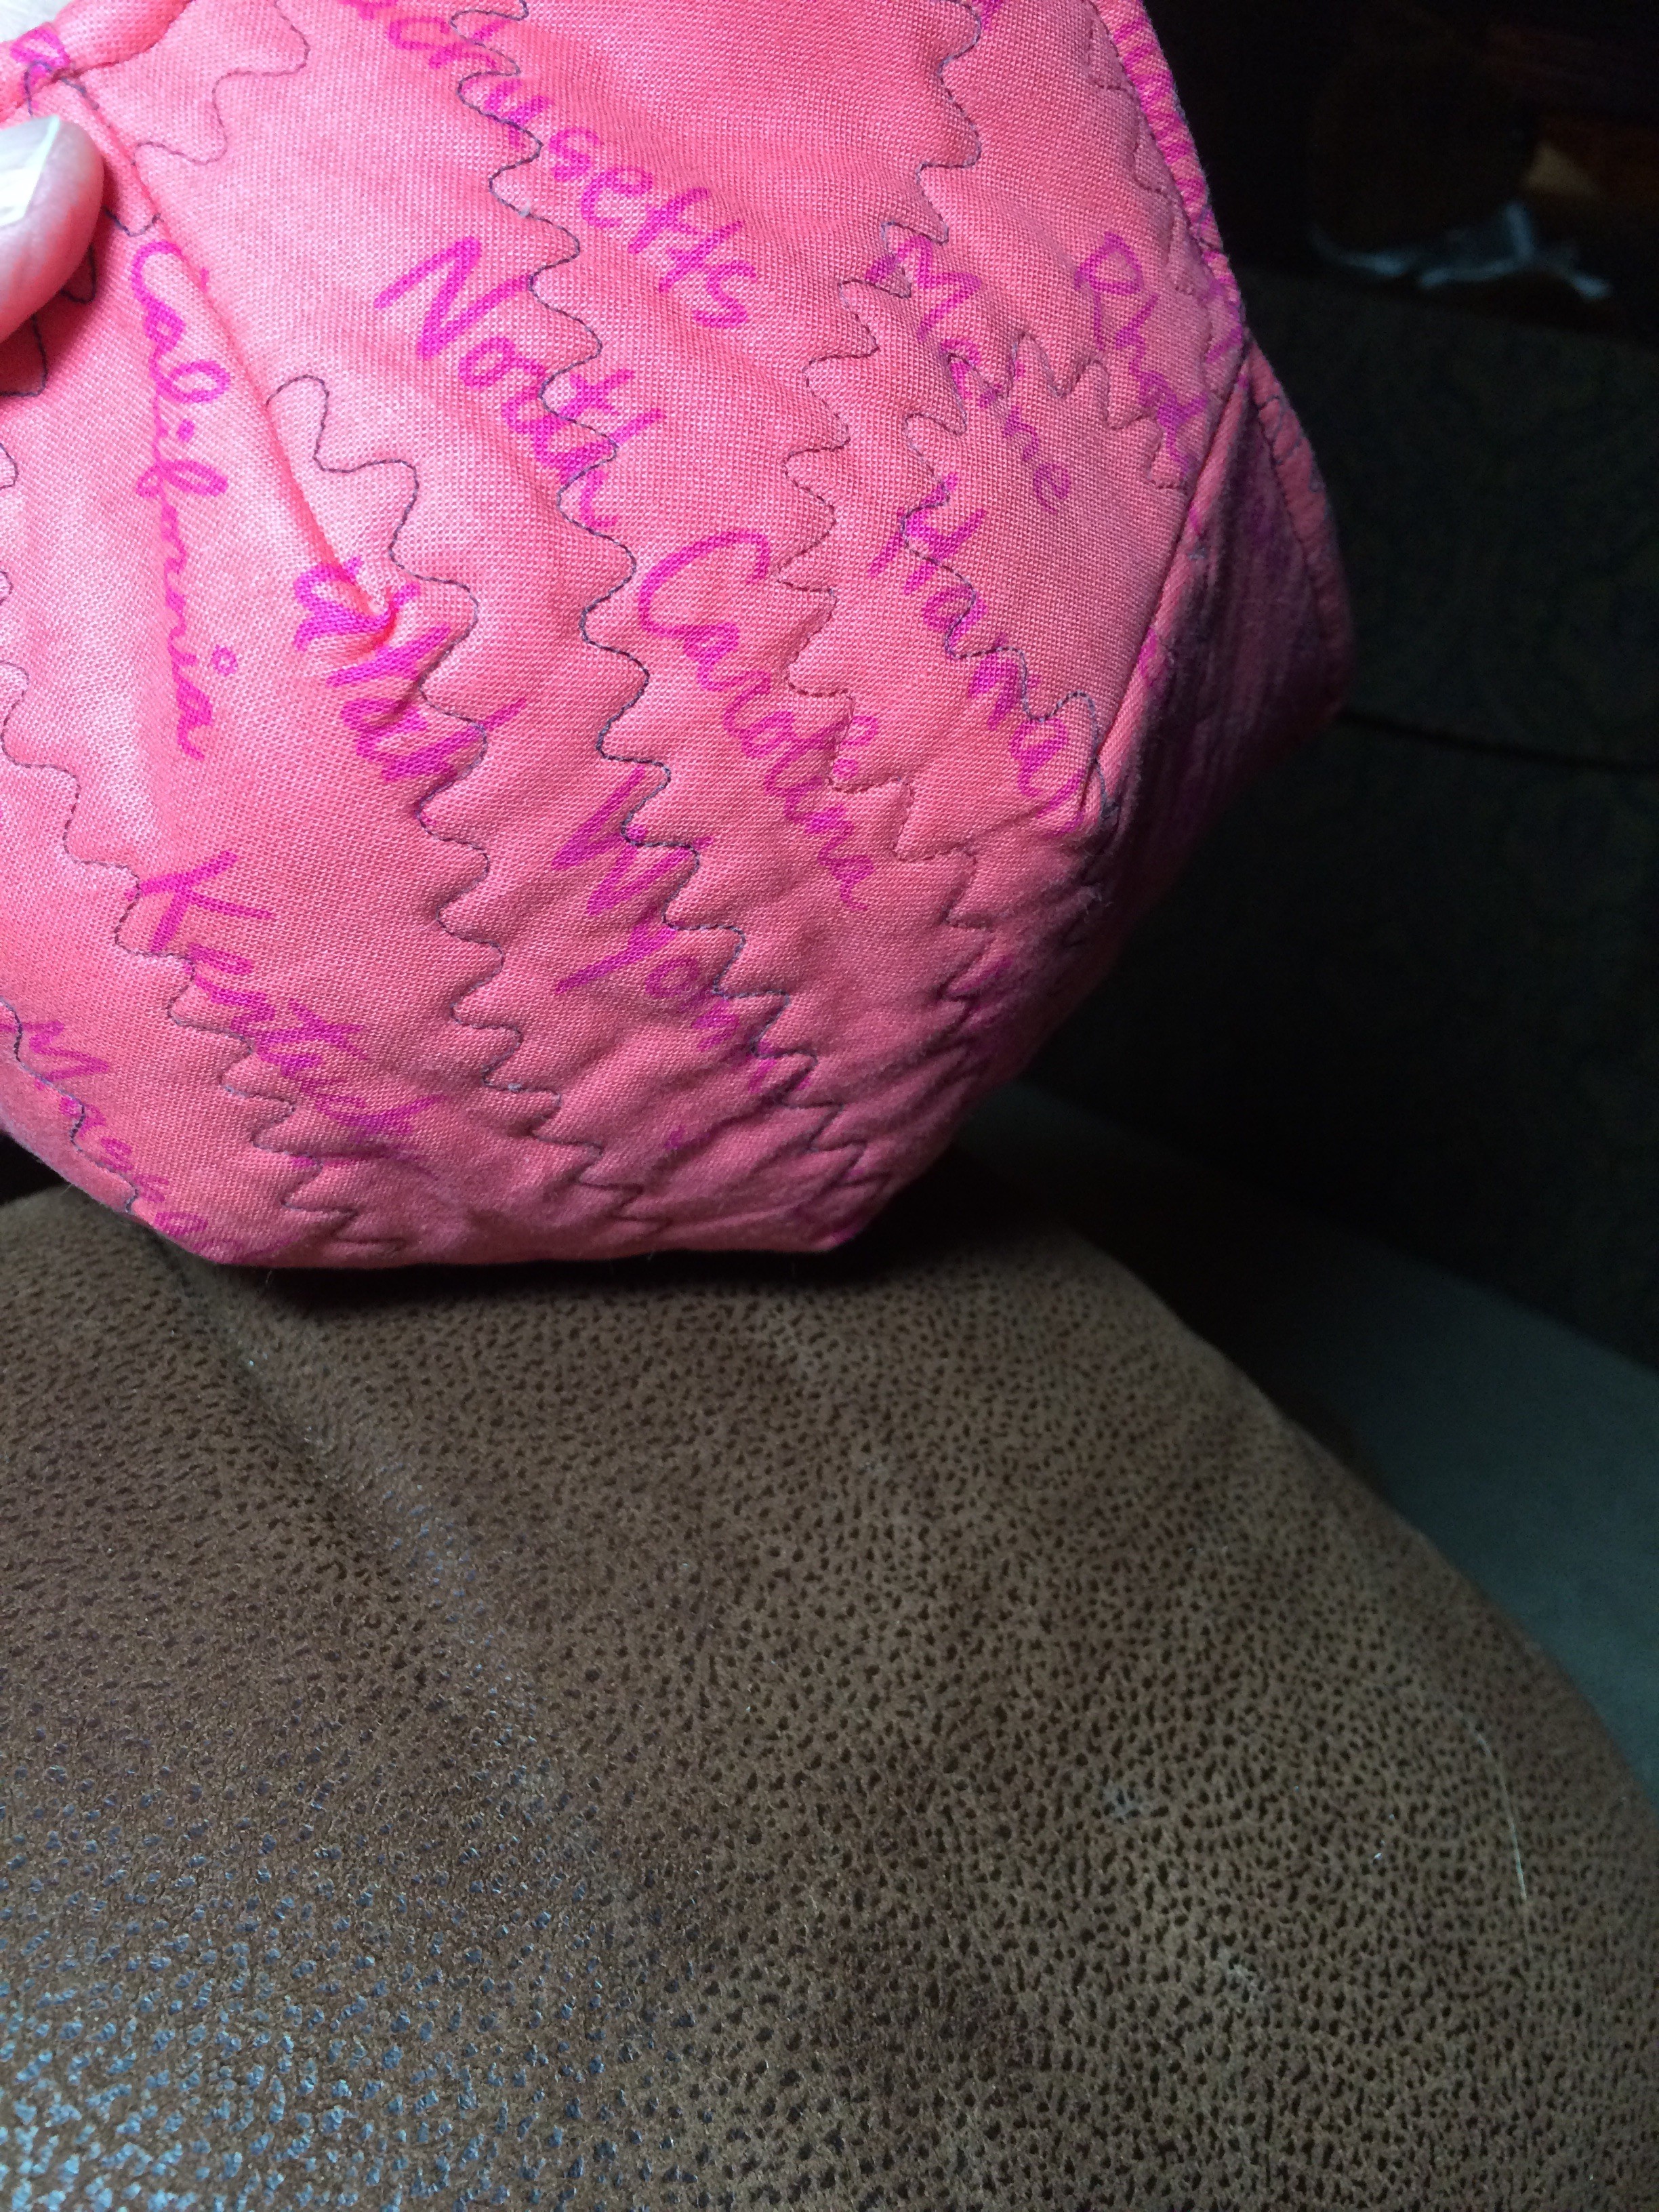
Fabric Used: Moda cotton twill . The store owner found eight bolts of this twill sitting around and said, “Somebody please make something out of this.” So I did. 🙂
 Pattern alterations or any design changes you made:
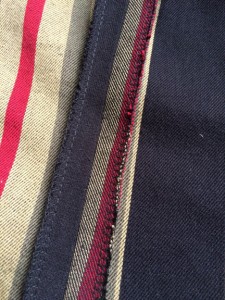
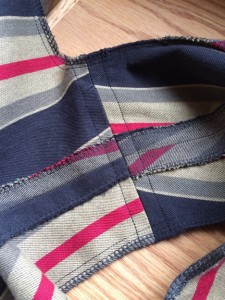
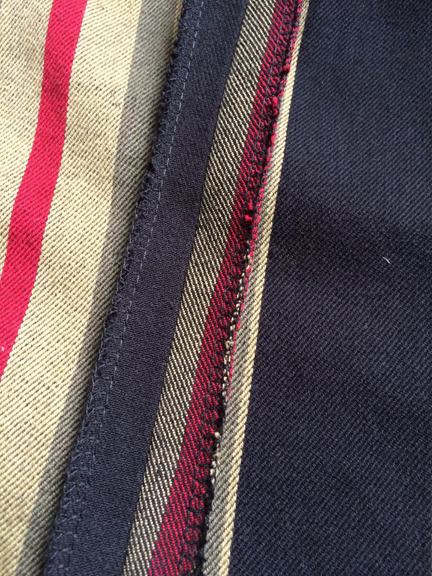
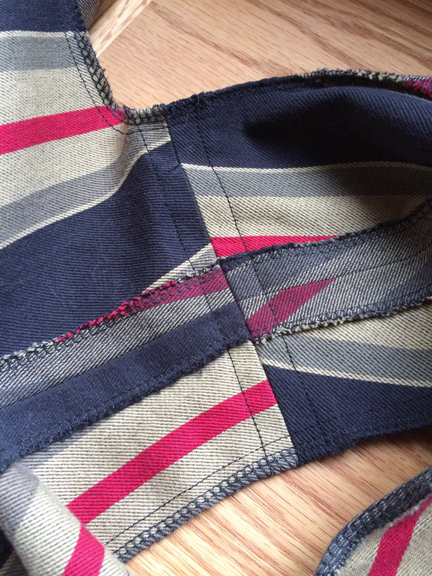
Such a quick and easy vest. Side front and side back seams serge-finished, then sewn WS together and seam allowances pressed open. I love the subtle contrast of the wrong side showing on the side front/back seams.
Shoulder seam, with side front/back seams
The only seams sewn RS together are shoulder and side. I topstitched those seams from the outside at 3/8″ just to keep them flat. I personally like the insides of a garment to look as nice as the outside.
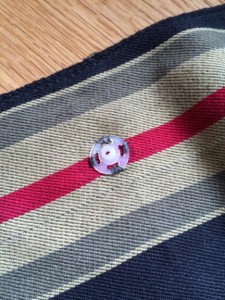
Left front snap
I used the Collins C17 “jumbo” plastic snaps, 1/2″ diameter, and I wished I had used something larger. Went to Jo-Ann’s but the larger ones they stock are metal. I felt they’d be too heavy for this lightweight vest. I plan to make this again soon in Indygo Junction’s beautiful Crossroads Denim, and will order larger plastic snaps for that – or use metal.
“But I don’t have a serger,” you say? Don’t despair. Use any of the overlocking stitches or fancy stitches your machine offers. Use cool contrasting thread. Or even use double-fold bias binding or that cool folded elastic that’s available now (just don’t stretch it!). You don’t have to have a serger – that’s just how the instructions are written.
Would you sew it again? Would you recommend it to others? Absolutely. I’ll be leaving it at the Bernina shop where I work, as a sample for shoppers to see. (After I sew my label in the back!)
Conclusion: Cute, easy, flattering vest in three lengths, suitable for medium-weight fabrics and great for repurposing jeans. Highly recommend!
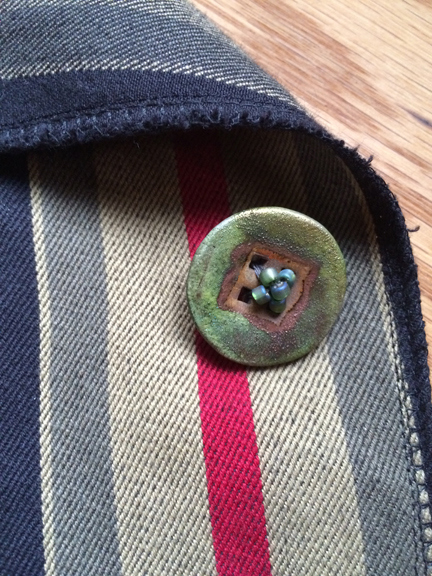
The picture at the top of the post shows the raku button I used. It’s been in my stash for about 15 years and was handmade by a lovely clay artisan who lived in Oregon at the time. She has since moved to France with her love and stopped creating these buttons. How sad for me and other sewers!
The button is sewn on to disguise the stitches on the snap inside the right front. After I secure that button, I run a couple more stitches and add little glass beads. Love to include creative touches like this.
And don’t you love the word envisage (in first paragraph, above)? My Good Husband, a passionate word nerd, had a word-of-the-day calendar on his desk at the Pentagon. The day he died, “envisage” was the day’s word. It means “To conceive an image or a picture of, especially as a future possibility.” Just telling you this brings back such wonderful memories—and brings tears to my eyes.
Oh, and a smile to my face.


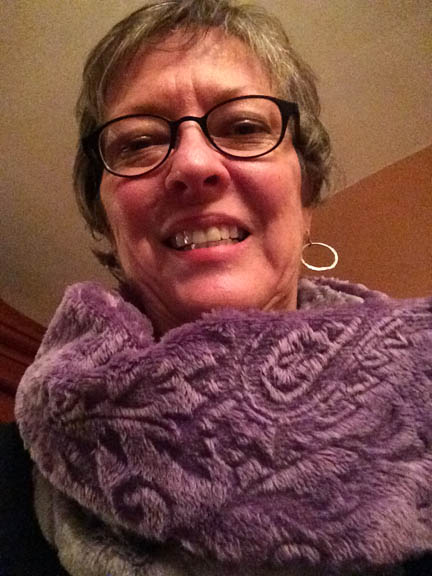
 One morning about two weeks before Christmas, I walked into the Bernina store where I work and noticed several women lined up holding bolts of Shannon Cuddle, a microfiber fleece. Benartex makes a similar fabric named Minkee. I believe Minkee has been around longer and is more well known. The variety of microfiber fleece that people are most familiar with is the dimpled version, frequently used in making baby blankets.
 My coworker had seen a video for an infinity scarf over the weekend and made one out of Cuddle. It was so beautiful that everyone in the store wanted one for herself and one for her best friend.
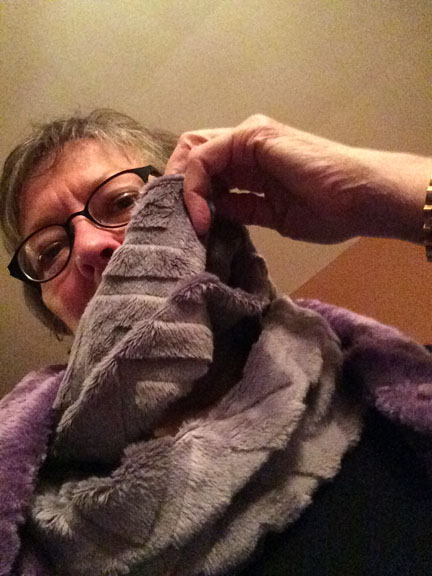


