First I’ll tell you what I’ve been up to, then I’ll show you. You can jump right to the pictures of my sewing projects by clicking this sentence, if you wish to skip all the yadda yadda.
I honestly can’t believe it’s been seven months since I posted my work here. I need to try to remember what I’ve done during that time. The bathroom reno was finished on March 5, just four days after we got our second Pfizer shots. During March and April, I made recordings for a few YSU voice students to use in their Zoom voice lessons and end-of-year juries.
In May, my grandson, Cody, graduated from Ursuline High School, and dad and stepmom came from Amarillo for the happy event. Cody is now a freshman at The College of Wooster, and loving college. #happygrandma He’s been saying for years that he wanted a career as a high school biology teacher. We’ll see where he ends up in four years.
Dr. Yun, the head of the voice program at YSU’s Dana School of Music, asked me to play for the Dana Vocal Performance Clinic the week of June 7. DVPC is a fun camp-like week where the students are high school singers, and the teachers are our Dana voice majors and grad students. Our college students get a feel for teaching, and the high school students get a sense for what life at Dana is like, with our hope that they’ll want to enjoy a college career there in a year or so. There are classes every day, fun activities at night, and a performance on Saturday. The performance encompasses a musical theatre medley, a choral segment, and solos by the high school students. It was a whole lot of piano playing for me, but fun.
[During that week, Dr. Yun asked if I would accompany her graduate students in their lessons during the school year. I had already been asked by senior Troy Gregory if I would play for his final semester at YSU, as I had first played for him when he was a student in DVPC in the summer of 2016. And then one of my musical theatre students asked if I’d play for his senior year, also. So, by the time classes began in August, I had seven students, which quickly grew to ten as soon as singers began seeing me on campus again.]
The next week Jas and I spent several days in Northern Michigan, at our neighbors’ summer home on Torch Lake, while they came back to Youngstown to take care of some business. We visited Petoskey, Charlevoix, and Elk Rapids, and Jas did a few projects around the house. On the way home, we drove an hour out of the way to stop at Interlochen Center for the Arts so I could see my son and daughter-in-law. My beloved, talented DIL teaches modern dance at Interlochen Arts Camp in her summers off from teaching dance at West Texas A&M University. Because my son’s job is remote, he spends every summer at Inty, and they get lots of fun road trips around the Leelaunau Peninsula and up the coast on the weekends.
Early the next week I got one of those frantic phone calls from the producer of a show that would be staged about an hour into Pennsylvania. The phone calls usually start out, “So-and-so at Such-and-such a theatre gave me your name. We’ve got this show coming up and can’t find a pianist.” Well, I’m a pushover when I see problems that I have the ability to fix. Even though it was a ton of driving, the show, held the weekends of July 10 and 17, with three performances each, was great fun. I met so many nice people, and made some beautiful music.
To fight Covid, their performances were held outside, which meant that we only had three instead of six performances because of rain. The theatre didn’t make as much money as they would have liked on this production, but the audience members all seemed to be thrilled to hear live music again.
During the second week of that show, I received a call asking if I would play Keyboard 1 for a local production of “The Color Purple,” and a couple of days later, I received a call from the show’s director, asking if I would play for auditions, call-backs, and rehearsals. I played on the evenings of July 14-15, attended the company meeting on July 19, and rehearsals began August 2, running three to five nights a week. I was then up to my ears in Color Purple music until October 3.
After loading out my equipment after the closing Purple performance, I went straight to a rehearsal with the same bassist and percussionist who had played Purple with me. Our friend, Amanda Beagle, had been asked to have a small live dinner-show at Christ Episcopal Church in Warren. Christ Church has a very active music program that’s been on hold since March of 2020, and is trying to get their program moving again. Because of Covid concerns, it became just a socially-distanced live show—no dinner—and was great fun to play for.
Once that was over, I focused on the score for Nunsense, which was produced the first weekend of November.
While I was working on that show and trying to learn 74 pieces of music for my ten students, I had Mazza Landscaping do some big changes around the south and west sides of the house. #happyhomeowner They also created a planting bed around two small trees in the front yard (east side), making mowing easier for Jas. Those small trees won’t be yanking his cap off anymore.
If you read to this point, you can understand that sewing time was almost nonexistent.
Now for a few summer and fall makes.
If you have an Instagram account, you might want to just to scan through my photos there. All of these items are there, with more pictures than I’m adding after-the-fact here, along with information about the various fabrics I’ve used. My IG id is jaycie622. You’re welcome. 😉

 In late April, I made a Sew Sweetness Bello Pouch in size medium, using the delicious vinyl my neighbor designs. This bag is typically finished with binding on the inner seams. I haven’t had great luck with sewing the binding in by machine, so I finished this by hand. I love handwork—it’s such a peaceful task to me. The pouch was lined with an early Cotton+Steel print, which has been in my stash for a decade. It went to live with my neighbor’s mother in Slovenia.
 Two I-Spy pouches for my Amarillo family. Masks for Miss C to wear at camp, a matching I-Spy to hold her clean masks, then a larger I-Spy for her mama, my precious DIL. Finished in late May and early June. The I-Spy is part of Sew Sweetness Minikins Season 1.

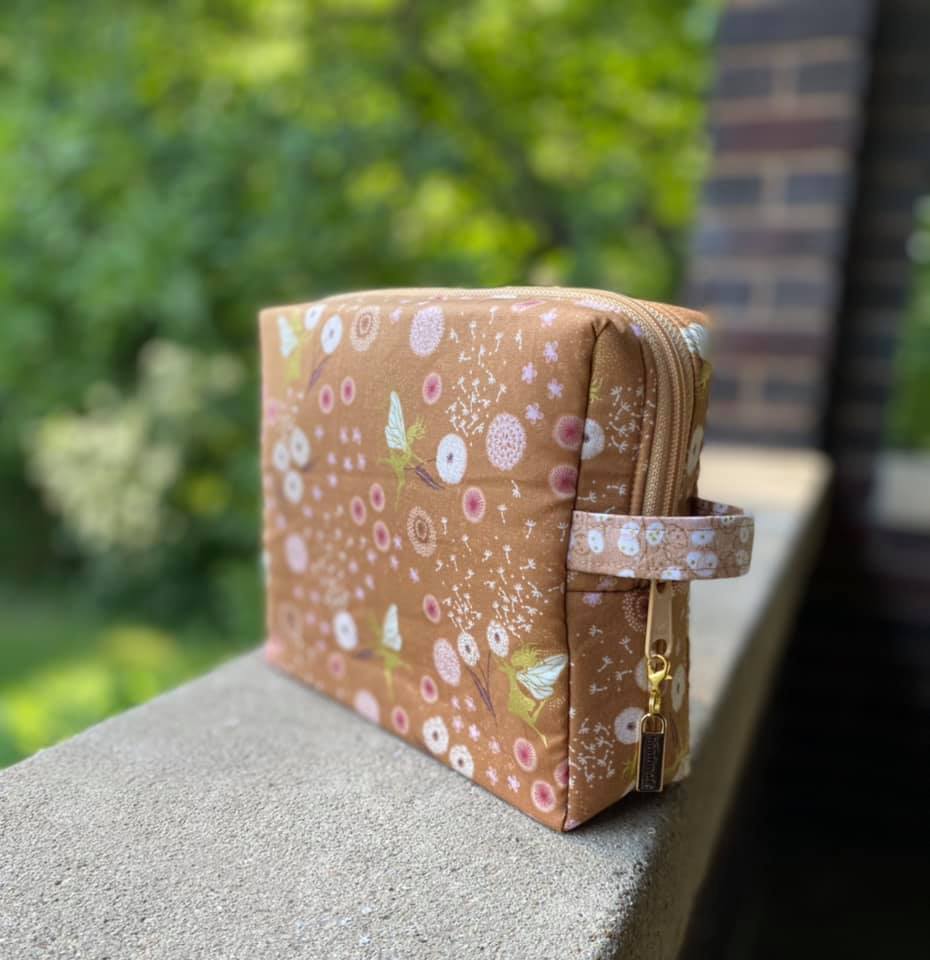
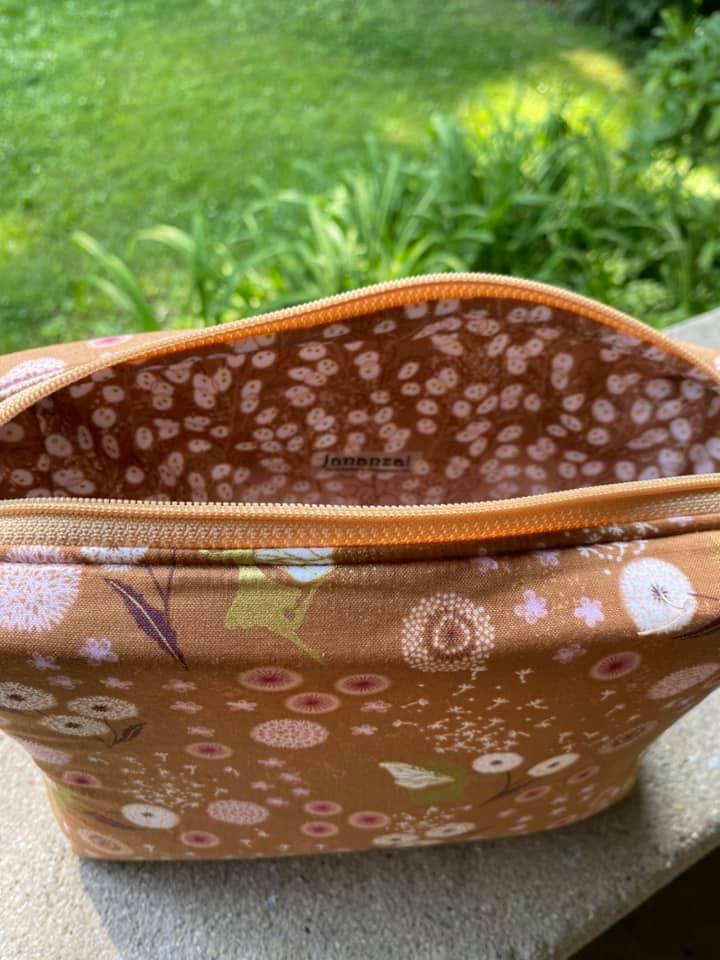
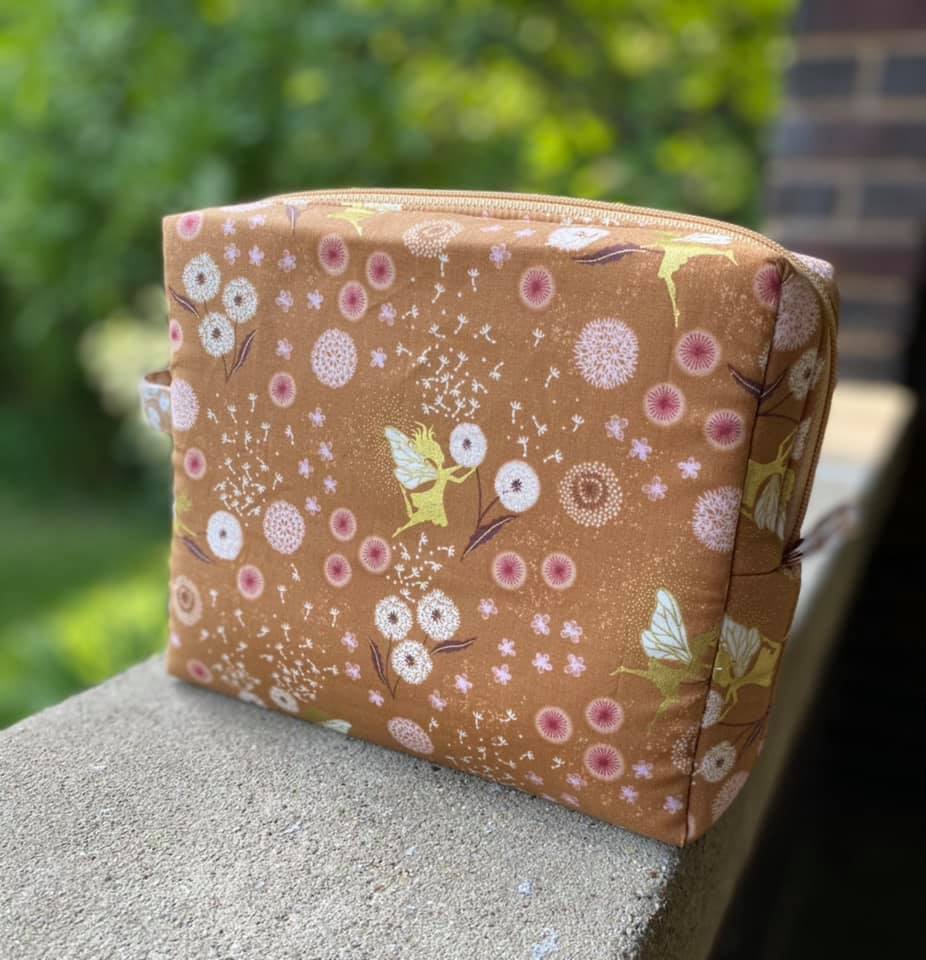
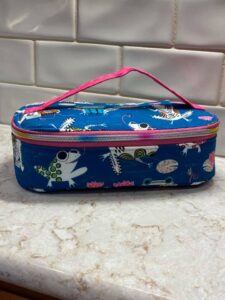
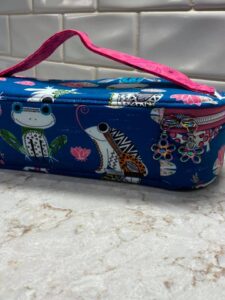
 An early June make: I had bought some cute fabric on a whim (damn you, electronic marketing!) and wanted to try a new bag. This is the Brumby Pouch from the Sew Sweetness Minikins Season 3, which came out in early spring, 2021. It was not a difficult pouch to make, just kind of tricky. Pay attention to what you’re doing and it goes together easily. I sent it to my Amarillo then-10yo granddaughter. As she was packing to head to Interlochen Arts Camp for a summer of musical theatre and dance, her mom packed her feminine hygiene necessities in to the bag, and declared it perfect! The fabric is from Lewis and Irene, called Fairy Clocks. If you’re into horses, you’ll notice that designer Sara Lawson, herself a horsewoman, has named the bags in Minikins Season 3 for horse breeds.

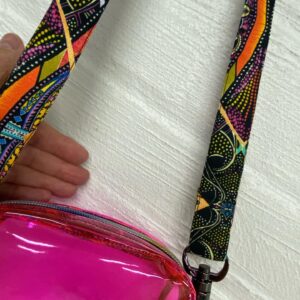
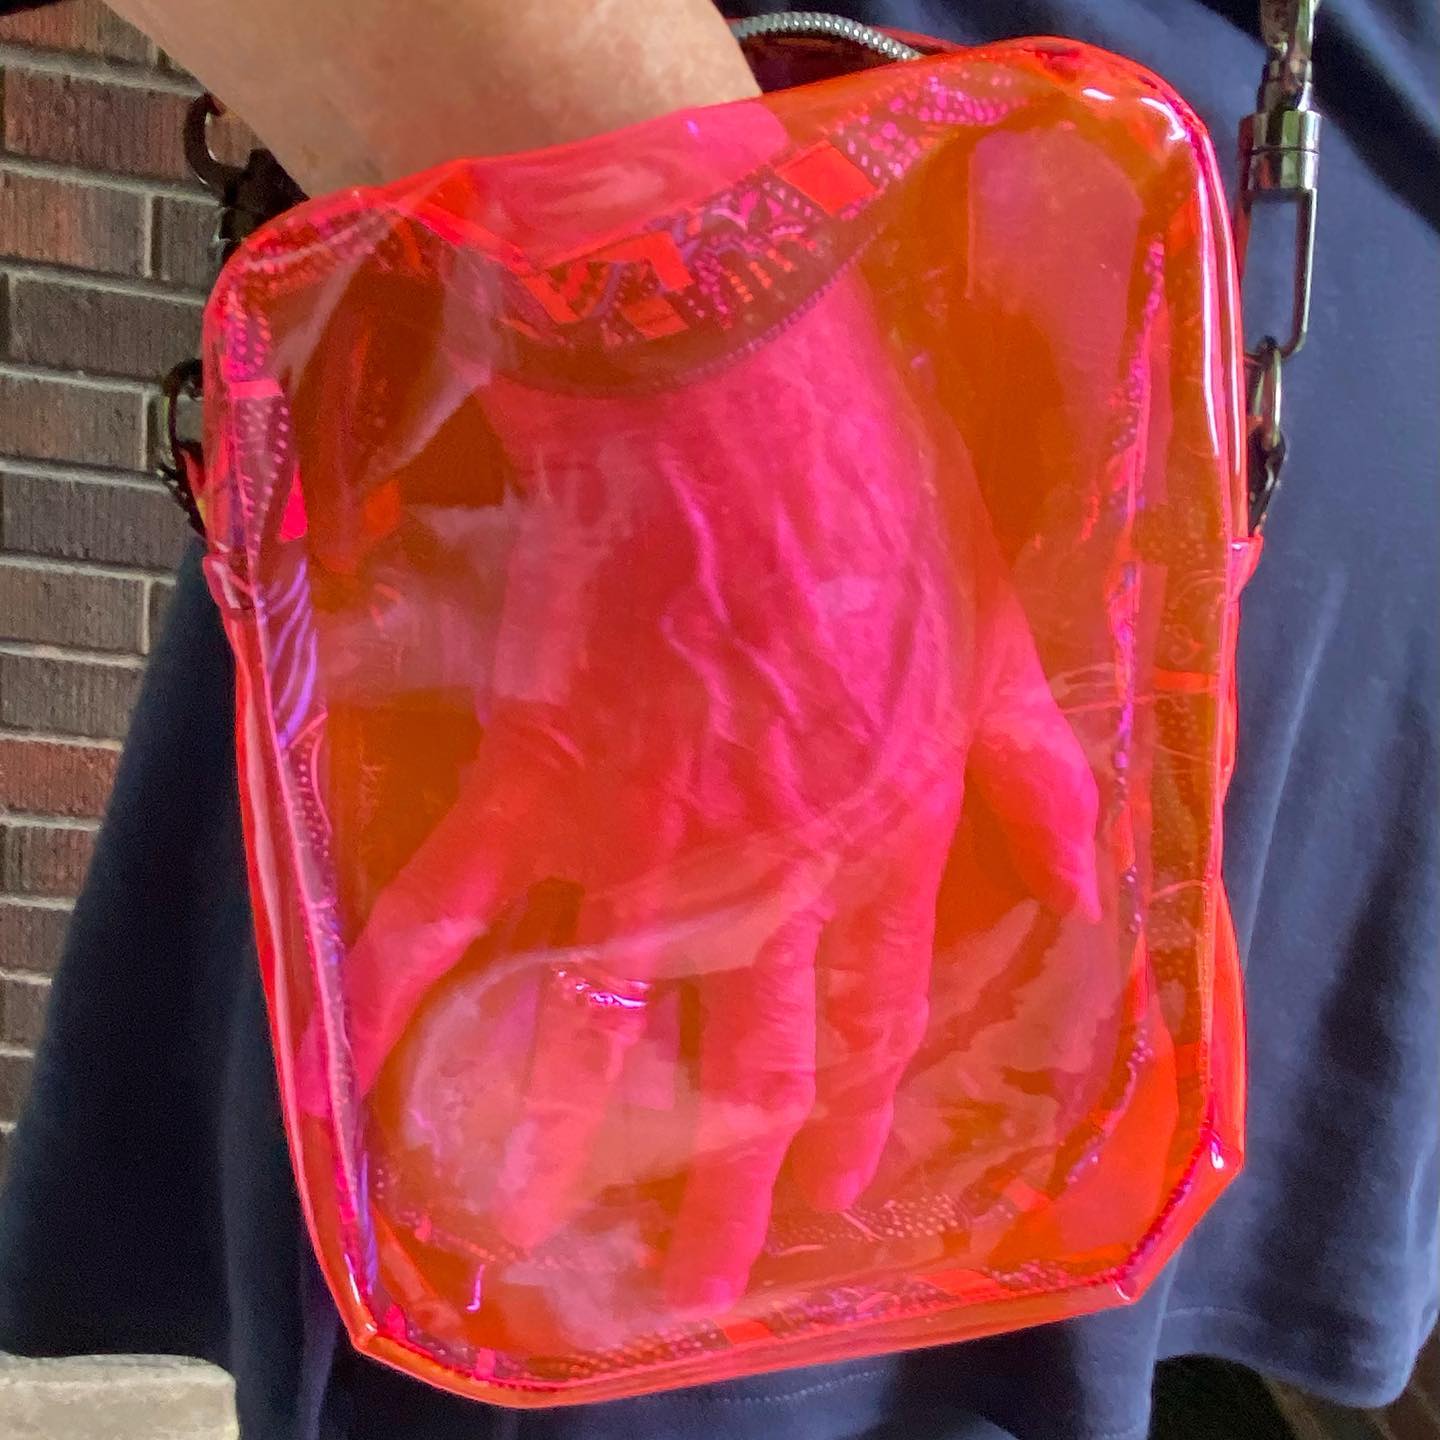
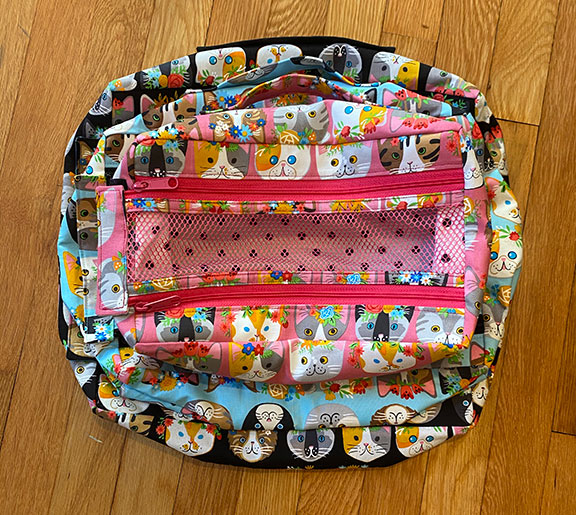
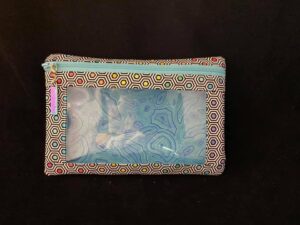
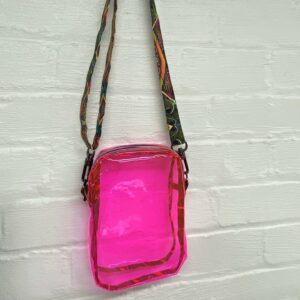 Now for a challenging bag! This is the Stadium Bag from Minikins Season 3. At Interlochen, the policy for entering Kresge as of last year was that only small bags were allowed, and they must be see-thru vinyl. When Leslie and Tyler told me that live music was coming back to the summer arts festival at Interlochen, and they had tickets to see Chicago in August, I decided I’d try the Stadium Bag for her. I’ll tell you what: those curved corners sewing with two layers of vinyl are swearword-inducing. But I persisted. Once I sent it to her, I learned the newer policy is no bags, just what you can tuck into your pockets. Oh, well. Now I’ve got to find some other vinyl bag patterns I like to use up the vinyl I bought for these bags!!
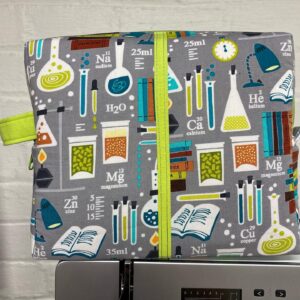
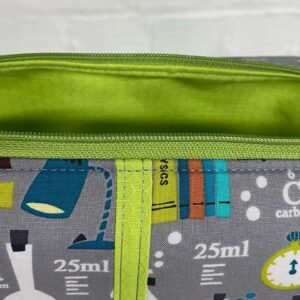
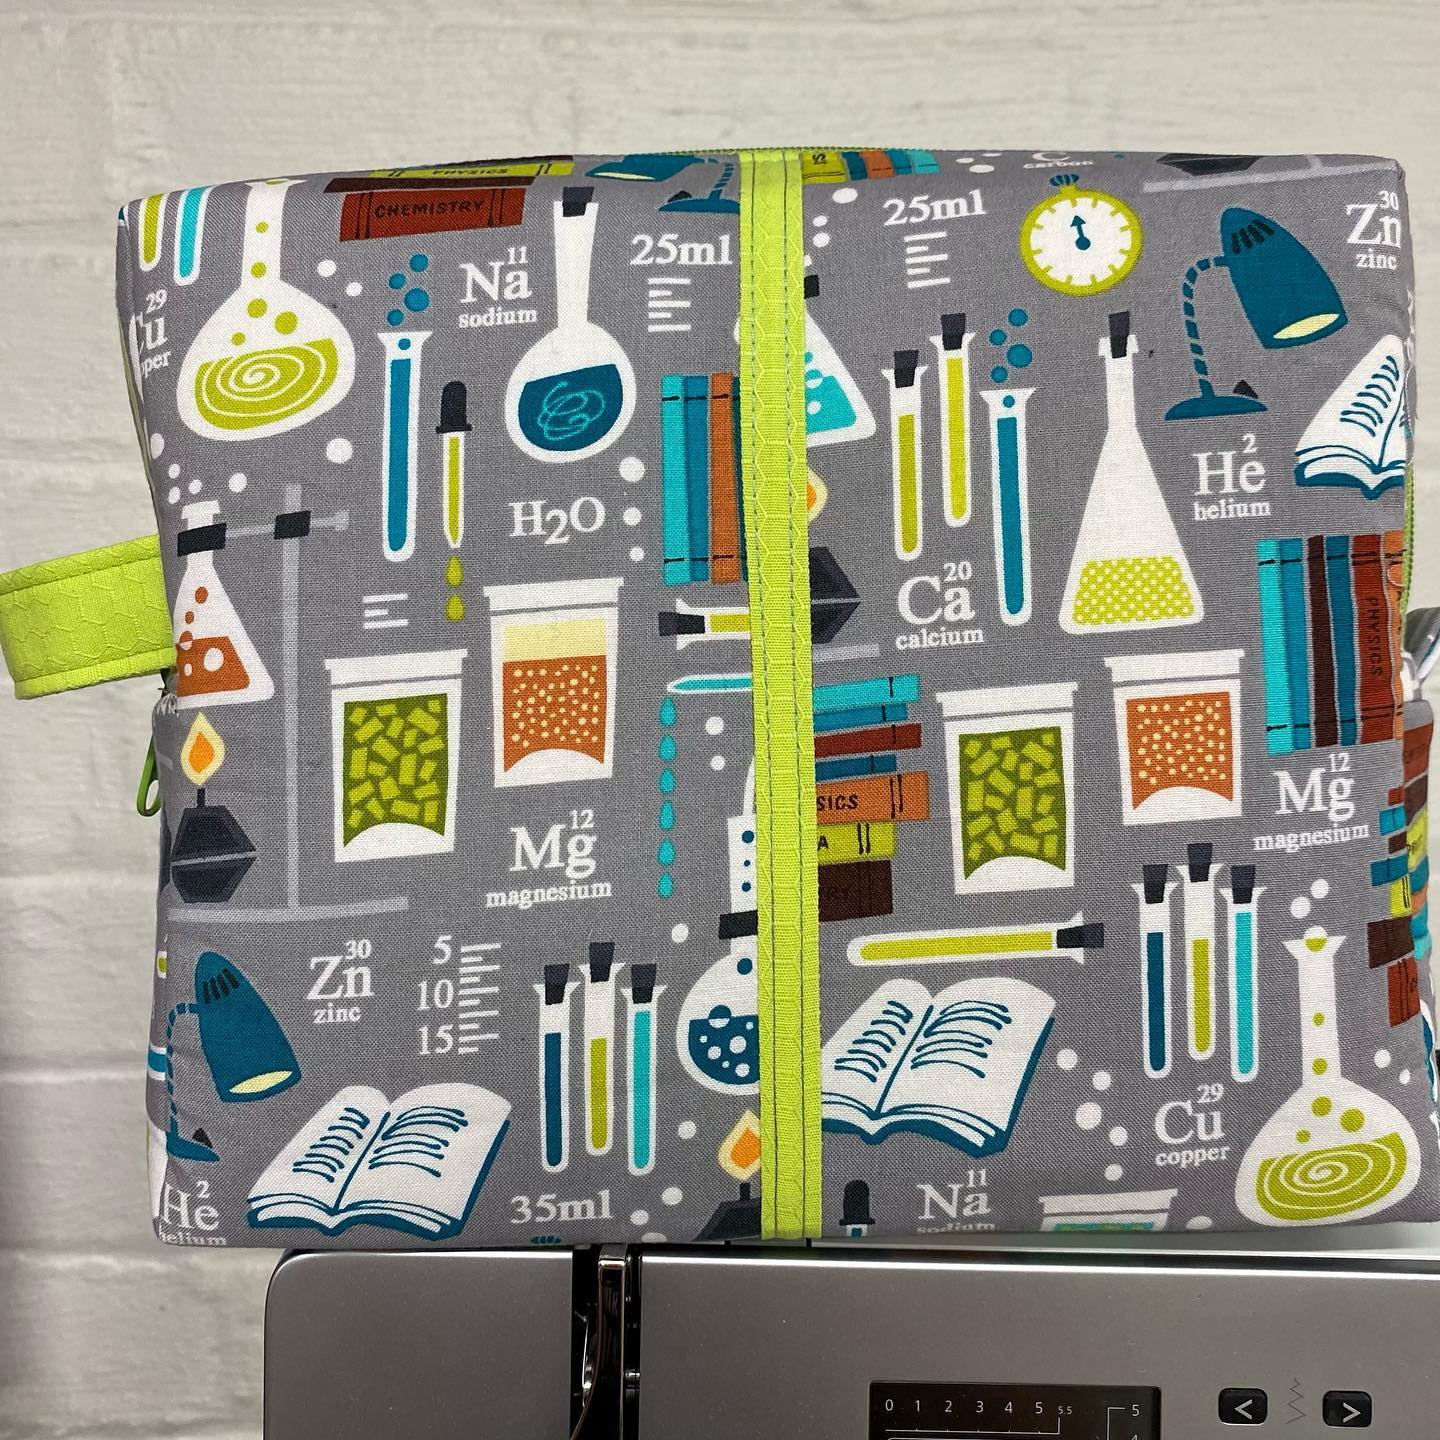
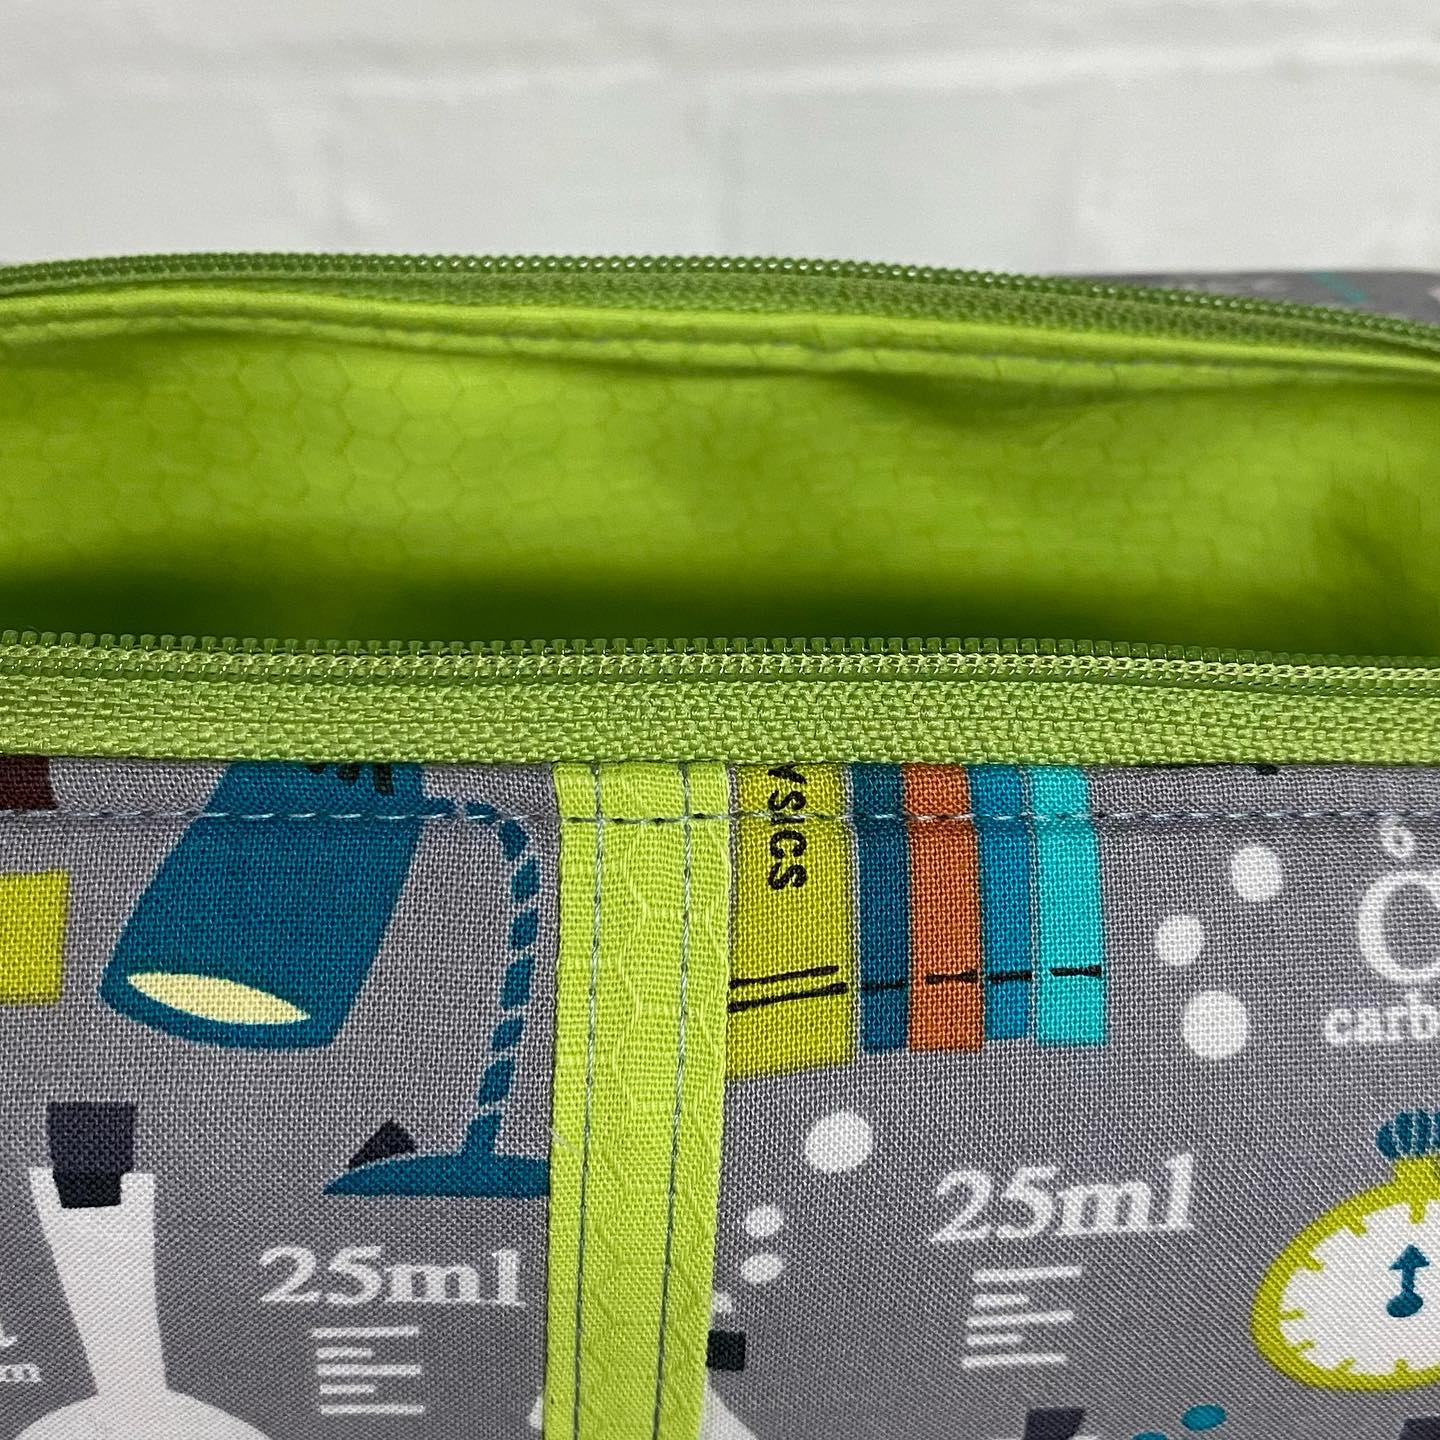
 This bag, another Brumby, was started with fabric left over from Celeste’s freshman year at Ursuline, when she wanted a cover for her chemistry book. Once started, it sat for many weeks before I said “now or never.” I had made an error in cutting out the back. The pattern piece was supposed to be placed on the fold and I forgot. So I had to figure out a way to piece it and disguise the piecing. Voila! A cool stripe up the center. I included the photo from the pattern cover, to show the three sizes available. This is a nice bag—lots of uses.
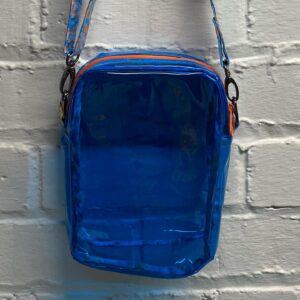
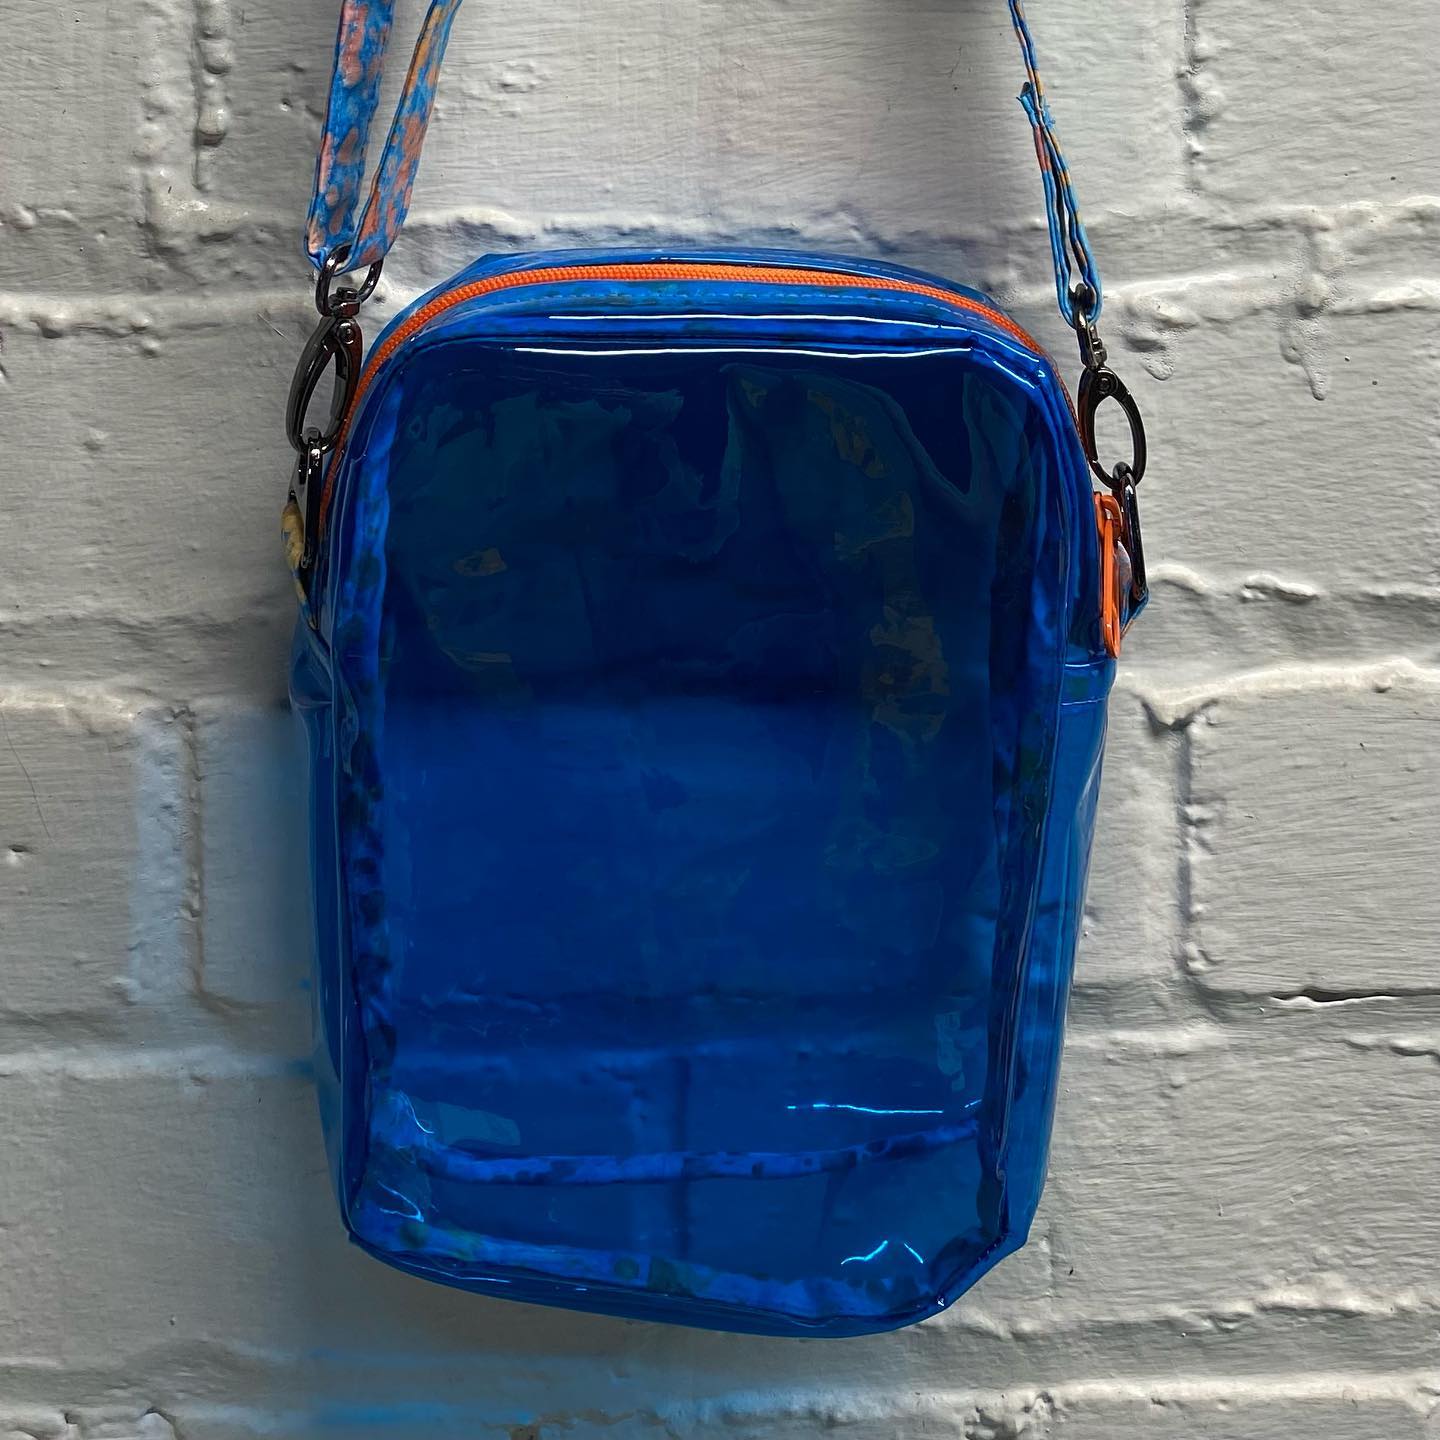
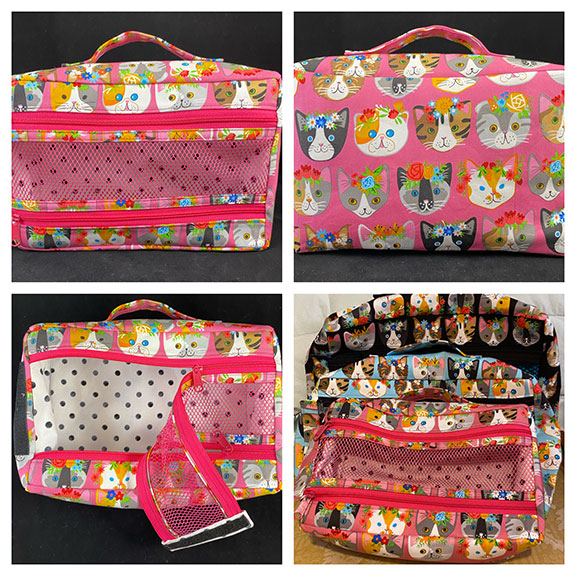
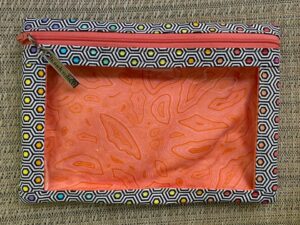
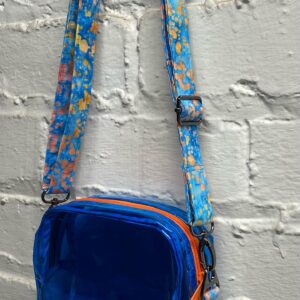 A second Stadium Bag for my friend, Heather, who handles hiring the summer camp staff for Interlochen. She lives part of the year in the Grand Rapids area, but when things get too hectic to manage the hiring remotely, she moves to the family’s summer home near Interlochen. Then she can take advantage of all the live concerts in Kresge. So I figured she could use a see-thru concert bag. The thing about Heather is, I know if she doesn’t really love or need a specific bag, she has lots of cool people in her work environment who might say, “Oh, I love that bag. Can I have it?”
 My partner, Jas (a common nickname for James), has a cousin with a house on Lake Erie. This cousin bought the house as a fixer-upper, and there are always projects Jas can get into. So every couple of weeks, Jas will drive up for the day and, while laboring over the pool table with a beer at 9:00 p.m., will says, “I’m not driving the hour-and-a-half back home.” One day he asked if I would make him a bag to carry the bare essentials whenever he goes up there. Then, if he decides to stay, he has clean undies, toothbrush, and deodorant. My reaction to that request was to make this medium Bello Pouch, made in batiks I brought home from my 2018 trip to Bali.
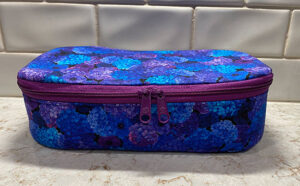
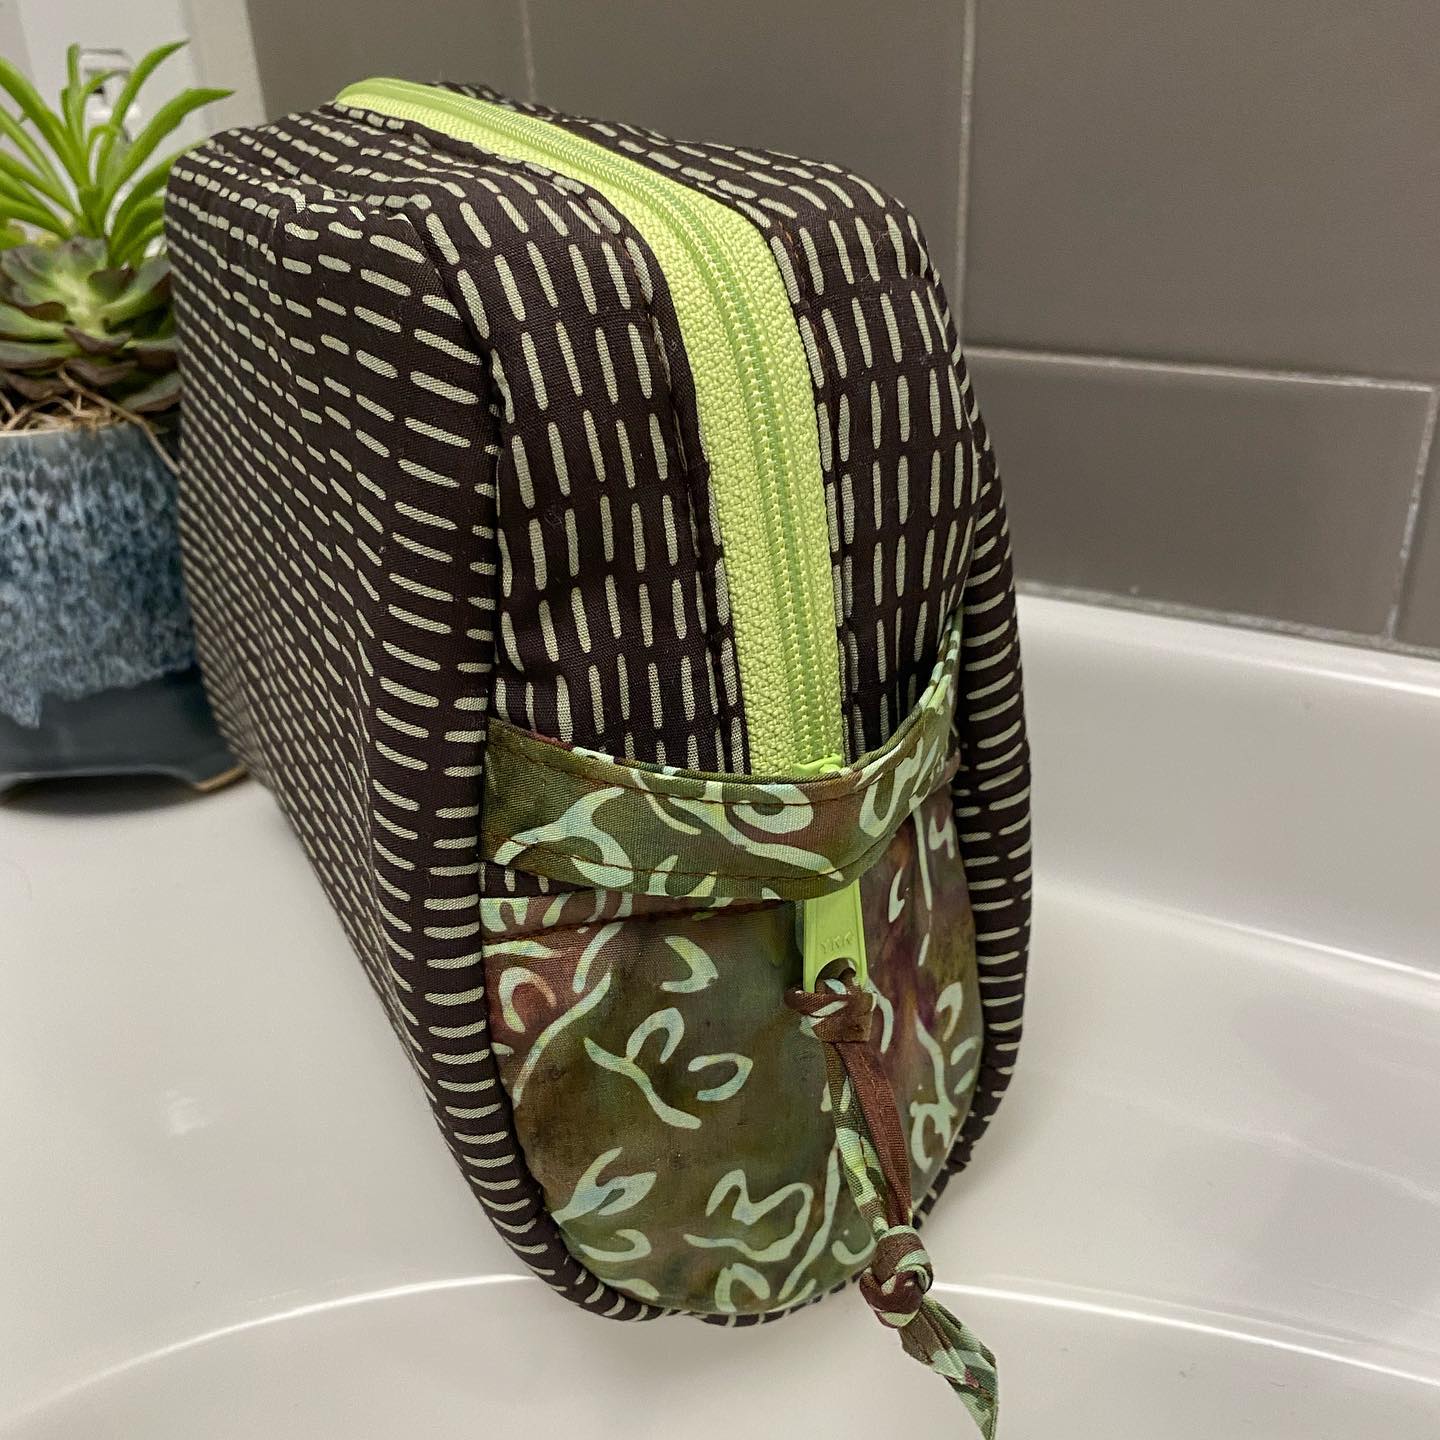
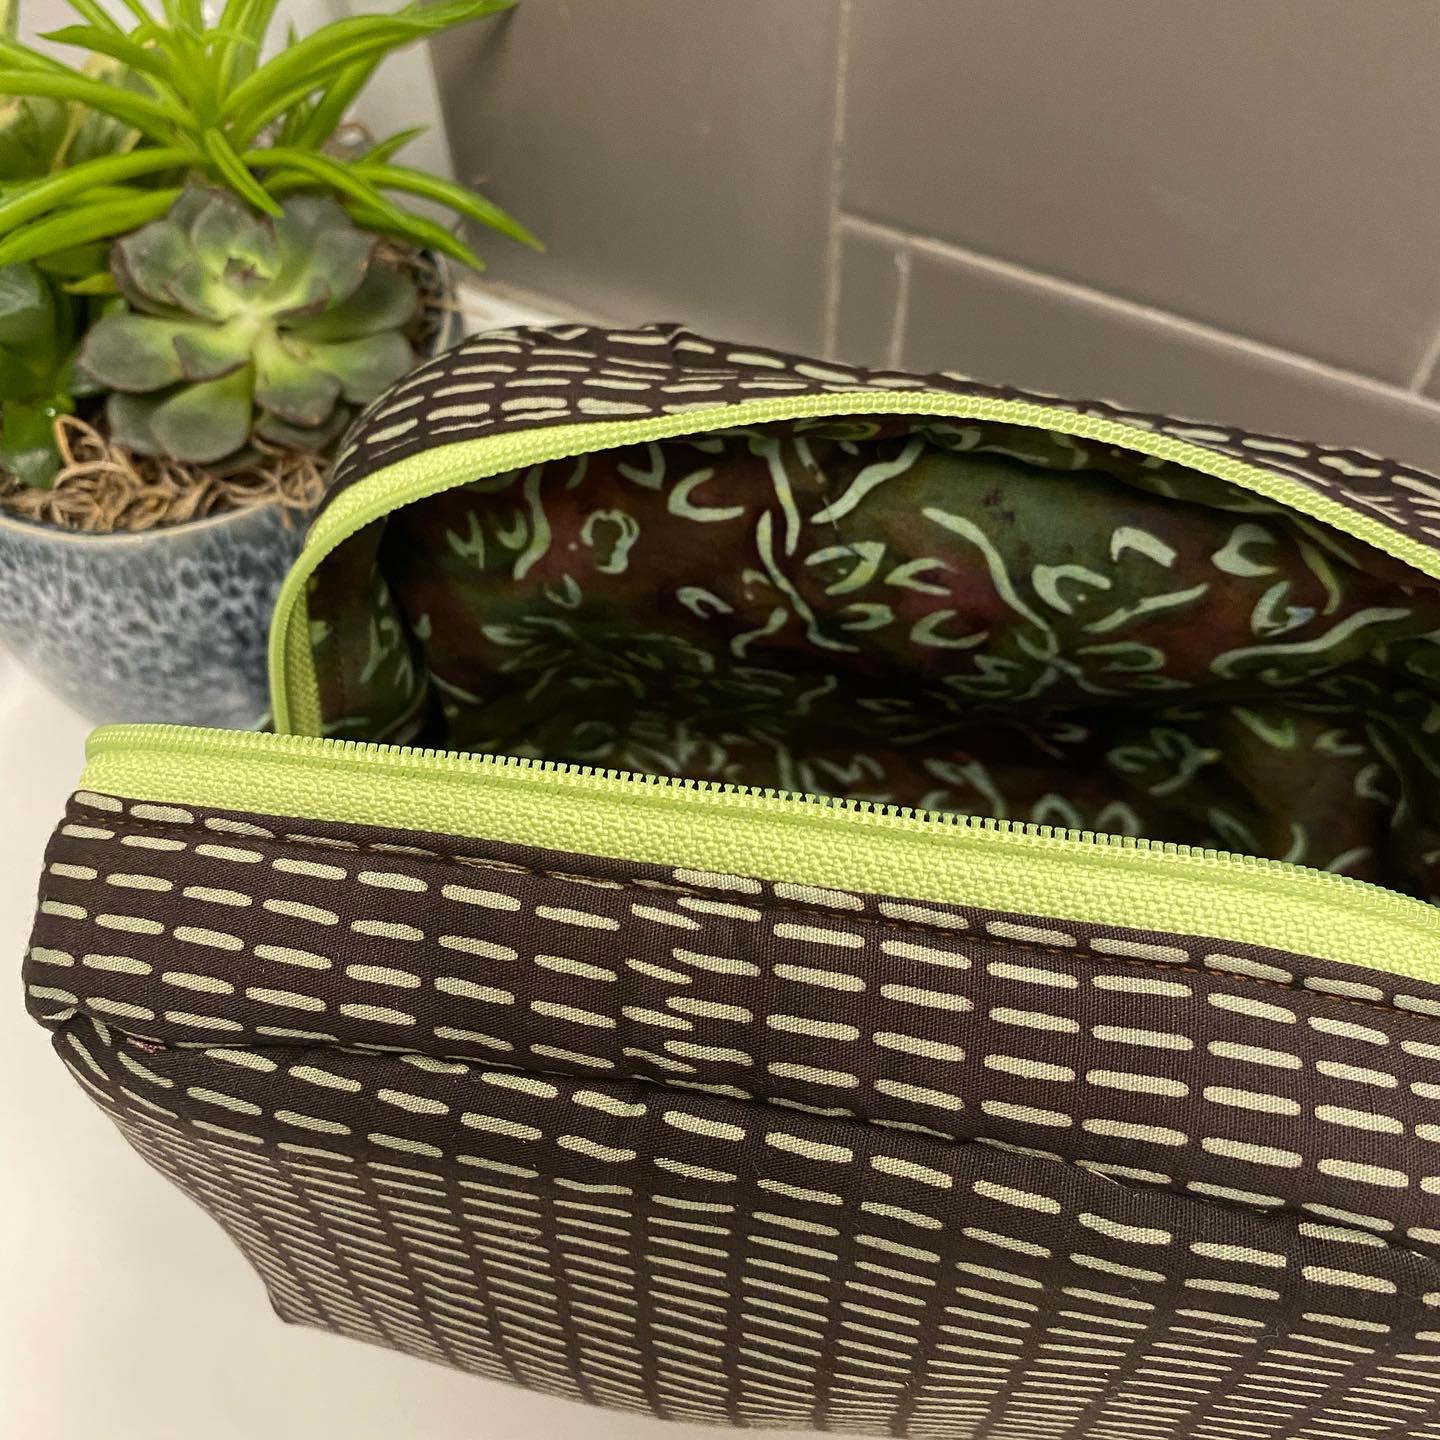
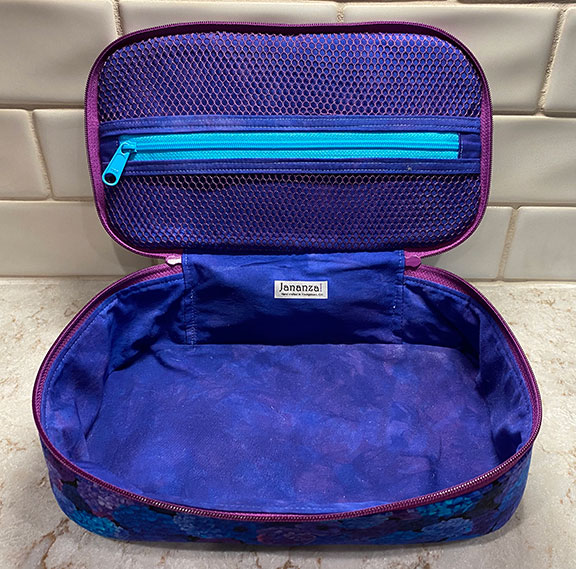
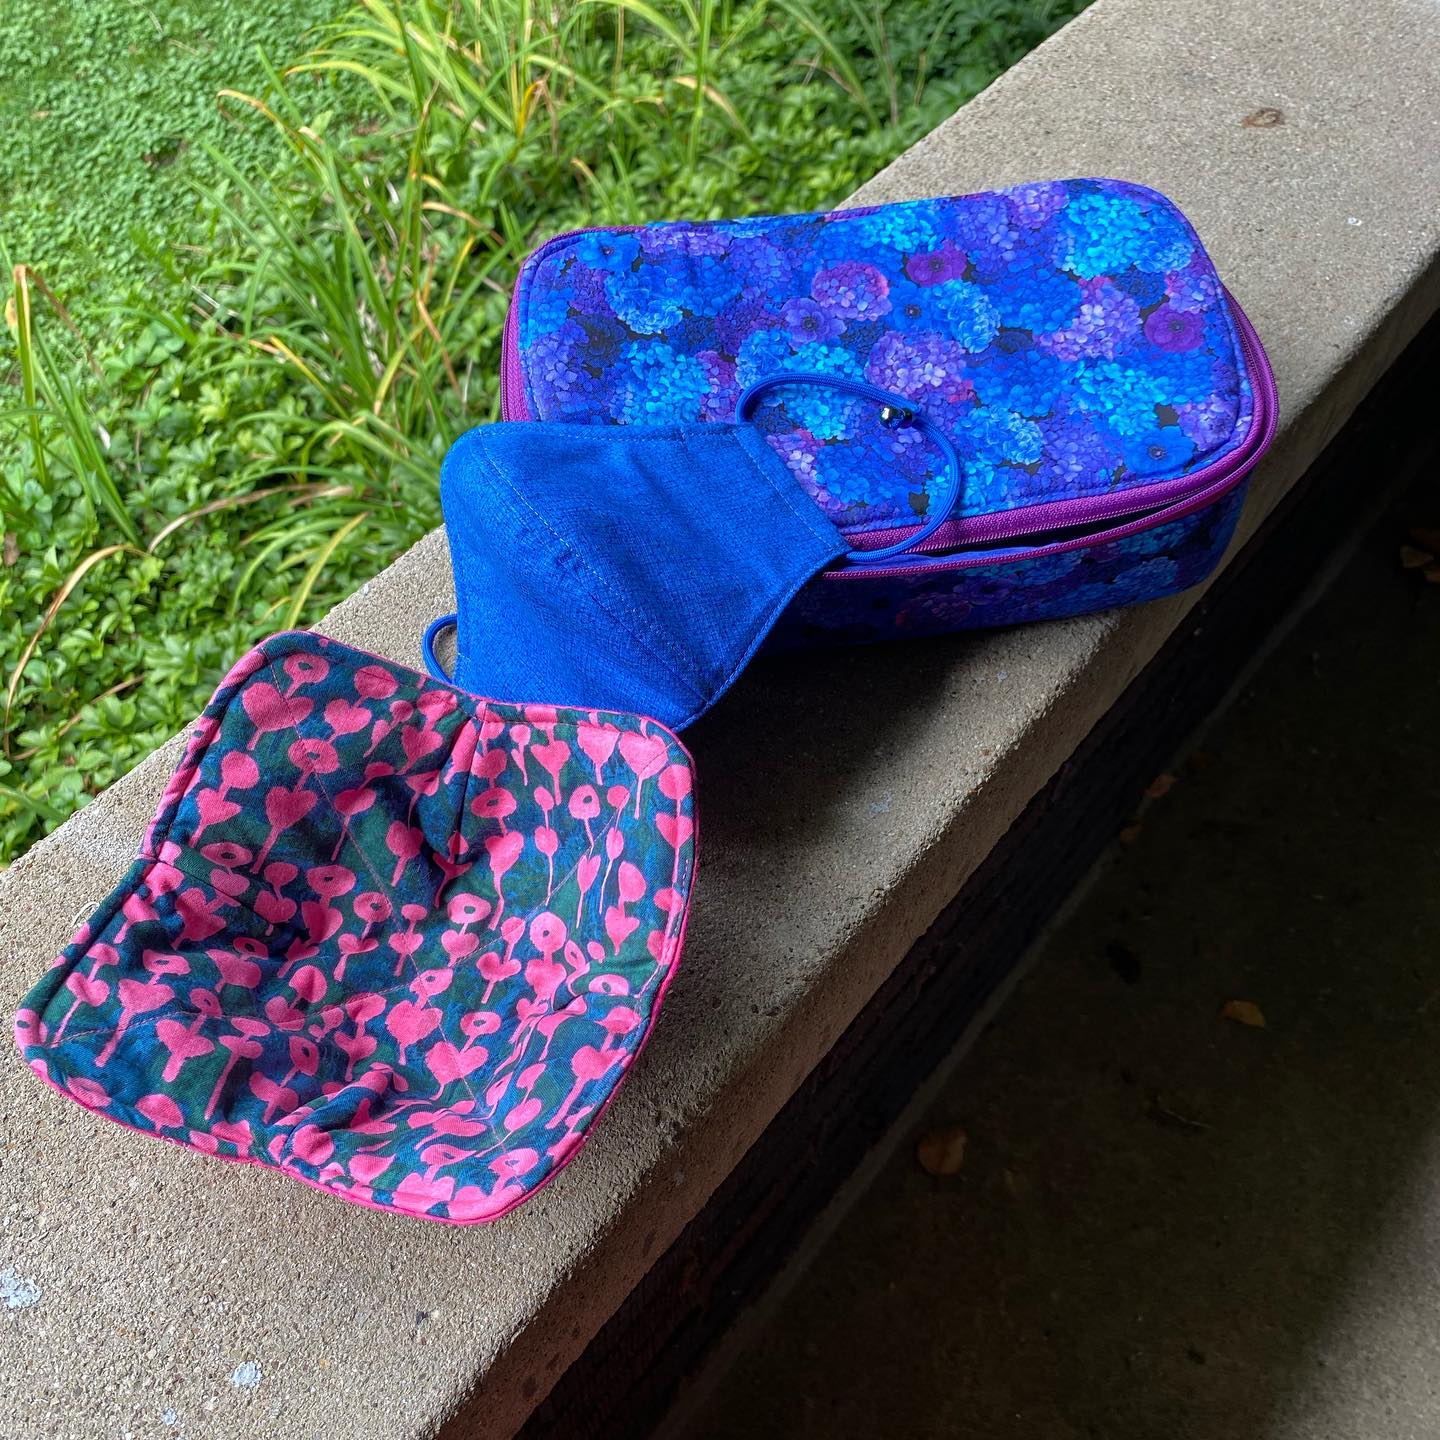
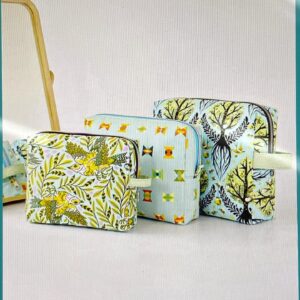
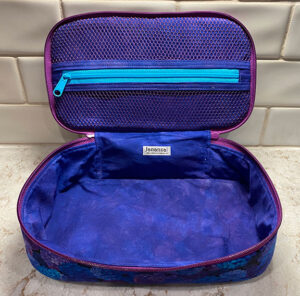 My son’s mother-in-law, Maggie, is the loveliest of women. We’ve spent time together during multiple summer visits to Interlochen. One couldn’t ask for a better friend. Her birthday is at the end of July, and I wanted to send her a little bag. I had found and stashed this beautiful hydrangea fabric a few months earlier, and sewed it up in the Sew Sweetness Hackney Pouch, which is part of the Minikins Season Three pattern bundle. This pouch is a bit of a tricky sew, but if you watch the video and pay attention to what you’re doing, you’re rewarded with a very cool little pouch for storing sewing implements or nail polish bottles in, or for tucking small necessities into your suitcase. This is the size Large Hackney.
While looking for some old post on my other blog, I found that I had posted this Hackney pouch for Maggie there when I was having website problems. If you’re interested in seeing what else I had to say about this pouch, you can click here.
 Once upon a time, maybe seven years ago, I made a bunch of microwave cozies for my grands’ teachers and my friends for Christmas. Tyler texted me in late August and asked if I wouldn’t make another one for him, so he and Leslie could each have one for their bowls of leftovers that were going into the microwave. And since I was making him something, I made an extra mask for Leslie, who would be going back to her in-person students at WTAMU in a few days. These items went together with Maggie’s Hackney Pouch and bag package of Biscoff cookies in a box that was shipped to Amarillo.

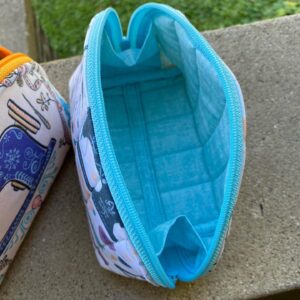


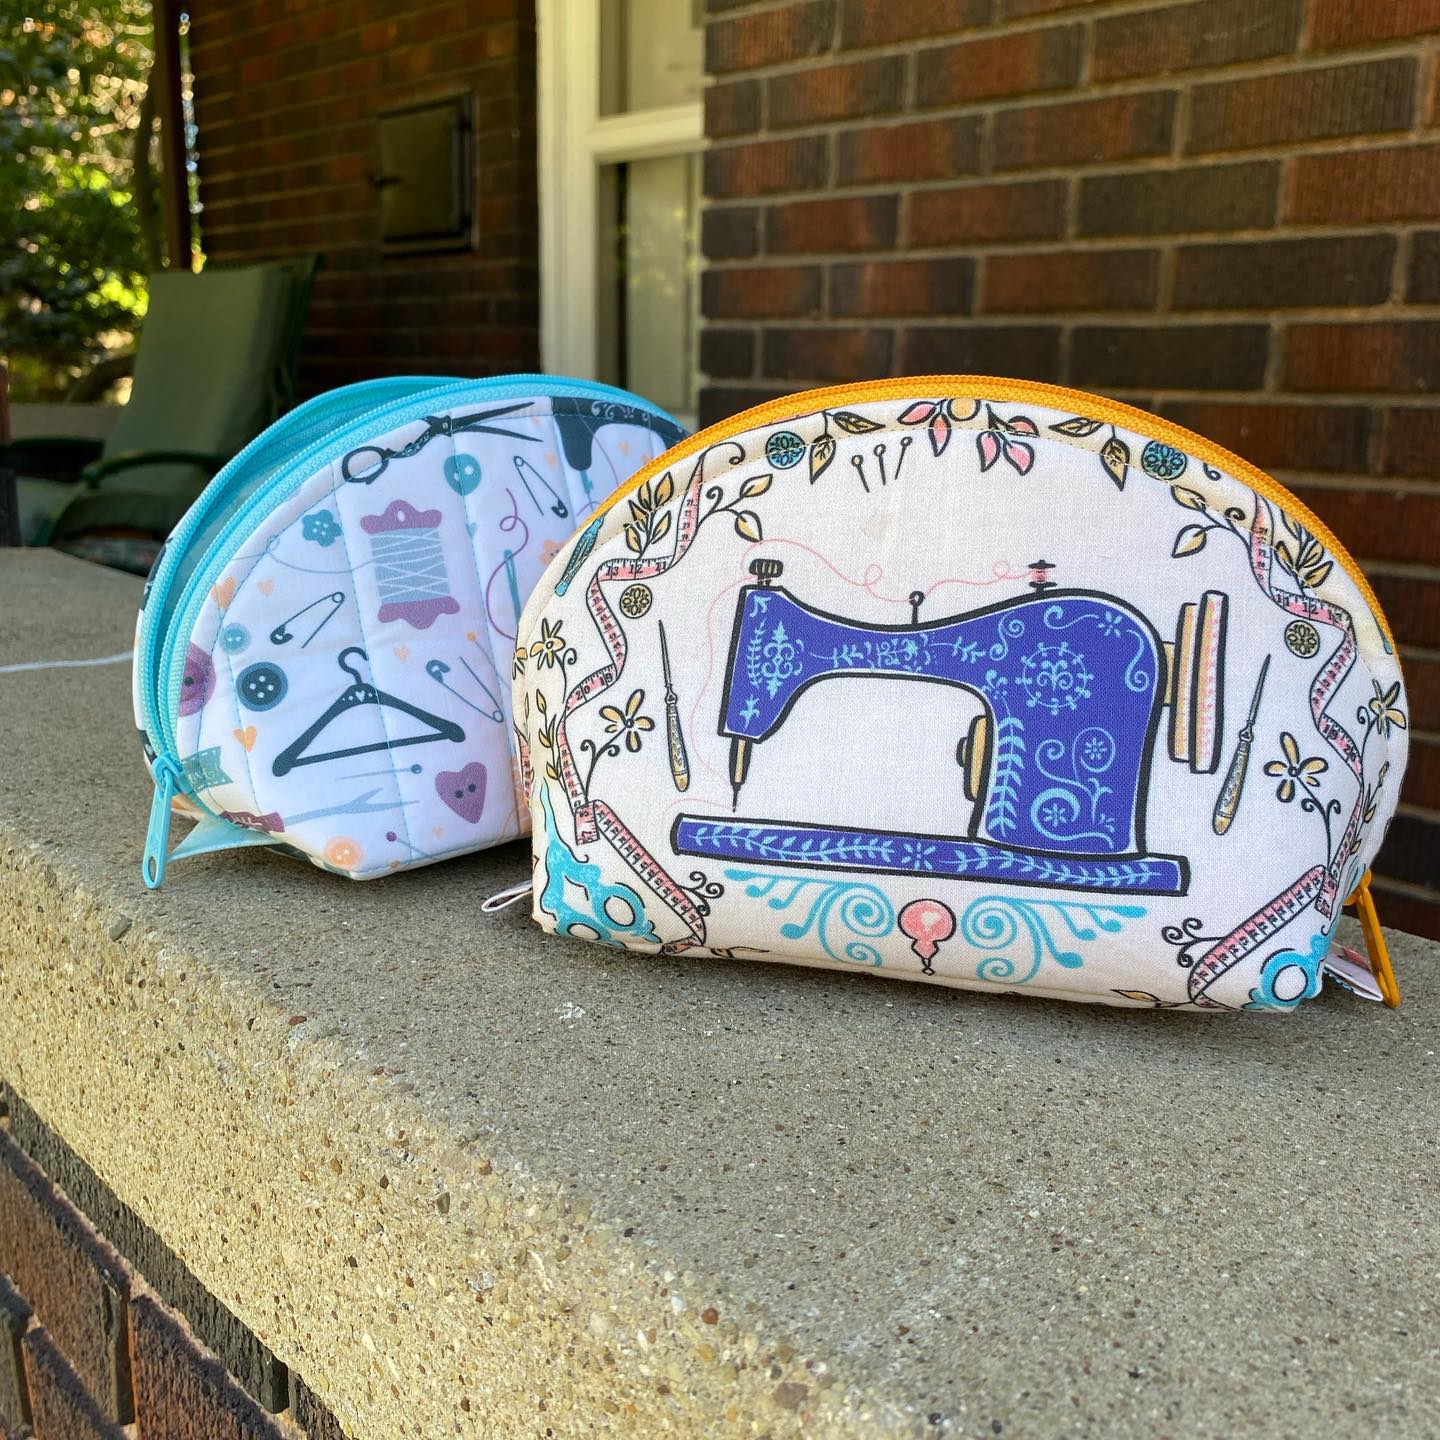
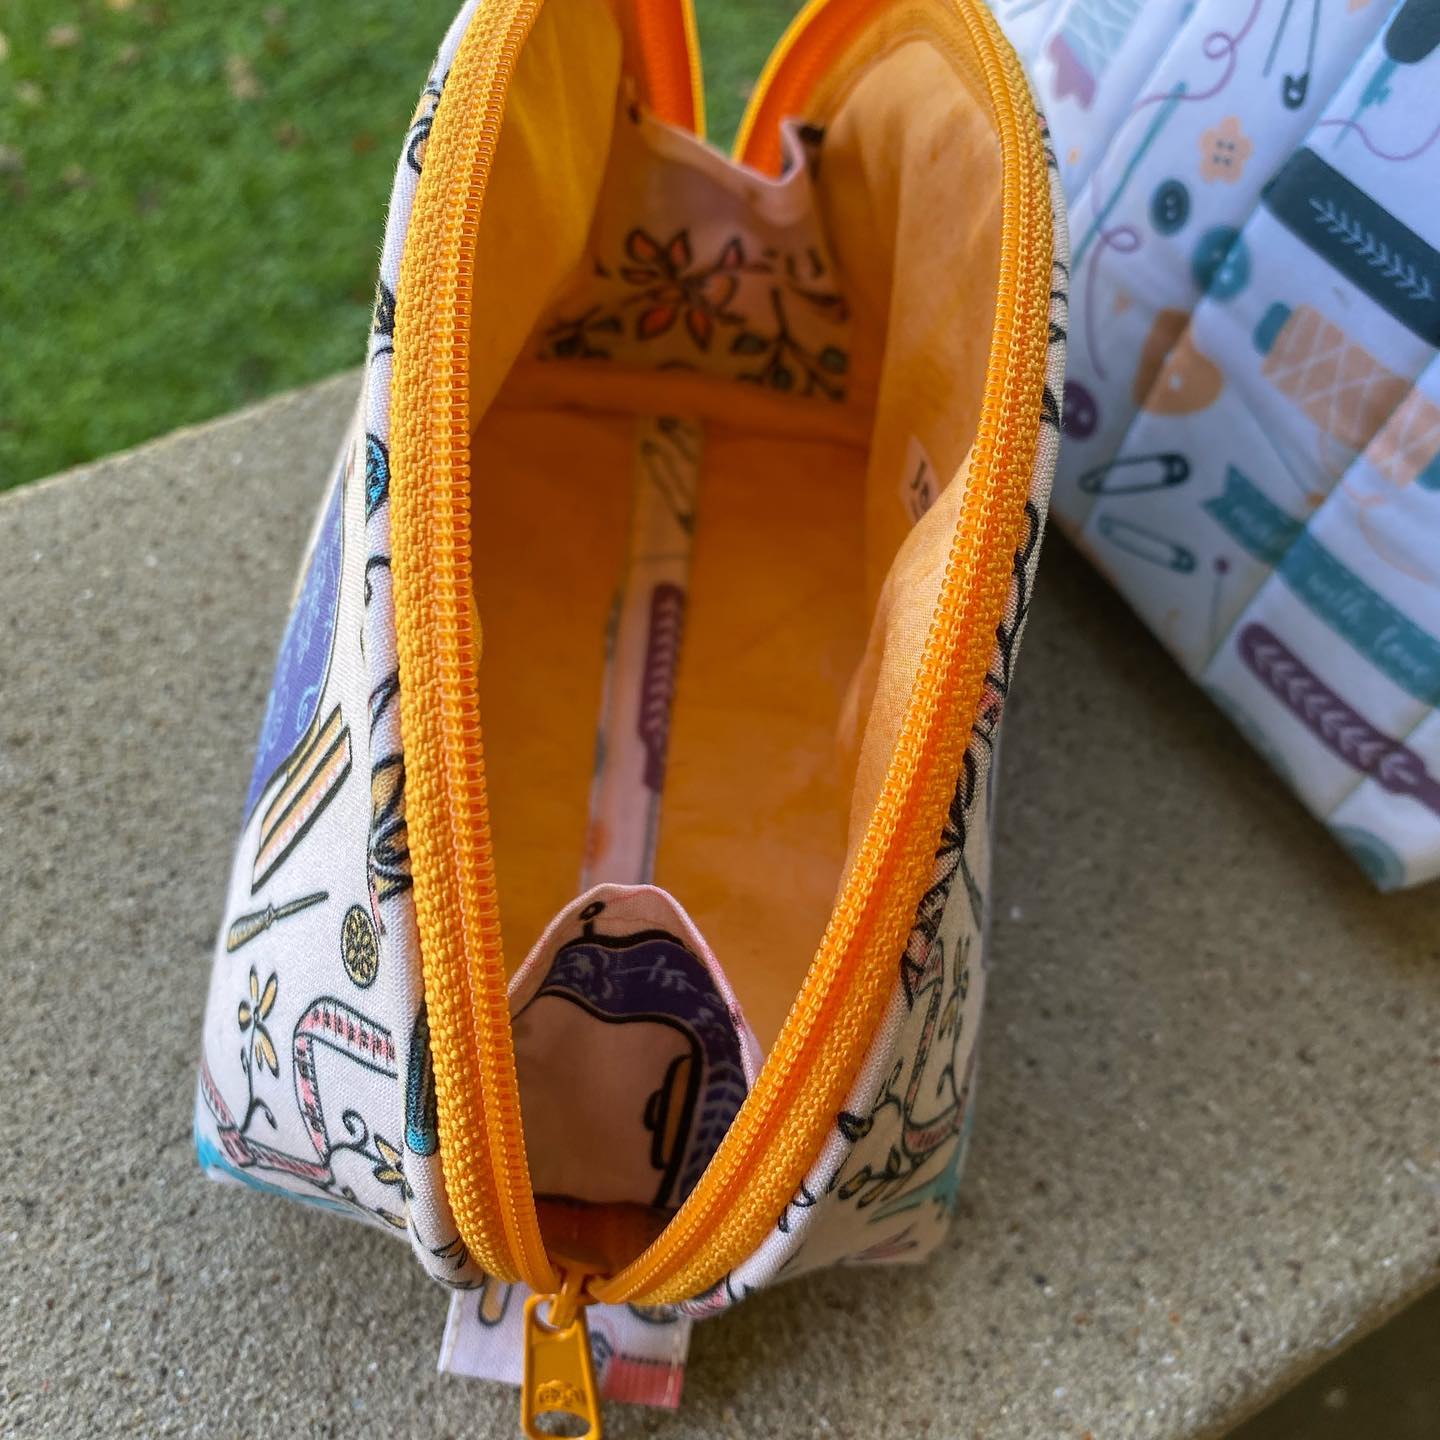
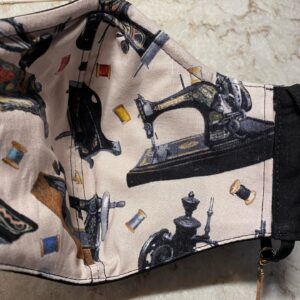
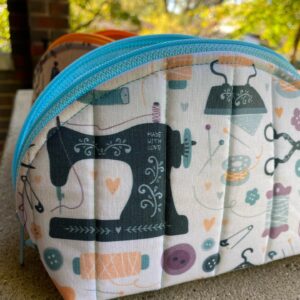 One of the story lines in “The Color Purple,” a show I spent two months of this year on, is when Miss Celie starts making pants and is able to support herself with her sewing machine. I thought about making a couple of bags out of sewing machine fabric for the actress who played Miss Celie and her understudy. But I didn’t know these women well, and wasn’t sure how important the sewing machine was to their recollection of working on that show. So, once I had ordered the fabric, I decided I was just going to make two Clam Up Pouches, designed by Annie Unrein of byAnnie.com. I love these little bags, and happily shared one with one of my DNA cousins, with whom I share the love of making bags. (See, it is in the genes!) The Clam Up pouch is designed for non-directional fabric. Since the sewing machine fabric was directional, I needed to piece the front and back together. The fabrics—exterior and lining—are quilted together with foam in the center before construction. Then I sewed the bottom seam and covered it with binding. There were other ways to handle that issue, but this was my solution and I loved the way it looked. I kept the one with the goldenrod interior for myself. It sits in my sewing room, holding nothing but my smiles everytime I look at it.
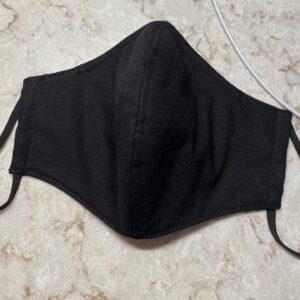
 While I was waiting for the very slow Spoonflower printers to get my fabric to me, I found another sewing machine print that I loved. I had mislaid one of my good masks, so made myself another black mask with sewing machines on the interior. The Covid regulations at YSU are that one wears a mask at all times while inside campus buildings. So while I’m sitting at various pianos all day long, I’m breathing in my love of sewing. (Note: Singers wear masks in their lessons and when in a practice room with their accompanist. Wind instrument players do not. Yes, I was inadvertently exposed by a clarinetist two weeks ago. Oh, well.)
 Another Hackney, cut out since June, finally got assembled in late October/early November. This one went to my granddaughter, Miss C. This is the medium size version of the Hackney sent to her grandma in August. I’ve included a photo of the three sizes from the pattern cover, to illustrate the range of sizes. A tricky back to construct, but worth the effort. It’s a trade-off, but both art forms make me happy, so there you go.


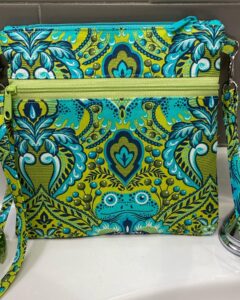
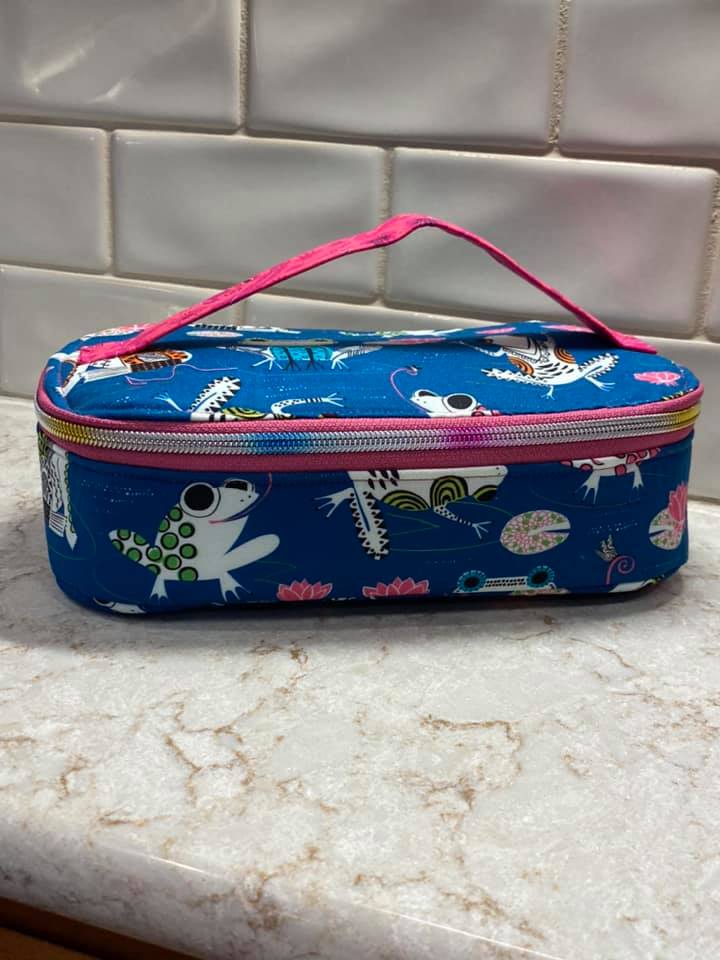
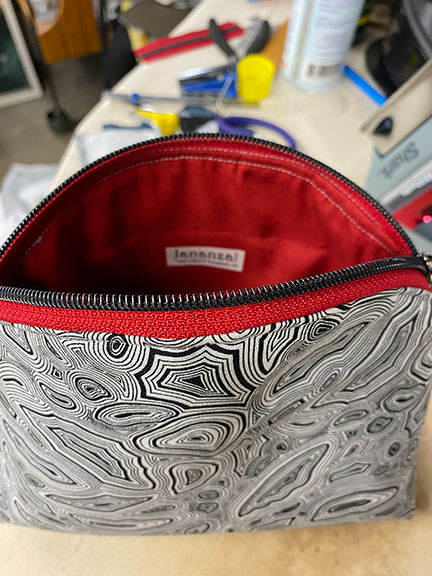
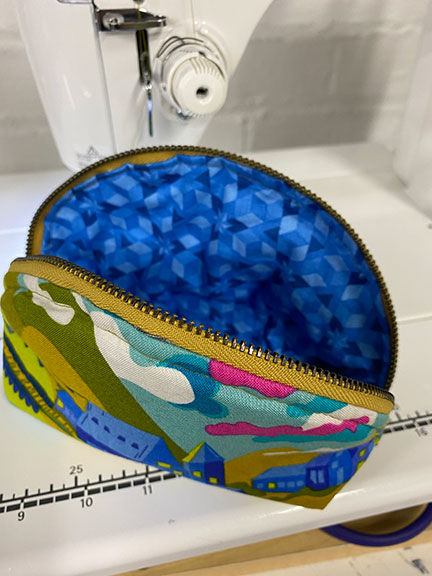
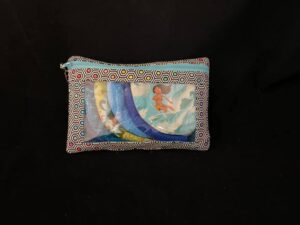
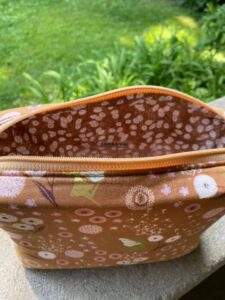
 And finally, my most recent effort. My cousin asked for three bags for herself and her two sisters from fabric they bought in Egypt on vacation many years ago. I think I have enough fabric for three Zippy Bags, but I wanted to make a test version before I offered it as an option for my cousin. This is the Sallie Tomato “Zippy Bag,” designed by Jessica Barrera, which has two sizes. I chose the larger bag as a sample for the vintage fabric. The finished size is about 8″ wide and 8″ tall. The small Zippy is 8″ wide and 6″ tall. I had seen a similar bag in the fabulous boutique Bellagio, in Asheville’s Biltmore Village, many years ago on one of my trips to check on my mother in Hendersonville, NC. It was made with three colors of leather, and I was in love with that bag. I’ve been looking for a similar pattern ever since that visit, and the Zippy is just right, both for a future leather bag for myself, and for the vintage fabric my cousin loves.


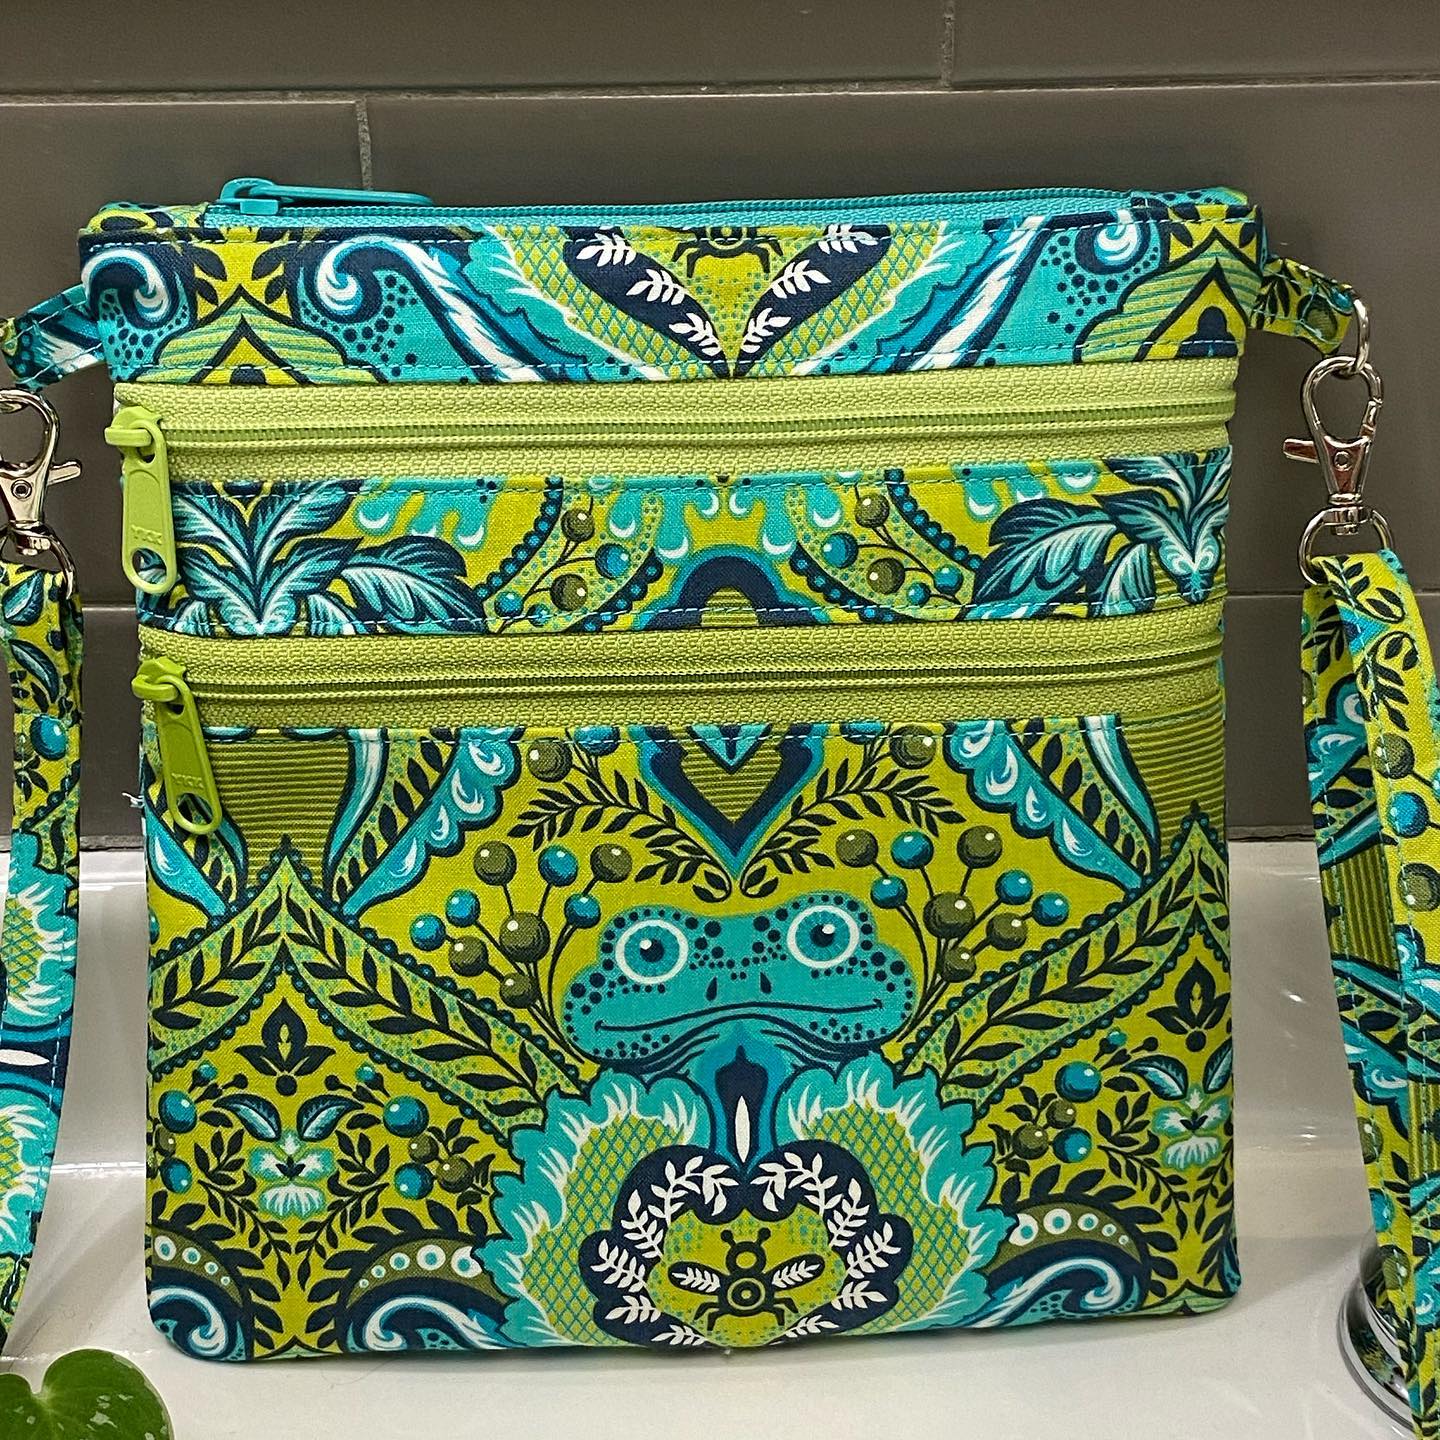
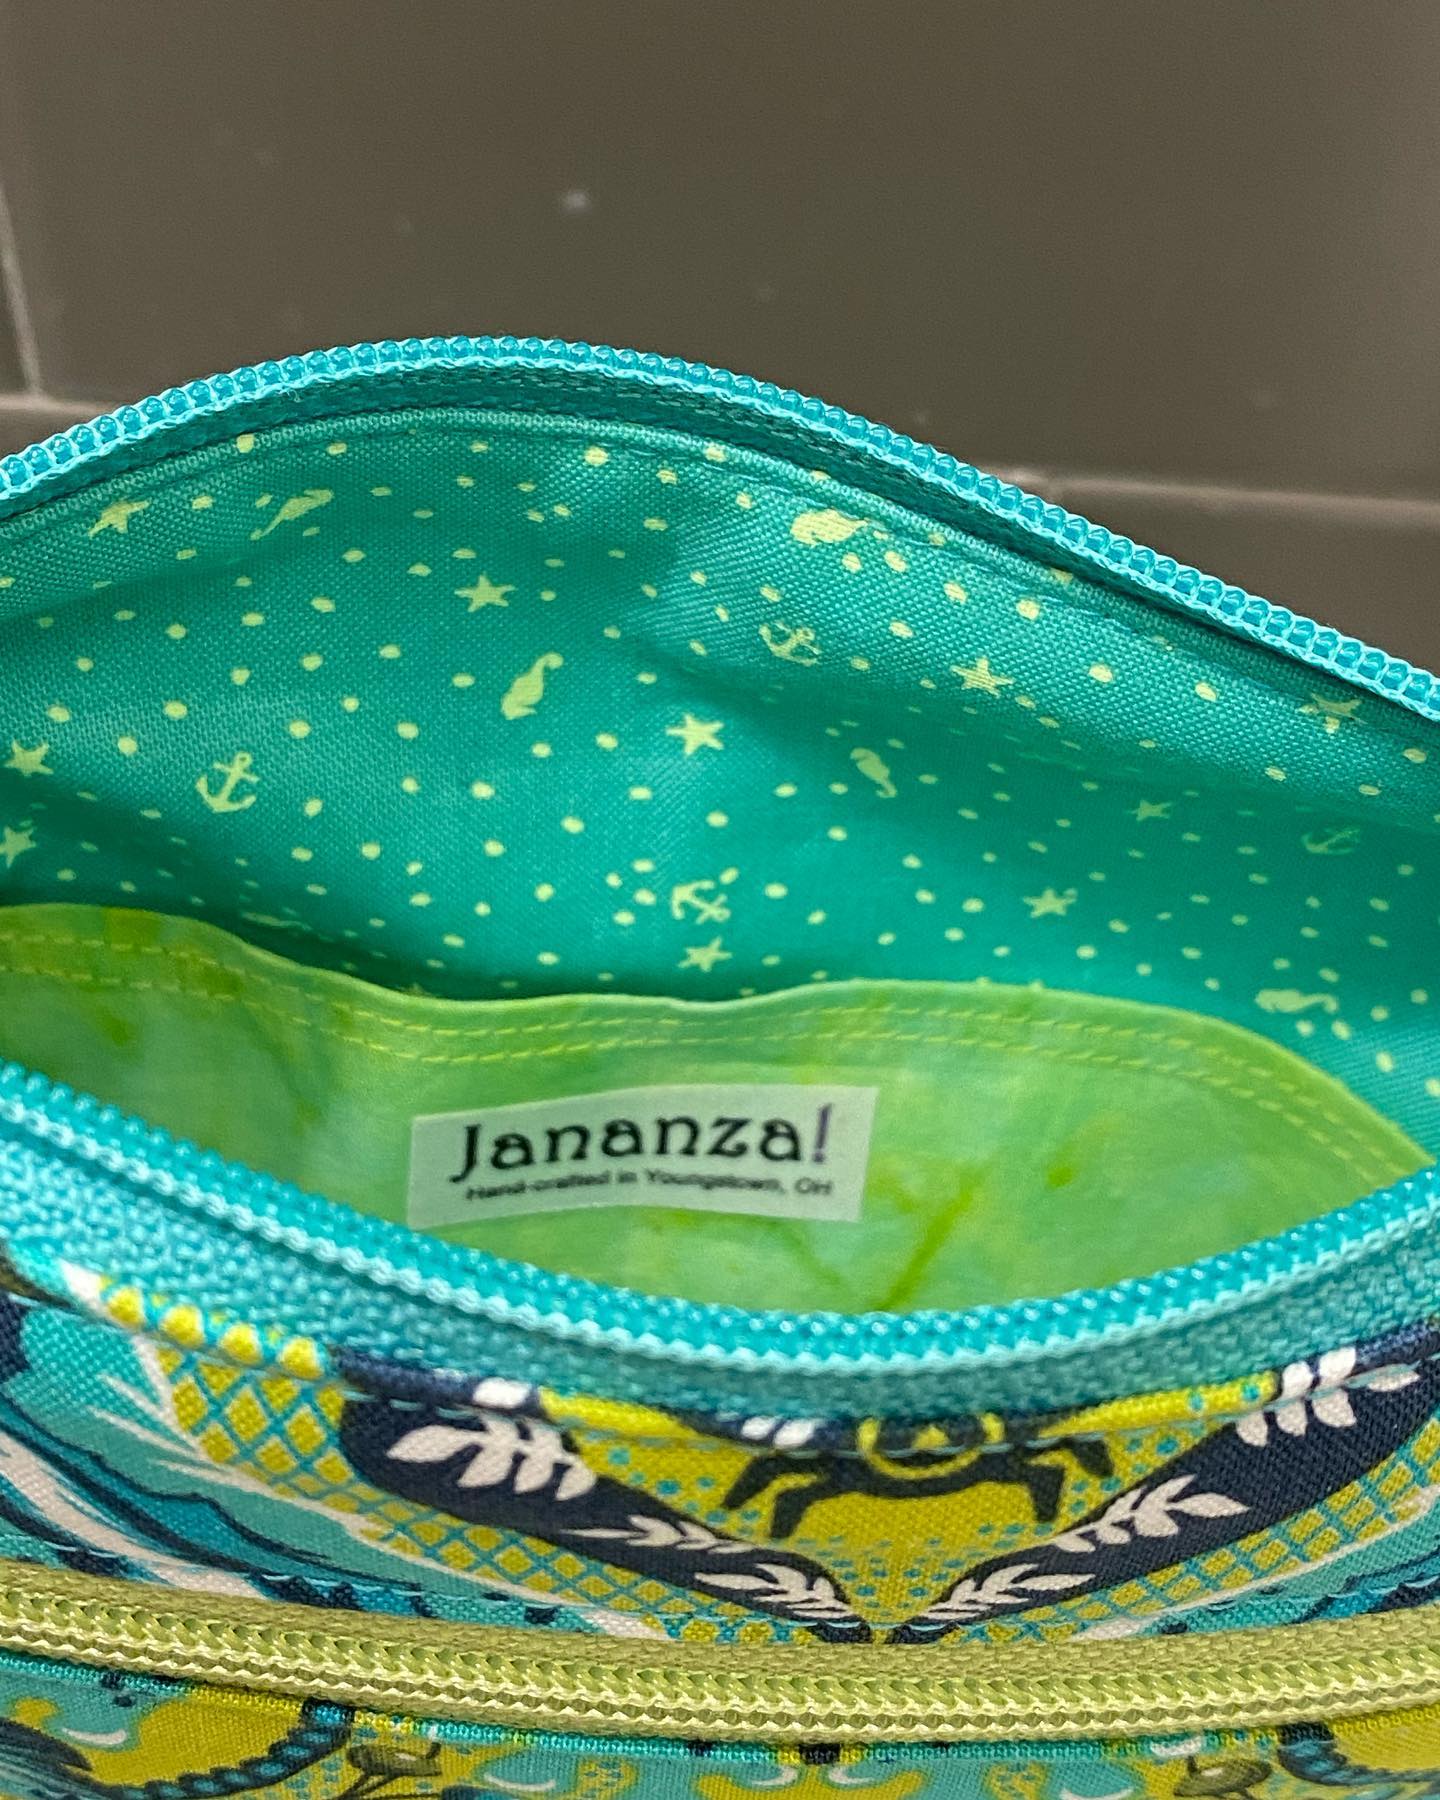
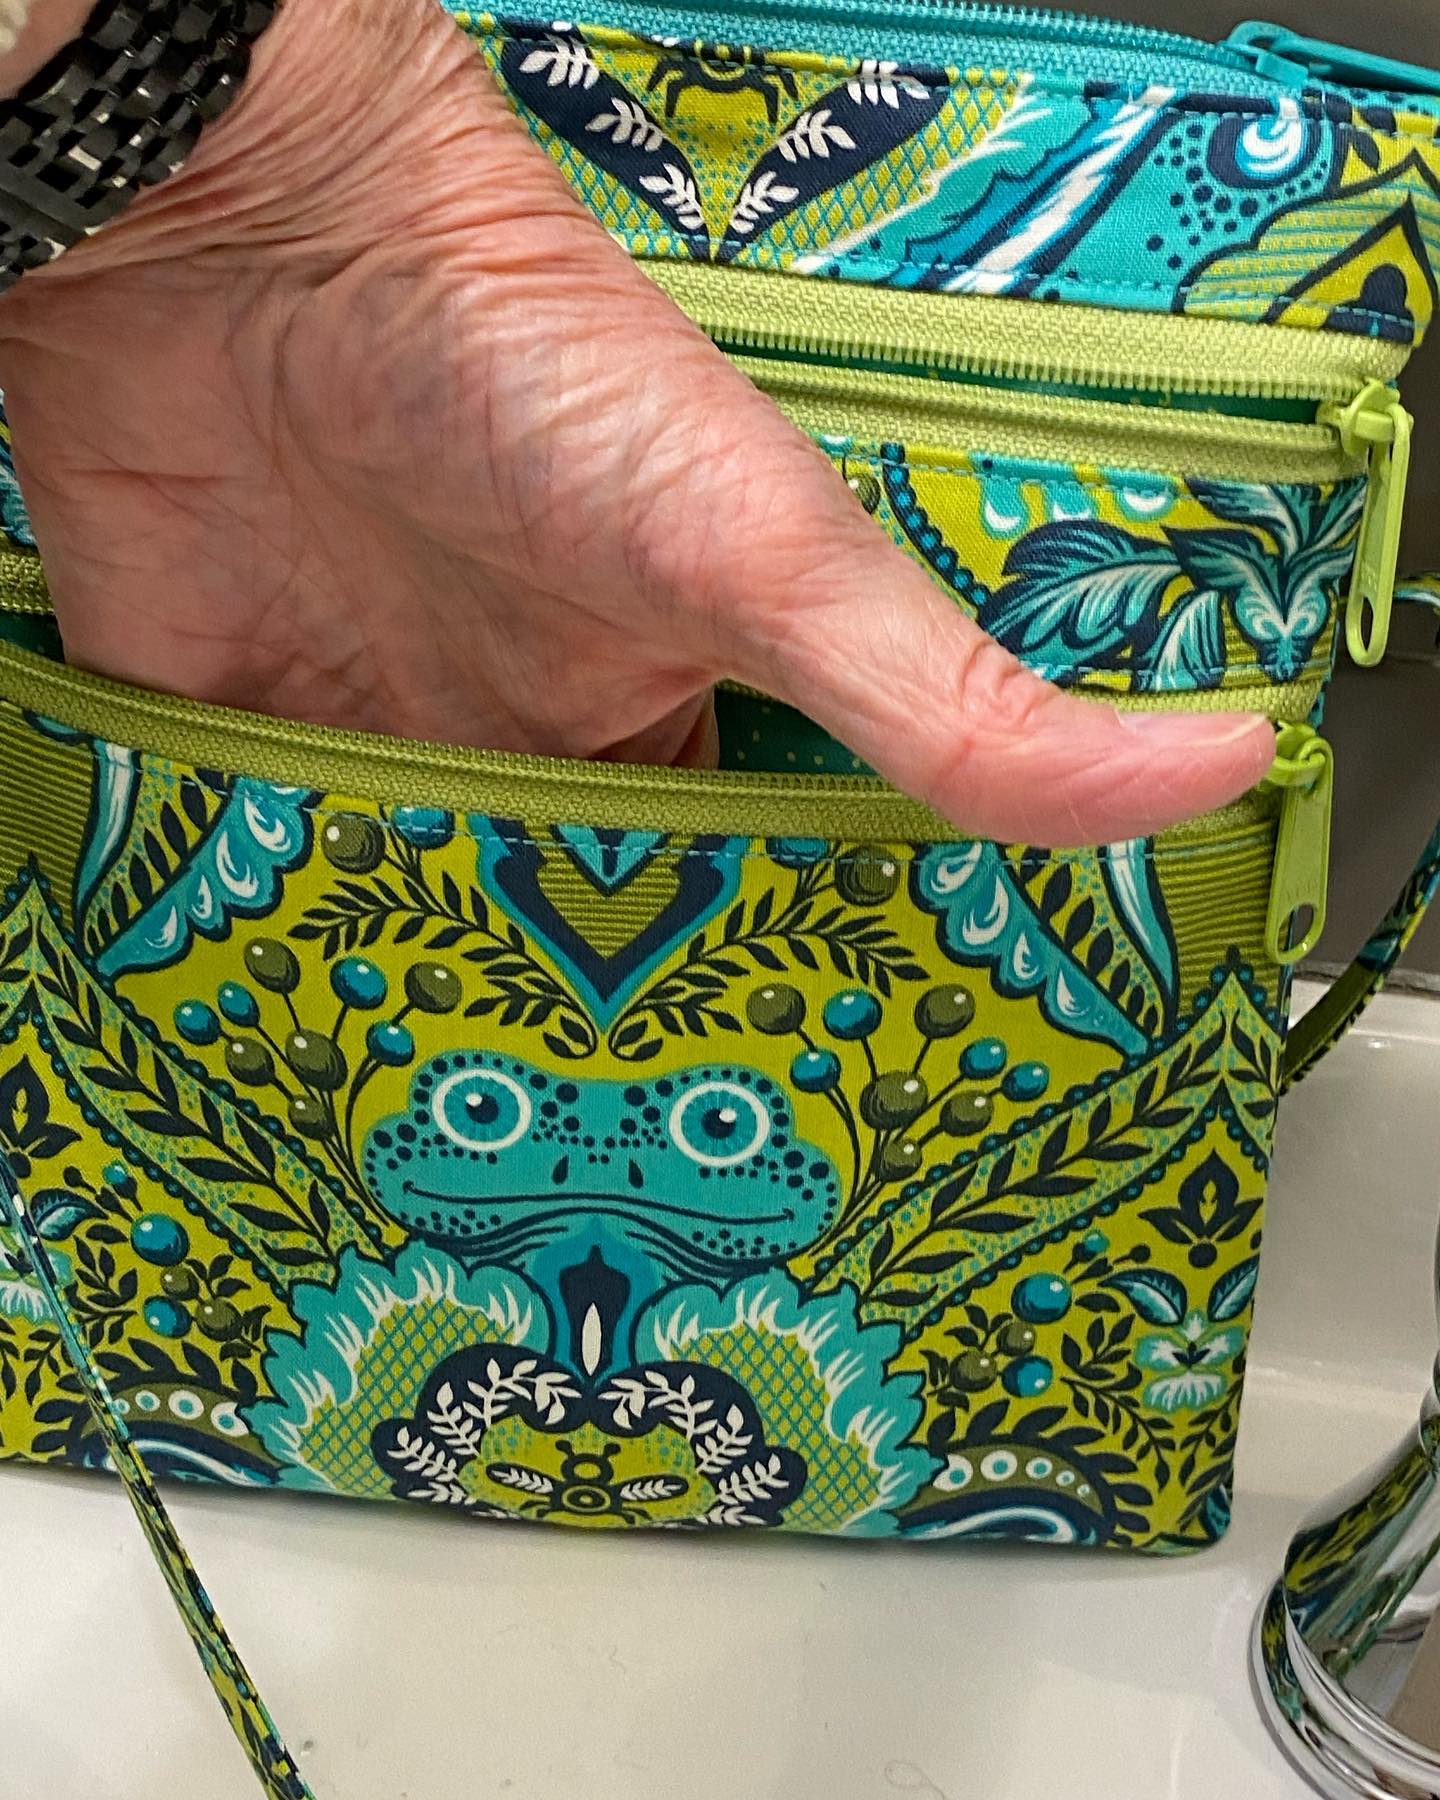
 In the “How Time Flies” post a few weeks ago, I mentioned some bags I promised to make for my cousin’s wife and her two sisters. I was auditioning the Sallie Tomato “Zippy” crossbody bag for that purpose. But then I learned there was a similar bag to the Zippy, a little larger and with boxed corners, so it carries a little more. That pattern, also from Sallie Tomato, is “Myrna.”
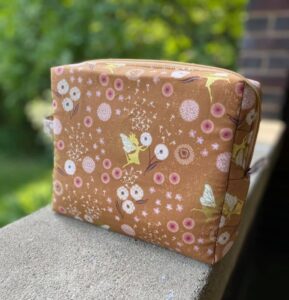
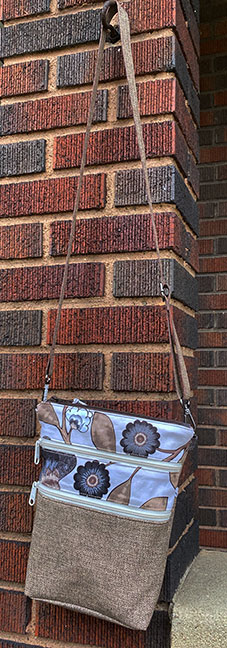 If the term “boxed corners” is foreign to you, it’s a method used in sewing bags and home decor to add dimension to a flat rectangle. Where the Zippy is constructed somewhat like an envelope, in the Myrna you sew a bottom rectangle between the front and back, then rotate and sew across the corner of the front and back. This results in a bag that is about 2″ deep. Instead of just slipping your wallet and your phone into the Zippy, with the Myrna you can also fit your sunglasses case and a checkbook and pack of tissues. Make sense? If you want some pictures to make more sense, this page may help.
 I think the more I make this bag, the easier it will get. It’s really not a difficult pattern—I just have to pay attention to what I’m doing.
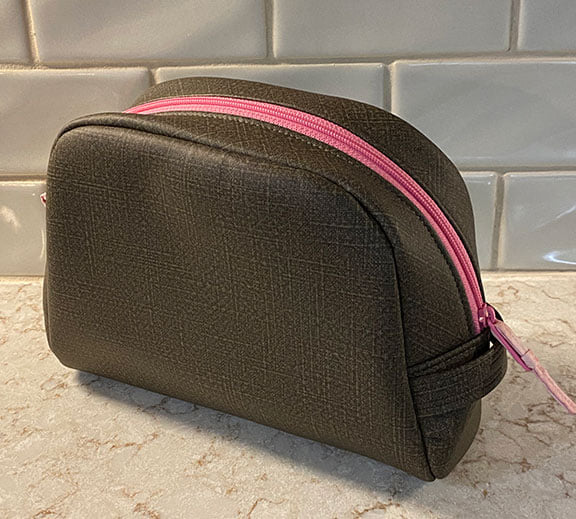
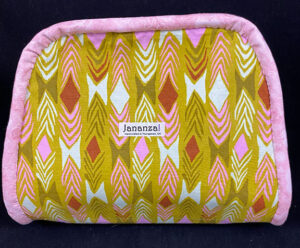
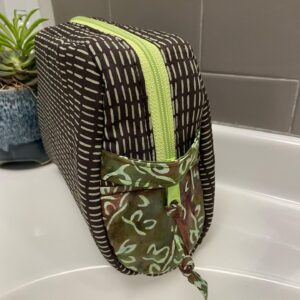
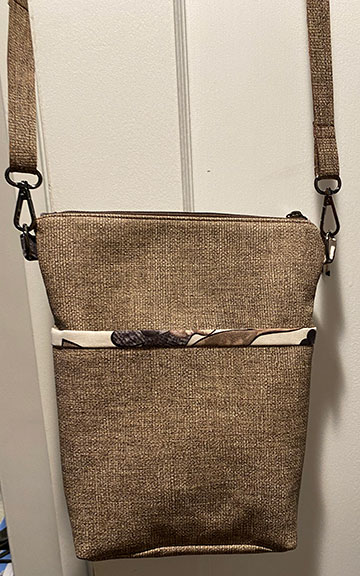
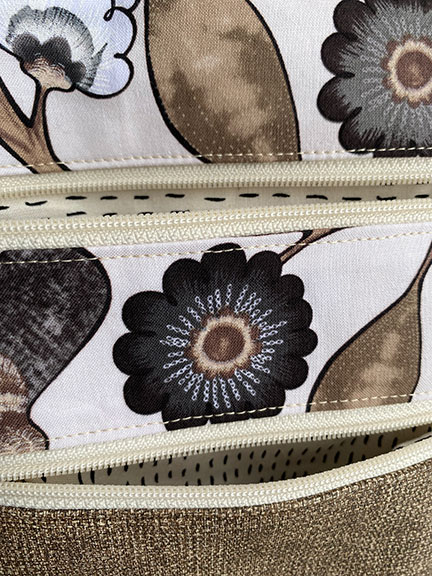 For the sample Myrna, I used some more of the fabulous Richloom vinyl which is designed by my nextdoor neighbor for Richloom’s RV and Manufactured Housing line. This particular fabric looks sort of like a nice heavyweight linen. It comes in a number of rich shades. I chose a brown that goes beautifully with the accent fabric, “Floral Philosophy” designed by Maria Kalinowski for Kanvas Studio. I love that print. It’s been in my stash for several years, waiting for just this moment. The front pocket lining is another high threadcount quilting cotton that’s been whiling away its time in my stash—I have no idea when or where I purchased it. And the interior lining is a lightweight white linen, Limerick Linen from Robert Kaufman Fabrics. It’s 3.51 oz. per square yard. I bought it to make curtains, but changed my mind. For this project, I tea-dyed it and fused it with Pellon Shape Flex to give it the body that I believe a bag lining requires. I love this combination of textures and prints.
 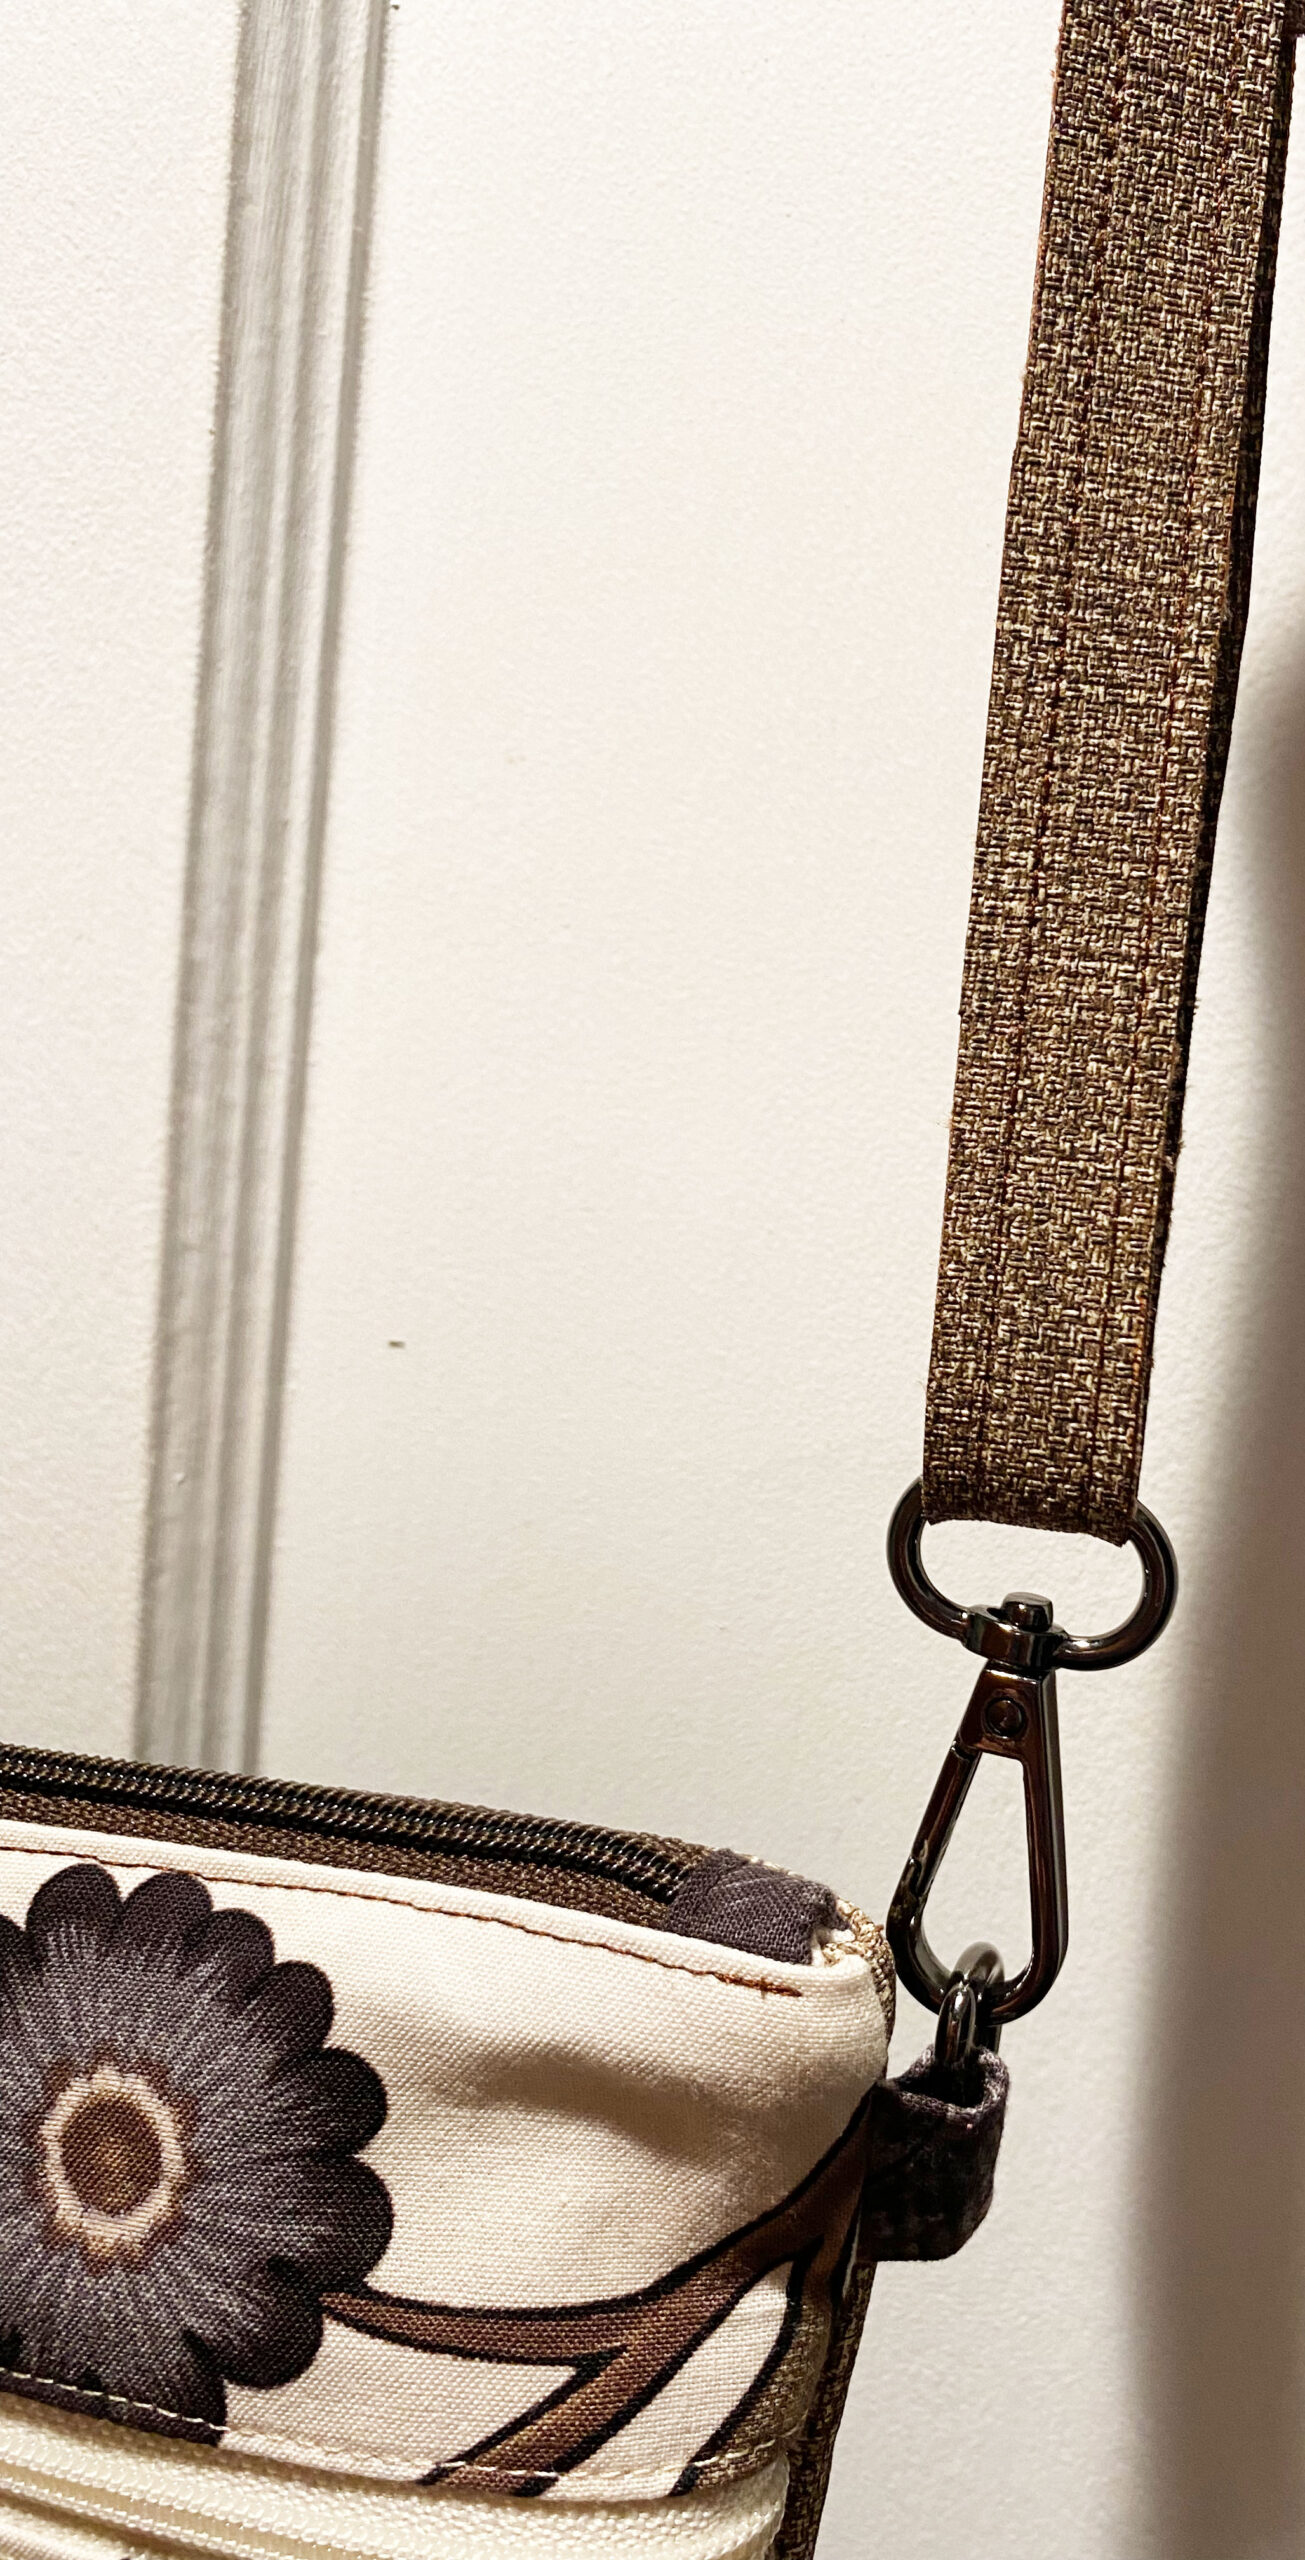 I treated the vinyl strap differently than instructed in the pattern. It said to cut a 1½” strip and fold it in half, then topstitch at ⅛” along both long edges. But if I used the Sallie Tomato method, I would have had one side folded and one side with raw edges. I could have folded both sides to the center, but then I would have had to topstitch the raw edges with zigzag stitch, and I didn’t want that look. Instead, I cut two ¾” strips the width of the fabric—just under 60″. I used Wonder Tape and clips to hold the two strips together and topstitched the length on both long edges. But I now had two long raw edges. I dug around looking for my bottle of Edge Kote, but it didn’t want to be found. So I remembered a set of Sakura Micron Brush Pens, found the set and pulled out the brown pen. I then sat with an episode of “Maine Cabin Masters” streaming on my little sewing room TV while I painted over the almost 120″ of raw edges with my brown brush pen. Zen! I am very pleased with the finished look of the strap.
 My only complaint about this pattern is the construction of the boxed bottom. The size of the bottom insert creates a nice depth to the bag, allowing you to carry more than just your wallet and phone. But it’s an awkward method. Instead of the size of the bottom matching the size of the side where the seam creates the box effect, there is excess fabric on the side. And neither the pattern instructions nor the video available on YouTube address this inconsistency. What is a sewist to do with that extra fabric? If I were to decrease the size of the bottom insert to make the bottom and the side match in length, then the depth of the bag would be smaller, and the bag user wouldn’t be able to carry as much, comfortably, in the bag. Something has to change here, and I may have to make one more sample before I dig into the special, vintage fabric my cousin sent me.
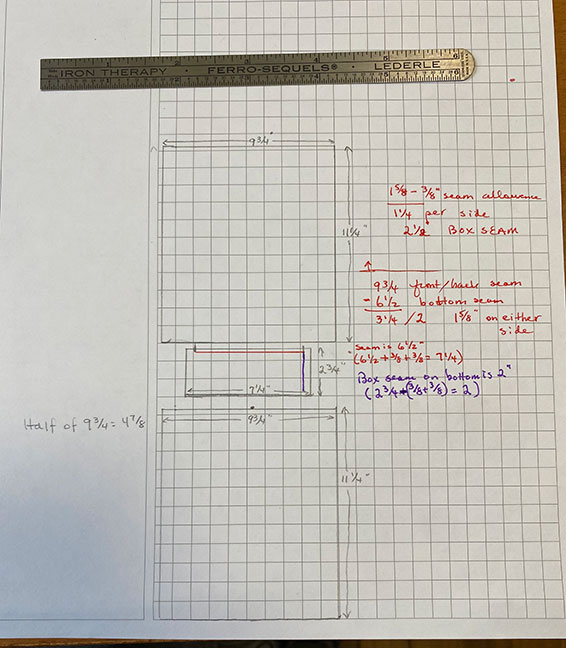 Would you like to see the lengths a perfectionist will go to in trying to solve a mental puzzle? Here were my notes yesterday morning when I was trying to understand the difference in the seam lengths between the bottom insert and the side. Too bad my Health app can’t see all the whirring in my brain and award me steps for that work!!