 I love learning new things. The reason I write my blog posts in so much detail, and carefully tell you every mistake I made, is so you might learn from my errors and be inspired to try using one of the bag patterns I use.
 Back in April or May, I was on the Klum House site, looking for something or other, and saw that Ellie Lum, the designer behind the label, was offering an Intermediate Bag Making class. It was more than I usually spend on an impulse purchase, but I wanted to learn what Ellie had to offer. So I paid my money and chose the colors I wanted for the three bags I would learn to make. Then I noted the class start date and forgot about it.
 A few of weeks later, about the time I was up to my ears in senior showcase performances, and church sub gigs, and preparing for my accompanees’ juries, the box of class materials arrived. I set it in my sewing room and forgot about that, too.
Juries came and went, the death of a dear friend threw me off-course for a week or so, the trip to Amarillo and Dallas to see my two sons came and went, and suddenly I realized I had missed the first Zoom meeting of the class—without even opening the box of materials. Without even being sure where I had stashed the box!
Sheesh! Last year was one tough year. But I’m very grateful to have been able to carve out time in the summer to learn about sewing with waterproof waxed canvas, leather strapping, and all the different connectors Ellie Lum has included in her bag design.
I won’t go into all the details of my boo-boos on these bags. I may add them later, but for right now, I just want to get these pictures out for you to see. I’m very proud of them.
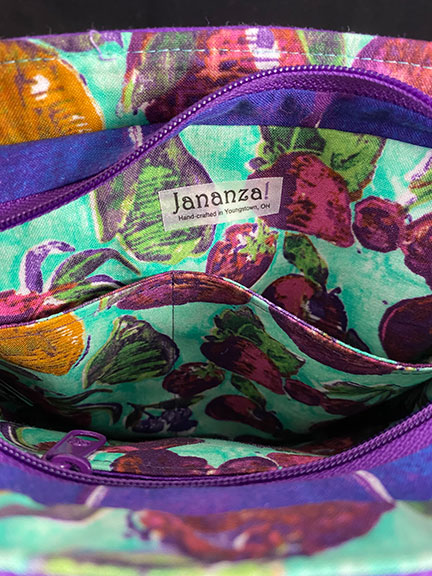
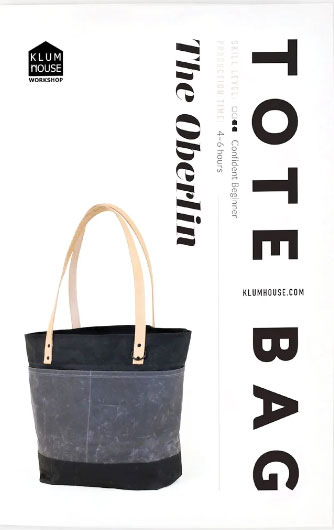 The first bag was the Oberlin. It could be used as a purse or a tote bag.
 The true colors are gray and black. It has a zipper closure and a magnetic snap, canvas lining, an interior hanging zippered pocket, and front and back exterior pockets that span the width of the bag, but are each divided into two pockets.
Several of the class students had trouble with the final stitching of the exterior and lining pieces. In my kit, I felt the exteriors and interiors weren’t exactly the same size, and those differences led to unwanted tucks in the stitching. I want to make the bag again soon, before I forget anything I learned, and see if I can get a smooth final stitching.
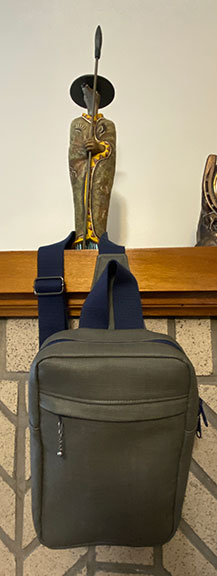
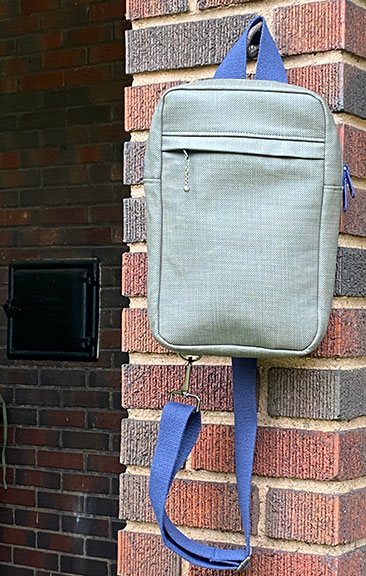
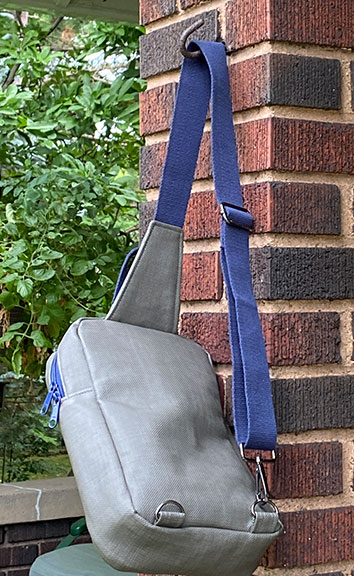
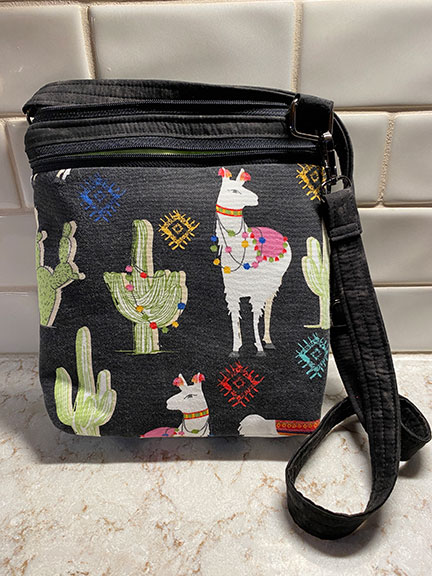
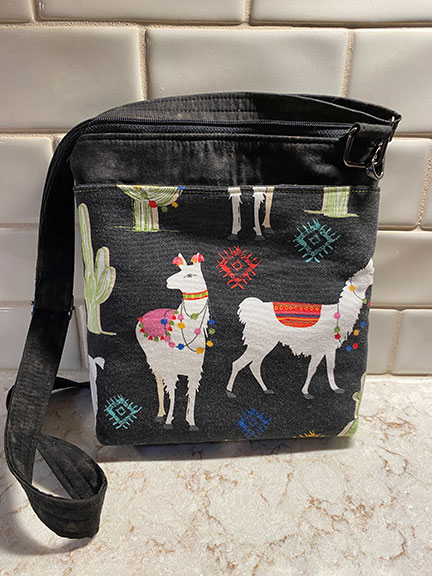
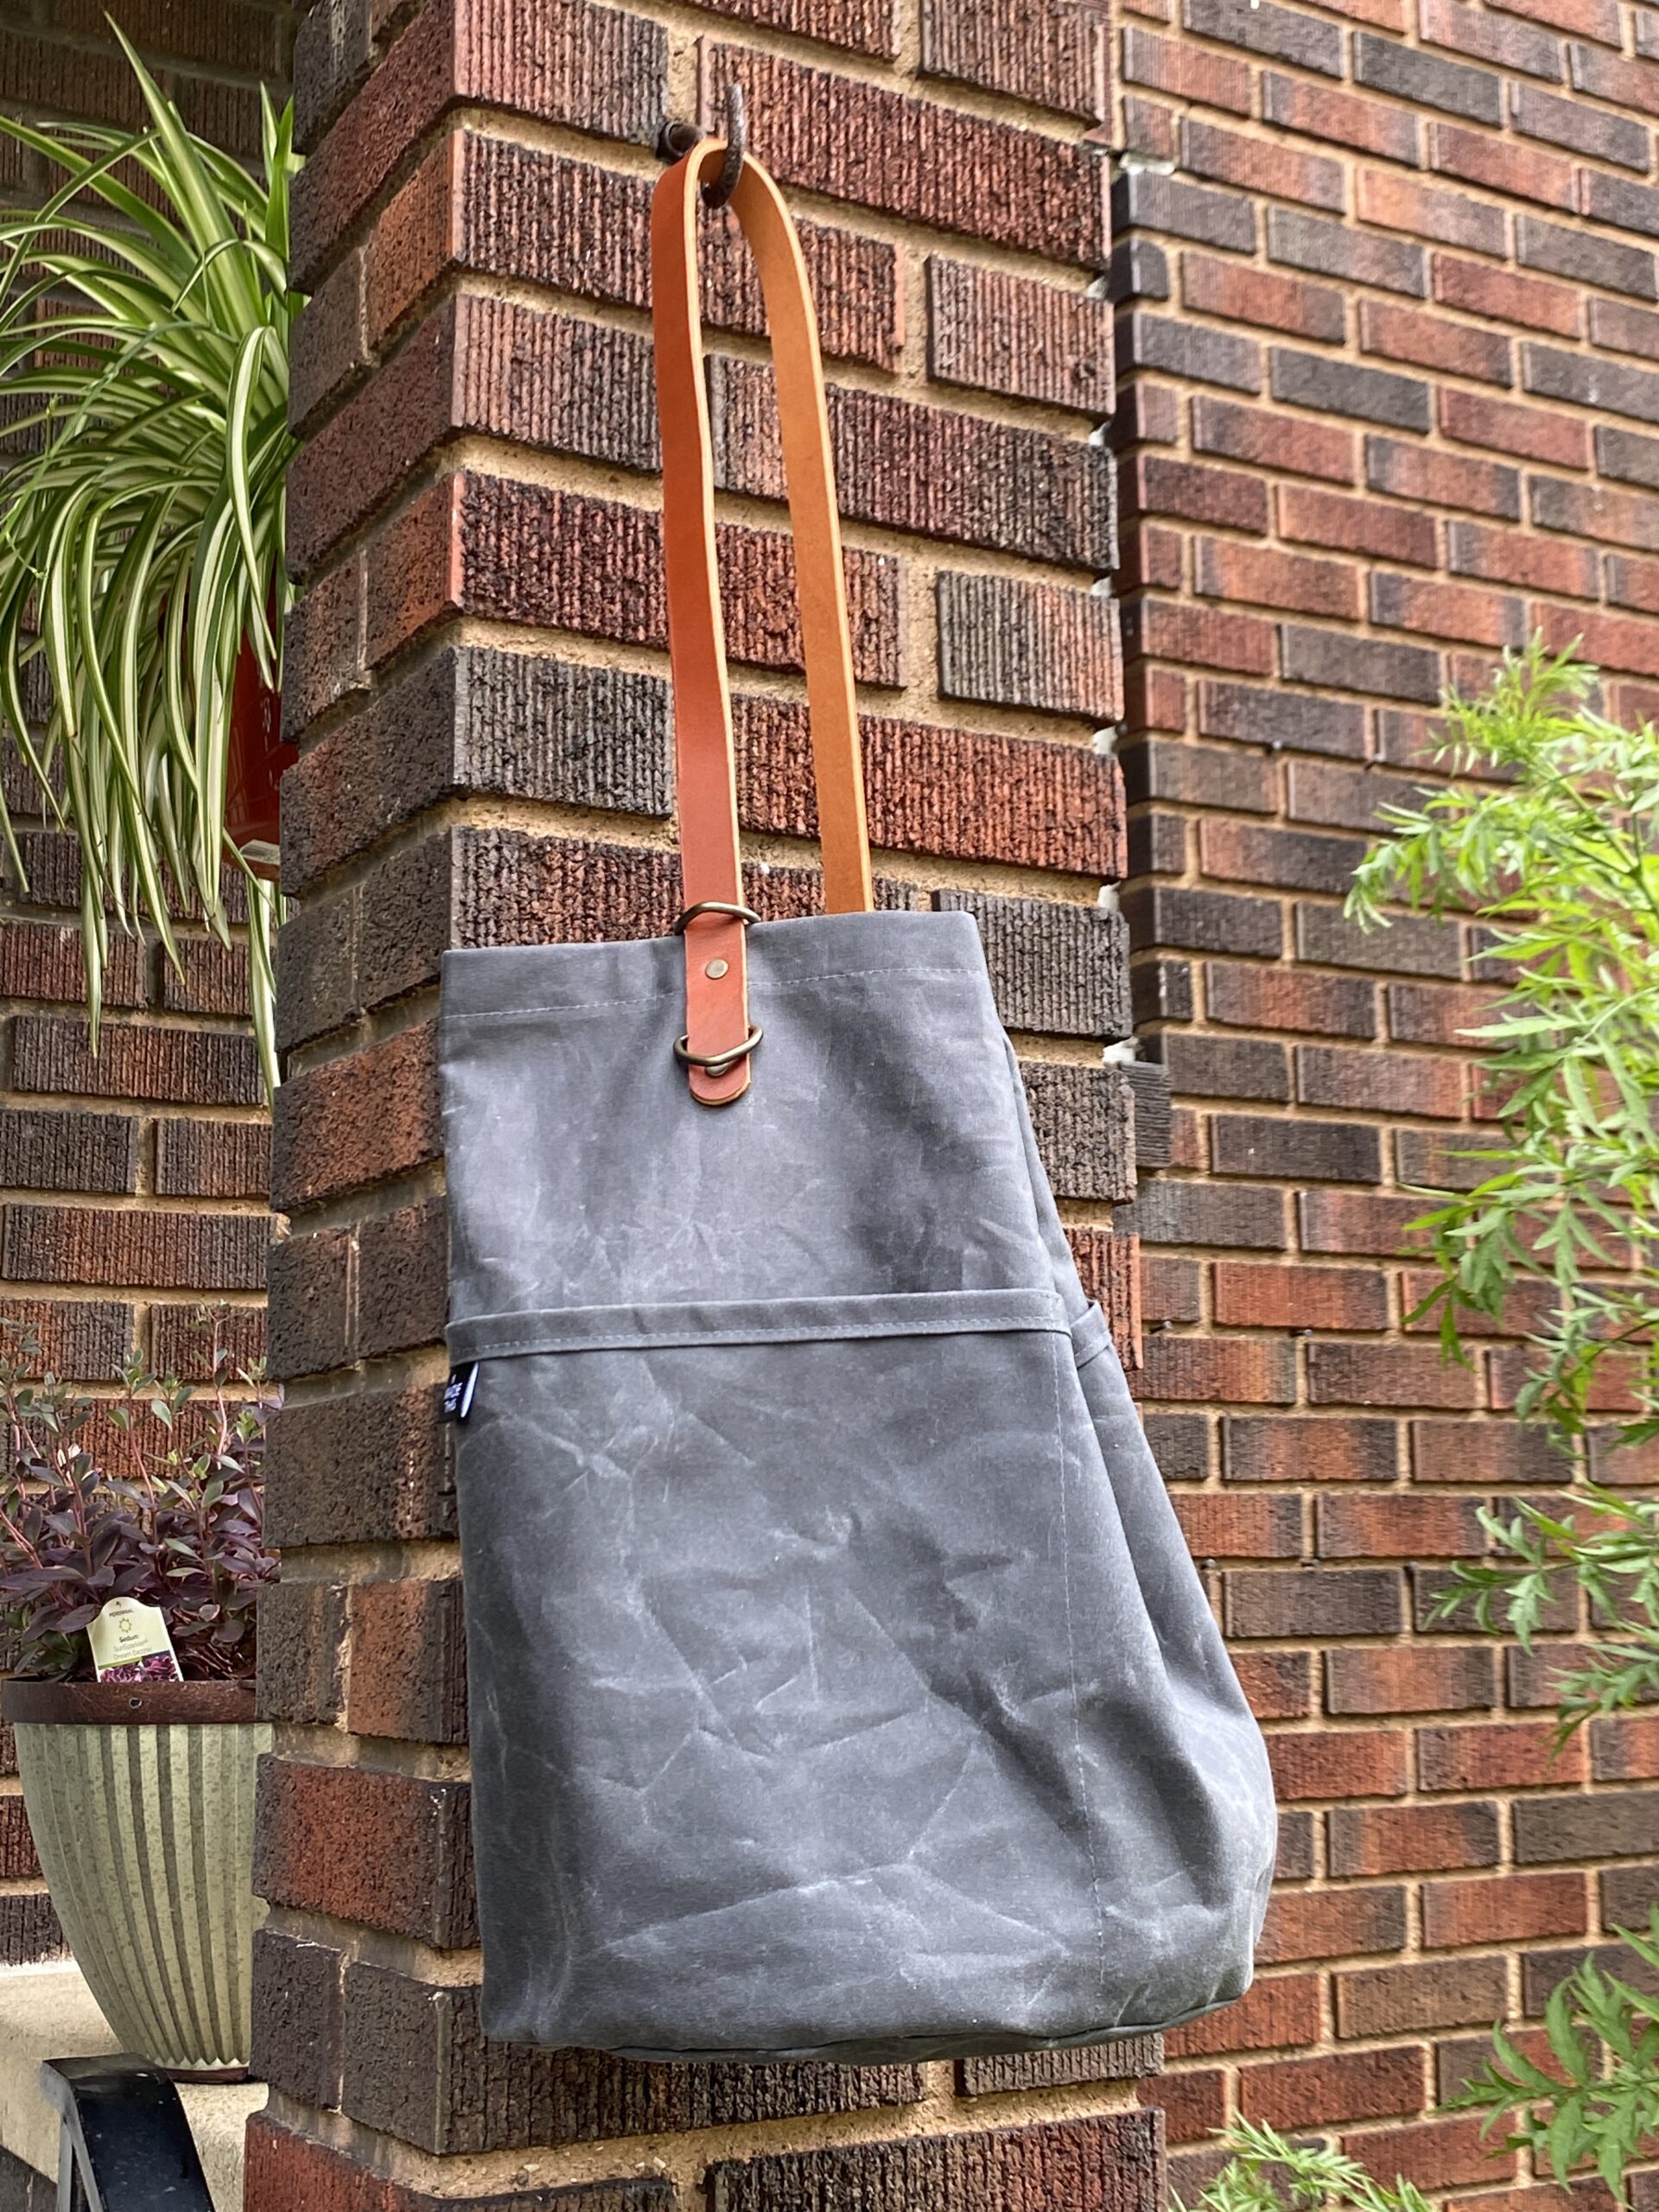
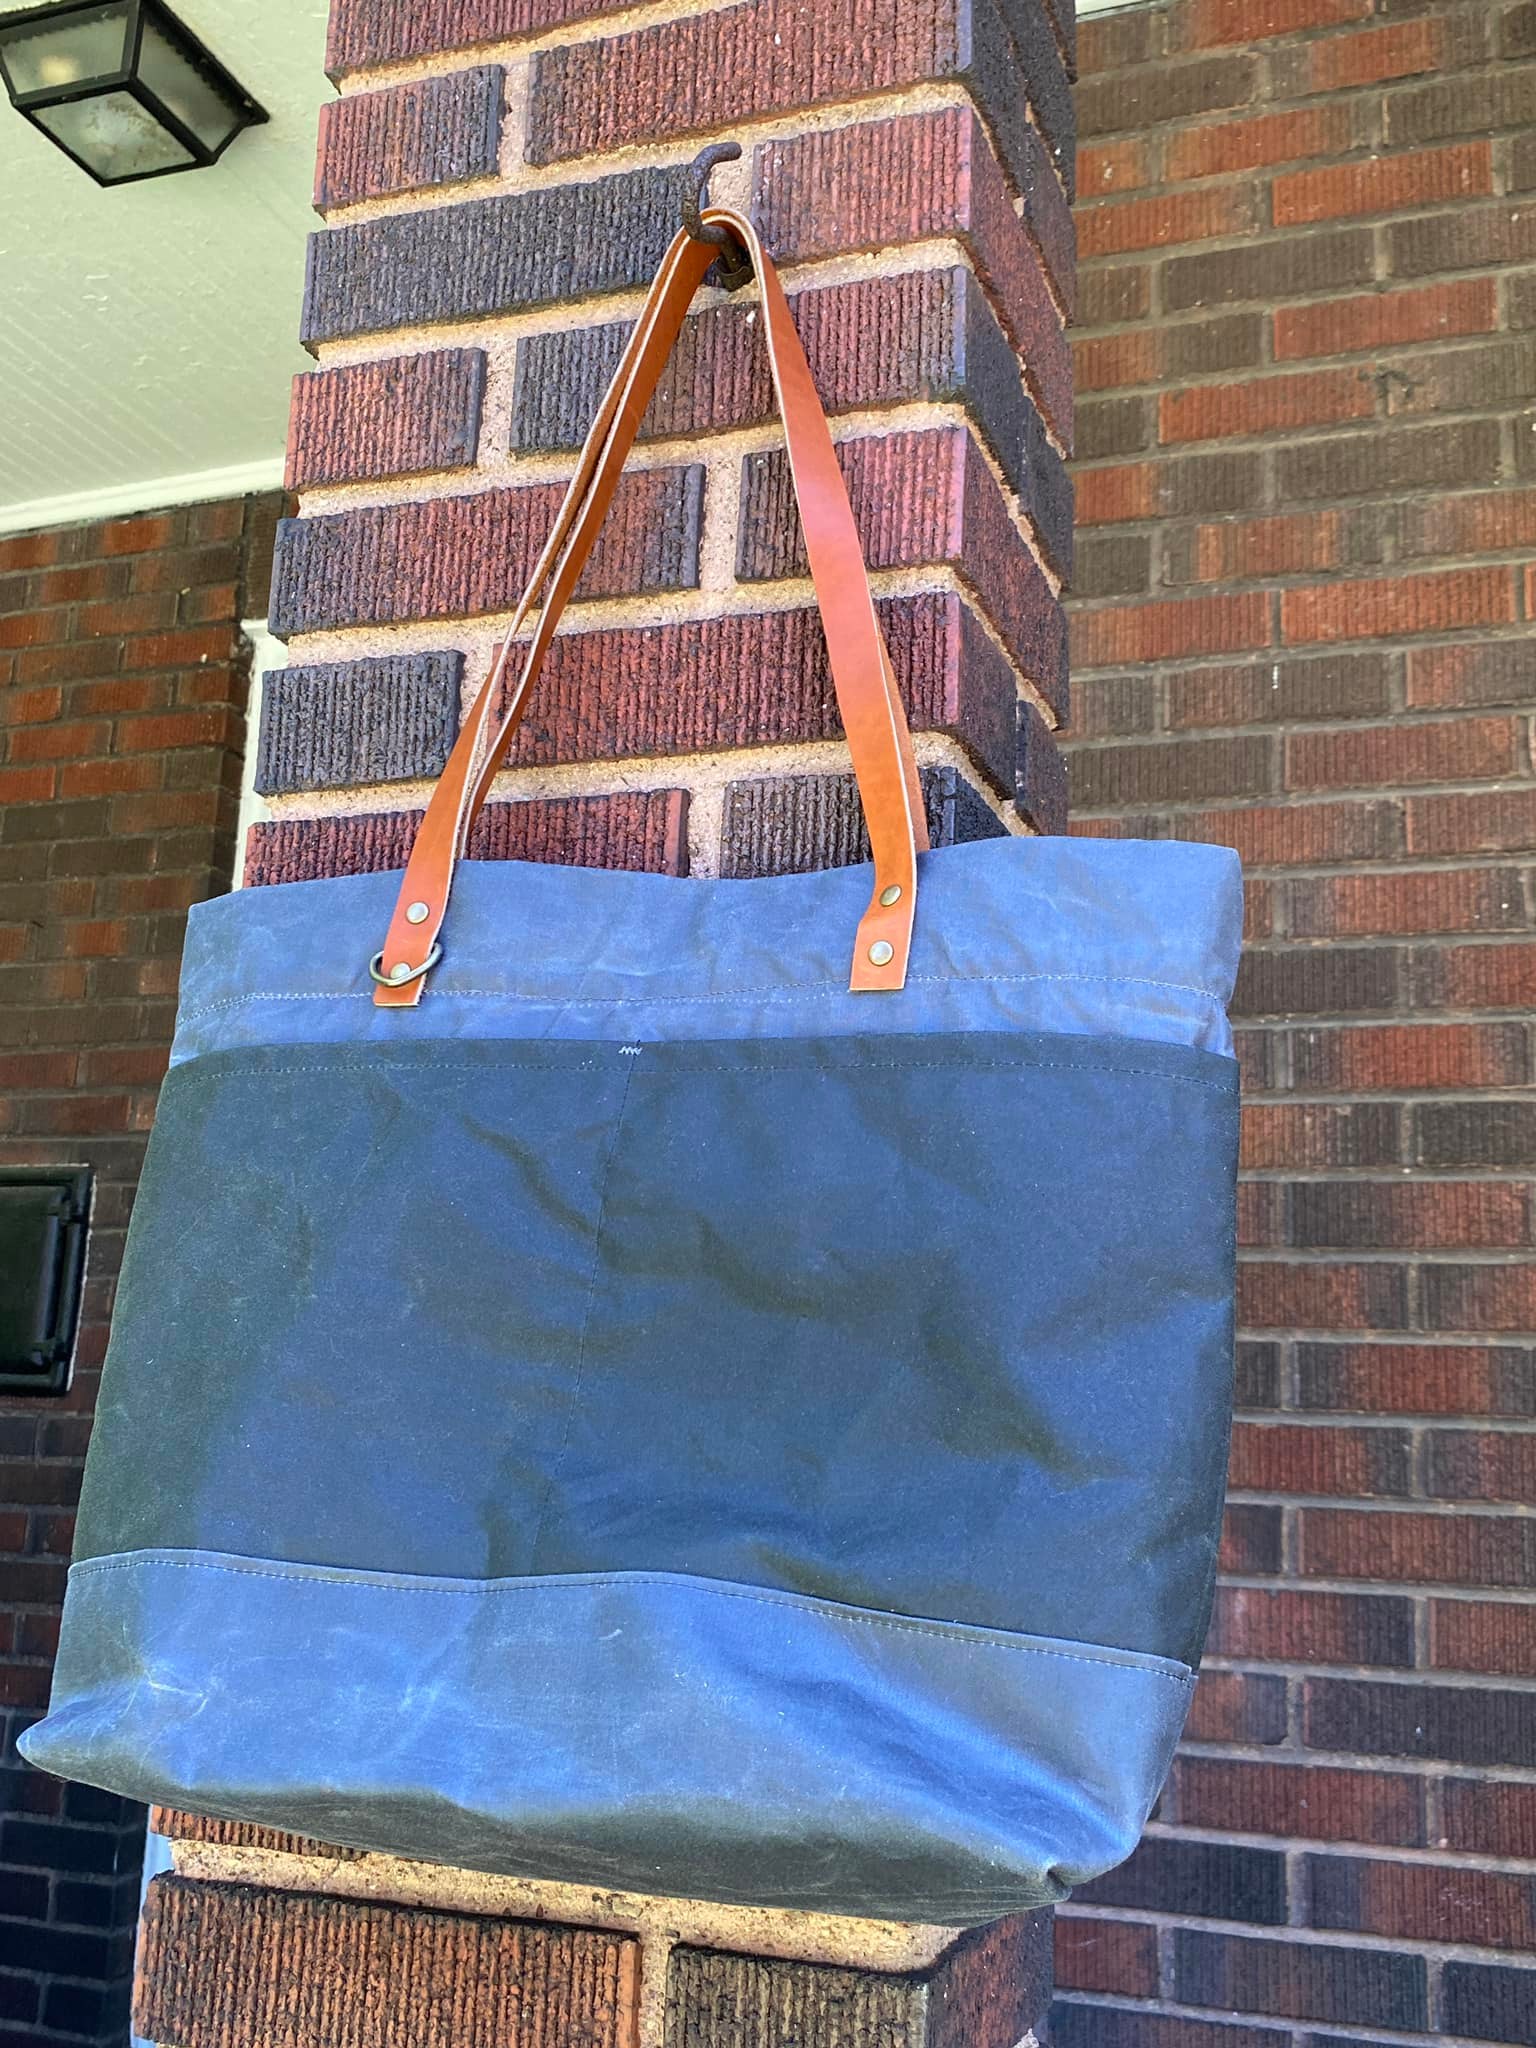
 The second bag was the Maywood Tote/Pack. It can be carried as a tote bag, or pull up on the cleverly designed leather strap, and wear it as a backpack. Beyond cool!
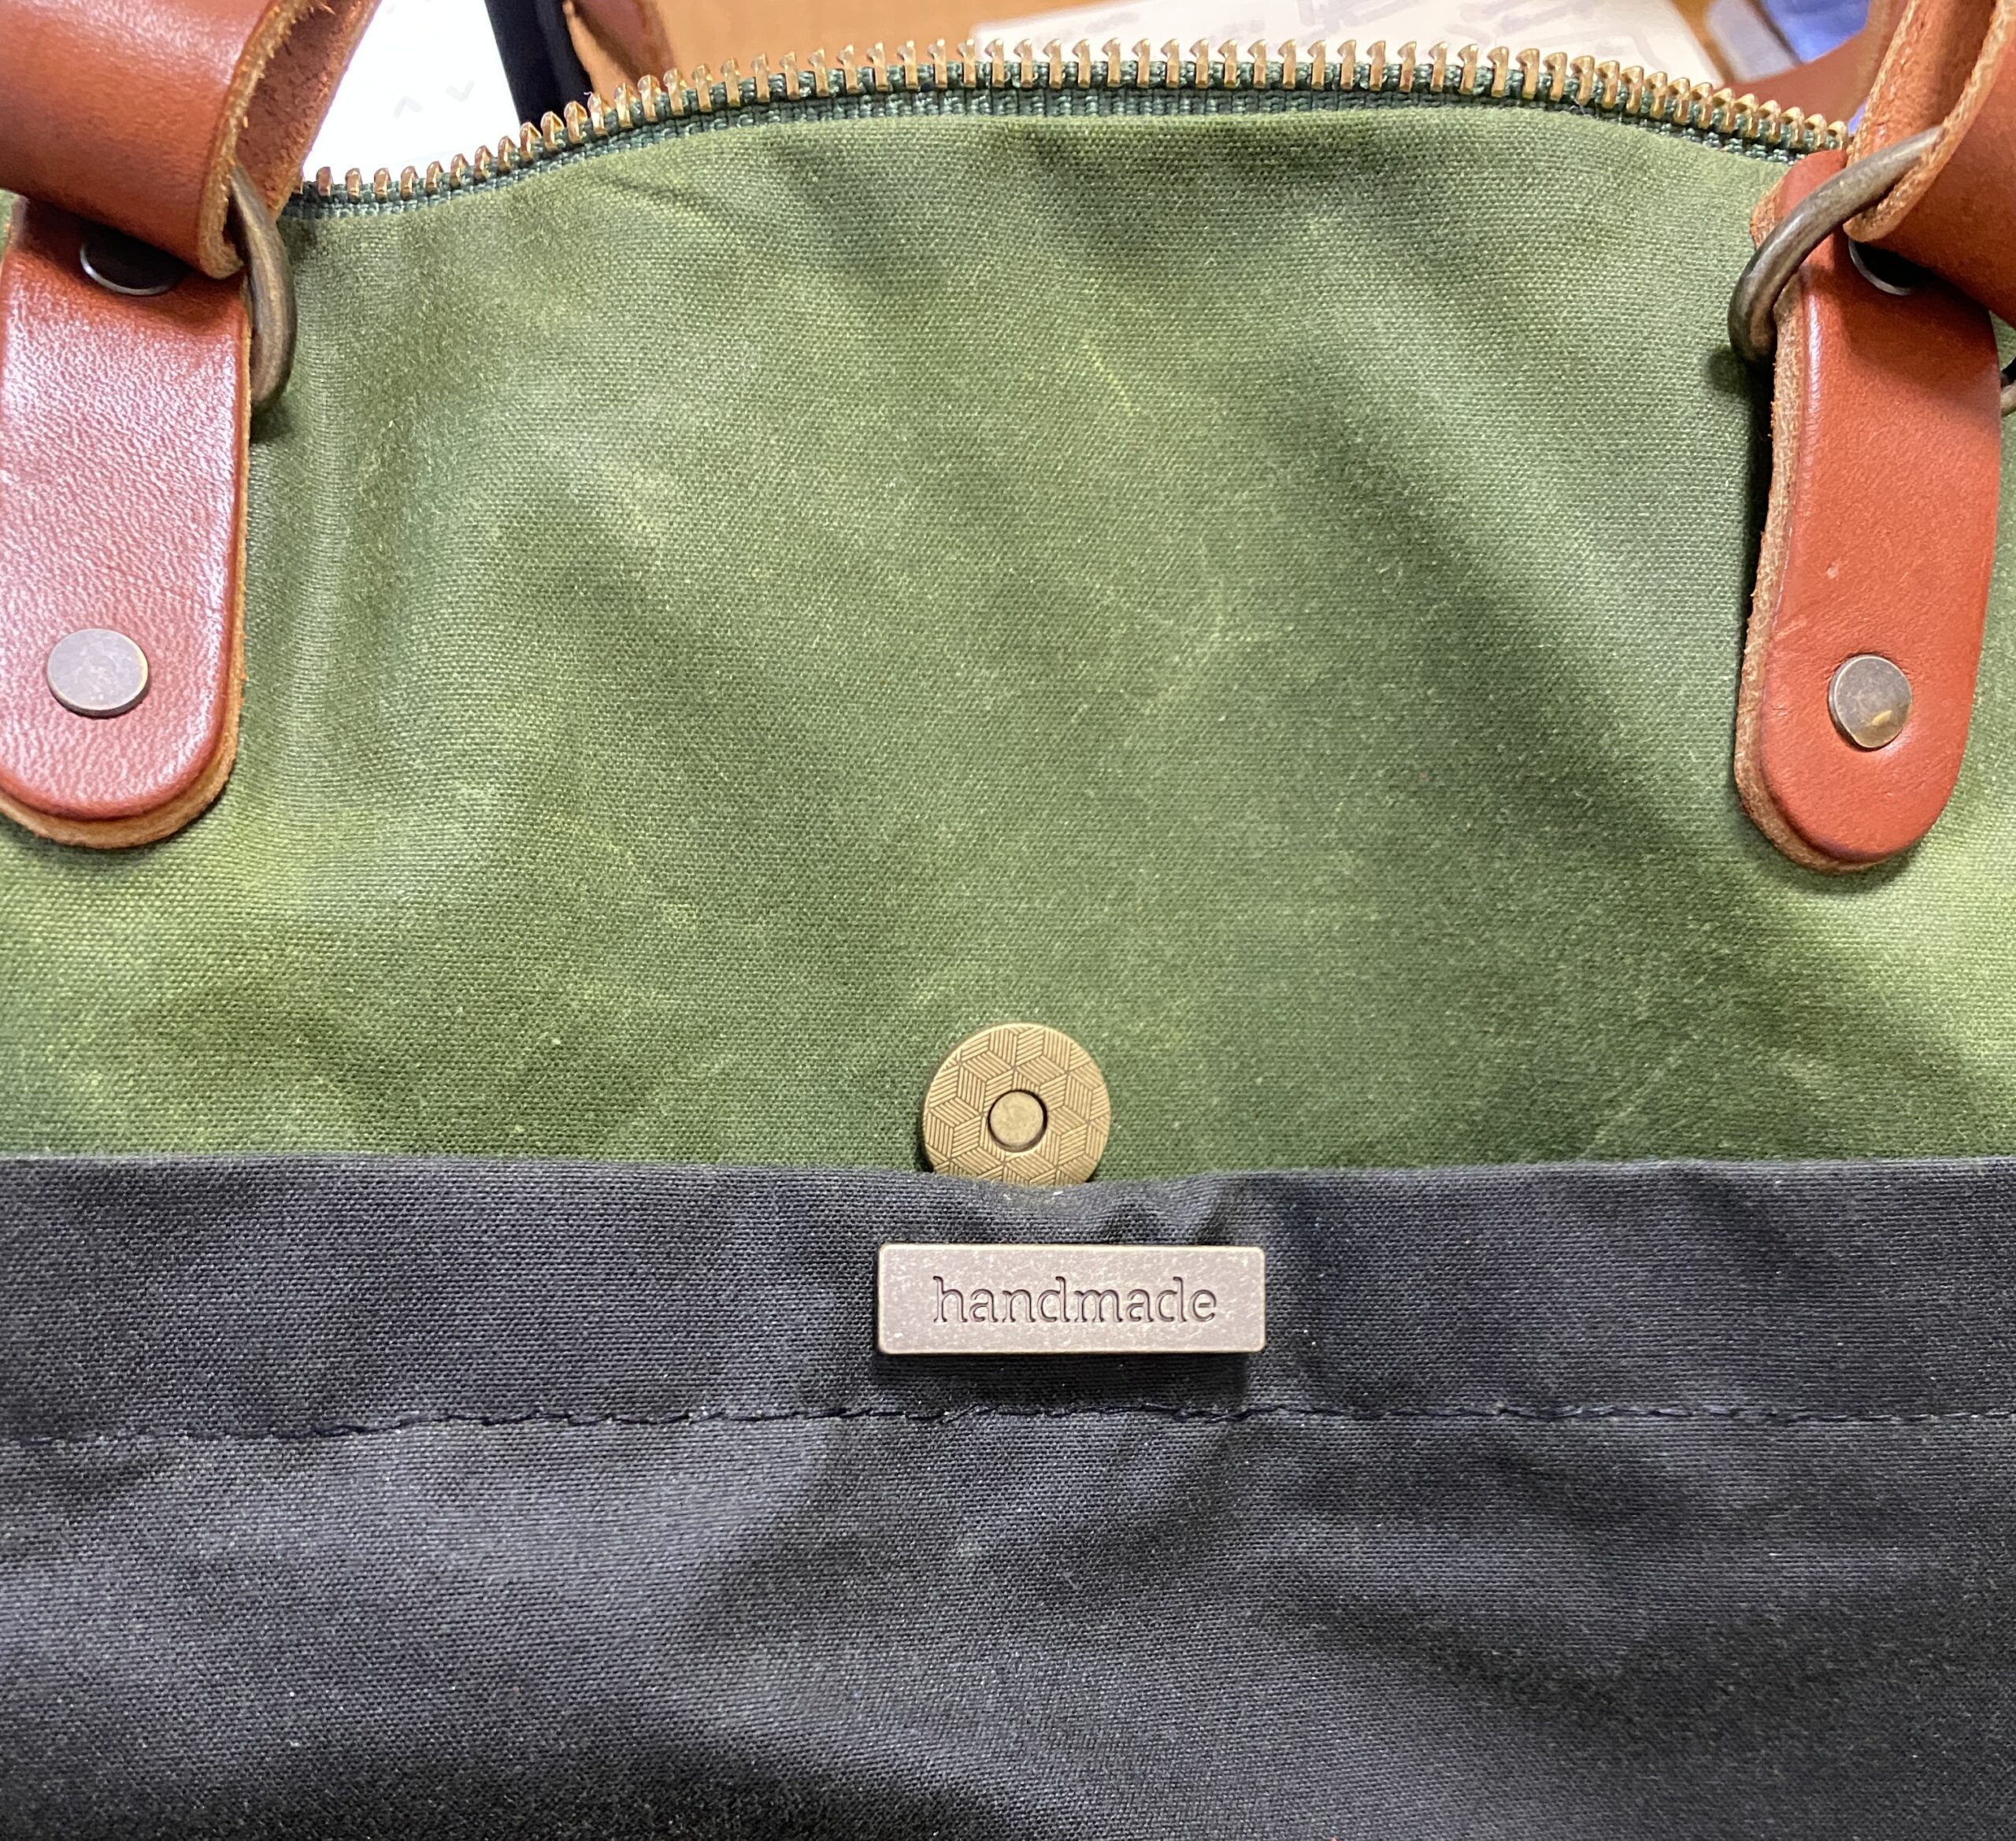
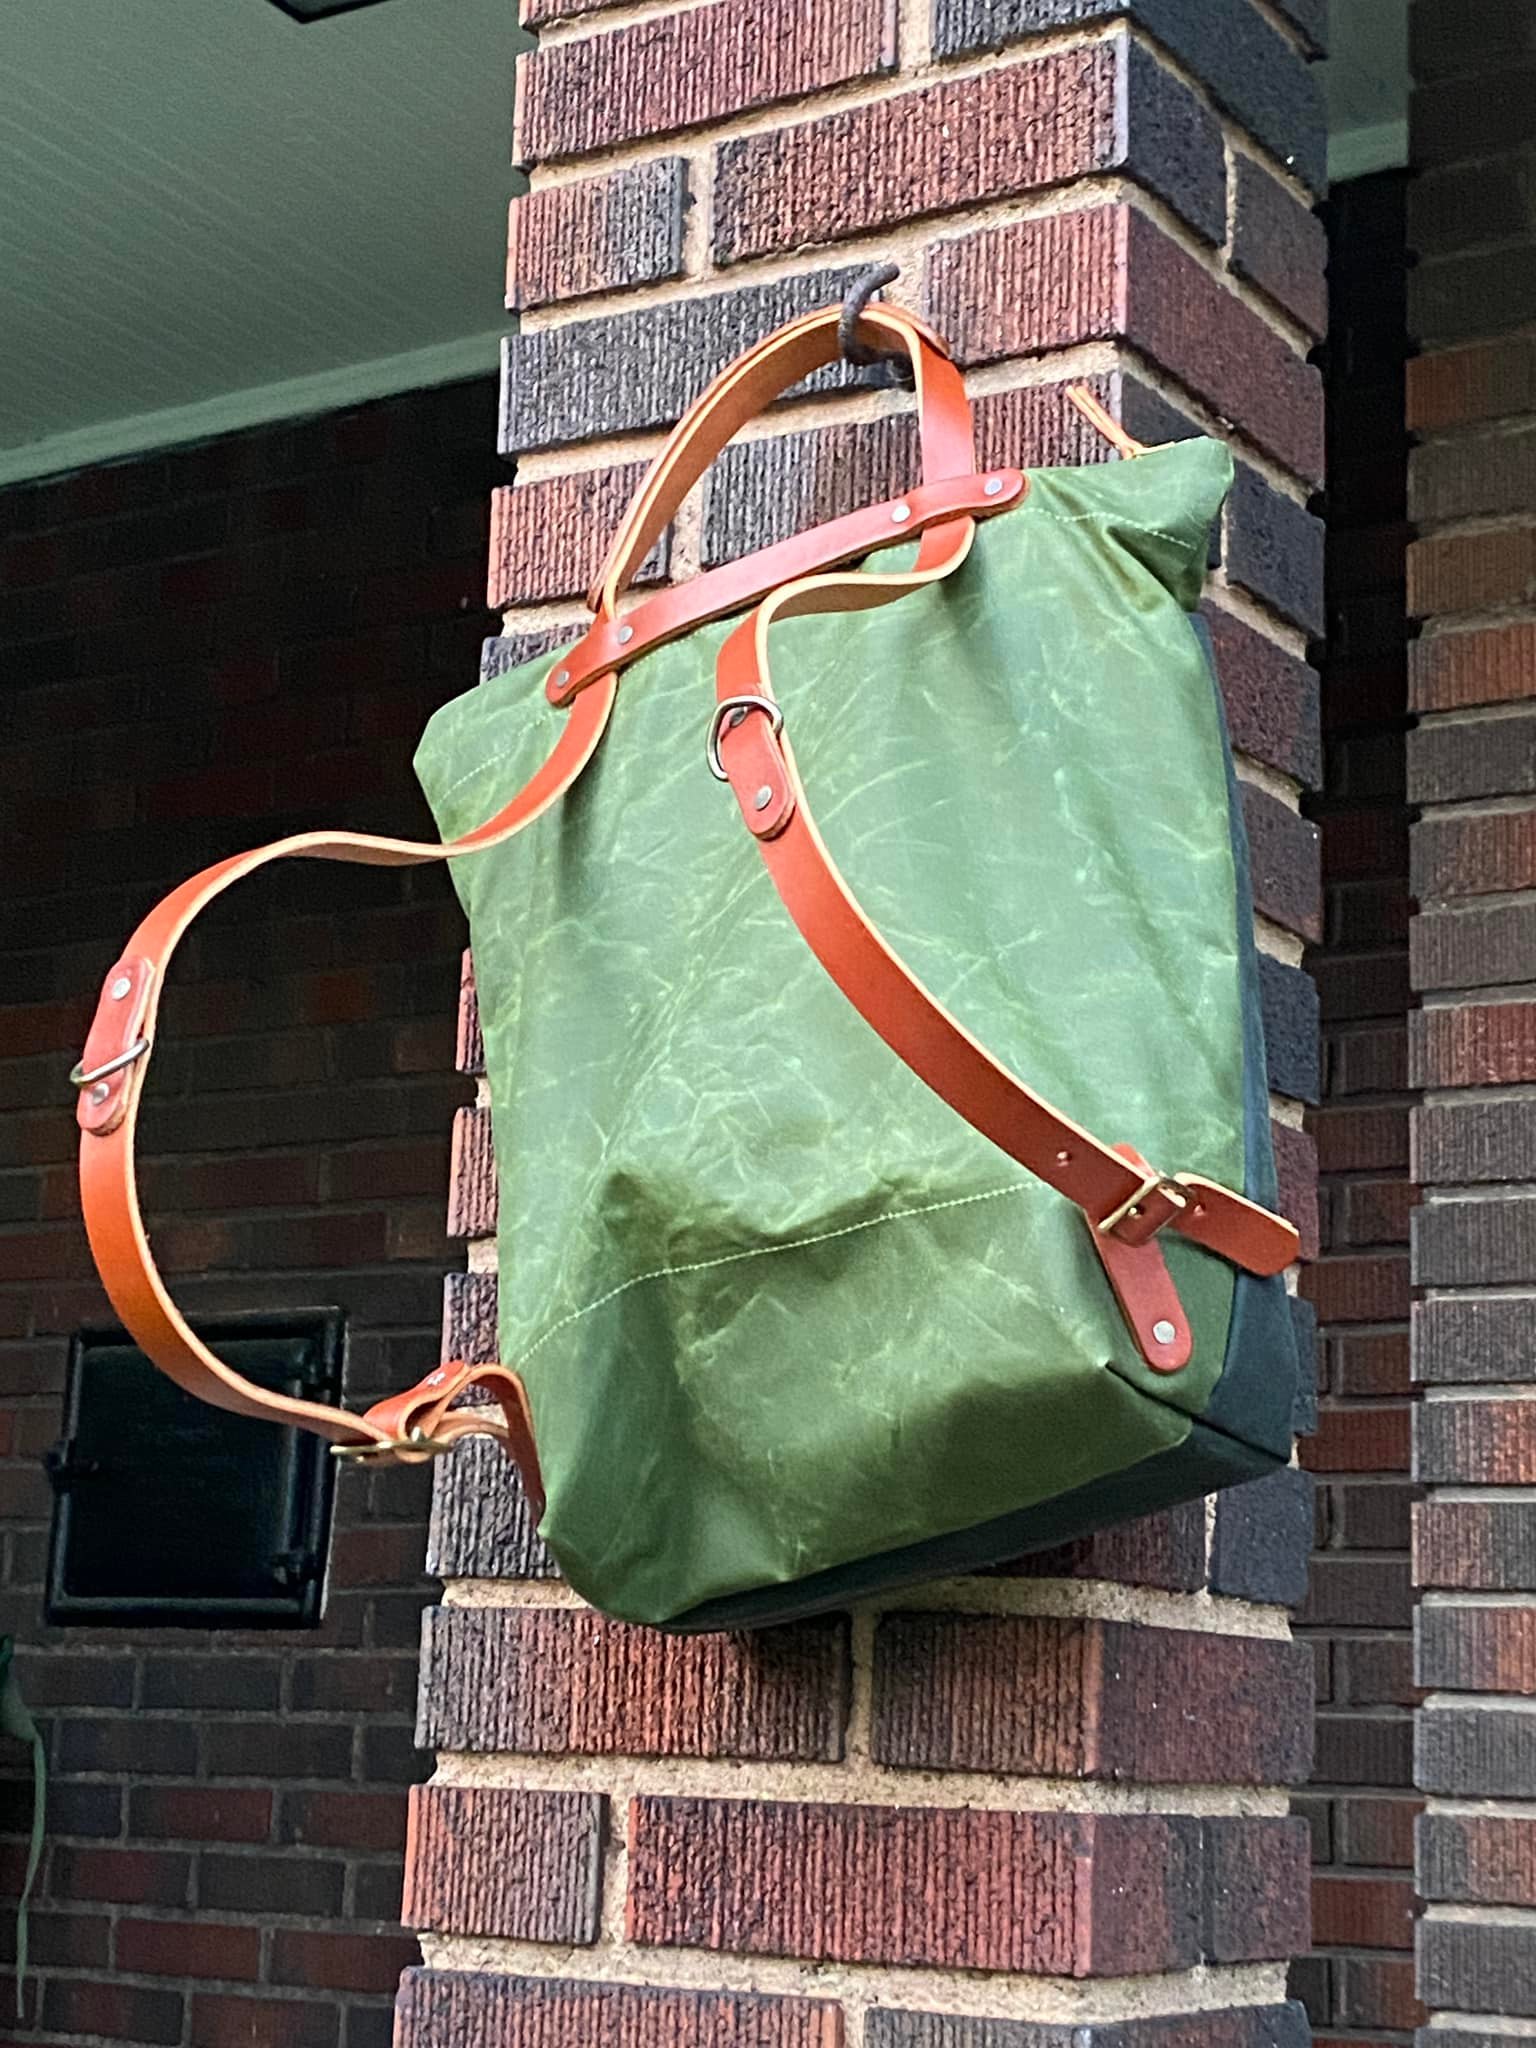 I chose Moss and Black for the colors of the bag and here’s where the Maywood and I ended up: 💚.
I have never, ever, in my entire life, loved a bag the way that I love this bag!!! The first Maywood photo at the top of the post is the front of the back. The photo with this paragraph is the presto-change-o backpack. Cool, huh?!
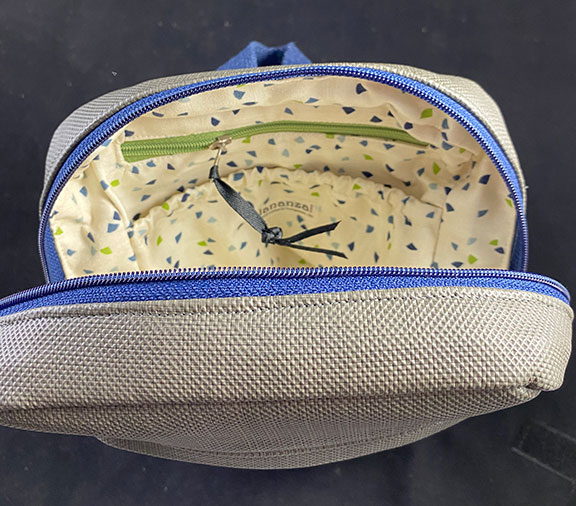
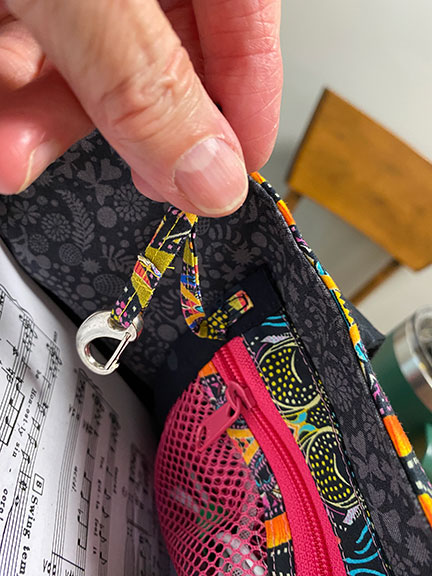
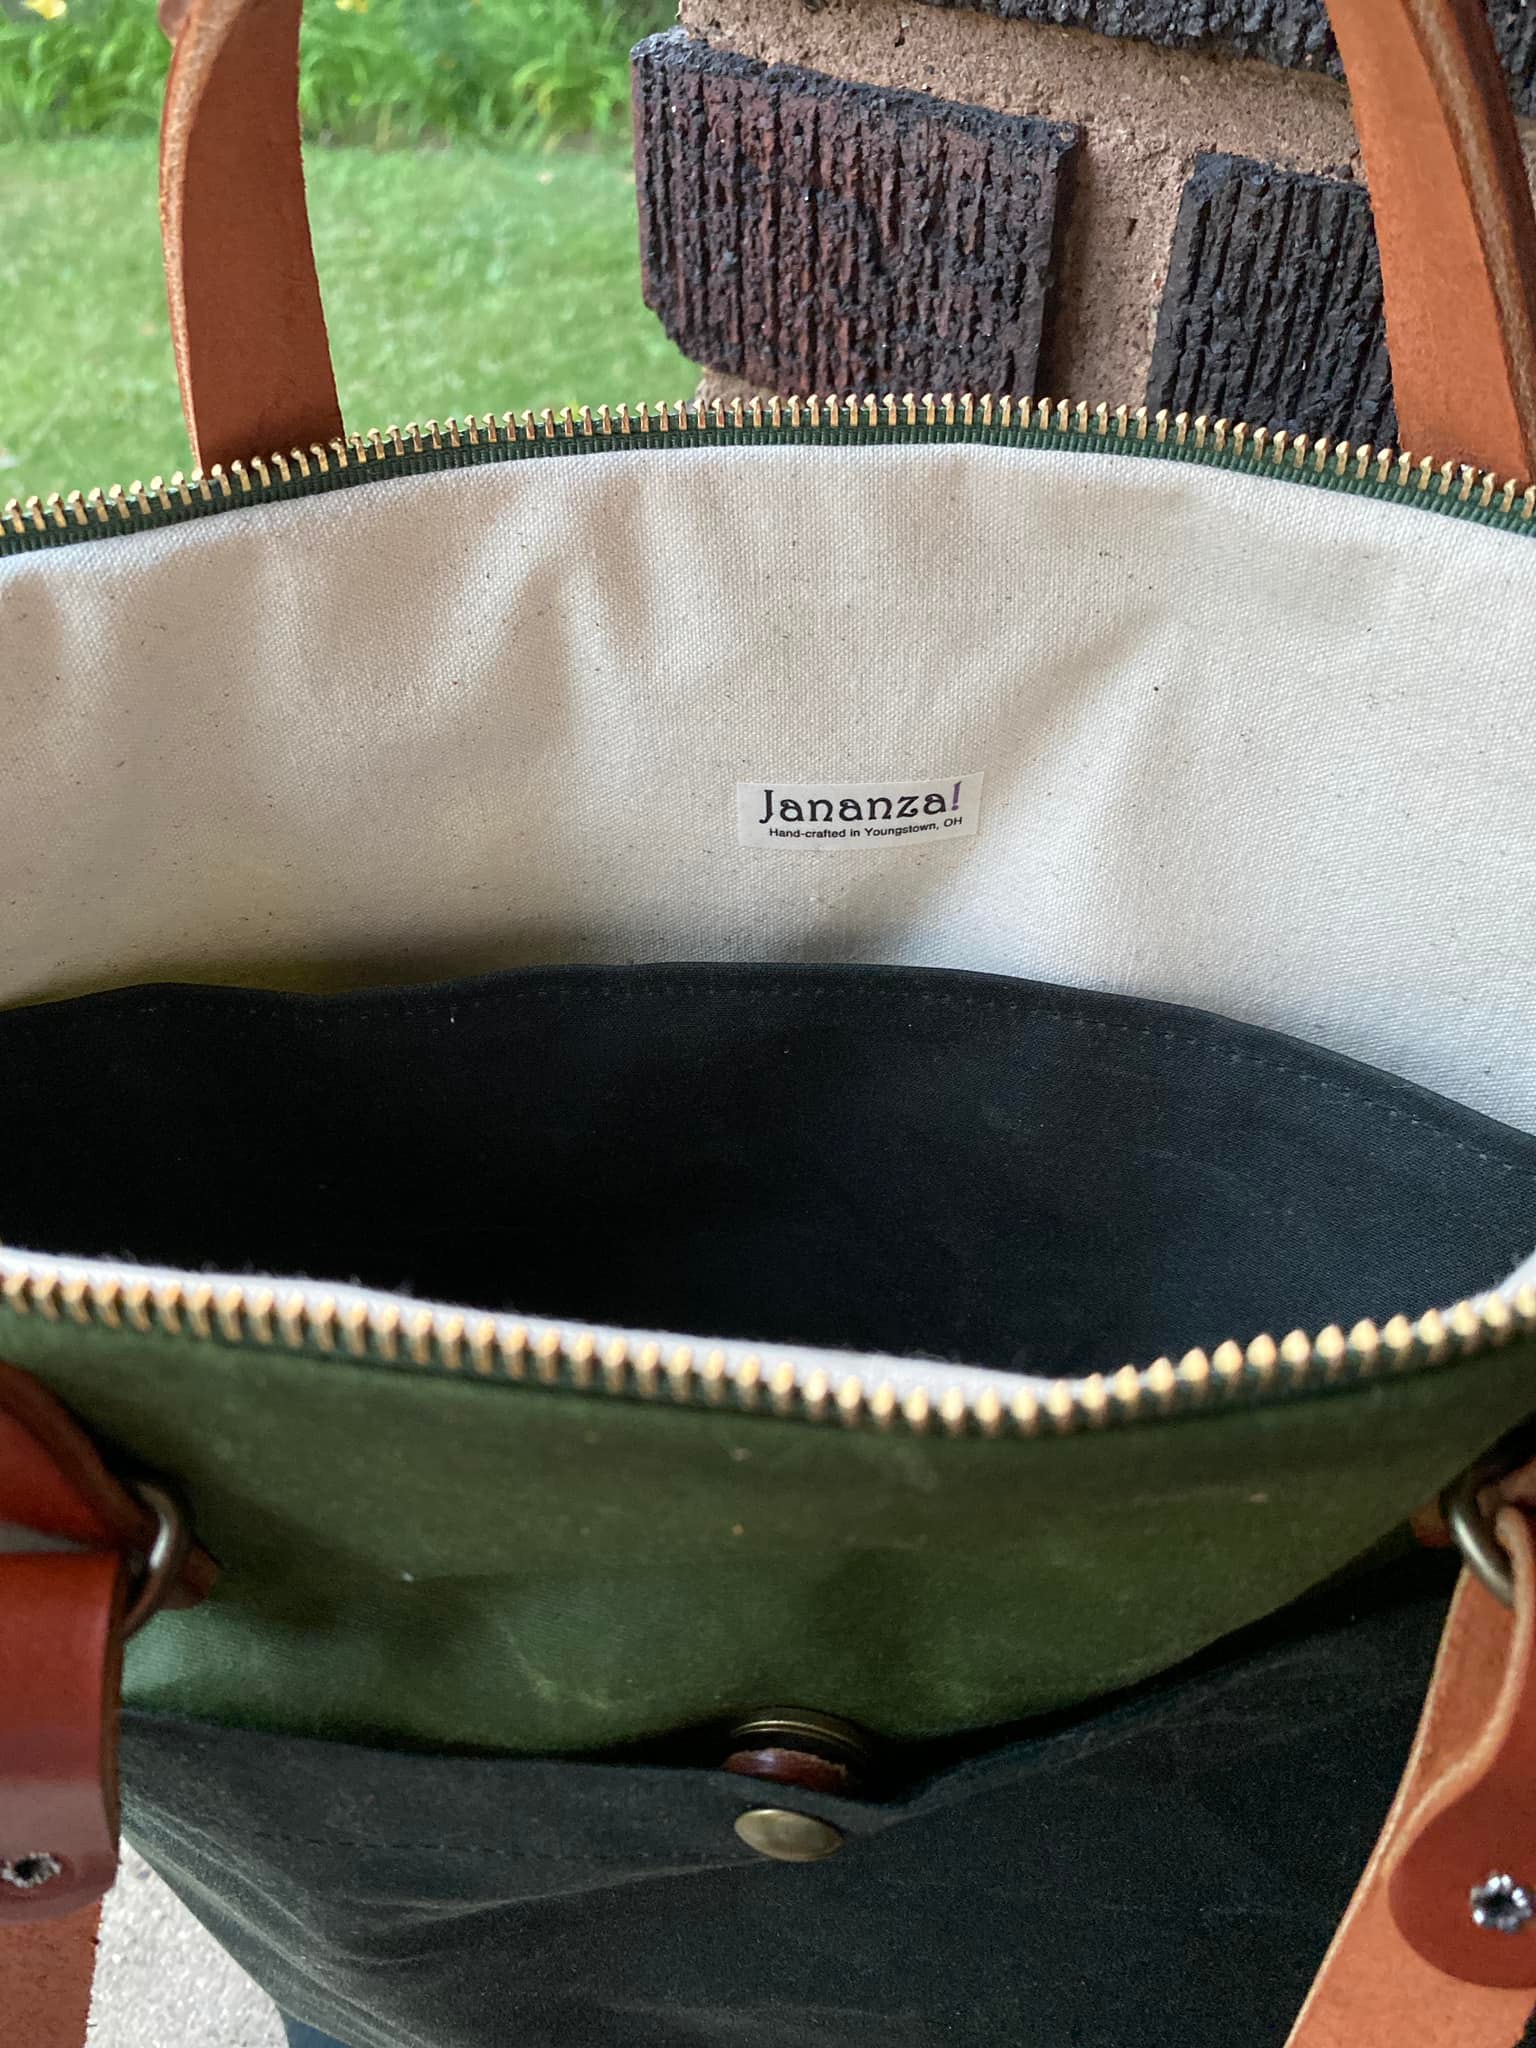 “Pockets?”, you ask. We’ve got pockets! The front of the bag has a slip pocket that spans the exterior (the black rectangle in the first photo). That pocket has a magnetic snap that holds it closed. And the interior has another slip pocket that goes from the base of the bag to about two inches from the top, and from side to side.
 It easily carries everything this collaborative pianist schleps to work with her every day. For example: iPad holding all my music (currently about 1800 pieces of music, plus three musical theatre scores); my page turn pedal; special reading glasses enabling me to see the mid-range of the piano music stand; my iPhone; sometimes my MacBook Air; sometimes a scarf or jacket; Apple Pencil and case; pencil and pen and highlighter; bottle of water; N95 mask; and small crossbody bag holding my ID, credit card, Kleenex pack, proof of vaccination. And it all fits easily into the bag and isn’t outrageously heavy!
Today I took carried it to a voice lesson I was playing with my favorite voice professor/neighbor/friend who had just returned from several weeks of vacation. When I walked into her studio after she had warmed-up the student, she stopped what she was doing to look at the bag, sling it over her shoulder, and ask me if I’d make one for her. 😂🤣 That’s how good this sweet bag is.
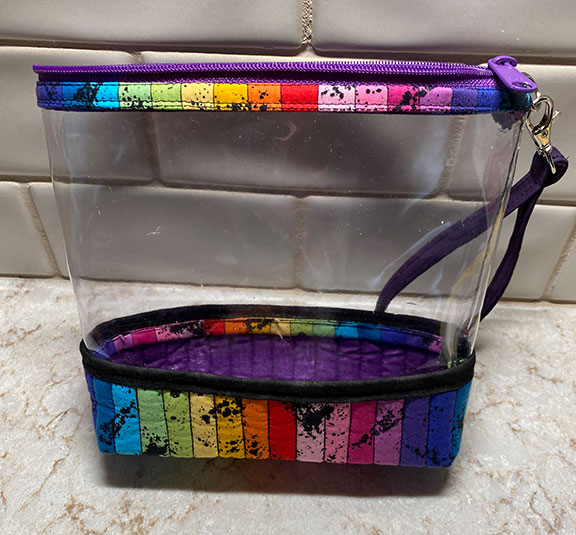
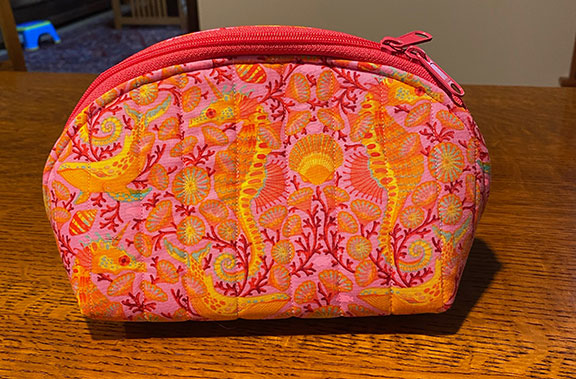
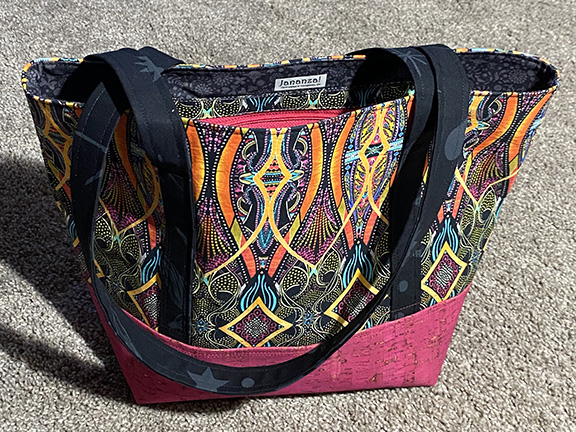
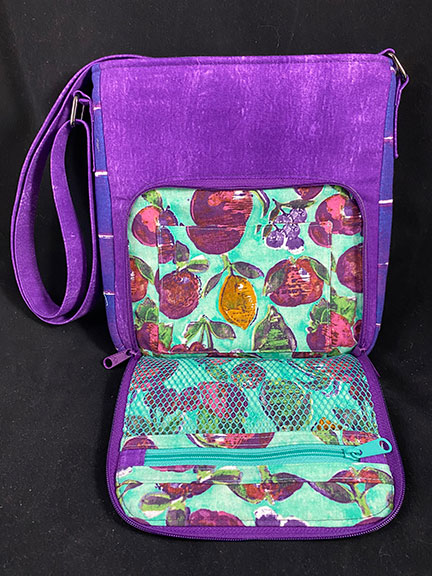
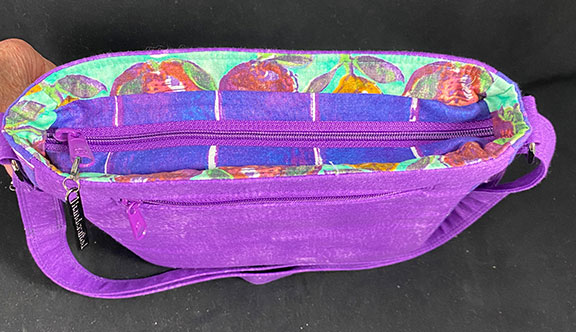
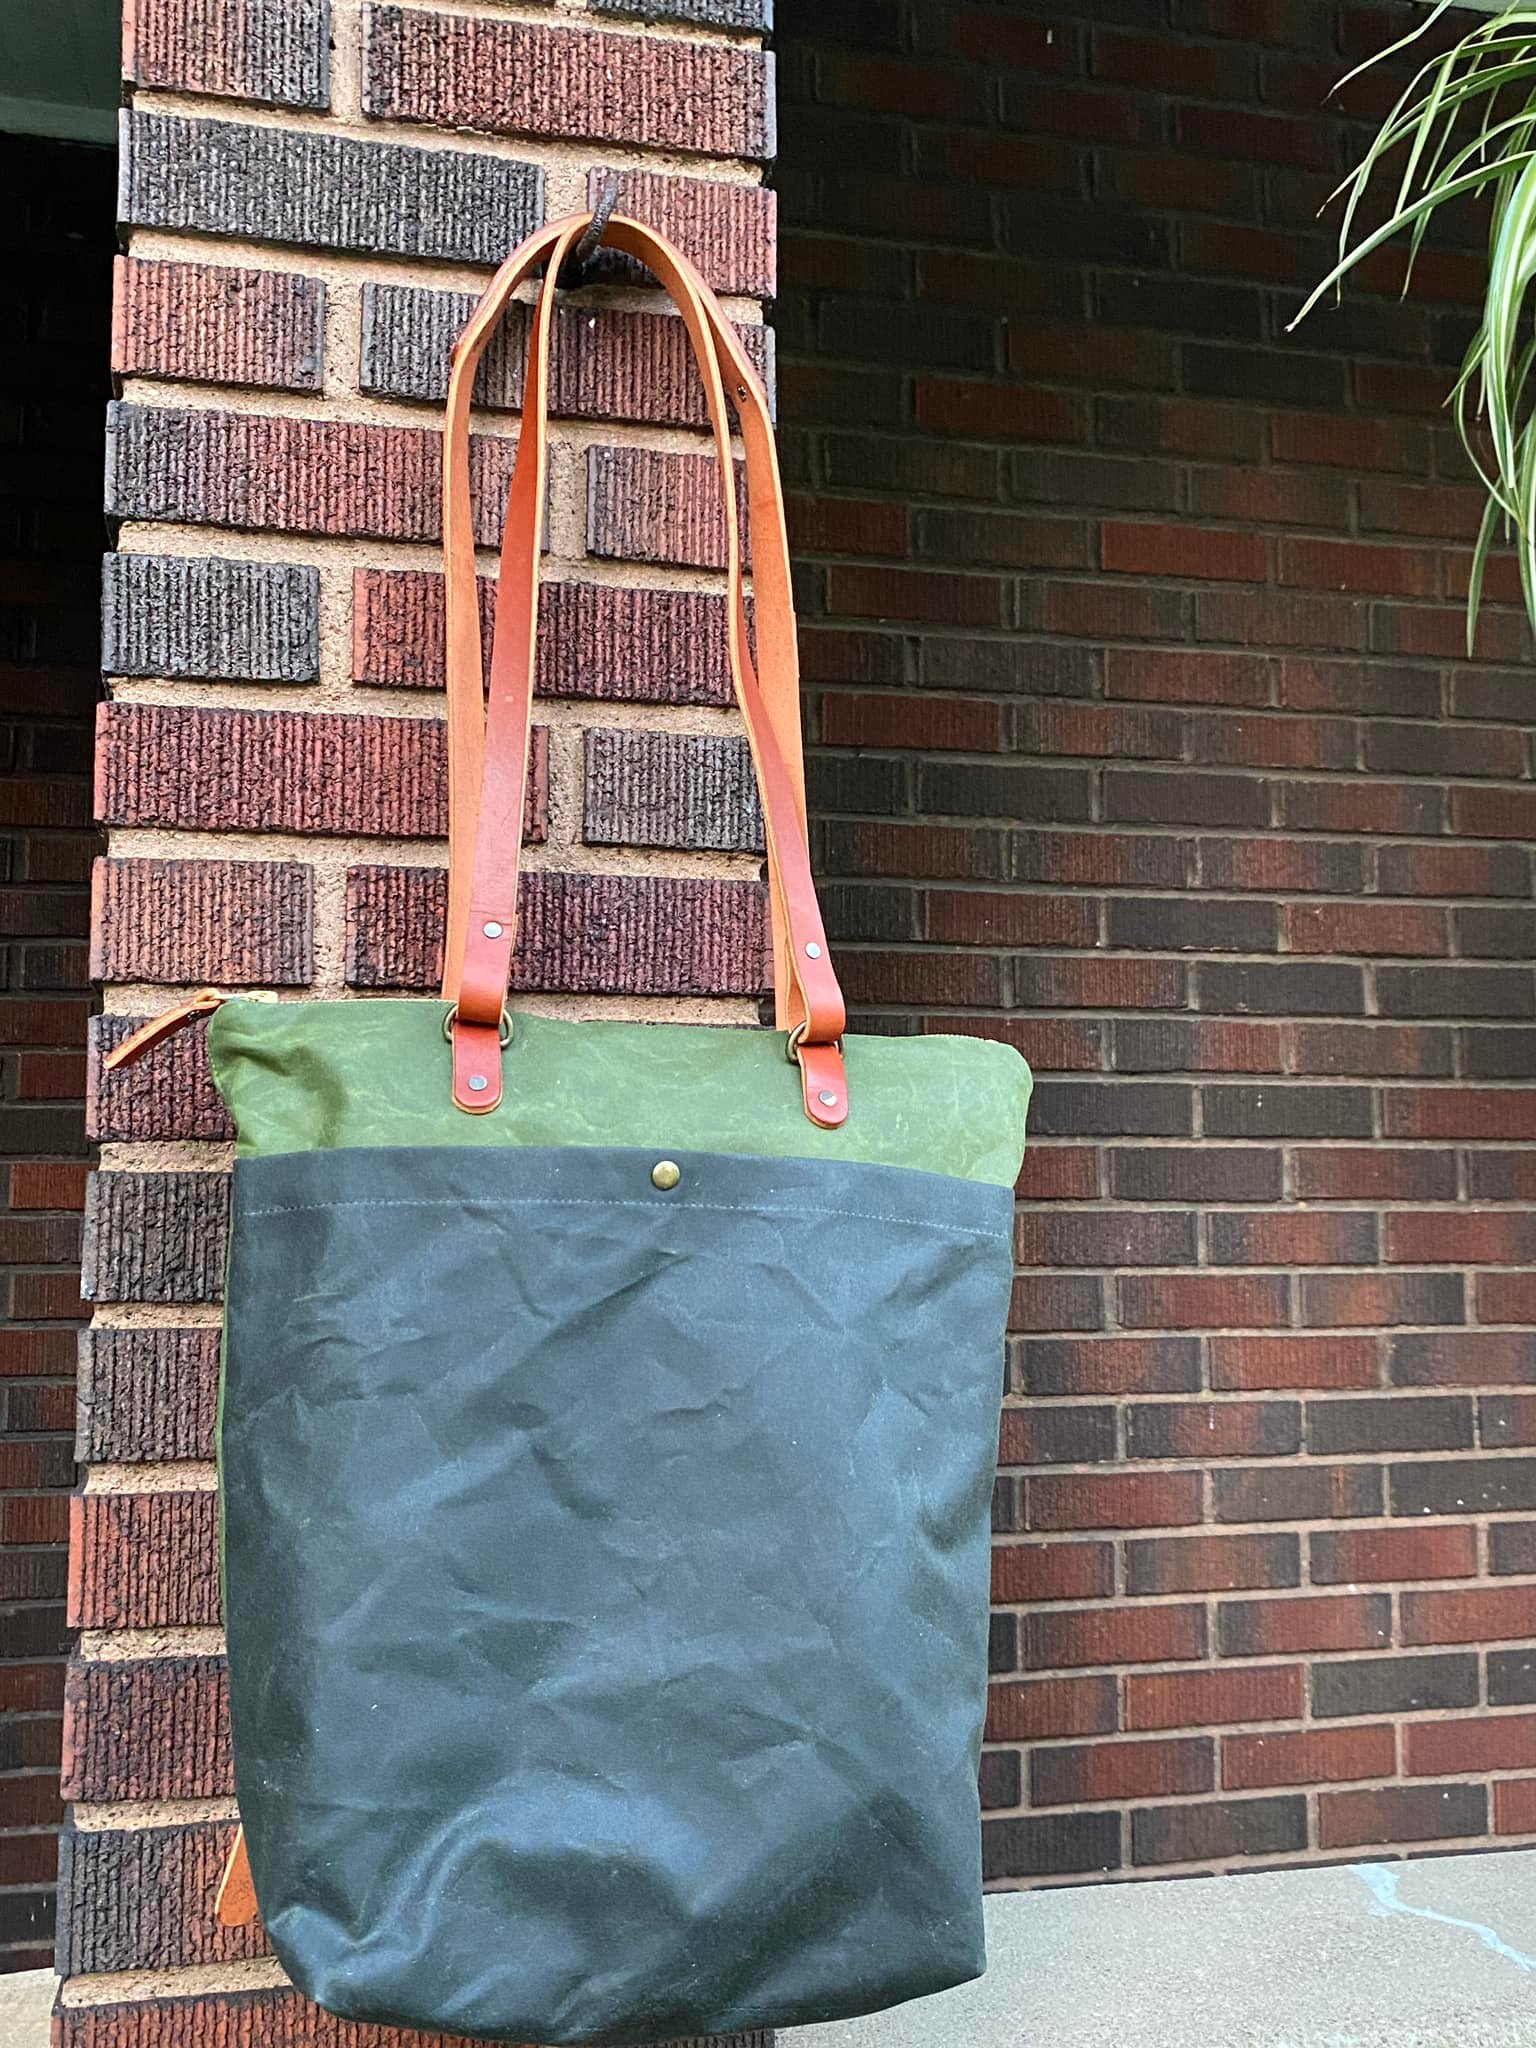
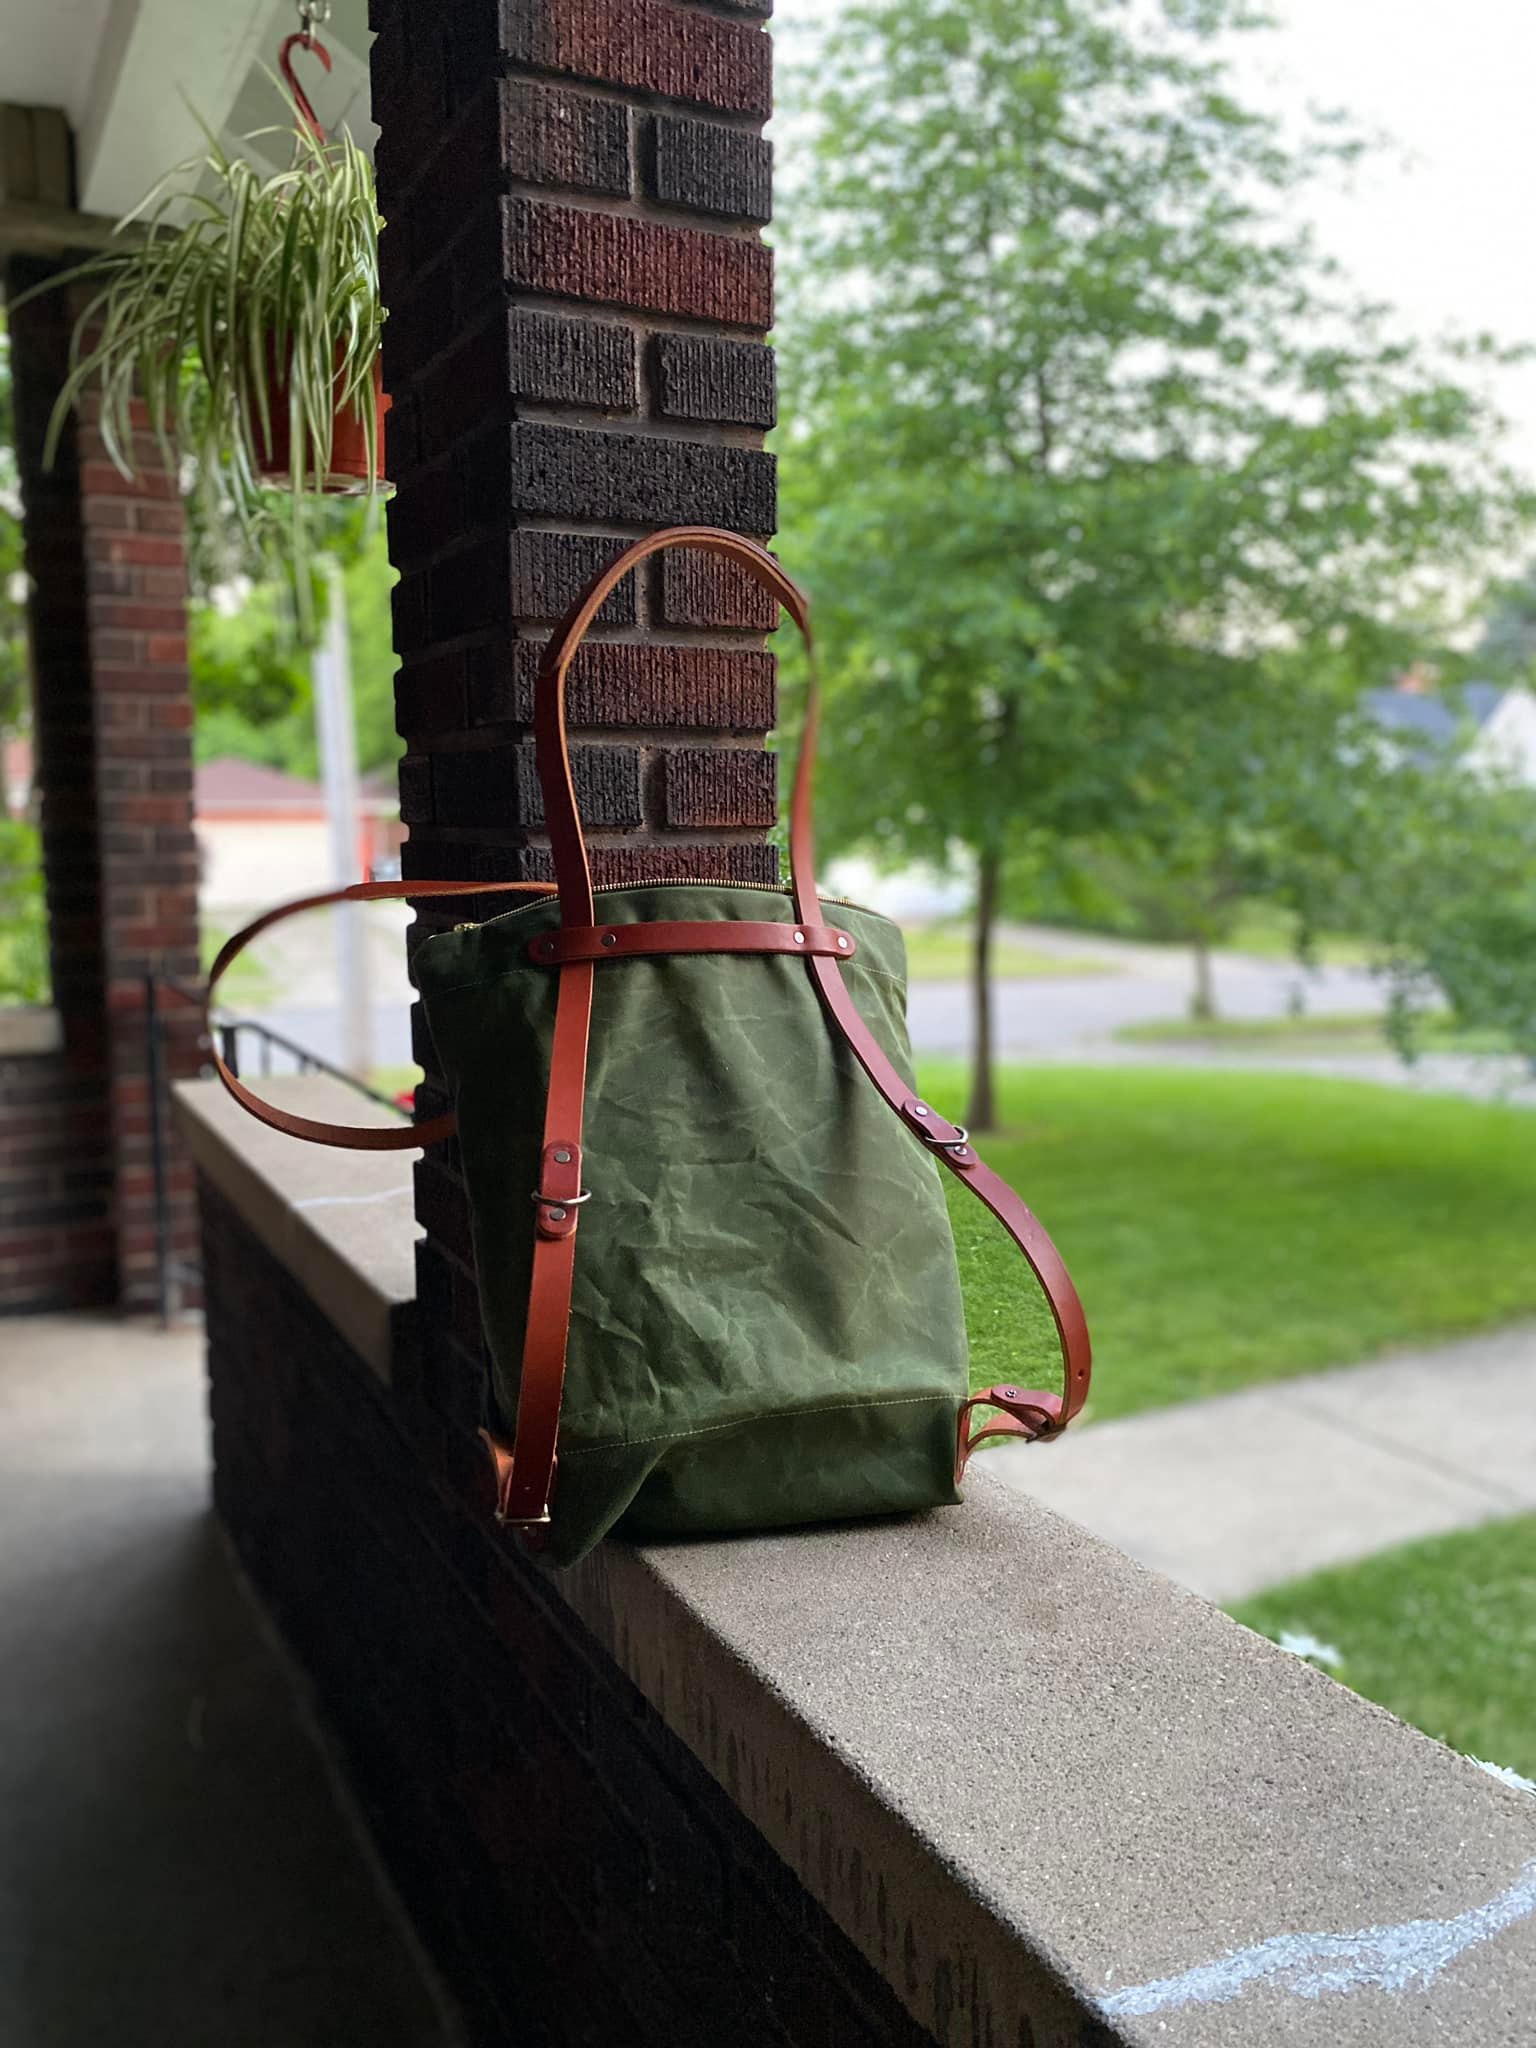
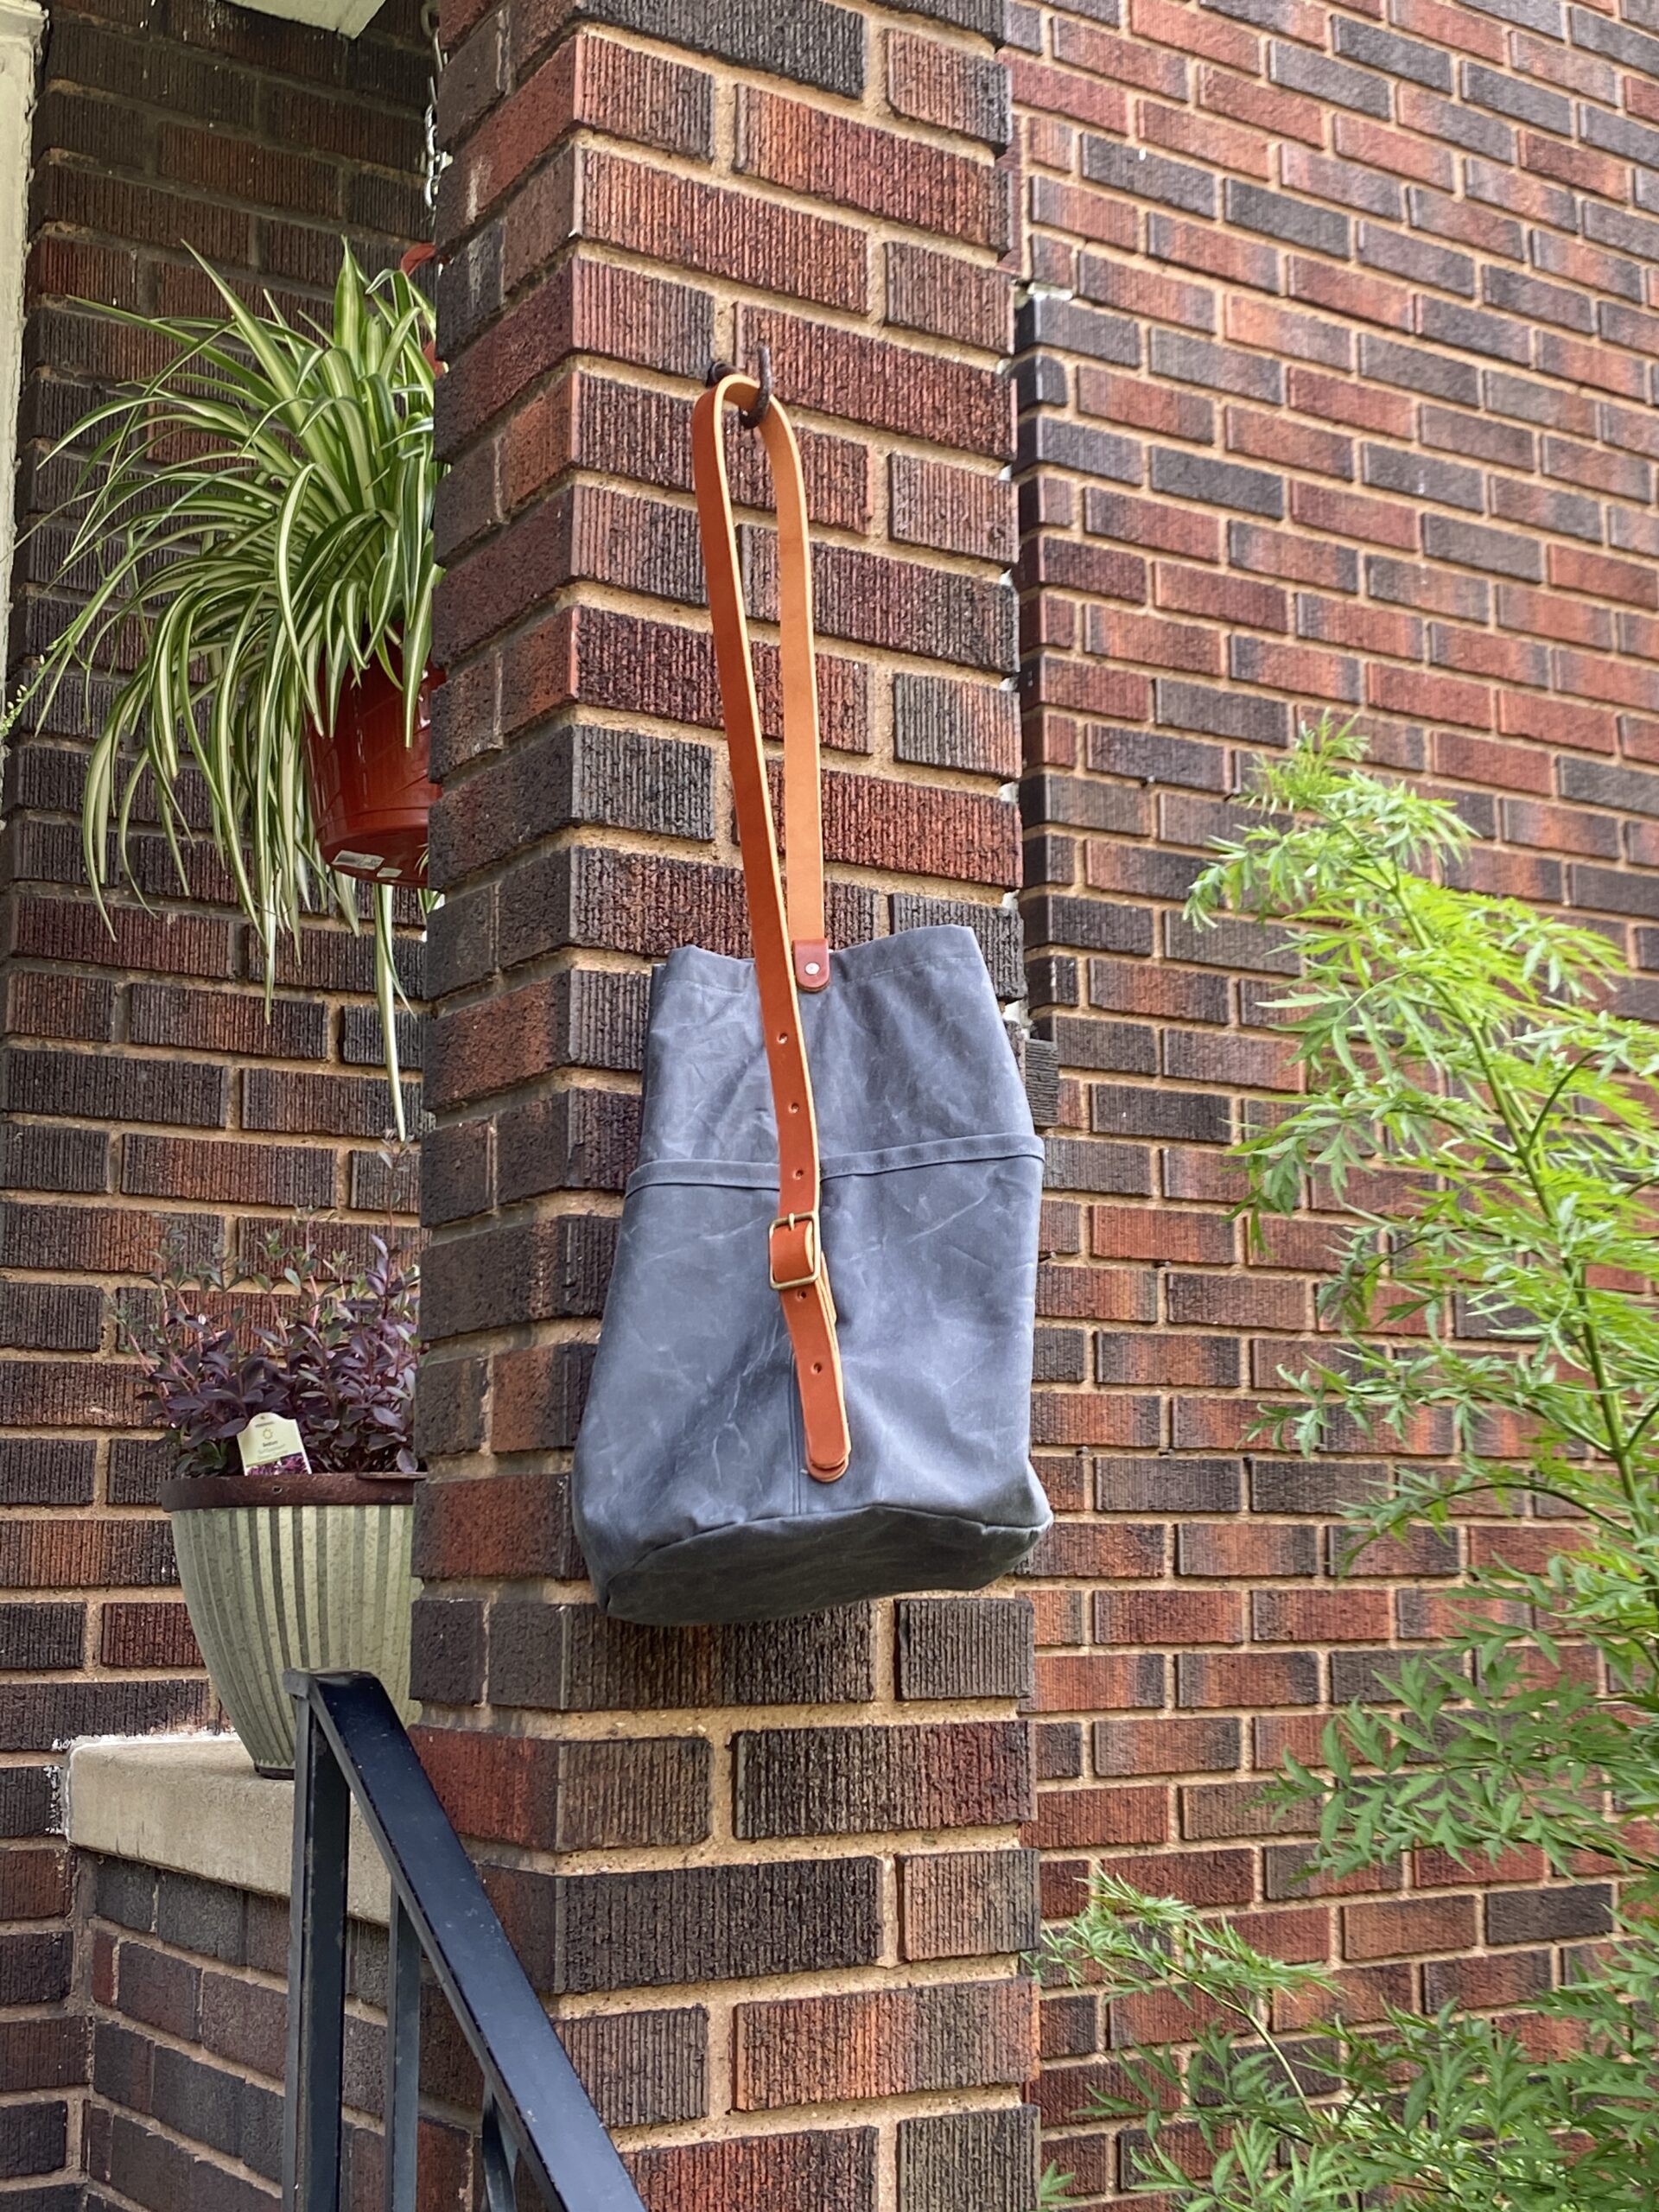 So that’s two of the bags in the Intermediate Bag Making class. The third is the Naito Bucket Bag. I finished it the day before yesterday, quickly took photos, and posted it to a couple of social media sites. But I haven’t carried it. But I sense it may become second only to the Maywood.
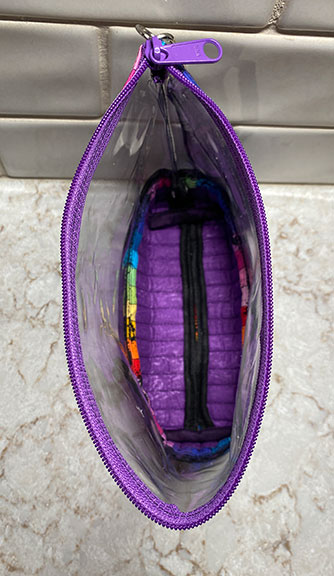
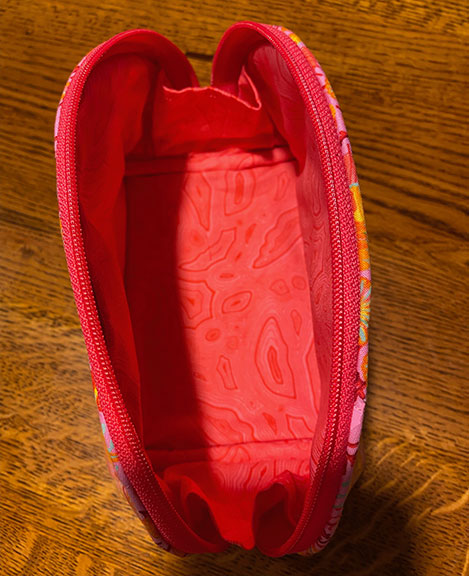
The color of the exterior waxed canvas is gray. The interior is a natural canvas. I love using light colored linings—you can find your contents much more easily with a light-colored lining. 👍
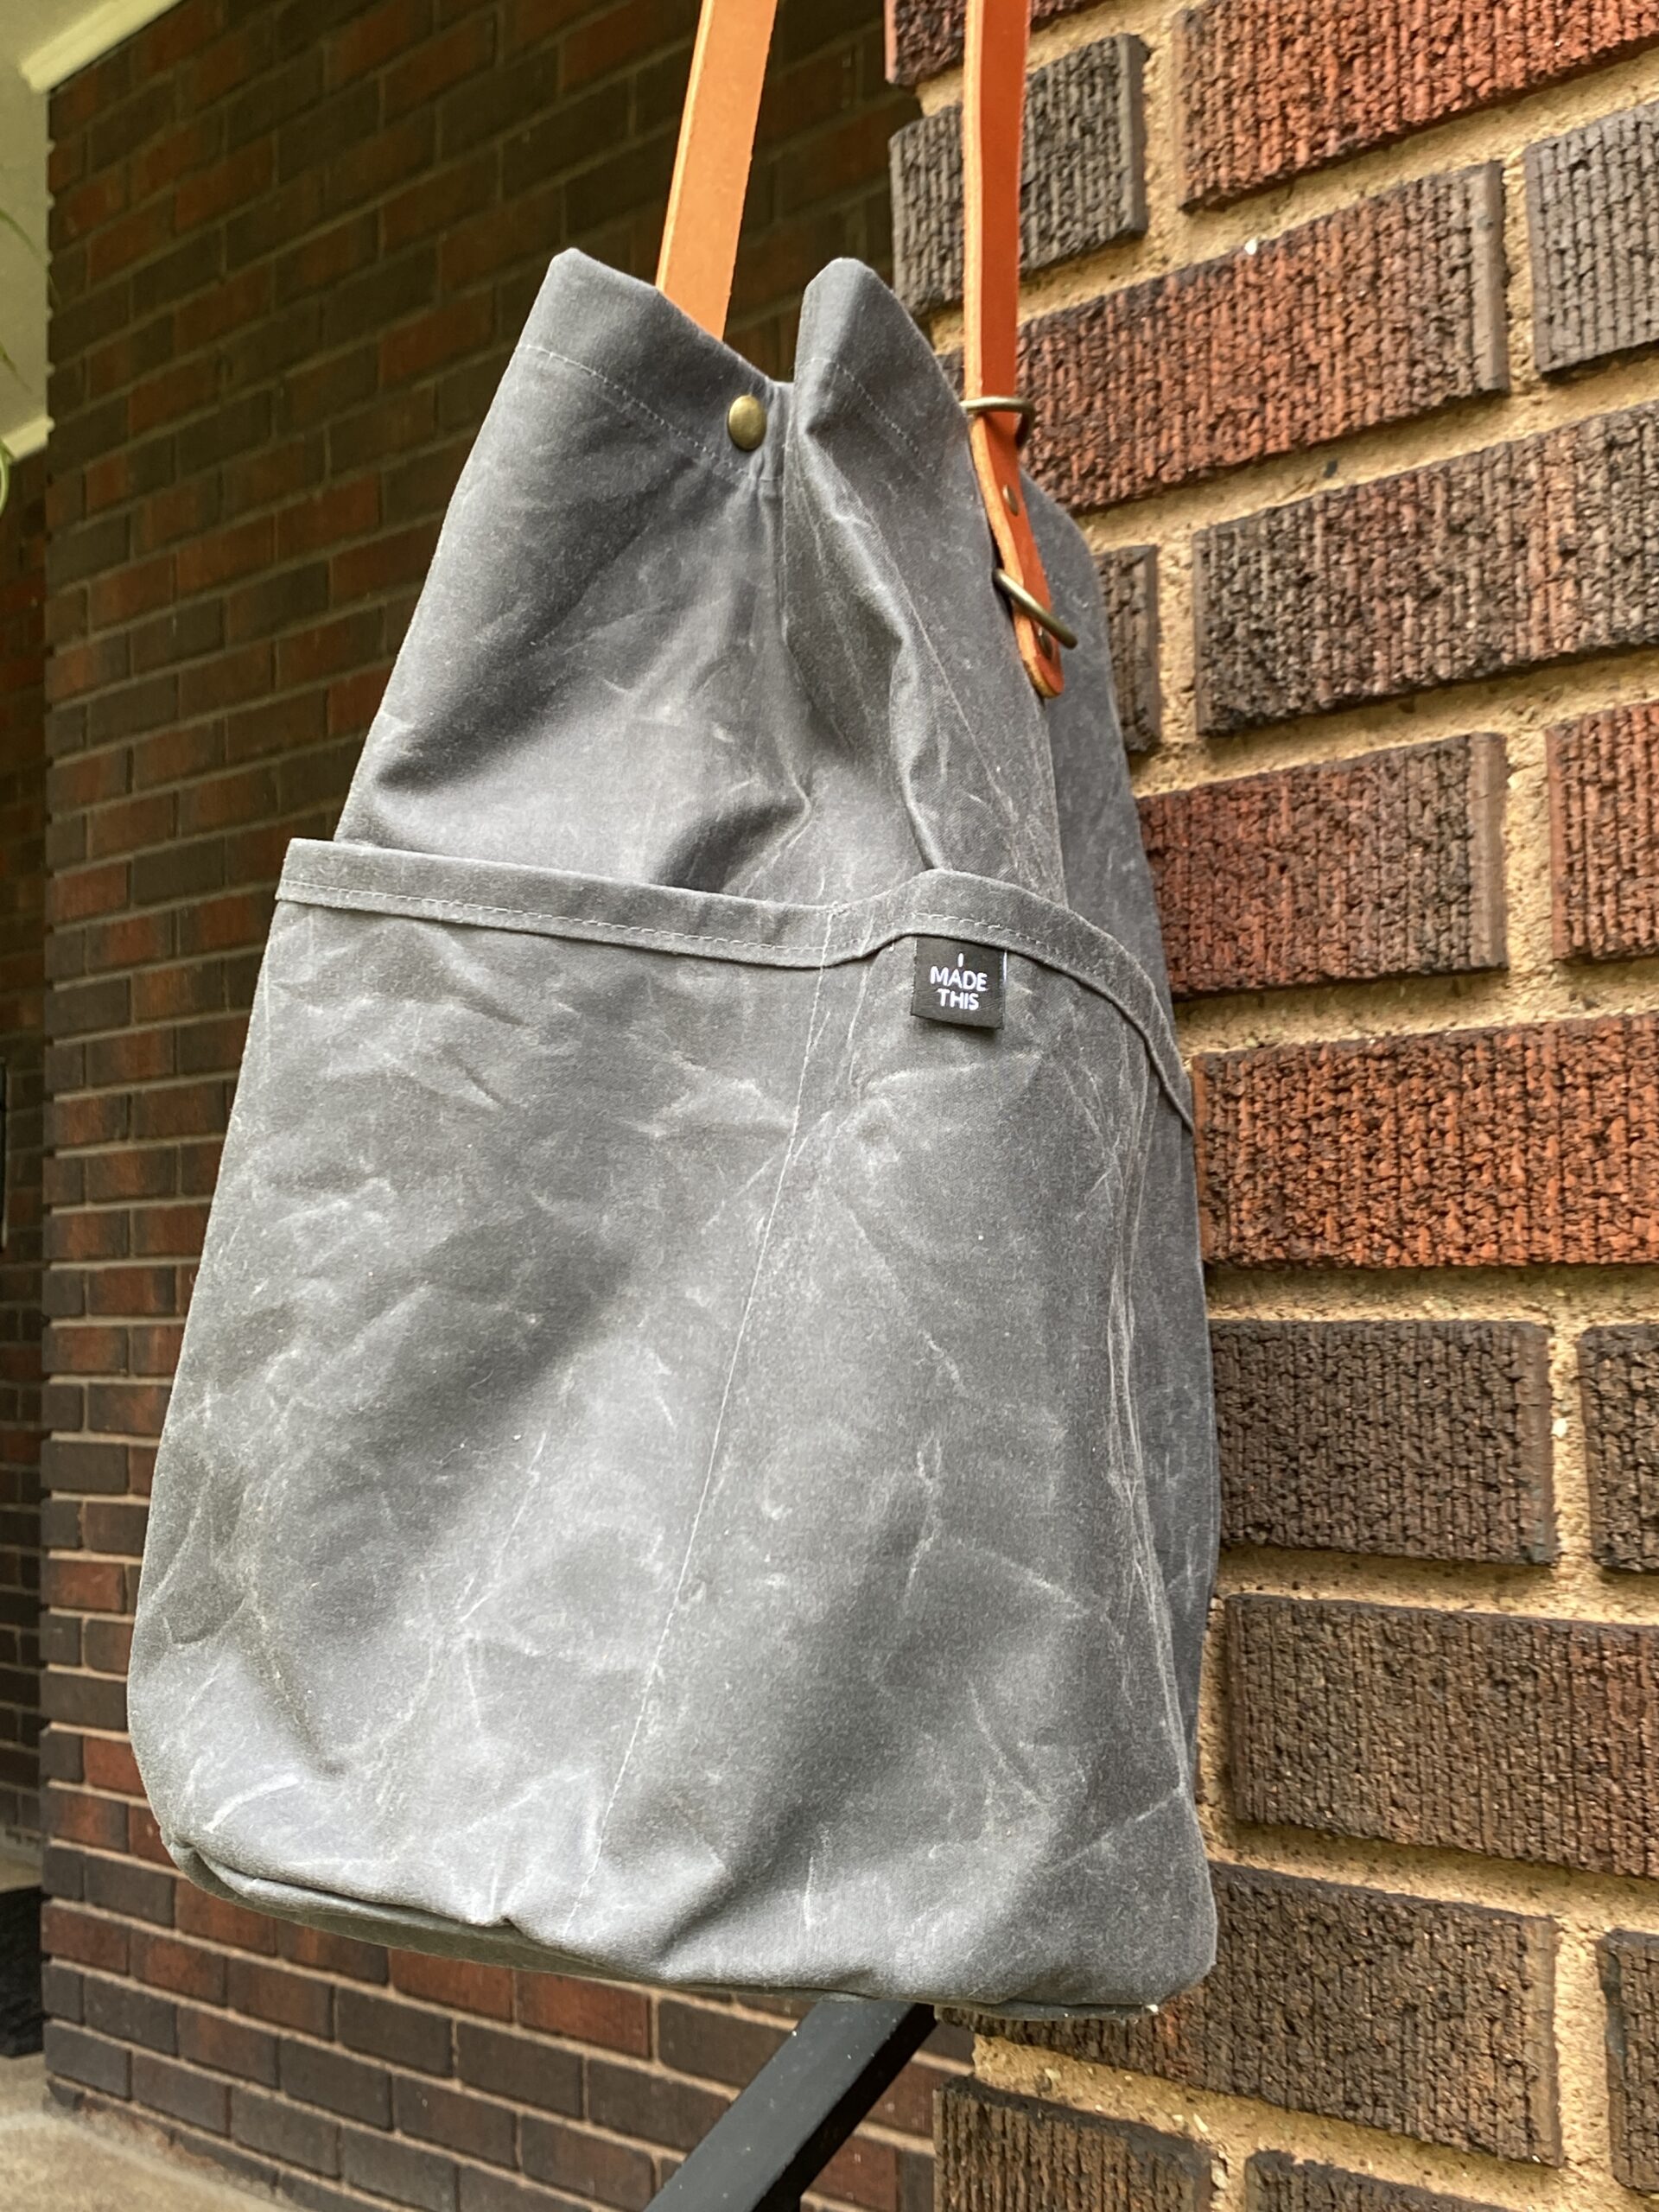 One of the best features of the construction of this bag is one of the great tricks of sewing. That’s knowing how to sew a curved edge to a straight edge. Honestly, I think this is the easiest such maneuver I’ve ever done! And I did it twice, perfectly. The bucket bottom of the exterior and the bucket bottom of the lining both require this trick. I didn’t cry. I didn’t curse. I didn’t even pull out my seam ripper! That success makes me want to construct more and more of these bags!
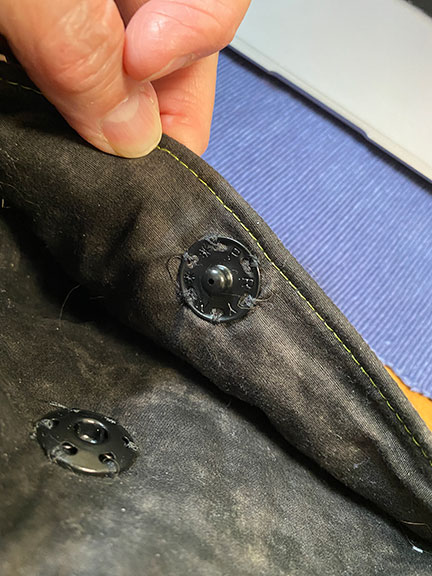
The other success on this bag arose out of failure in the Maywood. It was absolutely a user error, not an error in cutting at the studio or in design or documentation of the pattern.
 Both arose out of the magnetic snap rivets that secure the Maywood exterior slip pocket and the Naito top hem that enables the user to make that cool fold in the top of the bag when you pull up the strap.
There’s an “innie” and an “outie” anvil that correspond to the outie and innie snap heads. If you don’t use these anvils and your hard setting surface and your mallet when setting those snaps, they don’t set completely and the cap of the snap will fall off. Trust me, I know. It happened to me. I had to use my seam ripper and scratch my head to figure out how to cover up that error.
But I did figure it out. And you can bet I patted myself on the back. 😊
So if you want to increase your skill set and have fun while doing so, go check out Ellie Lum’s current class offerings, and see if there isn’t a bag that appeals to you. I think you’ll be happy you did.