Stretching My Brain

6101I like to learn. That may explain why I’m always trying new sewing tricks and blogging about them here. I had to accompany some students in their voice studio recital on Sunday. The ladies were to wear long gowns, i.e. it’s a dressy event. I wanted to be dressier than I was (black knit pants, black tank, and black knit jacket) for the last performance I accompanied, but I didn’t want to wear a gown. I wanted to make something, but was struggling to figure out what.

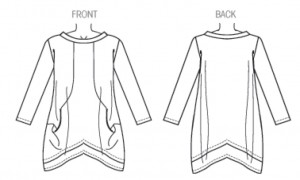
I have some personal concerns in my life right now, and many nights I lie awake from about 2:00 to 4:00 a.m. worrying about this issue. (I know there’s nothing I can do about it, but this grandma worries anyway!) As I lay awake a week-and-a-half ago, I knew what I wanted. I wanted another Butterick 6101, blogged here, only in black with long sleeves. (Look at the pattern illustration.) I love Katherine Tilton’s design esthetic, and I find her pieces fit me well and bring many compliments.

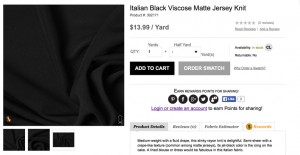
Mood Fabrics Italian viscoseAfter wearing the previous top I made, I find I don’t really understand the little mini pocket on the left side. It’s a funky little thing, and for a performance garment, I didn’t want funk. I wanted chic. I wanted symmetry. I had a wonderful piece of Italian viscose matte jersey knit. Wow.wow.wow. This fabric is fabulous! It’s similar to Exclusively Misook black knit, but lighter in weight. Or Eileen Fisher’s knit crepe, but softer. Really, I find myself just sitting and stroking it with my fingertips. It’s wonderful!

But, boy, did I have my thinking skills challenged with this set of pattern modifications! Logical thinking skills are important for a modification such as this, and you have to differentiate between looking in the mirror and looking at the pattern envelope. I pride myself on my logical thinking skills, but this project almost did me in!

B6101My mistake was not writing down exactly what I was going to do, and checking it twice. This illustration displays my goal. After much head-scratching this week, and after placing an order for and receiving another three yards of jersey from Mood Fabrics, I finally had it.

I cut the right side of the front on the fold. I cut the left side of the back on the fold. Oops. Then I cut the right side of the back on the fold. I didn’t have enough fabric (before the second order), so cut the front lower band and seamed it. I wanted the top to be almost dress length, so I cut the lower band 1.5″ longer than the pattern piece. I messed up my first back lower band cut, so recut—on the fold—after receiving the Mood Order. ReptileMeshThis piece was not angled so much, so the back hem should be fairly horizontal.

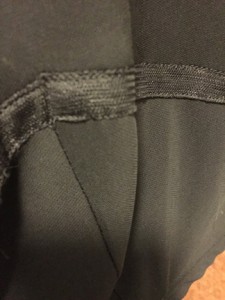
I bound the lower edge of the body in black nylon mesh before top-stitching that layer onto the bottom band. I inserted a half-inch strip in the neckline seam.

Here’s the pattern review:

Pattern Description: Loose fitting pullover tunics have collar, left side pocket detail, sleeve variations, hem band and top stitching. C: contrast right front, left front, left front and back pocket, armhole facing, hem band, left pocket and right inside pocket. D:contrast collar, right sleeve, left front, back pocket and right inside pocket.
Designed for lightweight woven and stable knit fabrics.
I made a modification of View C.

Pattern Sizing: Y(XSmall-Small-Medium), ZZ(Large-XLarge-XXLarge) This is my second time with this pattern. Both times I cut a Large.

Did it look like the photo/drawing on the pattern envelope once you were done sewing with it? I made many modifications, but the essence was still there.

Were the instructions easy to follow? Yes.

Drapey front showing the [right-front] pockets.

Drapey front showing the [right-front] pockets.

What did you particularly like or dislike about the pattern? It has a lovely drape. My only dislike is the mini pocket on the left side.

Fabric Used: To-die-for Italian viscose jersey from Mood. Run, do not walk, to grab some of this incredible jersey.

Pattern alterations or any design changes you made:
I am a professional pianist and wanted another concert black. Wanted it just above the knee to wear with leggings. Loved this top, but didn’t love the funky left side, so decided to make it from just the right side. Folded the front and back on the center line and cut the right sides on the fold. After some missteps, didn’t have enough fabric to cut the lower bands on the fold, so cut with CF/CB seams. I cut the bottom of the band about 1.5″ longer to get the finished length close to above-knee.

If I had cut the lower back band as I indicated above, I would have had an inverted V hem. I wanted a hem that was fairly straight across, so extended the center back seamline to be fairly even with the side seam. (I left the inverted V for the front bands.)

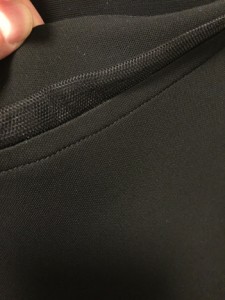
Binding at bottom of garment body. Stitched WST half-inch, then wrapped to back and topstitched.

Binding at bottom of garment body. Stitched WST half-inch, then wrapped to back and topstitched.

Instead of turning the bottom of the garment up, I bound the edges in my favorite soft nylon mesh from Gorgeous Fabrics. Then I topstitched that edge over the upper seam allowance of the lower bands.

Collar and neckline, sandwiched with mesh strip.

Collar and neckline, sandwiched with mesh strip.

I cut a 1-3/4″ strip of the mesh, with the stretch of the fabric, the same length as the collar. Then I seamed it, folded in half lengthwise, and sandwiched between the collar and the neck seam allowance. It just adds a little interest and ties the collar in with the bound edge above the lower bands.

Note that the pattern envelope says “lightweight woven and stable knit fabrics.” This jersey has 40-50% stretch — um, not stable. I should have cut it smaller, but the clock was ticking and I was more concerned with how to get my symmetry on. I ended up taking side/sleeve seams about 1-7/8″ wide. I had to keep fiddling with them to get the sleeves just right – tight enough to stay shoved up, but not so tight as to cut my circulation off!

Would you sew it again? Would you recommend it to others? Yes and Yes.

Conclusion: I completely love this pattern and am sure I will make it again. If I use a less stable knit again, I will cut a Medium rather than a Large. I ordered more fabric to make skinny pants/leggings to wear under the top, and it will become a staple for my collaborative pianist duties.


Of course there’s a funny anecdote to finish this off.
I got up early Sunday morning to do the double-needle topstitching on the skirt hem and sleeve hems. One of my spools of black thread was almost empty, so I decided to do the skirt hem first to see if I could get all the way through on the amount of thread on that hem. (I didn’t). Then I raced upstairs to finish practicing before the afternoon recital.

As I was sitting on the front row waiting for the students to file in, I noticed my left sleeve had a strange-looking edge. It didn’t have the lovely clean fold that the skirt hem had. I was trying to figure out what was wrong with the fabric when I realized I never sewed the hems on the sleeves!!!! I’m not a gal to leave my edges raw, and I was glad no-one would get close enough to realize what I had done.

And I laughed.

Working One’s Way Up the Priority List

IMG_0761I just wanted to sew today. I just wanted to sew up some fabric—any fabric—that had been resting comfortably in my stash. I have a Caribbean cruise to prepare for, and I had a really cool piece of mesh knit that I thought would be great.

I had read in Marcy Tilton’s blog about a double-layer mesh top she made using Vogue 8582. I love this pattern. I’ve made it several times, and find it very flattering to my body. I thought it would be fun to experiment with this new technique and see how the doubled mesh turned out.

I came, I saw, I conquered the technique, and now the top is going to travel to Amarillo.

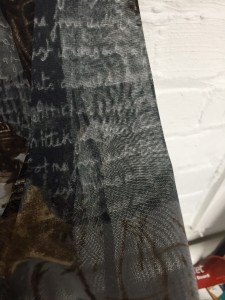
The sheer sleeve

The sheer sleeve

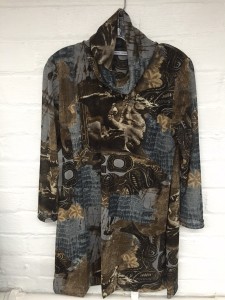
I made View C of Vogue 8582 in a fabric I purchased from MarcyTilton.com in July of 2014. Marcy called it “Roman Collage Mesh Knit” and I lusted over it for several months before splurging. If you read Marcy’s tutorial, I did everything as she said except I used the cowl neck rather than a neck band, so I sewed both shoulders, then inserted the collar, then set in the sleeves. I made two right sides, laying the fabric out with a crosswise fold, where I placed the hemline. I placed marks at the top and bottom of Center Front line and Center Back line and flipped the pattern piece after cutting out one side.

The body, with doubled mesh. No body parts displayed!

The body, with doubled mesh. No body parts displayed!

This is such an incredibly simple construction method, it really is fun. You have a beautifully constructed inner garment, as the seam allowances are inside the double layer. If you want to get rid of all seam allowances, you could do a Hong Kong finish on the sleeve seam allowance. And this pattern goes together quickly. Cutting to hemming can easily be done in an afternoon.

Vogue 8582

Such a cute print. Hem cut on the fold.

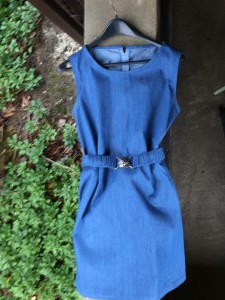
But when I put it on, the fit was just a tiny bit snug. Just enough snug that it will fit Leslie beautifully. And where steel blue isn’t my color (I discovered when I looked in the mirror!), it absolutely is her color, bringing out her gorgeous blue eyes.

I would style it with brown leggings and boots, or skinny jeans and Leslie’s uniform red cowboy boots. What’s not to like?

The up side for me is that I have one less piece of fabric in my stash. Yea!

A Bag to Meet All My Musical Needs

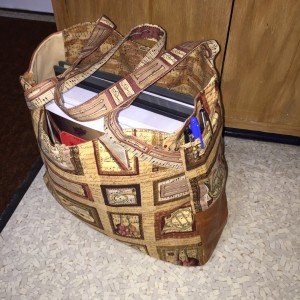
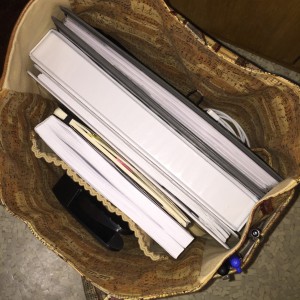
imageI’m currently working four different collaborative pianist jobs, which means several binders full of music, plus my iPad and Bluetooth page-turn pedal, and a calendar on which I attempt to keep my life organized.

Since the first day of class, I have been trying to figure out the best way to keep track of all this music and transport it back and forth from home to performance space. When I made Swoon Patterns’ Alice for my grand-high-schooler to use as a bookbag, I started thinking maybe Alice was the bag I needed to schlep all my music.

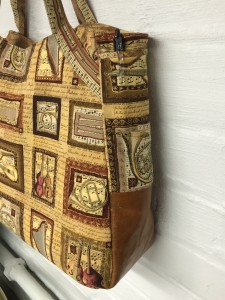
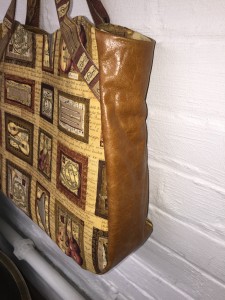
imageI have a drawer full of music-themed fabrics that I’ve been collecting for fifteen years. And I had a beautiful piece of leather (pigskin, maybe?) that I picked up at Tandy leather about four months ago. The lovely caramel shade of the leather went beautifully with the Symphony line of fabrics produced by Makower UK. So after some tests with bits of the leather, I set out to make Alice with several modifications to allow her to meet my needs.

imageFirst up were the side panels for the exterior. I didn’t quite enough to make two full side panels, so I thought I’d supplement one side panel with a piece of the exterior fabric to make it long enough. But even with interfacing, the thickness of one piece of cotton fabric was not equal to the leather. So I thought I’d use two pieces, and create a pocket for pens and pencils. I sewed one side seam all the way up before I realized I couldn’t have both those pieces of fabric full size—I needed to have the outer of the two pieces avoid the top seam. I cut about an inch off the outer piece and bound it with another piece of the same fabric.

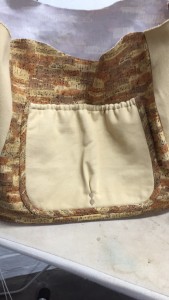
For the side panels on the lining, I wanted something a little heavier than the lining fabric, so I pulled some buttery tan twill out of my stash. This fabric was left over from a bedspread I made for my son and daughter-in-law’s house when they first moved to Tucson in 2000. I cut side panels out and interfaced them, then realized I didn’t love the shade of the twill. I took all the twill I had cut and lay it into a strong tea bath, ending up an hour later with a perfect shade to coordinate with the several Makower prints.

I did not use Alice’s pockets as designed by the brilliant Alicia Miller. Instead, I wanted a special pocket for my iPad and another for my page-turn pedal.

imageI thought the Patch Pocket would be fine for the pedal if it had a little volume to it. I didn’t want the pocket to sit flush with the side of the bag. So I placed the foldline of the pocket pattern piece a half inch from the fold, giving myself an extra inch in width, and cut two pieces. I fused interfacing to one piece and fusible fleece to the other. I stitched the two pieces, wrong sides together, along the top, pressed, turned, and topstitched about half-an-inch from the folded edge. Into this casing I inserted a piece of ¼” elastic, pulling it to take up the extra 1″ of fabric and have the size of the pocket approximate the original size of the pocket. Then I cut a bias strip of fabric 2.5″ wide and bound the raw edges of the pocket with about a ⅜” seam. Because of the challenges of turning the bias strip around the edges of the thickness of the twill and interfacing and fleece, I used Fabric-Tac glue to hold the binding in place while I topstitched the binding and stitched the pocket into place on the side. (The stitching on the pleat I had made was looking a little loose, so I stitched over it with two repetitions of a pointed oval that is included in my machine’s stitch library.)

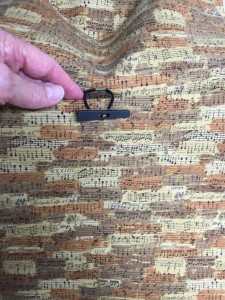
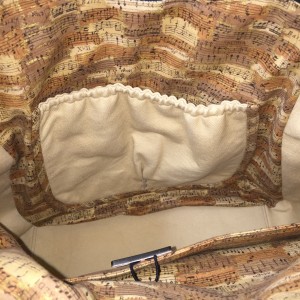
imageFor the next pocket, I used the Main Panel pattern piece, cutting two of the lining fabric, straight across the top, several inches shorter than the pattern piece. I interfaced, sewed across the top, topstitched the seam allowance to the wrong side, and basted into place on the remaining Main Panel lining piece, matching sides and bottom. Then I used a black elastic hair band and satin-stitched it into place on the Main Panel, about half-an-inch above the center of the pocket. I had a cool toggle button I loved in my stash, but the bone-y color on front didn’t look quite right with the tans in the fabric, so I just turned it over and used the black side.

The final step, edgestitching around the top of the bag, was a bear when I came to the four seams and to the one side panel that included leather. It’s the only thing on the bag that’s not perfectly to my liking. I think that’s a pretty good outcome!

I totally love this bag, and am flying high that I took a pattern and made this many changes to it—and figured out how to do them. I’m patting myself on the back!!

imageimageI’ll bet you want to know why I take both my softcopy music and my hardcopy music. It’s because I never want to leave the availability of the music to chance. I play from the iPad whenever possible, but heaven forbid that I sit down to play for a student’s performance and my iPad dies or the app freezes. I never want to put any of the students in that awkward position and jeopardize their grade. So I’m always prepared.

And now I’m prepared with a beautiful me-made bag!

A Little Bag for a Little Lady

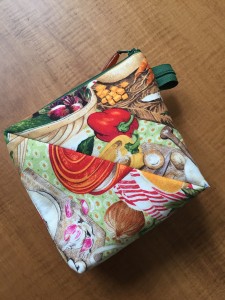
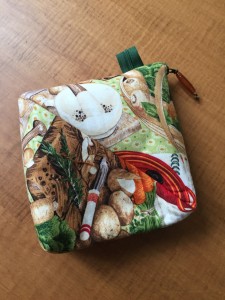
IMG_0691When I arrived home from Interlochen in early August, my DIL-Equivalent, Leslie, arrived a day after me for a stay of several days before heading back to Amarillo to start the school year at her university. I had hoped to quickly make a little wristlet clutch for her darling 5yo daughter, affectionately known as Meme.

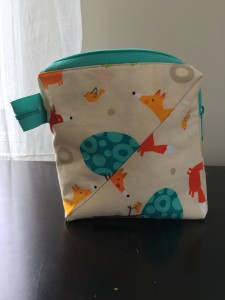
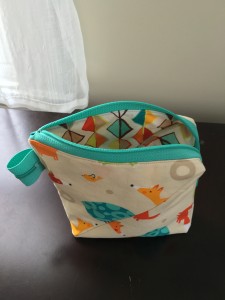
I printed off the Swoon Coraline pattern at 80%. Using the small version (11″ wide), that 80% printing meant the finished little bag would be 8.8″ wide.

I had read many posts in the Swoon Patterns Facebook group where sewists talk about printing the patterns at different sizes. Want a bag bigger or smaller than offered? No messy mathematics involved—just let Adobe Acrobat and your printer do all the work!

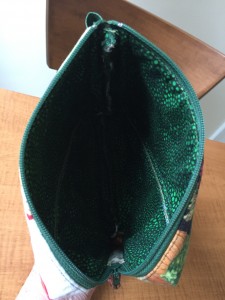
IMG_0692I searched through my stash and found a remnant from a bag I made two years ago featuring sweet little dogs. I dug out some lime cotton that matched the polka dots on the doxie fabric, and pulled a lime zipper from my stash.

I cut the pattern out, did all the interfacing fusing, and sewed the darts on the outside. Then my new university piano gig and my opera gigs got in the way of my having any sewing fun. I put all the doxie Coraline pattern pieces in a plastic bag and set them aside.

Leslie was in town this weekend—just enough motivation for me to quickly finish the bag so she could take it back to Meme.

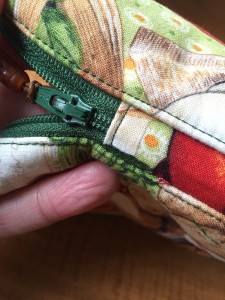
When I pulled the pieces out of the bag, I realized the clutch would be easier to hold if I used fusible fleece along with the interfacing. So I fused some fleece to the lining after the thought, and kept going. I sewed the zipper onto the lining and lining top and finished constructing the exterior and lining. When I went to sew around the top to attach the exterior to the lining, I discovered that there would not be enough room on the lining top to stitch the half-inch seam. I sewed a ⅜” seam and turned the bag right side out. (In retrospect, if I had used a ¼” presser foot, I probably could have used the ½” seam allowance.)

IMG_0694I finished the pressing and started trying to edgestitch the top. Whoo boy! There was simply no way that edgestitching was going to happen. The lip of the lining top was so narrow, I couldn’t fit the presser foot onto it to edgestitch by machine. I started searching through my embroidery thread stash and found a hand-dyed perle cotton that perfectly suited the bag, and spent the next hour happily hand-stitching the edge of the top.

IMG_0693The finishing touch is the label. When Meme met me (yet another grandmother), she decided I would be called Jananza. So that’s the name I’ve chosen for my bag-making efforts. I created the logo in Photoshop and send the image to Mountain Street Arts on Etsy. I love the labels.

Now I’m just waiting for a photo for the sweet little lady holding her sweet little bag.

A Little Home Dec

Bathroom curtainWhile the Jazzman was painting the kitchen, he was inspired to keep improving our circa-1927 house. When he finished pointing out to me all the improvements he made to the kitchen, he whipped some paint chips out of the “junk drawer”, saying “and this is what I’m thinking of for this bathroom.” Whattaguy!!!

I did not take Before pictures—shame on me—but if you’ve ever lived in an ollllld house, you can imagine it. The floor is classic hexagonal black and white tile with the little black hex flowers on the white background. It has a classic pedestal sink. I updated the faucet six years ago and chose the ceramic handles. The towel bar is white ceramic. The exterior wall is almost consumed by the window, so that the mirror just balances in the corner, resting on the window ledge and the towel bar.

The walls were ugly-bugly institutional blue-green. Did I mention ugly? The ceiling over the sink was flaked and flaking, tired looking and sad-sad-sad.

Jas started the work a couple of weekends ago. In his classic style, he removed all the hardware to clean it. He scraped the ceiling until not one flake of ancient paint remained. And he fixed holes and imperfections, scraping and sanding and patching until the walls looked as new as 88-year-old walls can look. The ceiling was painted ceiling white—lovely, reflective, clean! The exterior wall was painted a charcoal gray (the man loves him an accent wall), and the other three walls (two of which include doors, so not much to paint there!) were painted a medium silvery gray. Gahgeous!

On the Labor Day holiday we made a trip to Home Depot and Lowe’s and Jo-Ann Fabrics looking for this and that piece of hardware and curtain fabric to replace the antique curtains that shredded when I washed them. We didn’t find what we wanted, but figured out what we didn’t want.

This past Saturday we made another hardware trip to a different set of stores. We hadn’t figured out what we wanted to do about the old light fixture on the wall, but Jas was ready to get busy painting when we got home.

imageAnd shortly after we walked in the door, we got the call that Jas’s precious 91-year-old mother had been taken to the hospital, vomiting and in pain. The next call confirmed the worst: an aneurism in her stomach that she’d been living with for years had burst. He showered and packed for the three-hour drive to Columbus. Just before getting in the car, his brother called again and Jas was able to speak to his mother for a minute, telling her we loved her and that everything would be alright, for her not to worry about us. And twenty minutes into his drive, she was gone. Three hours from diagnosis to death. No long periods of pain and suffering. A peaceful death knowing that your three sons and their families adore you.

Jas continued on to Columbus to help his brothers make the decisions that had to be made. Sunday evening he came back home. The burial will be in Youngstown, and we realized we needed to open our home for a gathering after the burial. And here we were with the first floor bathroom in shambles.

On Sunday, while digging through all my boxes of fabric trying to find just the right piece of fabric for a bathroom curtain, I happened across a piece of white linen printed with musical notes and French lyrics. I had found this on the sidewalk outside a Paris fabric store while strolling through Montmarte a year-and-a-half ago. To make it even more perfect, this musical discovery came right after I visited the grave of my teacher, Nadia Boulanger. Inspired fabric!

I pulled it out, measured the tattered curtains, and quickly made a curtain to slide on the original hardware. And smiled!

CurtainMonday morning we awoke to a long to-do list. During the course of the day, he finished the painting, finished cleaning the hardware, and reassembled the bath. Once he replaced the window hardware, I was able to determine the correct length and finish the bottom casing. Fifteen minutes later, we had a finished bathroom. Bright, shiny, ready to host our friends after we say our final goodbyes to Jas’s mother.

But there’s one little problem. The remote for the garage door hangs on the kitchen door. When we push the appropriate button to open our individual doors on the detached garage, sometimes the doors don’t open. So we walk into the bathroom and pull the curtains aside to see whether the door is open. It’s a little family ritual. Because this is a single curtain rather than the original two, we can’t pull it open to peek out. We have to actually walk outside to look. Oh, the aggravation.

Next week, when we’re all done with the stress of this week and beginning the new sans-Mom life, I’ll pull the curtain down, slice it in half, and turn it into two curtains. And be thankful for this wonderful man in my life, and his wonderful mother who treated me as her own from the day she met me, five years ago.

A lovely lady, her loving sons, and their loving daughters-in-law.

A lovely lady, her loving sons, and their loving daughters-in-law.

A New Look at Book Covers

Cover OutsideA Grandma Sewing Tutorial

I never had to have my books covered in high school. At least I don’t remember having to cover them, but that was a long time ago. I barely remember what classes I took in high school. I do remember, however, cutting class as much as possible during my junior year. I didn’t love high school.

My sweet DGS is now three days into his high school experience. He texted me the other night and said he had a sewing project to complete before Friday, asking when I’d be available to assist his design efforts. When I asked what he needed, he said he had to sew a book cover for his algebra book. I tried to ask the correct probing questions to see if the teacher actually used the word “sew.” I suggested all the brown-paper-bag covers I had seen through the years, but he was adamant that he was going to sew it.

I quickly cleared my calendar and drove over to his house to retrieve him. After doing some mega-school-supply shopping and grabbing take-out dinner, we headed to the sewing room. I had some remnants on one table and pointed him there. They included fabric that I used to make a bedspread in the Tucson home where his parents lived when he was born. It was a nice solid buttery yellow upholstery fabric, sort of a ducky-lineny weave. Not interested. But a little further down in the stash was a piece I have had for years and can’t even remember where or when it joined my life. It is a floral tapestry print fabric like one would use for heavy draperies or to upholster a wing chair. The color palette is shades of green, teal, pink, rose, and a touch of pale aqua. I dug into a box of hand-dyed cotton and found a nice deep green/teal with touches of a lighter yellow/green.

First we measured the book. From front edge to back edge around the spine, it was 20″. From bottom edge to top edge, it was 10¼”. I wanted ½” seam allowances, and I wanted to topstitch close to the edge all the way around, so I added 1½” (¾” x 2) to the book measurements, giving me a rectangle of 21½” x 11¾”. I cut one rectangle out of the tapestry and one out of the hand-dyed cotton. Because of the width of the covers (probably about 9″ wide), I decided to make 4″ pockets—where you slip the edges to hold the cover onto the book.

Cover InsideDGS felt the cover would be heavy enough without interfacing or fusible fleece, but I did interface the pocket to make it sturdier for keeping the cover on the book. I cut two rectangles 11¾” x 9″ ((4″ pocket + ½” seam allowance) x 2). I cut two 4″ x 10¼” rectangles of Pellon SF101, pressed the pockets in half to measure 11¾” x 4½”, then opened them up and centered the edge of the interfacing along one pressed edge, leaving the seam allowances uninterfaced. Then I positioned the two pressed pockets along either edge of the lining and DGS basted them in place with a ¼” seam allowance. Now we had a rectangle of tapestry and a rectangle of cotton (with pockets attached), which we pinned right sides together.

These were seamed leaving about 4″ open on one side—either the top or the bottom. I pressed the open edges back, matching the start and stop points of the seam so that they would be easy to sew together. Then he trimmed the seam allowances, holding the scissors at an angle to grade the seam allowances (not have too many layers stacked on top of each other) and clipped the corners. Because the tapestry was loosely woven, next he zigzagged along the edges except for the opening.

Time to turn it rightside-out and admire our handiwork. And his next question was the usual for our projects, “Grandma, where are the chopsticks?” It’s our favorite corner-turning tool. Before sewing the opening, we tried the cover on the textbook, and it was a bit snug. And the clock was striking 9:00, so I told him I’d finish it up on Thursday before his Friday deadline, and ran him home for a good night’s sleep before High School Day #2.

I fretted all night about the fact that I didn’t allow for any ease. It’s not a body. It doesn’t need an ease allowance, right? Wrong! After finished my work on Thursday, I turned it wrong side out again and moved the end seams out as much as I could, which was ⅛ to ¼” on either end. Then I redid the zigzag stitch in a couple of places.

To finish, turned it rightside out, pressed the heck out of it, pinned the prepressed opening and topstitched close to the edge of the opening from the edge of the left pocket to the edge of the right pocket. Then I topstitched the rest of the way around from where I had stopped on the opening to where I had started on the opening.

He had left his book in his locker on Thursday, so I couldn’t see the final fit, but I’m pretty sure it was fabulous.

My tasks: Design concept, math consultation, fabric cutting, final fixing.
His tasks: Fabric selection, all sewing except final fixing.
Shared tasks: Smiling.

Back in the (Sewing) Saddle Again

Leslie Rayon Jersey TopWhile I was at camp, there was barely a minute to spare. I thought I was going to be able to volunteer in the costume shop and help them out with stitching. I brought my current knitting project and a couple of sewing projects, along with my beloved Bernina, and didn’t have nearly as much handcraft fun as I thought I would.

So you can imagine that I’m happy to be home and back in my sewing room. The Lovely Lady Leslie spent a few days in Youngstown after camp, and I was able to sit her down in my sewing room—instead of long distance—and show her patterns and fabrics and determine what would work for her and what wouldn’t.

Leslie Rayon Jersey Top

Ever the dancer!

Before she left this morning to drive back to Amarillo, I was able to quickly make a top for her out of a rayon jersey (sort of a steel blue, although Gorgeous Fabrics called it “Blue rain”) that we both loved. (Long sold-out at Gorgeous Fabrics. Pretty sure it’s been hanging out in my stash since November of 2013. 😮 )

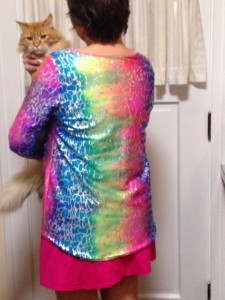
I used McCall’s 7020, which I used twice for camp tops. And what a difference a fiber can make! I never loved it in the cotton I got from Mood for my top. It felt wimply. I liked the look of the top itself on me, but could have chosen a better fabric if I lived in a town where I could pet fabric! Made up for Leslie in this is drapey rayon jersey, I think the result was much better. That gorgeous cowl collar will drape much more nicely, and I think she’ll get a lot of wear out of this.

<Sidenote On>
One morning at breakfast in the dining hall, I sat down next to Emily, who is the host in the Minnesota Building, down on the lakefront. She complimented me on the top, and I replied, “Thank you. I made it.” She observed that it looked very “Eileen Fisher.” That made my day!!!
<Sidenote Off>

I goofed a couple of times on this top and could kick myself. I topstitch the center front and center back seams with a double needle with wooly nylon in the bobbin. But when I trimmed the excess seam allowance away, I—ohmygodnononono!—cut the fabric. TWICE. Okay, so one was just a little nick. But the other was a four-inch gash!!!!! Fortunately both oopsies were close to the hem, so I pressed fusible interfacing to the wrong side and stitched a few more of the double needle topstitching lines over the problems. (I hand-stitched the gash closed first, then fused over it.) If Leslie doesn’t read this, she’ll never know. Even if she reads this, she may never be able to find my fix. I hope. It certainly won’t affect her wearing of the garment.

Otherwise, nothing unusual about this project. I did spray the wrong side of the CF and CB seams with starch and press them before topstitching, to give them more body while stitching. That left a starch residue on the garment, so last night I washed it in the machine with a couple of bath towels to try to remove the residue. Success! I normally wouldn’t dry a rayon jersey, but the collar and collar seams are bulky on this garment, so I put it in the dryer for about 15 minutes before finishing the hem.

Did my normal interfaced hem trick: Both hems (bottom and sleeves) were 1¼” deep, so I cut several strips of fusible tricot interfacing, which I fuse to the wrong side of the edge of the hem allowances. When I fold it to the inside and press, I have a clean fold on the hem, and sufficient body to support the double-needle topstitching for the hem finish. I think Marcy Tilton taught me that, and I am forever grateful.


And I’m baaaack!

Jas’s Summer Vacation

kitchen-doorwayIt’s amazing what one brain can forget in six weeks’ time. As I left the house yesterday morning to go grocery shopping, I had to stop and think what the process involved. Turn off the alarm system; wait, what’s the code. Unlock the door to go to the car; wait, there’s a garage door to open, where’s the remote. As I reached down to turn the door knob to go outside, the plate behind the knob looked different, looked shiny, looked new. I looked at it for a few moments, then just figured I wasn’t remembering what it looked like. After all, I’ve only owned this house for six-and-a-half years and used that door every day I was in residence. And I let it go.

Jas got off work early and did yardwork. Leslie arrived at 4:00 to use the printer and then take her dogs to the kennel. We had dinner scheduled for 6:30. At 5:00 I started preparing dinner. Jas walked into the kitchen, looked at me, walked over to me, put his hands on my shoulders, and said, “I have to tell you something.” This phrase, spoken by any significant person in my life, whether personal or work-related, always strikes fear in my heart. The worst is always just ahead.

He turned me around so my back was to the sink and I was facing the refrigerator and the door to the rest of the house. “Notice anything?” he said. I started scanning the walls, and suddenly I realized the chipped paint that had been in the corner for two years was no longer chipped. I said, my voice showing incredulity, “You painted!”

New Paint JobThis guy works twelve hours a day, five days a week on the railroad. He works outside where it’s hot, nasty hot in the sun. He spends time in a big shed where GM contractors are loading Cruze vehicles onto railcars. He walks back and forth on rock ballast, so that his knees hurt with every step and there’s nothing he can do about it. He leaves home at 6:00 a.m. and arrives home after work at 7:00 p.m., then showers to remove the diesel smell and puts on clean clothes and eats dinner (when I’m gone, fixes his own dinner), then takes care of the books for his union local and finally sits down on the couch to watch some news programs, where he falls asleep within three minutes. Five days a week this is his routine. And while I was gone, he spent his weekends plus an hour or so every weeknight prepping and cleaning and painting our kitchen!

Our house was built in 1927. (Okay, I own it, but this guy has put a ton of sweat equity into it since our second date!) The kitchen and upstairs bath were renovated in the early 1950s, according to circumstantial evidence such as paint color and sink styles. In the kitchen, the sheet vinyl rolls at the seams and we place rugs over the seams to keep from tripping. The stove sits six inches away from the adjacent counter/cabinet, and the floor between was gunky and gross and hard to get at to clean. The wood cabinet doors were darkened around the handles from decades of greasy hands opening them. The hardware on the door hadn’t been deep-cleaned in probably 60 years. The walls were an institutional blueish-greenish-nondescript paint color. The ceiling was peeling. (You liked that little rhyme, didn’t you?) The only thing I had done to this room since moving in was to replace the windows from old metal jalousie windows that radiated frigid air during the long NE Ohio winters to winter-friendly double-paned windows. And we put in a new-to-us stove to replace the old stove that dated from, probably, the 50s or 60s. Every time we looked around the room when we were house-talking, we said, “Someday. Someday.”

Jas had worked for three different painting contractors during earlier years, and the guy knows what he’s doing. He doesn’t paint over anything. He removed hardware, washed walls, scraped the ceiling, scraped the wall where the three or four layers of old paint were chipped, sanded and mudded and feathered the wall, cleaned the floor, scraping off old.old.old grease and grime, glued the loose formica-wannabe on the counter, cleaned all the hardware until it gleamed, steel-wooled the cabinet doors and drawers, and on and on. Preparation to the max, professional-level painting, all hardware looking like new, then perfect cleanup. Nothing was left undone. Amazing. Amazing!!!

ShinyThis formerly dull, drab kitchen glows. It gleams. The buttery ivory walls reflect every wave of light. The white ceiling adds to the reflection. And the whitewhite glossy trim completes the equation. It’s inspiring. I don’t like to cook; it takes a lot to inspire me. This kitchen is truly inspirational.

How could I not have noticed this? When I looked at the walls while he was holding my shoulders and talking [proudly] about what he had done, I couldn’t even remember what color the walls were before. He had to open the pantry door to show me the old color.

And after spending twenty minutes showing me everything he had done, we walked into the adjacent powder room and he showed me the paint chips he had collected for that room. He’s going to paint my ratty 1927 powder room, too!!!!!!

I am awed at the sacrifice demonstrated in this act of kindness. I know how tired he is at night. I know how hard he works during the days. I know how he loves his weekends, playing golf with his buds, relaxing on the couch, going out to dinner with our friends.

The amount of time and effort and love that went into this project—I am humbled that that was all done for me.

(And I didn’t even notice. I had to be told. Bad on me!!!!!)
(When he got to work yesterday morning, his coworkers all asked what I thought of his surprise for me. He had to tell them I didn’t even notice. #hangingmyhead!)

Am I a lucky girl or what?!