Another Camp Top

Frances-sideThat danged clock keeps ticking. I’m now less than a month from the day I leave to drive to Interlochen. I’ve got to go to Asheville this weekend for my mother’s 102nd birthday, and the 19th through the 22nd we’re going to Toronto and Niagara Falls with friends to celebrate my [there’s a five in it] birthday. I refuse to look at the calendar and calculate how much I have left to do before I leave. I’m just sewing and sewing and making myself crazy.

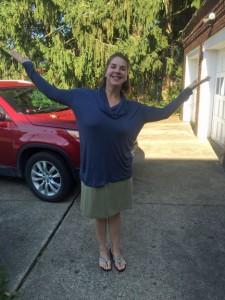
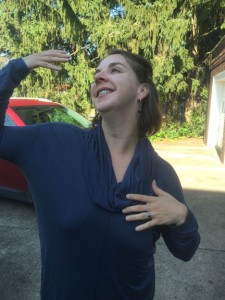
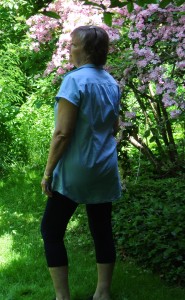
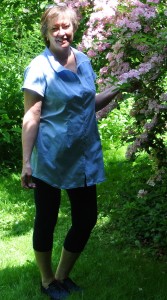
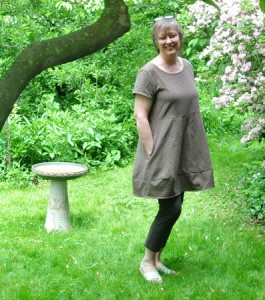
This afternoon I finished Green Bee Patterns’ Frances dress. It was easy to procrastinate, as I just didn’t love it. But now that it’s done, I do kinda love it. It’s very different from all the knits I’ve been sewing lately – all those Lagenlook-inspired flowy tops. But it’s cute—especially with leggings—and a nice change. If northern Michigan gets hot this summer, it will be cool and nice.

<Short Story Time>
In 1989, my younger son went to National Music Camp (now Interlochen Arts Camp) as a 14yo percussionist. The camp sessions in those days were eight weeks long. We had carefully packed everything he’d need to live in a cabin in the woods in Intermediate Boys Division. A few days later he called me and said, “Mom, can you please send me another blanket and a fan?” I laughed and have been laughing about that for 25 years. That’s what northern Michigan is like in the summer. It can be cool and rainy, or warm and rainy, or lovely. And it’s frequently chilly at night. He used both that extra blanket and that fan all summer long.
<Short Story Time End>

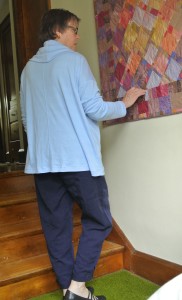
Frances-backSo I’ll need sweatshirts and cool cotton shirts.

Here’s the pattern review:

Pattern Description: This classic shirt dress features a short or 3/4 sleeve variation, front and back darts for subtle shaping, a yoke which the dress front and back gather into, a button placket, and collar. Stitch it in a single fabric for a classic look, or add a contrast fabric to the collar and placket.

Pattern Sizing: Women’s sizes XS-XL included. I cut L and it fits the hips fine – see below for bust thoughts.

Did it look like the photo/drawing on the pattern envelope once you were done sewing with it? Yes – I used solid color, no contrast. I chose the short sleeved version.

Were the instructions easy to follow? Yes, with a couple of exceptions.

  1. I wasn’t clear on how to attach the collar. I spent some time picturing it in my head, then sewed right side of color to wrong side of yoke and front, pressing it out and hand sewing the folded edge of the collar to the right side of the yoke and front. That way, when the collar is folded, the whip-stitched part of the collar is hidden.
  2. The instruction step for stitching the sleeve band to the sleeve was missing, although an illustration was there. This was another step I spent a lot of time working on and trying to envision.

What did you particularly like or dislike about the pattern? It’s not really my style. I thought it would be fun to do the sewalong on Craftsy with Alexia, but life got very complex around that time. Then as I started preparing my wardrobe for six weeks as an accompanist at Interlochen Arts Camp this summer and the requisite dark blue bottoms/light blue tops uniform, I decided to do this top in solid light blue and save the Cotton+Steel yardage for another Swoon bag.

Fabric Used: From Fashion Fabrics Club, a pale blue shirting with 98% cotton and 2% lycra. Nice stretch, and it was on sale for $3.95. Can’t miss!

Pattern alterations or any design changes you made:
I’m pretty particular about having my inside look as nice as my outside. The yoke is outside only, leaving all those edges hangin’ out on the inside. So I scratched my head and tried to remember how to do a double yoke – from probably 20 years ago. Yea, not too many cobwebs in my brain!

I jury-rigged the inside yoke, as I didn’t think about this technique until I had sewn the back to the yoke and topstitched. I folded under the seam allowance on the back of the inside yoke, then top-stitched it into place. You pin the front pieces to the left and right of the outside yoke. You can baste them in place if you want. Then roll the back up from the hem and wrap the other piece of the yoke around it, pinning the two yokes right sides together with the front pieces sandwiched between them. You stitch that seam, them you pull the back and the front out through the side and everything magically turns itself rightside out. Your raw edges are enclosed in the yoke, and the insides are beautiful.

When you attach the collar to the yoke and front neck, the folded seam allowance on the collar will hide all raw edges. When you attach the sleeves, you’ll have those raw edges, but you sew a second row of stitching about 1/4″ from the first row, then trim the raw edges close to the second row of stitching. Those will be the only raw edges you have and they’re not at all unruly.

This “burrito roll” is easy to do and fun – sorta like a puzzle. Here’s a YouTube video that explains it better than I did.

The other change I made was to fold several inches out of the body front and back. I wanted a tunic rather than a dress.

Frances-2Would you sew it again? Would you recommend it to others? I won’t sew it again, as it’s really not my style. But I would recommend to others, especialy beginner sewists. Nice pattern.

NOTE: If you are busty, or low-busted, I recommend doing a muslin of the top as far down as the darts go. These darts hit me right on the bust apex and the pocket kinda points right at the “hill.” (I’m a DD and somewhat low-busted. I had a conversation with Alexia before starting the pattern, and she thought it would be okay because of the gathering at the front shoulder – that I wouldn’t need to do a FBA.)

When I get to camp, I’m going to see if it fits my Texas friend any better than it fits me through the bust. If so, and if she likes it, it will move to her wardrobe. If not, I’ll probably wear a minimizer with it. But really, with the lycra in the fabric, it’s not terrible. I’m just overly sensitive about drawing attention to the “girls.”

Conclusion: I had a hard time getting through this project, as I wasn’t in love with it. But once I finished it and slipped it on over calf-length leggings, I wanted to dance around. This will be a perfect summer outfit.

You can still get the kit through Craftsy. Honestly, the high-quality fabric and the pattern and as I write this it’s on sale for $24.50 — a steal!


And if you have the slightest question in your mind, yes, I am still excited about working at Interlochen this summer. I have moments when I say, “Hey, Lady, you’re old. WTF are you doing?” But then I remember how sweet the kids at Joseph Badger High School were to me this past year, and how sweet my opera kids at Opera Western Reserve are to me, and I know it will just be more of the same. I guess I’m just everybody’s favorite GrandmaPianist.

The Eva Dress

Eva-1Blogless Anna, whose writing and sewing I love, made a Tessuti Eva dress a few months ago, and it stuck in my mind. I thought if Northeast Ohio ever escapes winter, I might like it for a summer dress. A couple of days ago, on one of my 25 mile drives to accompany a high school chorus, I stopped at Olive Grace Studios, a sweet little quilt shop about ten miles north of my house. There, tucked under the front counter, I found this great linen covered with Xs, sorta sashiko quilting, but not really. It called out “Eva” to me. Link to the dress pattern.

I won’t write a full review right now, as today and tomorrow are actually summery. The Jazzman just got off work and we’re racing out the door to drive up to the lake (Lake Erie, if you’re not from around here) and hang with our pals.

Here are my thoughts:

  • If you’re making the dress, a softer fabric is probably better than a midweight. I feel this is a little stiff and, hence, makes me look a little more portly than I actually am.
  • I love the bound neck and sleeves. The bound hem? Not so much. In fact, tomorrow while the rest of our friends are golfing, I’m going to sit with some nice music or an audiobook and rip out the hem. Then when I get home, I’ll interface and turn up the edge by ½”, giving it a smoother, softer, and less obvious hem.
  • The pocket instructions are a little wonky, for my taste. There seemed to be an emphasis on sewing to the notch and sewing the pocket bag completely separate from the side seams. I sewed and ripped and sewed several times.

<Side Seam Pocket Tutorial On>

imageI believe the better way would be to sew the each of the four pockets RS together to the front and back side pieces, matching the notches. The seam width would be a smidge smaller than the seam allowance for the side seams. So in this garment the seam allowance is ½”, so my seam to attach the pocket pieces to the side pieces would be about ⅜”. After sewing those four small seams, I would press the seam allowances toward the pocket, then on the front pieces only, topstitch the pocket to the seam allowances. (In the picture, you see the front of the pocket and its topstitching at the top of the picture. At the bottom you can see the back seam with no topstitching. You can click the picture to enlarge.)

Once that’s done, pin front to back on the side seams, pinning the pockets together. Stitch from the top (backstitching to secure the first couple of stitches) down to the notch, reduce stitch length to 0 and take one stitch to secure, then raise presser foot and pivot, lower the presser foot, return the stitch length to the previous setting, stitch around the pocket bag to the bottom notch, reduce stitch length to 0, take securing stitch, raise presser foot and pivot, lower presser foot, and stitch to the bottom, backstitching at the end of the seam to lock the stitches.

Serge or zigzag the raw edges. Clip the seam allowance at the notches, being careful not to cut the seam stitching. Press the seam flat, then press the seam allowance to the back and the pocket and its seam allowance to the front.

<Side Seam Pocket Tutorial Off>

It sounds complex when written this way, but once you’ve done it a couple of times, it’s very logical. To me, this method avoids grabbing bits of seam alliances where you don’t want to grab them–and therefore avoids a lot of seam ripping.

There was one more disappointment with this fabric. I finished the dress, drove to the lake, and sat down in a wicker chair in our friends’ lake house. When I leaned over to pick up something, I realized a rough edge in the wicker chair had snagged one of the thread Xs and pulled it out about six inches. My heart sank to my feet. Now that I’m back home, I’ll take a needle and try to pull it back through and secure it. But I may get to the situation where there are so many thread snags that I have to just pull them all out and have a plain linen dress.

C’est la vie!

Eva-3

P.S. Ran back to the quilt shop today to identify the fabric. It’s Diamond Textiles’ Primitive Collection, very similar to PRF 707. To my eye, the base fabric is taupe-olive, and the threads are cream and a blush pink. We’ll see how long these threads last. 🙂

One Pattern; Two Very Different Looks

7020-1-angelI have an ongoing love affair with Eileen Fisher. This affair is about 20 years old, and is quite passionate. Oh, the hours I spend looking at her various styles online at Nordstrom, Naturals-inc.com, Neiman-Marcus, and the EF website. Whenever I wear a piece of EF clothing, I feel très chic.

I recently discovered McCall’s 7020. If you look at the line drawings on the pattern back, this pattern is very similar to several of my favorite EF sweaters. Pairing the boxy top with a skinny pair of pants and flat shoes or boots gives me an instant put-together look.

You’ll remember I’m assembling a sky-blue-over-navy-blue wardrobe for my six-week gig as a collaborative pianist at Interlochen Arts Camp this summer. I found a sky blue cotton jersey at Mood Fabrics that I used for the Sewaholic Renfrew t-shirt that I blogged about here. I had enough left for one more shirt, and—after being reminded by my DIL-Equivalent that all shirts must have collars—decided to make the McCall’s boxy top with the cowl neck.
7020-1-front 7020-1-side 7020-1-back

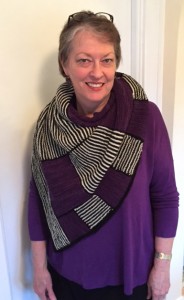
purpleNow that it’s all done, I don’t love it, but I will wear it. The fabric doesn’t have enough “oomph” to it, as I intimated in the previous post. I think I would love it in a nice sweater knit, like the purple one I wore to show off my latest knitting project. I would also like it in a rayon/lycra knit or an ITY poly/lycra knit—just something with a little more body and a little less chance of my bra showing through.
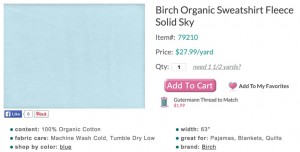
birchsweatshirtAbout the time I was making the first blue t-shirt, I found this Birch Organic Sweatshirt Fleece online at Hart’s Fabric in Santa Cruz. Yum yummity yum! You want oomph? This fabric has oomph. It has cat sleeping on your lap warmth and comfort. As I was trying it on during the sewing process, I kept thinking it might just be something to sleep in on cold Northeast Ohio winter nights!

Story time: When DS#2 went to Interlochen Arts Camp—then known as National Music Camp—for the first time when he was 14, I packed him up with all the requisite navy chinos, navy shorts, sky blue polos, red sweaters, and linens for the eight-week session. He would be living in a cabin, and his linens included a blanket. About a week later, he called me and asked if I’d send him another blanket and a fan. That tells you a little about summers in northern Michigan. It gets hot, and it gets cold. So I’m trying to make sure I have enough warm layers to keep me comfortable no matter what Mother Nature throws at that magical land between the lakes.

So, anyway, when I saw this sweatshirt material, I grabbed enough to make a sweatshirt. Indie pattern designer Jennifer Beeman, of Grainline Studio, recently introduced her Linden Sweatshirt and I quickly downloaded the pattern, thinking it would be an enjoyable project. But then after looking at McCall’s 7020, I thought it would be interesting to make a second version in the heavier fabric.

Okay, I’ll admit that the sweatshirt fabric, as yummy as it is, isn’t really the right fabric for Eileen Fisher’s boxy drop-shoulder top McCall’s 7020. Will I wear it? Absolutely. I’ll probably wear it over and over this summer. I have a couple of tanks in a similar blue that will give me an extra layer if it’s that cold. And it’s the right length to shove my hands in my pants pockets without destroying the line of the top.

7020-2-front 7020-2-side 7020-2-back

And—she said, patting herself on the back—the double-needle stitching and the binding is fricking brilliant!!


Here’s what I’m talking about.

I was short of fabric, so I cut the top and the sleeves at a shorter length. For the neckline and sleeve, I cut a binding strip of 2⅛”. For the hem, I cut two binding strips of 5″.

The body has center front and back seams, which I sewed, pressed open, then double-needle topstitched, centering the seam between the two needles. I think I use a 4.0 needle. After sewing, I trimmed the excess fleece from the wrong side. Love the look!

7020-2-necklineNeckline: With CF and CB seams already sewn and topstitched, sew the shoulder seams. (I always reinforce the back seam allowance with a strip of tricot interfacing.) Press the seam allowance to the back and topstitch from the outside. Trim the excess seam allowance on the inside. Run your measuring tape around the neckline, standing it on its edge and holding at the seam allowance (not the cut edge), in this case, ⅝” in from the cut edge. For my size L, the length was 27.5″. Multiplying that number by .8 (The Gospel According to Marcy Tilton) gave me 22″. I cut my 2⅛” binding strip a little longer than 22″, probably 23″ (to allow for seaming), lapped the ends, and made a diagonal seam.

(Quilters know what I’m talking about. If you don’t, here’s a little tutorial.)

Here’s the challenge: You want the seam on the wrong side of the binding strip, and you want the fleece to be the outside of the binding strip. So pin it and check it a couple of times to make sure you’re sewing the fleece side together and making the seam on the sweatshirt side. Don’t do what I did: First I made the fleece the wrong side. When I realized what I had done, I made the seam on the correct side, but I turned it the wrong way before pinning, so I ended up with a mobius strip!!! No. Good.

The seam (when correctly sewn) becomes the center back—mark it with a pin. Fold in half and find the center front and mark with a pin. Match the binding CF and CB to the garment CF and CB. Now pin cut edges together, fleece side of binding next to sweatshirt side of garment neck. Pin 1:1 from CB to the two neckline seams, then stretch the binding from the neckline seams to the CF. This will make the finished binding lie flat and hug your neckline. Sew with a ⅝” seam. Press the binding toward the neck opening, then wrap to the back so it just covers the seam. No need to worry about folding the raw edge under, as this is knit and will not fray. Place pins on the right side just under the binding seam and catching the edge of the binding raw edge.

Topstitch the neck binding with a double needle, running the seam centered between the two needles, catching the fleece binding with the right needle and the sweatshirt with the left needle.

7020-2-sleeveSleeve: This binding goes on after flat insertion of the sleeve into the armhole, but before sewing the underarm seam. Cut the binding strip a little longer than the cut edge. Sew with a ⅝” seam and press the binding toward the sleeve end. Wrap as you did the neckline, and press well. Now trim the ends of the binding to match the right side of the sleeve, including that wrapped ⅝”. When you open the binding out, you’ll see an angular hourglass. Finish the garment hem before topstitching the sleeve binding.
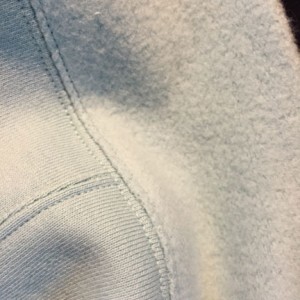
7020-2-hemHem: Cut the 5″ binding strip wider than the front and back hems (you still have not sewn the side seams). Pin the fleece side of the binding to the sweatshirt side of the front. Being careful not to stretch the binding, sew with a ¼” seam. Press binding away from the body. Turn the garment wrong side up and fold the strip to just cover the binding seam. This should give you about a 2″ hem band. Press well.

Sew side seams. I always start under the sleeve and sew to the end of the underarm seam, then go back and start at the same place and sew to the hem. This lets me make sure my underarm seams match and the seam allowance gets cleanly sewn toward the sleeve, and also helps me make sure my garment side seams end up the same length. It takes a few moments longer, but that’s my ripper use prevention technique.

Press the seams to the back.

Now pin the sleeve bindings in place, so the raw edge just covers the seam. Turn the sleeve wrong side out and place under presser foot. Double-needle topstitch, centering binding seam between the needles. Trim excess binding from the inside and press again.

Repeat with the hem, being careful not to stretch.

I hope that makes sense to you and that you’ll try it to see if you like. I’m thrilled with the result!
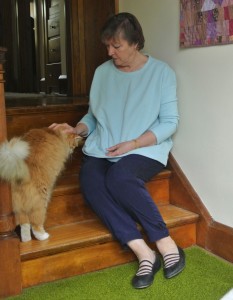

7020-2-rudiAnd Rudi likes it too. Oh wait, that’s Rudi we’re talking about. He likes anything that involves his getting a little lovin’.

One last note about the side view of the sweatshirt. It probably could have had a length adjustment in the front, in lieu of a FBA. But I didn’t. I’m thinking that after a few washings, it will soften up a little and not stand out so much. At least that’s my hope!

About DS#2 who went to National Music Camp in 1989 at age 14—you do that math. He turns 40 tomorrow!!!!!
Almost Makes You Want to Get Old(er)

MK2The distaff side of the couple we frequently vacation with has a significant birthday tomorrow, so I’ve spent this week creating a memorable gift for her. She’s an artistic genius. Every trip we take is scrapbooked like no scrap project I’ve ever seen. She loves to garden and frequently posts breathtaking floral pictures on her Facebook page. She takes watercolors with her on trips and comes home with pieces I want on my wall. Her brother is a lampwork glass artist, and she uses his beads to make jewelry that all her friends clamor for. And two years ago she and her husband and another friend bought a vacation house steps away from Lake Erie.

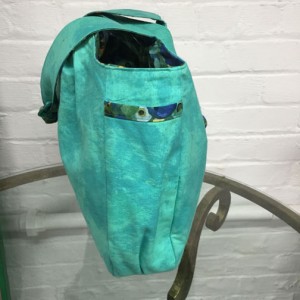
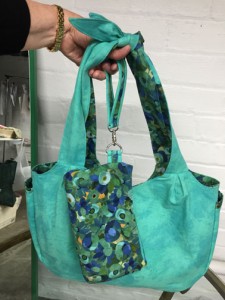
The reverse side of the bag, with two outside pockets.

The reverse side of the bag, with two outside pockets.

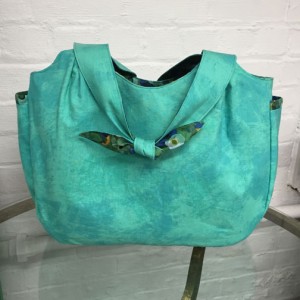
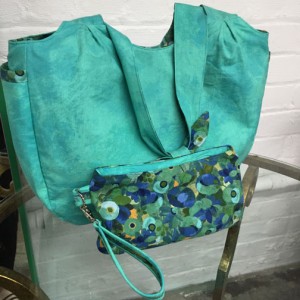
My first gift thought for her was a bag to carry things back and forth to the lake house. So of course I walked into a local quilt store looking for a nautical theme. There were cute fabrics, but nothing as fabulous as my friend. I kept walking around the store, examining every display case. I looked for blue and turquoise batiks. I thought about travel themes. I thought about watercolors and artwork. I thought about gardening. Then I saw the Carrie Bloomston PAINT line—let’s face it, I’d love a piece of every single fabric Carrie Bloomston designs. The solids in this line aren’t really solid. They’re very let-me-wipe-the-fresh-paint-with-this-cloth mottled. And wouldn’t you know it? The teal was sitting next to the Silvia’s Sonnet Teal Packed Floral from P&B. This is no wimpy little thin fabric. This is the crème brûlée of fabrics!

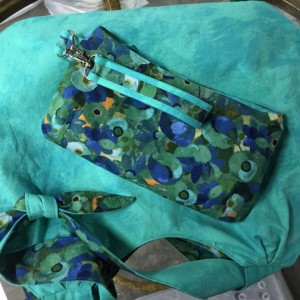
Cell phone pocket - or rotary cutter pocket!

Cell phone pocket – or rotary cutter pocket!

Regular readers remember when I made an Amy Butler Reversible Sunday Sling as my Gayley Girl Gift. That bag took lots of work, especially in the preparation. And this was a week I was overloaded with high school and middle school concerts and rehearsals. So I needed a quick sew. I made the Sunday Sling again, but the smaller size. Less fabric and interfacing to cut and fuse, shorter seams to sew. I made only one goof on this bag: after sewing the top seam (the pentultimate step!), I forgot to clip the curves. Let me tell you, no trimming and clipping on those four curves means no top-stitching on those four curves. It just isn’t possible! Of course I realized this after I had turned the outer bag through the reversible lining and sewed up the opening! But after unsewing and clipping and resewing and then top-stitching, I was very happy with the bag.

Outside side pocket.

Outside side pocket.

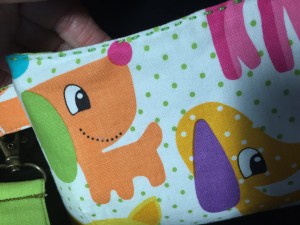
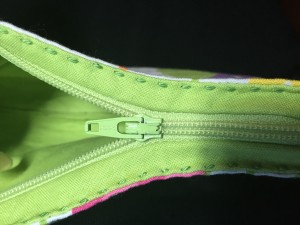
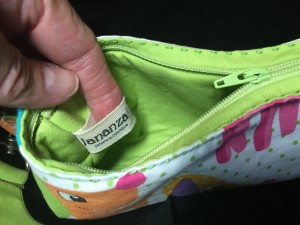
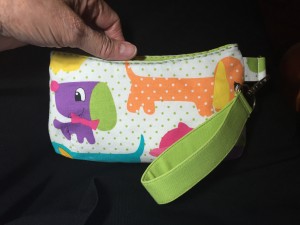
So that was step one of the gift, but I wanted a really special gift, so I thought a little matching clutch tossed inside would be extra special. I’m newly obsessed with Swoon Bags, so chose the Coraline Clutch/Wristlet as the perfect go-with. This is my second Coraline, and she’s a great little bag. Three main pattern pieces, and maybe 90 minutes sewing start-to-finish. There will be many more of her in my future. (Reviews coming up, but just not today.)

Sunday Sling alongside Coraline Wristlet

Sunday Sling alongside Coraline Wristlet

I love the learning experience of sewing. What I learned on Coraline this time (actually figured it out as I was sewing up the opening to turn the Sunday Sling): I always press the seam allowances on the opening that I leave for turning a bag right side out. MK8Once pressed, the opening is much easier to match up for whipstitching into place. If I pin it, it’s not a smooth line for sewing. So tonight I tried putting several small pieces of scotch tape on the butted opening edges. It was much easier to sew it closed. I was much happier with my finished project and will keep using this technique as more bags pop off my sewing machine.

The happy touch to end my day was showing my Molly Maids the Sunday Sling and having them suggest I send some bags with them to the Molly Maid office. I love when people love my work as much as I do!

MK1

Hems on Stretch Garments

Here’s what I’ve been doing for a year-and-half now and I have lots of perfect hems. I buy soft fusible tricot. Using my rotary cutter, I cut strips the width of the interfacing. I cut them however deep the hem is (1-1/4″, 1/2″, whatever). After the side seams are sewn, fuse the interfacing to the wrong side (inside) all the way around the hem so one edge is at the cut edge of the hem and the other is at the hem fold line. Then fold on that fold line and press. What a beautiful clean hem! Then hand wind a bobbin with wooly nylon and topstitch from the outside with a double needle using the garment thread on the outside and wooly nylon on the inside.

Because of the wooly nylon, you won’t get a double-needle “ridge” and the hem will stretch. Clean and beautiful!

On my sleeves, I apply the interfacing to the flat sleeve piece, before sewing underarm seam. Press the hem in before sewing seam and it will be very easy to sew the hem when you’re done. On the Crossover tunic, I sewed the seam before attaching the skirt to the bodice – much less fabric to handle.

Hope you try and like this method as much as I do.

http://www.sarahveblen.com/interfacings.php

Not Ready for Vacation!

YellowniceI’ve been trying to finish up some UFOs (UnFinished Objects). This top, from Vogue 8912, was started before our January vacation to Mexico, but it just didn’t reach completion before the plane took off. So I mulled it over for a couple of months before finishing it a week or so ago.

Here’s the review:

Pattern Description: From the envelope – Very loose-fitting top has neck and front bands, pockets, slightly shaped front hemline, and narrow hem. A: uneven hemline (wrong side shows), and purchased bias tape finishes armholes. B: fold-back cuffs. Semi-fitted shorts or tapered pants have elastic waist, side pockets, and stitched hems. (This pattern is now OOP.)

Pattern Sizing: 8-24, very loose-fitting. I cut my usual 16.

YellowSideDid it look like the photo/drawing on the pattern envelope once you were done sewing with it? Yes, given my modifications.

Were the instructions easy to follow? Okay.

What did you particularly like or dislike about the pattern?
The armscye is the same whether you’re making with a sleeve or sleeveless. This is just wrong!! The design for a sleeveless top should have the bottom of the armscye cut higher. Shame on me for not making that alteration myself. As it is, I’ll buy a tank in a light neutral color to wear under it. (You notice how my elbows are glued to my sides for the photo shoot?!)

Yellow-FrontFabric Used: Added to my stash in the early 2000s with no note attached. It’s either cotton or rayon. It’s a light weight that will feel nice in the humid summer heat. Kind of a fun travel-oriented print.

What was the designer thinking with this back?! It looks like I'm wearing a tablecloth!!!

What was the designer thinking with this back?! It looks like I’m wearing a tablecloth!!!

Pattern alterations or any design changes you made: I did not like how long the back was — much longer than the front! After trying it on as designed, I cut off several inches and curved the side with a bread plate.

Somehow, when cutting it out, the center front came out much longer on one side than the other. How did I do that?! I sewed the neckband on, then tried the top on and it was awful. Unsewed the neckband on the longer side, drew a new seamline and resewed. Now it’s okay.

Would you sew it again? Would you recommend it to others? Nope. I’m really ambivalent about this top. When you add the fact that I made it to go with a new pair of Eileen Fisher light silver gray capris and now they have a stain-of-unknown-origin that doesn’t want to come out, this was a pretty wasted sew. 🙁

Recommend? Nope. Too many other nice tops out there. Skip this one.

Conclusion: What did I learn? Tissue fit the top and if the armscye is too low, fix it!!


So there you go—one more piece of fabric moved from my stash.

Bonnie Bucket Bag

Bonnie-WindowFirst, I must tell you we had a taste of Real Spring today in Northeast Ohio. When I opened my basement sewing room window, this is what I saw. What a relief to have a day with decent temperatures and no precipitation.

You’re going to see more bags on my blog and coming off my sewing machine in the near future. If you follow my writing, either here or on Facebook, you know that I have a job that is supposed to be mine imminently, starting in mid-January. Oh, wait—that was three months ago! As I continued hearing about discussions between the Philosophy and Religious Studies Department and the local university provost, I realized that I needed to come up with a little income boost that I could depend upon without waiting for the provost to recognize the value of a liberal arts component in one’s higher education. I love making bags, and somehow I happened upon Swoon Patterns. Oh my gosh. These are beautiful, well and intelligently designed bags. And one of the most amazing factors is that the design team says to its fan base, “Make as many as you want and sell them if you like. You don’t need our approval and you don’t need to pay us a license fee.” What? In this day of people looking out for themselves, this attitude is almost unheard of.

And then I discovered the Swoon Patterns Group on Facebook. What a loving, supportive, unselfish group of sewists. And the designers make themselves available to encourage their fans. Most of my online time is now spent in this group and the Jocole group (my other new passion – check out the Jocole Yoga Pants). I derive ideas and support from these people. Brilliant.

Finally, you know that—after a long career as a technical writer, web editor, and legal writer and editor—I’m pretty picky about how things are written, especially instructions. The pattern instruction writers and editors for Swoon are as picky as I. They write clear, logical instructions. And if you don’t understand, just post a question on Facebook and someone who has already made this bag will help you through your obstacle course.

Front View

Front View

So back to the income-production effort … I’ve decided to craft and sell the bags I make and a few other miscellaneous accessories (the microwave cozies and notebook covers, for example). Even if I only sell a couple of bags a month, that will fill the gap that occurred when I lost the Bernina job and the provost simultaneously got cranky.

After asking on the Swoon FB group, I was told by several people that I should start with Bonnie.

So here she is, along with her review (click any photo to enlarge):

Back View

Back View

Pattern Description: (From the pattern page) “Bonnie is a slouchy hobo-style bag featuring a recessed zipper main closure and exterior double welt pocket. Display two different fabric prints on the exterior, or give her a store-bought look by using one fabric for the exterior with contrasting top stitching. The oval-shaped bottom allows room for nearly anything!”

Pattern Sizing: O/S – Finished size: 14″ wide (at top); 12″ tall; 6″ deep

Did it look like the photo/drawing on the pattern envelope once you were done sewing with it? Yes

She has feet!!

She has feet!!

Were the instructions easy to follow? Yes

What did you particularly like or dislike about the pattern? Clear, straightforward instructions; professional finish touches. I feel I could have found this bag in any high-end store.

Fabric Used: Exterior: Cotton+Steel Mochi Navy Gamaguchi and Cotton+Steel Basic Plummy XOXO; Lining; Several hand-dyed pinks from Janet A. Smith at TextileArt.com. These fabulous hand-dyes have been in my stash for 12 years; the artist appears to no longer be offering her beautiful wares. A good alternative appears to be DyeSmithy on Etsy.

Interior pocket - that lining is a whole lotta Pepto-Bismol!

Interior pocket – that lining is a whole lotta Pepto-Bismol!

Pattern alterations or any design changes you made: I added a small interior pocket as I’m always losing my keys. I cut a rectangle, approximately 6″x8″, folded it in half, sewed with ¼” seam, and turned right-side out, then topstitched into place.

The Etsy Zipit Store now has great zipper pulls.

The Etsy Zipit Store now has great zipper pulls.

As I’ve made several other designers’ bags lately, and because I was using quilting-weight cottons rather than vinyl or leather for Bonnie, I was concerned that she needed a little more oomph in her body, besides just the interfacing. So I used the fusible fleece that I had used in the Amy Butler Reversible Sunday Sling that I made a few months ago. In doing so, I made the inserting of the zippered welt pocket on the bag front more difficult for myself. The fabric plus the fleece plus the interfacing, plus the two layers of fabric and interfacing for the welt, plus the zipper … argh, too much to expertly topstitch around!! I ended up running two layers of satin stitch around the pocket to hide the wonky topstitching. Next time—if I choose to use the fusible fleece again—I will remove the fleece from the area of the pocket or else I’ll put the fleece on the lining. Or I’ll skip the zipper!

Final step was to protect with Scotchgard™, inside and out.

My overstitched welt pocket.

My overstitched welt pocket.

Sturdy connectors for the shoulder strap.

Sturdy connectors for the shoulder strap.

Would you sew it again? Would you recommend it to others? Absolutely will do again. Absolutely would recommend.

Conclusion: If you’re a fairly new bag sewist, Bonnie is a great place to start. And Swoon is a great design house to settle into. I cannot heap enough praise on the Swoon Patterns Group on Facebook. A nicer and more encouraging group of fellow bag sewists cannot be found, I believe. Stumped on something? They’ll help you figure it out. Just need to vent? Have at it and they’ll cheer you up. This group “has your back” at all times and on all issues.


I did have an oops and an almost-oops.

Boonie-OopsFirst, my oops. I didn’t pay enough attention to the bottom strip, to ensuring the front and back strips met at the sides. So not like me!! Won’t do that again.

And my almost-oops: I’ve made a number of little zippered bags over the past 18 months or so. (Yes, these will be available when I get the website up and running.) I hadn’t paid attention to the fact that Bonnie featured a zippered closure at the top. I followed the perfect directions for inserting the zipper and had these little zippered bags in my brain. The instructions didn’t match what was in my brain. I looked at the illustration and read the instructions several times. Still no “aha”. As a last resort, I opened up the Bonnie web page and clicked on each and every bag photo on the page. There’s that “aha!” As soon as the Jazzman left for his Friday night pub crawl with his pals, I ran back downstairs and finished up the zipper and the lining.

So the moral of that story is: don’t think you know what you don’t know!!!

And now I can hear you asking, “So, Jan, when’s this store going to open. I want one of your bags and I want one for my sister’s birthday and my ….”

In two months I leave for six weeks where my focus will be on creating great summer camp musical theatre experiences for middle and high school campers at Interlochen. Although I’ll take my sewing machine along, I won’t have the time to focus on either sewing or shipping any textile treasures I might sell. So I have four months to get up to speed, develop my website, establish my brand, and be ready to entice you to buy lovely bags.

Bonnie-LabelStep one was deciding on a name. I think it’s significant that the name was given to me during the summer of 2014 when my son, my grandchildren, and I visited Interlochen and my son’s partner encouraged me to follow my dream and apply to Interlochen as a collaborative pianist. This was also the first time I had met her then-3yo daughter, who decided I would be called “Jananza.” So Jananza! it is. I smile everytime I think of it. Thanks, Miss C, for my new name.

<Note> My labels come from Mountain Street Arts’ Etsy store. I highly recommend this vendor. Pam’s customer service is wonderful. Her communication is quick and clear. She’s generous with sharing her product knowledge to help you have a positive experience. I’m so happy with my labels and will be buying more from her as this new effort develops its own sense of style.

<One more note> I think you’re probably wondering how much a bag like this will set you back. (I can already hear my Tucson friend, Jill, thinking ….) The bag contains high quality quilting cottons that sell for over $10/yard, interfacing, heavy stabilizer for the base, bag hardware (feet, O-rings), zippers, zipper pulls, thread, a new sewing machine needle, fabric protector, labels, hours of cutting and construction time, wear and tear on the machine, …. Bonnie would sell for around $75.00.

So, despite all that, how do you like Bonnie?

In Search of the Perfect Fit

ica1frontSo, we’ve been eating a little differently around here. The Jazzman is on the elliptical every day for 45 minutes or so, and he’s lost pounds—pounds, I tell you! I’ve lost ounces. But there have been enough ounces so far that I’ve had to buy new bras. The new measurement was 2″ smaller in circumference, but (of course!) a larger cup size.

renfrewLast October, my SIL-Equivalent in Columbus showed me a t-shirt she had made in a class at a local fabric store. The pattern is the Renfrew t-shirt from indie pattern designer Sewaholic. I loved Barb’s version. She chose a knit stripe in a nice mid-weight cotton. And she had done a fabulous job with the neckband on the pattern. It looked like she had been sewing this pattern for years, rather than it being her first time. I ordered the pattern and put it on my project list.

One of my goals for 2015 is to break the code on altering patterns to fit my sizable bust measurements. Why is this an issue? Because most sewing patterns are designed for B cups. I am now a Triple-D (or F, in European sizing—I don’t know why American companies switched to D, DD, DDD, and so on. Confusing.). Each cup size increase translates to a 1″ increase in full bust circumference. That means if I choose a pattern for my 36″ high bust measurement, I have to somehow add 4″ to the pattern to get it to fit around me. But in the front only, as my back is the perfect 36″!

iacuniformEver since I got the summer job at Interlochen, I’ve been obsessing about components for my uniform for the summer. See those cute campers in the picture? They’re in blue tucked-in polo shirts. And shorts. Neither of those items have a place in my standard wardrobe. I noticed last summer that faculty and staff tend to find a way to skirt (no pun intended) the requirement. So I’ve been searching for the right shade of blue in a fabric I would like and patterns that will cover my bum and let me feel comfortable while spending my day on a piano bench.

I found a nice blue cotton jersey at Mood and got enough for two t-shirts. I decided to start with Renfrew. I read everything in my personal library of sewing/fitting books on FBA. I googled FBA and Renfrew and found this blog post, which was somewhat helpful. But I felt there should be more hard and fast mathematical rules to it. I wanted it to be a science, not an art. And then I found a video on tissue fitting patterns by my teacher and friend, Marcy Tilton. Here’s the YouTube link.

ica1side2I spent about an hour fiddling with the pattern, tracing it, pinning it, taping it, and cutting it. I dug into my knit scraps and found enough to cut out a front and a back and sew them together. I fiddled with armscye bust darts and adding space and subtracting space. I ended up with a t-shirt body that seemed like it fit me. (Please ignore my cheek in the picture. This was dermatology week, and she froze some old-lady crap off.)

iac1sideThen I cut it out in my blue cotton jersey and set to constructing it. The lightweight cotton jersey had more give than the scraps I had “muslined” the pattern in. So where my muslin had fit me perfectly, the real deal felt rather large. It felt sloppy. I don’t want to look sloppy!! I experimented with making the side seams ½” larger, thus removing another 2″ from the circumference of the garment. I unsewed the darts and moved them up a couple of inches.

Where I thought I was going to be done by 9:00 a.m., it is now 4:00 p.m. Except for my lunch break, I’ve been going nonstop all day. And I have a shirt that fits. It looks almost nothing like the pattern picture, as I omitted the bottom band and the sleeve band and cut it 3″ longer to get the bum-covering length I wanted.

I don’t love it, sd this blue is not really my color. And yet, when I put it with the navy Eileen Fisher stretch crepe slim ankle pant, I do like it. And styled with my new Bernie Mev “Victoria” woven elastic sneakers, well, I’m a happy girl.

I will attempt the Renfrew again—probably more than once, but with a more substantial knit.

And I will continue refining the FBA.