Love Potion No. IX

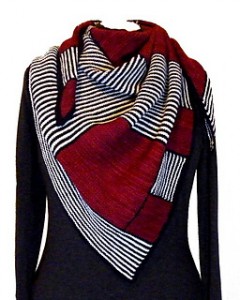
IXLate last summer I saw a picture of a stunning geometric handknit scarf on Facebook. A few weeks later I realized I had to resign from the Cleveland Orchestra Chorus because of work conflicts. I wanted a special gift for our assistant director, a beautiful and very talented young woman named Lisa Wong. Lisa’s wardrobe is filled with black, which she accents deftly with grays and occasional pops of color. She is chic to the Nth degree. When I had first seen the scarf picture, I instantly thought of Lisa and how wonderful this scarf would look on her. On my last night at rehearsal, I showed her the picture and asked if she thought she’d prefer red or purple for the accent color. We agreed on purple and I ordered the yarn—Malabrigo Sock yarn, soft and cuddley.

Throughout a busy fall and winter (new job at the Bernina store; musical directing Sondheim’s “Company”; vacation in Florida; moving Mother into a nursing home and emptying her assisted living apartment; helping my son clean out his house after his ex moved out; and taking on a new opera gig), I did my best to make time to knit. The Jazzman likes to watch news shows when he gets home each evening after a long day on the railroad, so I used that time to sit with him and work on the scarf.

The pattern was complex and moderately difficult. Some of the techniques were new to me. The instructions were—to this technical writer—imperfect. As I worked through the pattern, I found little boo-boos that were too far back for me to be willing to fix. I have my limits!

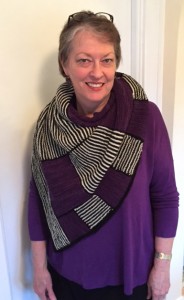
purpleWhen I was about three-quarters of the way through the scarf, I realized I had made a major error: two adjacent striped squares were parallel rather than perpendicular. And then on one of the purple squares I realized I had slipped a stitch, creating a hole. Argh! I left a note to Lisa on Facebook telling her the scarf was going to come to her next fall—just as the cold weather is beginning again—rather than at the supposed end of this long and bitter winter. This one would be for me to wear with a purple Eileen Fisher sweater that was a gift from my DIL-Equivalent.

So here’s today’s premier wearing, just an hour after finishing. Tonight the Jazzman and I went to a fundraiser for my neighbor’s non-profit, and several people noticed and admired the scarf. Isn’t that always the best way to end a project?!

Knitting geekery. If you’re not a knitter, you can skip this paragraph!
For anyone working on this pattern, here are my clarifications to the less-than-perfect instructions:

  1. Section 6, striped square – this is not really an error, but just a lack of clarification. If you don’t count carefully but rather just read, you might think, as I did, that the final row of this section is CC2. But because the block contains an odd number of rows, the final row is CC1 (black), not CC2 (natural). Big Oops #1. And nothing is said about binding off.
  2. Section 7, solid square – Okay, if you don’t bind off, where does the next row begin? My notes say to stop the previous block at the intersection of blocks 2, 3 and 8. “Leaving the existing stitchs on the right needle, use MC to work 37 garter ridges, K2T at the end of every ridge.” That means this block is perpendicular to the previous striped block and to the solid color block in the first block row. If this is correct, then there needed to be a bind off row, which doesn’t exist. Maybe this block needed to be parallel to the solid color row in the first block row. But it would have to be attached to the first block row by K2T at the end of each row. Another Argh!
  3. Section 8, striped square. Again note the odd number of rows, necessitating CC1 as the final row.
  4. Everything was fine until the top edging. The way the author sometimes tells you what to do before telling you to do it is confusing. This is one of those instances. The top edging says, “Using CC1 pu and k 234 sts. Then, Row 1-3: K to end. 2 garter ridges. What she should has specified is that R1 is WS. That pick-up row and #2 are RS, then 1 and 3 are WS, making 4, the BO row, RS.

Honestly, I’m happy this first version is finished. I will keep both the instructions and version #1 next to me while working on version #2.

And the bottom line? I love it! The yarn is just lovely. This will be worn each time I wear the purple EF sweater.

Rewriting History

tj19892014In 1988, when John and I were newly a couple, his daughter Tamara met a lovely man (Jeff, who has now been her husband for over 25 years). During their first summer of dating, Jeff met Scott and Tyler and learned that Tyler was an avid musician. Having spent several summers at what was then National Music Camp (NMC, now Interlochen Arts Camp, IAC), Jeff graciously ordered information to be sent to Tyler. The seed was planted, Tyler learned more and more about percussion during the school year, and he applied to spend the summer of 1989 as a percussionist at NMC.

Tyler, age 14, went into camp with a swagger, “I’m gonna be a drummer in a rock band when I grow up.” Within two weeks of starting the eight-week program, playing tympani and other percussion instruments in two orchestras, he had fallen totally and deeply in love with classical music. He was completely immersed in music for hours of every day, associating with kids who were as passionate about music as he was. One of his cabinmates was to become his best friend for all time. It was a magical experience.

As I watched Tyler grow and develop through that summer, I bemoaned the fact that I hadn’t had similar opportunities. Sure, I went to a one-week music camp for one or two summers, but it was absolutely not the same thing. I never found myself the way Tyler was able to find himself at Interlochen.

I frequently thought how different my life would have been, “If only my parents had known about Interlochen and sent me there” (or some equivalent place). But my mother was a devout Seventh-day Adventist, and she would have never.ever.in.a.million.years have sent me to a secular institution or any place that didn’t observe the seventh-day sabbath.

I visited IAC again last summer on family vacation with Tyler and my grandchildren. Twenty years had passed since my last visit. I was thrilled to be there. Tyler’s life partner, who was working as a choreographer in the theatre department, said to me, “Why don’t you apply for a collaborative pianist position. They can never find enough accompanists.” Her words started the whirlwind in my head.

By jove, if I can’t have had the childhood I wanted, I’m going to rewrite my history. I’m going to have the childhood I wanted, now!

And today I received the email telling me I had been accepted for a collaborative pianist position in the theatre department. I will go to Northern Michigan in late June and return in early August. Six weeks surrounded by creative people—music, visual arts, sculpture, photography, creative writing, dance. Six weeks walking among the white pines in Interlochen State Park; six weeks hearing young musicians’ dulcet tones emanate from every practice room; six weeks of gratitude for the gift of music with which I was born.

Lucky. Lucky. Lucky. Lucky. Lucky.

I’m going to create beautiful music with talented young people in one of the top arts organizations in the entire world.

It’s never too late to have a happy childhood!

Will It or Won’t It?

Punk(Fit, that is.) About a month before the beginning of my ill-fated “career” at the Bernina store in Boardman, OH, I visited the second store Joyce owns, located in Twinsburg, OH. She had told me of picking up some fashion fabrics at the recent quilt market from the back of a truck in the parking lot and I had to see what she had bought. One piece caught my eye. It was several shades of gray, along with black and white, and was covered with words. It appeared to be a polyester, which I tend to shun, but had a very nice hand to it.

I seem to have been smitten by fabric with words lately. I got one piece from Emma One Sock for a Katherine Tilton t-shirt. The other came from a department store fabric department in Frankfurt, Germany. Another Katherine Tilton top.

So when I saw this piece in the Twinsburg store, I didn’t look at the words at all, didn’t attempt to decipher or translate. I just grabbed it. The longer it sat in my sewing room, percolating, the more I wondered what the words were/meant. Would I wear it and some kid point at me and snicker? But after a little digging yesterday, I now think it’s a tip of the fashion design hat to Stephen Sprouse. I guess I can say I’m in my punk phase when I wear this top.

Here’s the review:

StyleArc RosiePattern Description: (From the pattern envelope:) This is a great top for all occasions. The slight cap sleeve is very flattering and the back inverted pleat give this top a point of difference.

Pattern Sizing: 4-30. Note that hardcopy StyleArc patterns are one size per envelope. I looked at their size chart and ordered a 14 in several patterns. The first one I made was way too small. (My high bust is 38″, but I’m a DD cup, so think I should have bought 18.) This pattern is designed for wovens, so I made it in a knit to get around the sizing problems. Success!
(StyleArc now has an Etsy shop where most of their patterns are available in PDF. Three sizes are included in the PDF – yea!!! And there’s no shipping-from-Australia fee – double yea!!)

Did it look like the photo/drawing on the pattern envelope once you were done sewing with it? Yeah. Sort of.

Were the instructions easy to follow? StyleArc’s instructions are summary, not detailed! And the illustrations are minimal. So you’ve got to know what you’re doing or have a sewing friend you can call upon for help. Or hope for a review in PR! 🙂

What did you particularly like or dislike about the pattern?
Like: The design lines on the front are interesting. Additionally, the peplum skirt is nice in that it’s not all flippy and twirly for this non-girly-girl. I like to cover my hips, not accentuate them.

Dislike:
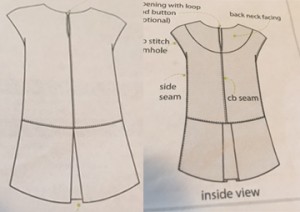
Rosie illustration1) The markings on the back inverted pleat aren’t clear enough with the five notches. You must bring both the outside notches to the center. Notches #2 and #4 just indicate where the fold will be. The illustration on the front clearly shows this. However, the illustration on the back led me to believe I was to bring #1 to #2, and #5 to #4, just using #3 to align to the center back seam. I searched PR and looked at everyone’s photos, but still didn’t have a clear image of what I was supposed to do.

2) Step #5: “Join the centre back seams together. If opting for a back opening stitch up to the notch attaching the loop onto the left side.”
(Please forgive me. I’m a technical writer and editor. This was totally unclear to me!) There’s a comma missing after “notch”. The loop should be attached at the top of the back left side, about 1/2″ down from the top. Baste in place, then catch in the center back opening when you attach the facing.

3) The armhole finish was a little awkward. You finish the shoulder seams, then turn the edge under 3/8″ and topstitch. But to where? And then how do you finish the side seams when you’ve already finished the armhole? As I was doing the side seams (next to the last step!), I unsewed an inch on the front and back of each armhole, stitched the side seams, then turned the armhole under again and redid the topstitching on the 2″. I like my insides to look as nice as my outsides, but this finish doesn’t allow that.

Fabric Used: The inset is a polyester picked up from a jobber. I ordered a yard of black ponte from Emma One Sock for the body of the top. (4-way stretch rayon blend ponte – black) The ponte is not heavy, but this pattern really wants something lighter.

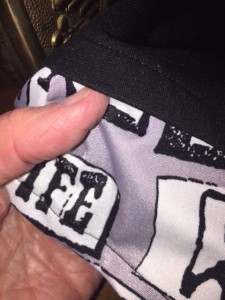
Hem finishPattern alterations or any design changes you made: I am 5’8″ and have recently figured out that most patterns are drafted for 5’6″. I normally add 2-3″ to the torso, but didn’t do that here. It was too short so I cut a 4″ band of the poly, attached it to the bottom cut edge, turned up the regular 5/8″ hem and topstitched, then turned up the poly bottom 1/2″ and topstitched. (This is a technique borrowed from Katherine Tilton in B6101 (My blog post on B6101)). (Click on photo to enlarge.)

One more note on knit vs. woven: I made the facing, using the poly to make it lighter. However, if you’re using a knit rather than a woven, consider sewing the back seam to the top, omitting the opening with the loop and button. The neckline is large enough to fit easily over your head. Then use a strip of your knit to bind the neckline and armhole – either letting it show on the outside if you want to make a statement, or turning it to the inside and topstitching. I think you’ll be much happier with this finish.

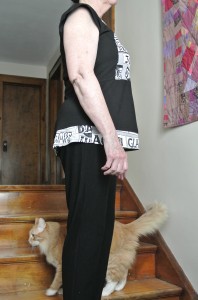
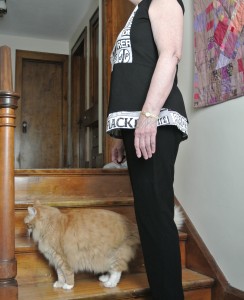
rosieside2rosiesideAnd one more note on fit: When I first put the top on, I thought the right armhole gapped in the back. Turn to the right, turn to the left. Gap; no gap. I thought there was no way to fix it and didn’t know what I was going to do. But once it was completed, I don’t notice the gap so much. So my word to the wise on this one is to not jump to conclusions. (And what is Rudi looking at?!)

Would you sew it again? Would you recommend it to others? I will probably make it again, in a knit, and cut the skirt/peplum 3″ longer to begin with. Yes, I would recommend to others—just read all the reviews first!

Conclusion: A cute top. Make it in two coordinating fabrics to accentuate the bodice front design lines. Or insert a bias strip of coordinating fabric in those front seams (ooh, how about a mesh?) if using only one fabric.


The ice on the inside of my bedroom window when I was changing into sandals to show you this top!

The ice on the inside of my window when I was changing into sandals to show you this top!

Styling has so much to do with how a garment feels to you. I was wearing my Eileen Fisher skirted leggings (which I love-love-love) when I finished this top. It was 0° outside and I had just returned from a business lunch. I pulled off my sweater, slipped the top on, stood in front of the mirror, and stuck my tongue out. Frumpy-dumpy! Pulled off boots, pulled off tights, pulled off skirted leggings, pulled off t-shirt, put on Eileen Fisher stretch crepe slim ankle pants and fave Naot sandals with the new top. Took picture of icy window and snow outside to let you know the sacrifice I was making. Looked in the mirror and LOVED the outfit. (BTW, we’re getting eight more inches of snow today. Ugh. But at least I’m not in Boston or New England! Sending lots of moral support to those people!!)

And regarding the title of this post. The entire time I was cutting and assembling to the point where I could try it on, I kept saying, “This is not going to fit.” I thought I would have to send it to my DIL-Equivalent, the lithe and lovely Leslie, who is the same height as I but one size smaller. I agonized over this, as I loved the poly wordy fabric. But then I basted the side seams and put it on and cheered!

Now I’m going to be looking at all those StyleArc patterns I bought in the wrong size to see which are designed for wovens and can be made in knits to save them.

And Leslie’s loss? Well, I’m making her a pair of yoga capris and sending a dress for her 4yo Miss C. Saved again!!

A Tank That Won’t See the Light of Day

Frustrated sewist!

Frustrated sewist!

I bought a kit from Craftsy with Meg McElwee’s “Tank + Maxi” pattern and enough Robert Kauffman cotton jersey to make a tank and a maxi. I thought it would be nice to have a maxi tank dress to take with me to Mexico next week.

It was a PDF pattern, so I printed and taped and traced, then cut and sewed. Size Large, true to the pattern with the exception of adding 2″ to the length. Easy. Nice. Professional finishes. Not right!!!

No! No!

No! No!

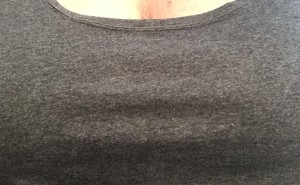
If you’re busty, you know that ripples across your bustline are a no-no. So, the first place I’m going to have to start to make this pattern become a TNT is to master the FBA.

TMI!

TMI!

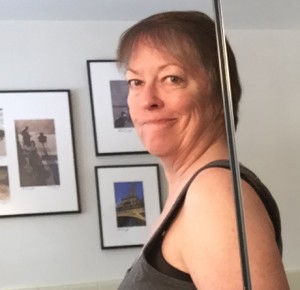
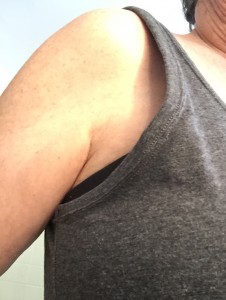
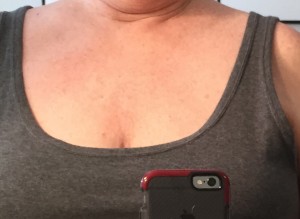
I really don’t like having passersby knowing what color bra I’m wearing. This gaposis offers way too much information.

<Tutorial On>
Click on the “TMI” image to see the great binding finish. The bindings are sewn with a ⅜” seam. Press the binding away from the top and wrap around to the back so that it covers the seam on the inside. Pin in place, then topstitch with a double needle so that one needle is on either side of the seam. (Rather than stitch-in-the-ditch, you’re going to stitch-over-the-ditch.) (To make it a little clearer, if your shoulder seam on the front pattern piece is 2″, your finished measurement of the shoulder strap will be 2″, because the bindings are just opened out, then wrapped around the back without taking anything away from the front.) Easy and gorgeous!
<Tutorial Off>

"You'd be so easy to love ..."

“You’d be so easy to love …”

But really. Look at this neckline. It’s just the right tease of décolleté without making me uncomfortable. This is a neckline I love. This is a tank and maxi dress I could love!

Now to master the details!!

<del>Here’s the kit — and such a great deal!</del> (Edit, 5/24/2019: And by now we all know that Craftsy went away, replaced by its less-loved cousin, Bluprint. I searched Bluprint and the kit isn’t there. I googled Meg McElwee and found her old blog, last post February 1, 2018 😞. I scrolled through the Shop section of her blog, and no “Tank + Maxi” pattern. You can find her on Instagram. If you’re wanting the pattern, maybe message her there and ask about the “Tank + Maxi” pattern.)You couldn’t buy the fabric for that little anywhere else, much less the fabric and the pattern!

Oh, and just to be clear, I will wear this tank under sweaters all winter. I just won’t wear it by itself. Not until I master the details.

Vacation = Must Sew

Butterick 6101As I write this post, it’s 32° outside and the snow is falling. We’re slated to accumulate about three inches today. So why am I sewing summer clothes and wearing sandals? Because next week is vacation in Mexico—yippee!!

For me, vacation has always meant new clothes. I don’t know why. And when I have drawers full of perfectly suitable clothes, I always feel I need something new. Okay, truth: I want something new.

Everytime Marcy Tilton and Katherine Tilton design new garment patterns for Vogue and Butterick, I snatch them up. I had picked up Katherine’s Butterick 6101 the moment it hit my inbox – so many possibilities.

B6101-backThe fabric came from the Bernina Store in Twinsburg, OH. When the owner went to quilt market in Pittsburgh last year, a jobber said “psst!” to her outside his truck in the parking lot of the hall, and she bought a small stash of apparel fabric for her quilting store. I’ve picked up a few of them, and this gray print with mauve undertones was one. I believe it’s a rayon/lycra blend, but with purchases like this, you can’t really be sure.

The pants were snagged up when Naturals Inc. in Oregon had an after-Christmas sale and sent me a coupon for an extra 25% off. How could I resist? I don’t love shorts and I do love Eileen Fisher, so these slim capris became mine. But when they arrived, I immediately thought, “I have nothing to go with that silver.” So I went shopping in my stash and this is what happened.

Here’s the review:

B6101-sidePattern Description: From the pattern back: Loose fitting pullover tunics have collar, left side pocket detail, sleeve variations, hem band and top stitching. C: contrast right front, left front, left front and back pocket, armhole facing, hem band, left pocket and right inside pocket. D:contrast collar, right sleeve, left front, back pocket and right inside pocket. I made version A.
Designed for lightweight woven and stable knit fabrics.

Pattern Sizing: Y(XSmall-Small-Medium), ZZ(Large-XLarge-XXLarge)
I made a Large. I usually add 2″-3″ to the torso or length of Katherine’s designs, but cut this one as printed.

B6101-bigpocketDid it look like the photo/drawing on the pattern envelope once you were done sewing with it? Yes.

Were the instructions easy to follow? Some of the instructions were a struggle. In talking to various friends who are designers, I understand that pattern companies have their own ways to express things and sometimes what the designer writes as instructions doesn’t make it into the pattern.

That said, I found the hems challenging. The illustrations were made to look like you could just put a binding on it – specifically the Lower Left Back and Lower Left Front. This insert is not straight across the bottom (as indicated in the illustration), but looks more like a large shallow scallop. I ended up turning up the hem edge 5/8″ and then top-stitching with a double needle.

There were times I had to read the instructions for a step several times and then stop and try to picture it in my head before proceeding.

What did you particularly like or dislike about the pattern?
Like: Another lovely Katherine Tilton top.
Dislikes: 1) That funky little pocket on the left side. Gotta figure out how to omit that next time. 2) The hem problems.

Little pocket, in center of photo

Little pocket, in center of photo

(And after trying the top on with designated slacks and tank to take pictures for the blog, I find I love the funky little pocket. Will not be omitting!!)

Fabric Used: This is a mystery from a jobber, but I think it’s rayon/lycra. It’s a very lightweight, almost meshy fabric that flows nicely.

Pattern alterations or any design changes you made:
I interfaced all the hems and the back shoulder seams with a tricot interfacing. I learned this from Marcy Tilton and use that tip on every knit top to stabilize the shoulders and to make the hems so much easier to turn and double-needle topstitch.

IMG_8819On the right side seam, the illustration shows opening up the basted hem and sewing to the bottom, then turning up the hem. As with my comments about the left side seam, the right side is not straight across. It’s a shallow scallop (for lack of a better explanation). I left the hem turned up, then sewed to the bottom, then topstitched along the top of the hem allowance across those folded edges to hold in place. Then I double-needle stitched all the way around the hem. (Please leave a comment if this doesn’t make sense to you. I’ll also put a close-up picture on my blog to better illustrate.)

B6101-armholeWould you sew it again? Would you recommend it to others? Probably, with some changes. I think I’ll make a regular facing for the Lower Left Back/Front rather than trying to bind or just turn up. I’d be much happier with that finished result, I imagine. Also need to tweak the pattern to decrease the size of the armhole—too much gapage.

Conclusion: Another unique top from Katherine Tilton. Very flowing and flattering. Great for next week’s snow-fleeing vacation in Mexico.


I think this is one of those tops that I’m going to grow to love more and more as I wear it. The fabric is very comfortable, and I think I’ll be happy I have it as we’re walking around Tulum next week.

Take care of the snow until we return. 🙂

Thick and Thin

2015-01-14 20.04.20It’s pretty sad when the lack of two tassels keeps you from wearing something for almost a year! In my so-far-successful effort to finish everything I start, I made two tassels this week and have worn my new scarf twice. And I love it!

The scarf in question is the Tilled Scarf by Quirky Bird Knits. The yarns are Malabrigo Rasta in color number 866, Arco Iris, and Malabrigo Silkpaca in color number 96, Sunset.

2015-01-14 11.53.41The pattern calls for one skein of each yarn. At the end I ran out of the Rasta, so didn’t have enough for the tassels. (On rereading the pattern, I think I used a single strand of the Silkpaca, rather than holding it doubled throughout. Oh well.) I pondered a long time what to do about the tassels. I didn’t want to buy a $22 skein of yarn just to have enough for two tassels.

2015-01-14 11.52.56There’s a lovely little needlework store name With Needle in Hand in Boardman. I took the finished scarf there and examined each rack and every yarn. Finally I decided on two hand-dyed silk ribbons to pair with the leftover Silkpaca. I got the 7mm ribbon in Gidgee and the 4mm ribbon in Jindalee or Tea Tree. I wrapped the lengths of ribbon and silk/alpaca yarn over the tails of the Rasta that were hanging from each end of the scarf, wrapped and tied the tassels with the Silkpaca tails, and – scarf all done!

In retrospect, I should have ironed the ribbon first …. When I put the scarf on for its second wearing, I realized I had dripped Balsamic vinegar dressing on the tassel at dinner on Saturday night. I rubbed the affected ribbons with water and a little hand soap, gently rinsed the affected ribbons, and used my flatiron to press them. Inspired, I thought.

2015-01-14 11.54.10The hardest thing about this scarf was the switching from very thick to very thin on each set of rows. It required a lot of deft holding to maintain tension in the yarns. (Click the pic to view the difference in the yarns close up.)

And the result? Worth all the effort. I love this scarf and have gotten many compliments and queries about it with each wearing.

Purchased as a kit from Knitter’s Mercantile of Columbus at the 2013 “A Knitter’s Fantasy” show in Youngstown.

Gayley Girl Gift

gaylebagMy New Year’s resolution is to have only one project going at a time. And that translates to “finish what you start.” I can be a tad ADD, i.e. “Look at that pretty piece of fabric; I think I’ll sew that today.” And my Very Bad Habit is to throw each new pretty thing onto my cutting table. And the mess begins. If I can stick to my resolution—and 15 days into the year (half a month gone already?!), so far/so good—I can get rid of the clutter and mess and feel more at peace in my little basement haven.

Jas and our travel pals and I had the most wonderful NoCal vacation in September. And one of the best memories is of a sidetrip to Capitola and lunch with one of my cyberfiberfriends, Gayle.

To say Gayle offered us lunch is an understatement. Gayle was incredibly generous and opened her home to us and shared herself and her talents (and her very talented and musical husband). I wanted to return her gift in kind.

Gayle sews – beautifully. So what could I make to say “thank you” that wasn’t something she could make for herself? The answer came as two lightbulbs went off in my head.

Lightbulb #1: While working at the Bernina store, one of my tasks was to arrange all the store samples of bags and accessories onto a wall. One of the bags was the Amy Butler Reversible Sunday Sling. This is a cool bag—verrry large and perfect for carrying a stash of fabric to a class or a lunch-worth of veggies from the farmer’s market. And did I mention big? The pattern has two sizes and I chose the larger one.

I’ve made a number of bags, but I’m never content with the weight of the bag. By weight, I mean the way it will stand when you place it on a table or the floor. I have yet to find the interfacing or inner construction that makes me happy. Amy Butler and her team have hit a home run with this bag, IMHO.

Lightbulb #2: On the shelf at the Bernina store, I found the perfect fabric to craft this bag for the consummate foodie. The exterior would be Makower “Cook’s Kitchen,” the interior would be Timeless Treasures’ “Gorgeous Gourds,” with a little accent of P&B Bear Essentials Two Green Bubbles.

Cook's Kitchen

Cook’s Kitchen

Gorgeous Gourds

Gorgeous Gourds

Green Bubbles

Green Bubbles

Here’s the review:

Pattern Description: “Stylish & sweet and easy to sew! This reversible modern design is great for beginners – with simple, large pockets, tie handles and pleats. This gorgeous bag makes every day as easy as Sunday.” (From pattern page on Amy Butler website)

Pattern Sizing:
Small Sling – 18” wide x 14 1/8” tall (28” tall with Handles) x 3 1/4” deep
Large Sling – 23” wide x 16 1/8” tall (30” tall with Handles) x 4” deep

Did it look like the photo/drawing on the pattern envelope once you were done sewing with it? Yes
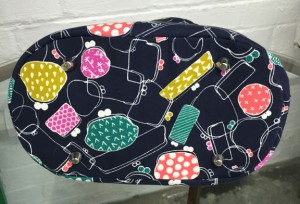
Were the instructions easy to follow? Yes, but verbose. A lot of reading.

What did you particularly like or dislike about the pattern? Loved the stiff interfacing in the base. A sturdy and well-designed bag.
The downside is how difficult it is to turn rightside-out when you’ve finished attaching the inside to the outside. Because you’ve got layers of batting and interfacing and stiffener for the bottom, plus layers of pockets, you’ve got a lot of fabric to pull through that small hole. Take a deep breath and take your time.

Fabric Used: 100% Cotton (see my website for exact fabrics)

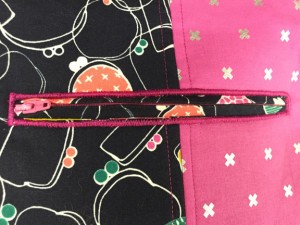
Pattern alterations or any design changes you made: Changed up the pockets somewhat. On one of the outside pockets I added a contrast binding. On the inside big pocket, I added two zippers. I made the tuck in the cell phone pocket smaller, as phones have increased in size since the pattern was designed.
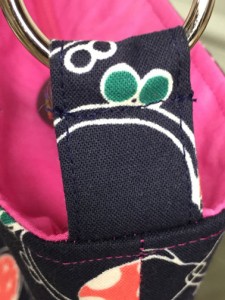
For the handles, I cut four of the inside fabric and four of the outside, as I liked the look of the handle matching whichever side is out.

Would you sew it again? Would you recommend it to others? I bought enough batting and interfacing to make another for myself, but am not giving it a high priority, as it was a lot of work! (But so worth it — conflicting emotions!)

Conclusion: Great tote bag, nice design, clear instructions. Makes a wonderful gift for someone you really like.


A few more pictures. The bag will go into the mail on Monday. Jas looked at it again as he left for work this morning and said, “Gayle is going to love that bag!”

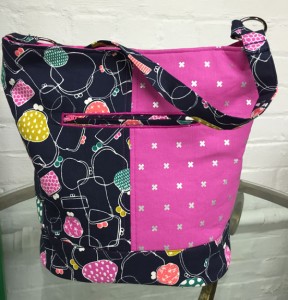
Bag front, full view

Bag front, full view

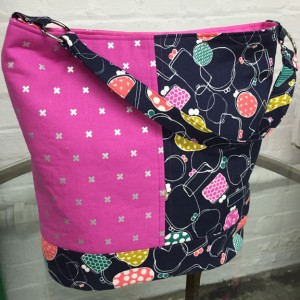
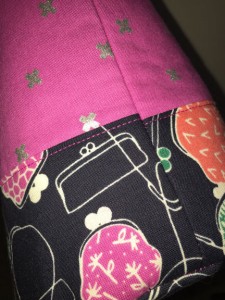
Outside, back view. Contrast trim on large exterior pocket.

Outside, back view. Contrast trim on large exterior pocket.

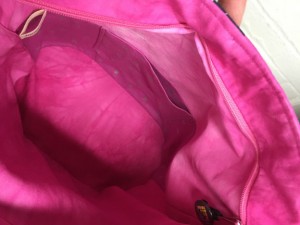
Inside, look closely to see the cell phone pocket.

Inside, look closely to see the cell phone pocket.

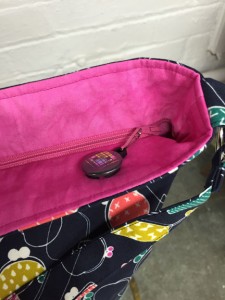
Inside, full-width pocket, seam up the middle to create two pockets, each with zipper closure.

Inside, full-width pocket, seam up the middle to create two pockets, each with zipper closure.

Baby, It’s Cold Outside

Brrr!It took the winter of 2014/15 a little while to set it, but it’s here now. Boy, is it here. The temperature for much of yesterday was right around 0°, with wind chill temps in the minus-teens. Tomorrow the wind chill temp is supposed to drop to about -24°. One does not go outside without gloves, even just to take the bag of used kitty litter to the garbage can! (TMI? Sorry!)

At the Bernina/quilt store where I work worked until noon today, we’ve had two shelves of Shannon Cuddle just lingering on the shelves. Shoppers would come in and say how soft and lovely it was, but then move on to other fabrics. As I wrote yesterday regarding the Cuddle infinity scarf, there were bits of it going to new homes, but much of it is still on the shelf.

When I picked up the Winter issue of Stitch Magazine, and saw this cuddly lounging jacket made from Shannon Cuddle, I felt inspired. Taking advantage of the employee discount at the Bernina Store, I bought enough to make a jacket for my DIL-Equivalent and one for myself.

Here’s hers:
IMG_8720The reversible jacket requires about 2¾ yards of two colors of microfiber fleece. For Leslie, who lives in Amarillo and whose family has a long history of ranching and farming, one of the sides had to be “My Lil’ Buckaroo” in camel. For the outside, I chose Cuddle Embossed Vine in brown.

When I laid the pattern out to cut the fabric, I discovered an error in the pattern. I wrote to the designer and got a quick response, ensuring me that the error was the publisher’s, not hers, and that the publisher had agreed to fix it and reload the PDF pattern.

Jacket backThe pattern is marked “one size fits all,” but I beg to differ. Really, one size fits up to about a normal size 14, and that’s snug in the sleeves. On Leslie’s version, I had to take scant ½” seams and the sleeves still were probably too tight to wear a t-shirt under the jacket. On mine, I will try adding a bit to the shoulder seam and slash-and-spread the sleeve to give myself more room.

HoodMy only other complaint is the lack of a “sew here” button marking. I sewed those buttons on three times and still wasn’t happy with the placement and the way the jacket falls in the front. I doubt I will ever wear it out in public. This jacket—for me—is going to be something I wear in my drafty old (1927) house to stay warm in these brutal and long NE Ohio winters.

And how cute is this hood? Very! Now to finish one outstanding project downstairs so I can cut into the black classic and ivory vine Cuddle yardage that’s waiting for me in the sewing room.


Edited 1/12/2015

Note: I’ve exchanged several emails with designer Cheryl Bush regarding problems I had or errors I discovered with this pattern. Here are her comments:

The sizing should be marked S-L (One Size Fits Most between sizes 0-14).

To determine the best placement for the shoulder buttons, try jacket on at when completed. Smaller sizes should sew a button onto one side of the front, about 1 inch in front of the armscye, just under the hood seam. Larger sizes may prefer buttons to be 2 to 3 inches below the shoulder seam for a roomier fit. Do the same on the opposite shoulder, but this time on the inside lining.

If you find tacking the neck seam together after sewing the inside and outside together, you might sew the hood seam together from the outside as invisibly as possible for about an inch at the center back.

Cheryl noted “This is content that was included in the submission to Stitch Magazine, but omitted by the editor.”

Thank you, Cheryl! I’ll look forward to trying more of your patterns.