WIP-Safety Scarf

safetyscarf3The Jazzman is on his annual golf outing to Florida with four of his best golfing buddies. I both look forward to and dread this week every year. “Look forward to” because it’s a time I answer to no one but the cats. I can stay in my jammies all day. I can eat breakfast for all three meals. I can spend the entire time in my sewing room. Or in bed, for that matter. “Dread” because—wait for it—I’m afraid of the dark. Yep. Me. Sixty-something woman who has covered a lot of ground in her life. Afraid of the dark.

Ever since I was a little girl, I have always thought some badguy was standing outside the window watching me, wanting to harm me. I don’t know where this came from. I pride myself on being a logical-thinking, rational human being. But I’m not. I’m afraid of things that go bump in the night.

I live in an 87-year-old house. Lots of things go bump every night.

When the Jazzman is here with me, I’m not afraid. But when I’m alone, I’m prone to stay upstairs in one room with all the shades drawn.

<Sidebar On>
Short story time: Twelve-or-so years ago, I lived with a fiancé and his 14yo daughter in a very lovely but very large house in Tucson. He and I went out one night to a party, leaving the daughter at home alone. When we arrived back home two hours later, every light in the house was on. Every single light! When we walked into her bedroom, she had the largest skillet from the kitchen on the bed with her. Yep, afraid of the dark. It didn’t matter that we lived in a gated community and the house had a security system that was armed while we were away. She was pumped and primed to bash any badguy over the head with the skillet.
<Sidebar Off>

This week however, I’ve been sick. I picked up a sore throat on Thursday morning. By Friday night it had developed into an upper respiratory whatever, and yesterday the doctor pronounced Upper Respiratory Infection and gave me a Z-Pak. All I’ve wanted to do all week is to sit on the couch with knitting needles in hand.

A couple of weeks ago I had visited The Flaming Ice Cube in Boardman. They were offering a class on brioche knitting. My schedule wouldn’t allow me to take the class, but I like exploring, so I bought some suitable yarn and the pattern. (With the help of my friend Melinda, I chose HiKoo SimpliWorsted in a gray sparkle and a light and dark gray variegated. This yarn is washable and soft—a great combination.) That night I sat down to start the cowl.

Twelve rows into it, I realized I wasn’t having fun. There was nothing about this cowl that was bringing me any joy. Without a backward glance, I pulled the whole twelve rows apart and rolled the yarn balls back up. Then I turned to Ravelry where, after a lot of searching and flipping through pages, I found Stephen West’s “Safety Scarf.” It looked like much more fun, and only required two more skeins of this reasonably priced yarn.

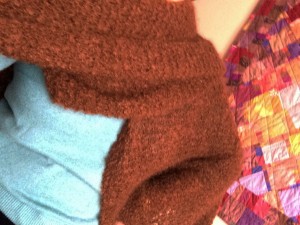
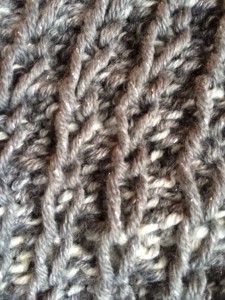
Now, after three days alone and about 30 episodes of “Breaking Bad,” I’m finished with the fourth section and midway through the fifth. And I love this scarf.

My Canadian cyberfriend Jeannie asked for more photos, so I wanted to give you a WIP post. (Work in Progress, if you’re unfamiliar with that acronym.)
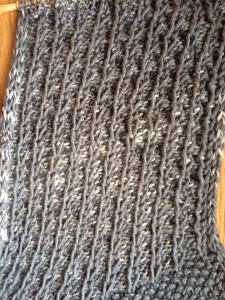
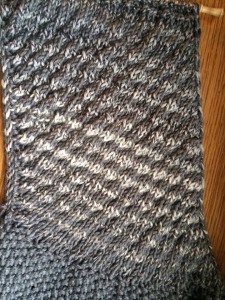
safetyscarfsafetyscarf2I greatly enjoyed Section 3 of this scarf, which is shown in the photos on this post. But it’s not for the distractible. Four rows form the pattern. Rows 1&2 are in the main color; rows 3&4 are in the contrast color. The odd-numbered rows are the right side (photo on left) and a modified cable pattern gives that stitch that spans a couple of rows. The even-numbered rows are the wrong side (photo on right) and are basically knit 3, purl/slip 1. That purl/slip is what gets the distracted knitter, though. Attention must be paid! Row 2 is K3/P1. Row 4 is K3/Sl1. And if you reverse those, your pattern is blown.
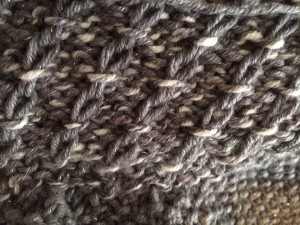
SafetyScarfBadThe first time through, I was 29 rows into the 60-row section when I realized something was very wrong. I looked at the directions again and realized that when I slip a stitch on the wrong side of the “fabric”, I was to hold the yarn in front. I was holding it in back, which gave these little lockstitches. (See the horizontal cream-colored bars in the photo? Those don’t belong there!) Now those lockstitches could be kinda cool in the right environment, but this wasn’t that environment! So I pulled out 29 rows and started again.

The next time I was only about 15 rows in when I discovered a problem.

After my third restart and unknit, I went to the computer and created a spreadsheet. I can always follow a spreadsheet.

So after four starts (which, coincidentally, is the same number of Kleenex boxes I’ve emptied in the past two days&jdash;from nose-blowing, not from crying), I have now finished Section 3 and all the remaining episodes of “Breaking Bad.”

Finished Section 4 (only 4 rows) and now on Section 5, I’m searching for something to watch that will get me through the rest of this scarf.

The only problem: I can’t remember what happened in the last scene of BB. This is the way I am with all books and movies. I can remember everything that leads up to the end, but I can’t remember the exact end. Now I need to fast forward through Season 5, Episode 16, so I can remember how it ended with Jesse and Walt.

Now, if you’ll excuse me, I’m going to go swig some DayQuil and find that last episode of “Breaking Bad.”
Preteen Playdate

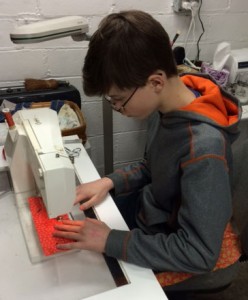
B1Last Sunday when my son popped by for a minute with my grandkids in tow, my grandson said, “Grandma, can I come over next weekend and sew a wallet? I made a wallet for myself out of paper but it’s falling apart.”

The most special thing to me about this exchange is that he didn’t say—to his mom or his dad or his grandma—”can you buy me a wallet?” He said, “I want to make a wallet.” Such an activity was within his realm of possibilities!

In preparation, I started searching the internet and came upon Allisa Jacobs’ blog and her tutorial for “Father’s Day Men’s Wallet.” It looked like it might just meet Boston’s needs.

I had the pleasure of hosting the grands tonight. Their mom texted me this afternoon to remind me, to tell me what time she’d drop them off, and to let me know that Boston wanted to make a wallet tonight. I told her I wasn’t sure we’d be able to get it all done tonight, as there were many steps in the project. Not only did we get it done, but we also had time to cook some supper in the middle there.

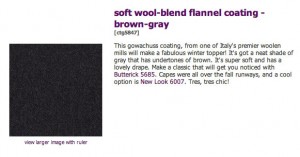
CoatingThe first order of business was to find fabric. I had some leftover soft wool flannel from my Marcy Tilton coat (whose construction, I just realized, I never blogged – oops). He thought that would be nice. BThen I took him to a stash container that I knew held some good 100% cotton quilting fabrics that would be a good weight for the inside. I knew there were prints of bricks and abstracts and other things I thought a 12½-year-old boy might like. But the thing that caught his eye was a salmon polka dot. That was what he had to have. Next we looked a threads. He found a soft orange that went well with the salmon. For the topstitching on the outside, he saw several variegated Sulky threads that he liked. I showed him a single row of stitching, then I showed him a double-needle topstitching treatment, and he loved it.

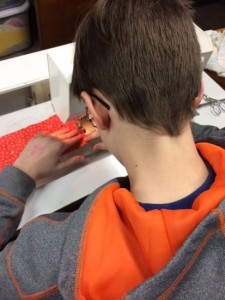
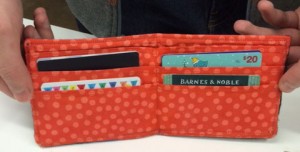
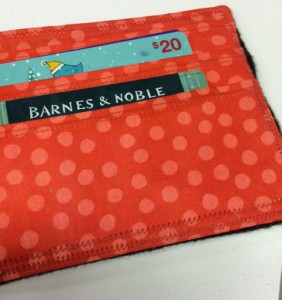
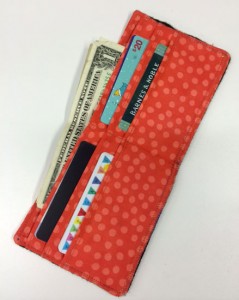
B2On to cutting and construction. The boy has been using a rotary cutter since he was six. I held the ruler, he operated the cutter. No fingers were sacrificed. We cut the flannel, then started to lay out the cotton, which had been folded for about five years. “Grandma, can I iron that? I like to iron.” A man after my own heart! He meticulously removed all the folds, then we cut the inside and the pocket. I showed him how the pockets would work, we counted his gift cards—from Barnes & Noble, Amazon.com, iTunes, and Handel’s Ice Cream, the local favorite—and I showed him how we could add an extra pocket that wasn’t in the pattern. We cut, then he folded and pressed the pockets. He did the edgestitching on the pocket folds, machine-basted the pockets together, sewed the seam down the middle to create the card pockets. He fused the interfacing, figured out how to lay the right sides together (and why), and sewed around the edge, leaving the opening for turning.

B3“Where’s the chopstick,” he asked, when it was time to turn the wallet. The boy knows how I do things and what my favorite tools are.

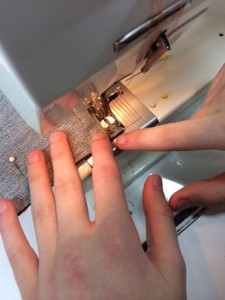
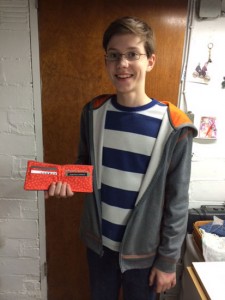
We pressed, I hand-sewed the opening closed, he pressed some more. All that was left was the topstitching. The way he was sitting on the easy chair, I sensed he might be feeling a little uneasy about the topstitching. “Would you like me to do it, or do you want to?”, I asked. “Maybe you could do it, Grandma.” So I did. Then he pressed some more. (Look at that cutie pie. Look at those dimples and that sweet face. Can you understand how he has me wrapped around his heart?!)

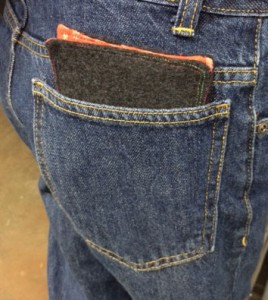
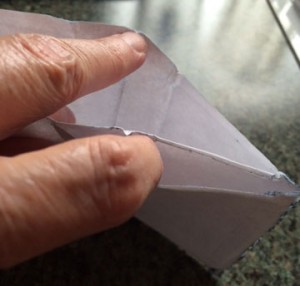
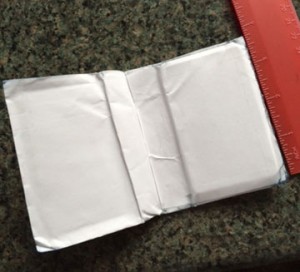
B9When he went to load it with all his gift cards, I realized the second pocket that we had added was too deep for the cards. They would get lost. I said, “Next time we make this …” and showed him how we could topstitch across the pocket before basting them all together so the card pockets would be identical depths. B6Then I realized I could probably hand-sew it after the fact so they’d be equal depths. We measured the first pocket, then measured down the same distance on the second pocket. While he pulled the first pocket down, I grabbed a needle and thread and sewed a line across as much of the pocket as I could. I held my hand down inside so I wouldn’t go through to the outside. Gotta be able to get those bills into the money pocket! (No, it doesn’t stick up out of his back pocket like that. But we wanted you to be able to see it.)

B7B8

And, about two hours after we started, we were finished. He carefully put the cards in place, then lined up his bills and tucked them in. He tucked it into his hip pocket and, as a last step in the process, took his old paper wallet and threw it in the trashcan.

I’m still smiling!

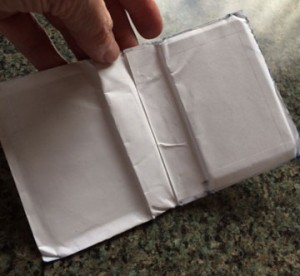
P.S. Pics of the original wallet. That’s an engineer-in-training, if I ever saw one!

walletp2walletp3walletp1

Antiquities

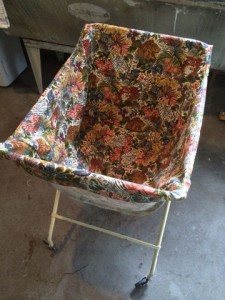
Laundry CartThe previous owner of my house was a 92-year-old woman who had fallen and moved to a nursing home. She had never married, never had children, and her nephews were charged with selling her house. The nephews were all in their 50s and 60s and had no use for her possessions. Most of her things stayed in the house when I bought it. This was convenient for me, as I had gotten rid of many of my possessions in Tucson before I moved, knowing I would be living with my son and daughter-in-law for at least a year.

The sofa and loveseat that were seriously marred by catscratches were reupholstered and now stand in my living room and library. The dining room suite stayed in place; the two chests now hold my antique serving pieces. Matching dark green wicker chairs are on the side porch and allow us to eat our dinners in comfort all summer long. The most used item that stayed was the laundry basket.

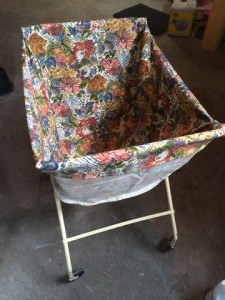
laundry3This is the old-fashioned folding laundry cart on wheels. My mom had one. If you were born in the 50s or earlier, your mom probably had one, too. The one in my basement laundry area probably dates from the 40s or 50s in this vintage 1927 house.

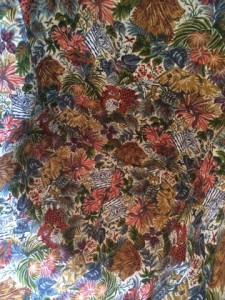
The woman I bought from was also a sewist and it looks like she made the laundry cart liner. It was an orange and yellow print, probably 100% cotton, probably bought from the sewing department of Strouss-Hirshberg or McKelvey’s. But it had seen better days. Tears were starting to appear from overuse; if I didn’t replace it pretty son, it would completely deteriorate and the dirty laundry would be on the floor!

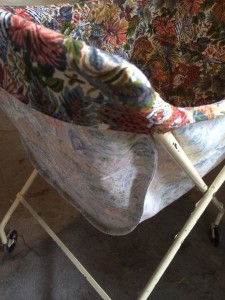
laundry2Yesterday I pulled the liner off the cart and started removing all the stitching. It turned out to be two major pattern pieces—the bottom and the sides, plus some seam binding for the raw edges. When it was all flat, I pressed the pieces, then started digging through my stash. Rather than stick with a gingham-weight cotton, I found some upholstery-weight cotton that had been stashed since Boston was born. Both Boston’s and Ridley’s nurseries had been decorated with jungle animal prints, and this midweight cotton/linen was printed with shades of olive and rust and gold, with zebras and lions and other jungle animals peeking out here and there.

laundryI laid out the fabric, laid out and pinned the pattern pieces to it and cut them out, making sure I remembered how I took it apart so I could put it all back together. Two hours later, I had a new liner for my laundry basket.

What had been a tough morning at the computer became a happy morning in my sewing room. And now, every time I roll the cart to the laundry chute to transport the next load of laundry, I will look at it and smile.

I’m thinking I might even make a pattern to sell on Etsy. If I needed a new liner, mightn’t someone else, also? I think so.

Here’s a little blast from the past for you from the Department Store Museum blog. Strouss’ department store. Even a garden shop on the top floor!

Measure Once, Cut Twice

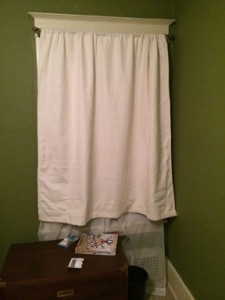
curtainsNo, wait. That’s not right. I think it was supposed to be “Measure Twice, Cut Once.” Oops.

Back in November, when I had just returned from ten days in Europe and we had started this never-ending winter, DS told me that DGS needed some draperies on his bedroom windows in the new rental house. There were sheers on the windows, but nothing that afforded any privacy.

Being the good grandma that I am, I measured both windows and wrote the measurements down in the Notes app on my iPhone. A few days later, I snuck into Jo-Ann Fabrics on Saturday morning after Thanksgiving. I had great coupons in the Jo-Ann’s app on my phone, and the line wasn’t bad at all. I scored great fabric and insulated lining (along with some fleece to make DGD’s blanket) for a great price, and brought it home to stash for my next sewing opportunity.

Then I got involved in a political campaign, and my sewing moments are few and far between. But last weekend I carved time out and set to work.

I had measured the south window at 29.5″x56.5″ and the west window at 29″x57″. I wanted the curtains to come just below the window sill, as both walls have heat vents at the baseboard below the window. Going just below the sill would give my much-needed privacy without obstructing much-needed heat. A young man who’s going to be a teenager in August has his needs, knowwhatImean?

I decided to start with the west window, finish that piece, then run it to my son’s house to make sure it fit. I drew a picture on a piece of paper, added all my seam allowances and hem/rod pocket allowances, and pulled the selvedge out along my cutting table to measure the required length. Then I sat and pulled a thread across to get a straight cut. When I got to the last couple of inches of that cut, I suddenly thought I hadn’t check to see that the cut edge of the fabric was straight. Big Damned Oops! The selvedge edge I had measured was 2″ longer than the other edge. People, I’ve been sewing for 50 years!!! How could I have forgotten to straighten the cut edge first?!!!!

So I straightened the cut edge and rethought my hem turnbacks. Instead of doubling the 2″ hem (or whatever it was), I decided to just turn back a ½” and make the hem 1½” rather than 2″. For the next two hours I turned, pressed, folded, pressed, inserted insulated lining, pinned, and stitched. Hurray – #1 done.

Pulling on my snow boots, I drove the four miles to my son’s house, let myself in, and slipped the curtain onto the rod. Oh. Shit. It was 2″ short. (By the way, I don’t care that the sheer hangs almost to the floor. Not my problem. Son doesn’t care. Grandson doesn’t care. All we care about is privacy and less cold air. But I did care about the curtain ending below the sill.)

What on earth did I do? How could I have made this error? The only thing I can think of is that I used one of those big steel measuring tapes in the yellow-and-black case. Y’know, where you have to add 2″ or 3″ to the final number you can see on the tape to get the actual length? I think I was supposed to add 3″ and failed to do so. (Huge sigh.)

I stood there and tried to think of ways to solve the problem without making an entirely new panel. I could get some fabric in the pretty army green of his walls and add a 3″ panel at the bottom and a 1″ band of trim around the panel. Or I could just cut another piece of the fabric, hem the bottom and sides, and topstitch to the wrong side of the hem of the existing panel.

Or, as DS suggested when he got home and saw it, leave it as is. Let the record show that DGS didn’t notice any problem at all.

So I made a note to add 3″ to my calculations for the next panel.

And to hit myself in the face if I ever again measure something only once.

Where Does the Time Go?

boucle2It’s been twelve days since I last posted. Here we are, almost to the end of January. The swift passage of time seems impossible and unbelievable.

Where have I been? What have I been doing? My friend, who is the Jazzman’s closest cousin’s wife (did you follow that?), is running for the Ohio State House of Representatives in District 58, and she asked me to be her campaign treasurer. I’ve been very busy with those duties. Then, coincidentally, she needed her website built. That’s one of the hats I wear in my other life—website administration. My son agreed to take care of the build for her, and I’ve been very busy loading pages and tweaking the look.

I don’t even want to think about the number of projects that are sitting and waiting in the basement. They’ll just have to wait. In the past week I’ve had an in-person job interview with one company and a phone interview with another company. I think a lot about my cyber-fiber-friend Shams, who recently started working at Google. She’s having difficulty finding time to sew, as her commute has lengthened, and the stress of a new job with lots to learn has been challenging for her. Now, there’s no company in Youngstown with the oom-pah-pah of Google, but working full-time again would certainly change the layout of my days and weeks. So I’m pondering that—what to give up, what to clear out, how to restructure life.

This is the first interview I’ve had in three years, despite the dozens of applications I’ve completed and résumés I’ve distributed. So that feels good. Maybe it’s time to completely clean out the basement sewing room, keeping only the bare minimum of supplies. Then, in several years, when I really decide to retire (rather than being forced into it by the economy), I can start over with things I really want to have around me.

The Jazzman and I talk about moving from this beautiful old 2+ story house into a rancher, where our aching, arthritic knees wouldn’t have to maneuver stairs several times each day. If we are able to find exactly what we want and figure out what to do with this house, at least a concerted effort to unclutter and purge now would make the process of packing and moving then much easier.

So, anyway, that’s what’s running through my mind. And now a long-overdue post.

boucle1While on vacation in Maine, I stopped in at Halcyon Yarn in Bath. Oh my gosh, if I owned a yarn store, this is what I would want it to look like, and the people who work there and helped me with my purchases would be just the sort of people I’d want working with me. While there, I was looking not only for a simple knitting project for the last few days of vacation, but I was thinking about my friend-of-many-years, PianoLady, who was preparing for her daughter’s wedding. Each time PianoLady shopped for MOTB dresses, she’d send me pictures. We thought long and hard long-distance together—as good friends of 35 years do—until she found the perfect dress. At Nordstrom, of course.

The wedding was being held aboard a cruise ship in Florida just prior to taking off for a cruise around the Caribbean. And air conditioning being what it is, there was the chance she would need a light and elegant wrap to assure her comfort. When my hands touched Halcyon’s “Signature Collection Victorian Bouclé“, I swooned. It’s the stuff you dream of when clouds are involved. Then I looked at the sample stole hanging in front of the display, I couldn’t stop petting it.

I had the nice ladies at Halcyon send a skein of the bouclé to PianoLady, and bought the pattern from them. Then piano lady changed color choices on her dress, and Halcyon’s color 101 wasn’t going to work. But by then I was dreaming of tossing this scarf around my own shoulders!

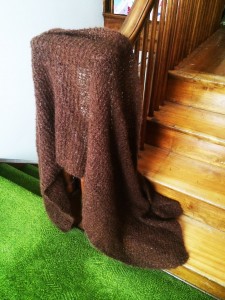
So I ordered two more skeins, had PianoLady send me her skein, and packed the yarn, needles, and pattern into my carry-on for my November trip to Europe. It was the perfect travel project. No-thinking-required garter stitch – knit every row. When I got close to the end of the third skein, I decided I wanted a more generous size, so ordered a fourth skein. I finished the stole during our Christmas concerts, and then started to think what I might wear it with. Nothing! Nothing in my wardrobe called out for this stole. So guess where it lives now—on the back of the couch in front of the TV. Anytime I’m a little chilly, down it comes. I feel a touch of old-world elegance when I’m wrapped in this beautiful froth of chocolate brown wool.

This yarn and pattern is one of those vacation purchases that I’m very glad I made.

Dolly and Me

Doll dressI was never a doll girl—at least, to the best of my memory. There were dolls in my childhood life, but they were never something I couldn’t live without or something that I spent time playing with. I’d rather play with this toy where you had a square green plastic plate with holes in it, a whole bunch of flowers (I especially remember the daffodils, which we didn’t have in Florida), and a planting tool with which you pushed the base of the flowers into the holes in the green square. I wish I could remember the name of that set so I could find it on eBay. I’d totally play with it today! (Just as my pushing-40 son loves to build Lego figures with his son.)

So when my DIL told me she was getting my DGD an American Girl® doll, I was kind of surprised. I have never envisioned DGD as a doll girl. But that first AG doll was followed a year or so later by another AG doll, and last November, when discussing Christmas lists, DGD told me her dolls needed Christmas party dresses. (Yes, I totally love that DGD just assumes I can make anything she suggests.)

Being the pushover grandma that I am, I started searching for 18″ doll clothing patterns. I found McCall’s 3474 on eBay and a lovely purple paisley velour in my stash (which later yielded a tunic top for DGD to match her doll’s outfit). And a pretty outfit for a doll emerged.

Here’s the review:

Pattern Description: View A has jacket, top, and skirt; view B has jacket, top, pants, hat and scarf; view C has lined vest, top, flared pants and beret; view D has lined vest, top and skirt; view E has top and skirt; view F has top and pants. I made View A jacket and skirt.

Pattern Sizing: One size.

Did it look like the photo/drawing on the pattern envelope once you were done sewing with it? Yes.

Were the instructions easy to follow? Yes.

What did you particularly like or dislike about the pattern? Simple well-thought-out construction and classic styling. Jacket collar very easy to construct. Because I used a knit, the fit was a little generous. If I make it again, I will use a woven fabric for a sleeker fit.

I think the beret is darling, and I will use the rest of the fabric scraps to make that after the rush of the New Year settles down.

Fabric Used: Stretch velour from my stash, probably polyester. Quarter-inch seam allowances were a little difficult to maintain because of how the right-sides-together velour tended to nestle into itself. I recommend a woven instead.

Pattern alterations or any design changes you made: Flat sleeve construction; topstitched skirt hem rather than handstitching (because of deadline – and DGD doesn’t care!). Used snaps for front closure and omitted the decorative buttons (only because all I could find on a rushed trip into Jo-Ann’s were too large for the scale of the jacket).

Would you sew it again? Would you recommend it to others? Yes.

Conclusion: A cute classic pattern with multiple variations for an American Girl doll. If your DD or DGD is asking for clothes for her doll, you can do an entire wardrobe from this one pattern!

Velour_Seated

A Pretty Top for a Pretty Girl

Velour_SeatedWhen Butterick 5954 was released last fall, I ordered it as soon as it went on ClubBMV sale. In fact, I ordered two (one in each size) so I could make one for a friend. And that friend is … DearGrandDaughter.

Velour_BackFor Christmas, Ridley had asked for a Christmas party dress for one of her American Girl dolls. As I was nosing through my stash, I saw a lovely purple velour knit in a sort of paisley print. I believe I bought the fabric from fashionfabricsclub.com about 12 years ago. Simultaneously, I saw a pattern on eBay for pants, skirt, and jacket to fit the AG dolls. I made up the jacket and skirt out of the velour (review to follow), but then realized I had enough to make B5954 for Ridley.

You might remember when I made a top for her in early December. It was a Girls’ 14, and was shortwaisted. I stated then that I must measure her before making anything more. Let me tell you why I broke that edict—the December top fit her perfectly in the bust. Only the length was a problem. Velour_BackAt 10, she is about 5’6″. I looked at the Misses’ size chart for B5954, and saw that the Small would probably fit her in the bust exactly as the Girls’ 14 had. So I just took a chance.

Velour_HemWhen I delivered the tissue-wrapped top to her last night, the fit was perfect. Neither she nor I could have been happier. Success!!

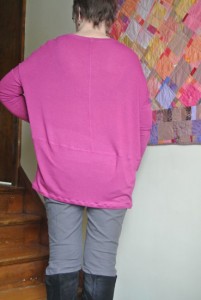
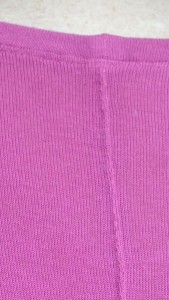
[Picture at left, see the excess at the back seam which gives the flare. Picture at right allows you to see the dip in the back. The picture above of the front view doesn’t show that length difference.]

Here’s the review:

Pattern Description: MISSES TUNIC: Close-fitting and flared, pullover tunic has front variations, shaped hemline and narrow hem. Wrong side shows on back hemline. C and D: collar.
Designed for lightweight Two-way Stretch Knits. I chose view B – collarless and ¾-length sleeves.

Pattern Sizing: Combinations: Y(XSmall-Small-Medium), ZZ(Large-XLarge-XXLarge) I cut a Small.

Did it look like the photo/drawing on the pattern envelope once you were done sewing with it? Yes.

Were the instructions easy to follow? I hardly used them. Only referred to how they wanted me to treat the neck opening.

What did you particularly like or dislike about the pattern? I would have preferred to put a binding on the neck opening rather than just turning and top-stitching, but it turned out fine. If I make that same neckline for myself on a future version, I’ll use a binding that turns to the inside.

Loved the various versions. So much room for creativity!

Fabric Used: A velour (knit—fiber content unknown, probably polyester) purchased a thousand years ago from FashionFabricsClub.com.

Pattern alterations or any design changes you made: Cut the Small exactly as is. Used flat construction on the sleeves. Fused a soft knit interfacing to the hemline of sleeves and skirt. Used strips of the same interfacing on the back shoulder seam allowance to stablize that seam.

Would you sew it again? Would you recommend it to others? Yes and yes!

Conclusion: Beautiful, flattering top with a flare to the skirt. Lots of options for design possibilities. Bravo, Butterick!


What happens when you give a twirly girl a skirt with excess flare? Why, she twirls, of course.
Velour_Twirl

Fleece: an antidote for sub-freezing temps

Fleece BlanketIf you’ve read the newpapers or watched television or opened up Weather.Com in the recent week, you know that—along with the rest of the northern and eastern half of the Continental United States—we have been quaking in our long underwear. My son recently moved into a new-to-him, old-in-the-world-of-insulation house and has asked me for insulated drapes for windows.

R in blanketAs he was moving in and getting settled, he decided to paint a few of the rooms that were the most color-challenged. The Jazzman helped out, and the project involved taking Miss Ridley to the paint store and asking her what colors she would like her room to be. She settled on a pale lavender with yellow trim.

As I was thinking about ways to make the house warmer, I decided Ridley needed a new blanket for her bed. The colors would, of course, be pale lavender and yellow. I thought instantly of a no-sew fleece blanket my cousin had made for my mother several years ago. Searching the internet, I found the instructions I wanted. While in Jo-Ann’s looking for drapery fabric on the big-sale Saturday after Thanksgiving, I noticed the fleece was marked 80% off and threw a purple/yellow owl print into my cart, along with a coordinating turquoise solid. Yesterday I set to work.

FleeceWith help from the Jazzman, I spread the two fleece layers out on an open space in the foyer. I measured and trimmed to make it as much of a rectangle (rather than a quadrilateral) as possible. Then I turned on an audiobook on my iDevice, settled on the floor with tailor’s chalk, a quilting ruler, and a pair of very sharp scissors, and set out to cut “fringe” and tie square knots. Fleece blanketThe whole project, for a twin-bed size blanket, took about two hours. Today, my legs are barking and my forearms are crying, but the job is done. And without the use of even one needle.

Fun? Yes. I enjoyed making the blanket, especially knowing how much this sweet 10-year-old would love it. She loves everything I make for her, which makes it real easy for me to come up with other garments and gifts to make for her.

And, boy, does she love this blanket!