When I found my half-sister, Debbie, back in March of 2016, when she was 80 and I was 65, I was welcomed with open arms by her entire extended family. I flew to northern Arizona six weeks later to meet Debbie face-to-face, and also got to meet both her daughters. Cindy, who is about seven years younger than I, lives with her mom. Cathy, about five years younger than Cindy, who lived in Orange County, CA, at that time, drove to Arizona that Saturday to spend Mother’s Day with her mom and sister. A year later, Cathy’s daughter and her husband moved to Medina, OH, for his work, and they graciously invited my partner and myself to join them for holiday gatherings. Another year later I met Cindy’s daughter, who had just returned from her missionary posting in Kosovo. Somewhere in there I was able to meet Debbie’s son, Bill, and his wife, who live near Plymouth, MA. But the rest of the family just became Facebook acquaintances because of the distance. One person with whom I have formed a close online friendship is Cindy’s daughter-in-law, Renée, who lives with her family outside of Waco, TX, on acreage where they garden and keep chickens and an enormous pig named Petunia. (Don’t you love.love.love that name?!!!!)
And so begins the story of the new tote for the new niece.

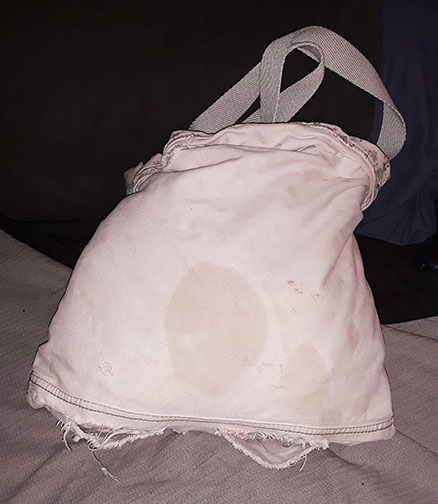
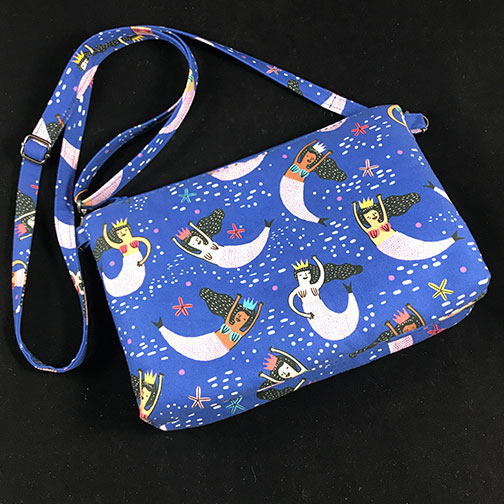
Renée’s “sad old bag”
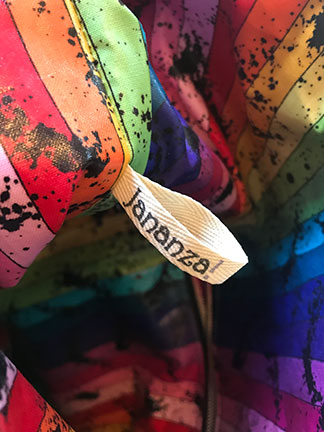
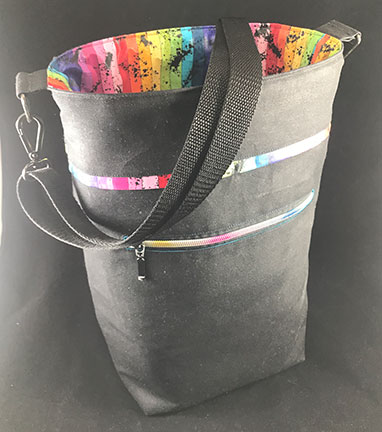
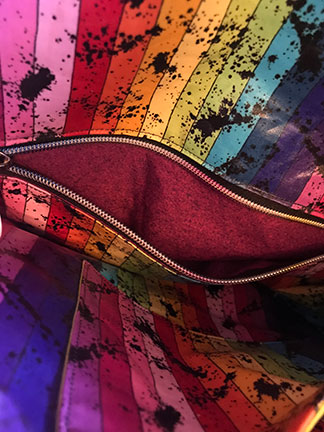
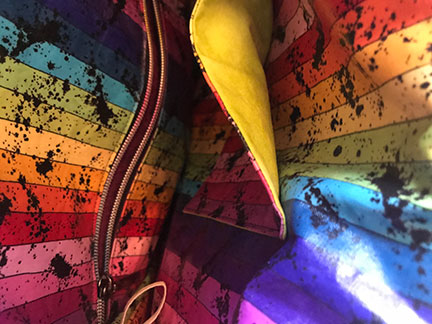
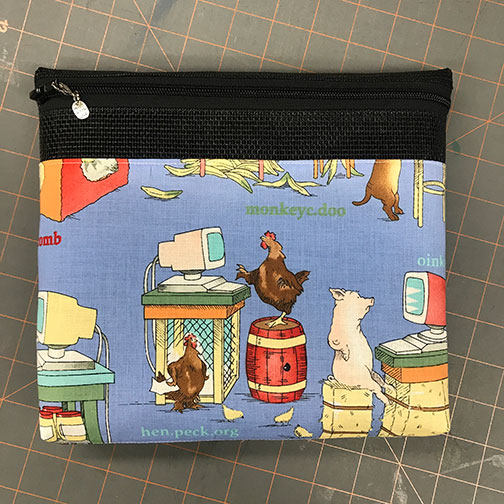
In mid-January, Renée posted a sad picture on Facebook, saying “My lined canvas tote bag is nearly dead and I dread finding a new one I love nearly as much.” I responded that I know a bag maker. 😊 That response spurred a conversation about what she likes and needs in a bag. She nearly always wears black (who does that sound like?); she wants the bag to indicate her support of the LBGTQ community, so some rainbows would be nice; she needs a zippered pocket for prescription bottles; she likes to clip her keys into the bag so she can find them easily; and so on. We settled on an exterior zippered pocket, an interior zippered pocket, and a slip pocket (a small, flat, rectangular pocket into which one can slip cards or bills or other small items) and an approximate size. Renée and her four kids and her husband (my half-sister’s grandson) arrived in Ohio over the weekend and I drove the 75 minutes from Youngstown to Medina yesterday to deliver the bag. The exterior fabric is a sturdy black waxed cotton. The interior is “Rainbow Graffiti Stripe” from the Buzzin’ Around collection by Kim Schaefer for Andover Fabrics, treated with OdiCoat to make it waterproof. When the bag gets dirty, she only need wipe up spills and stains with a damp cloth. The hardware is all black. Zippers are rainbow stripe by-the-yard zippers. Pockets are all lined with something bright. 🥰 Don’t you love this bag?
<Techie discussion on>
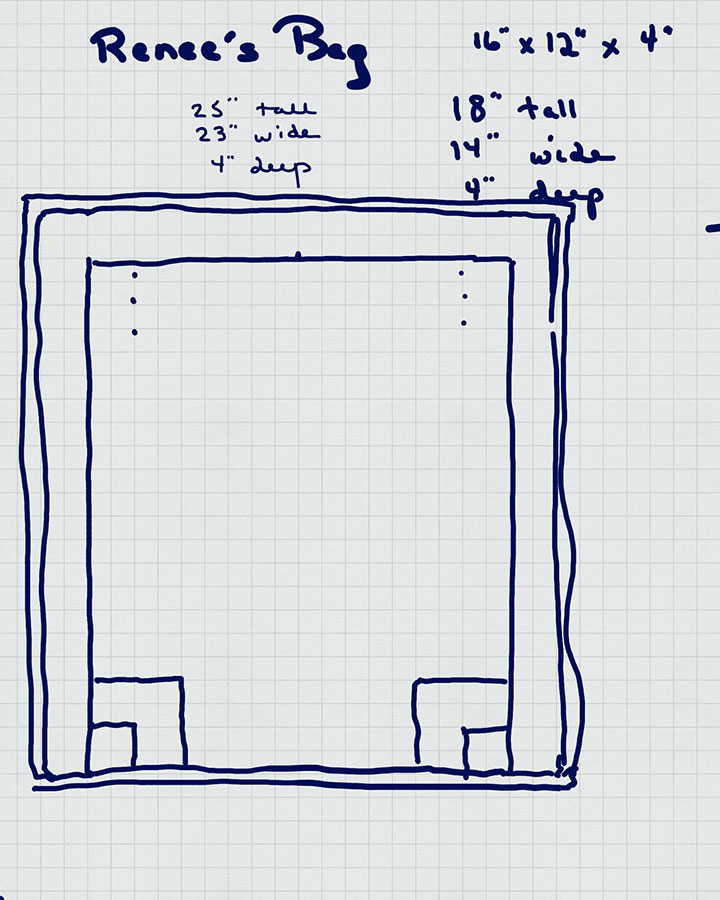
 The dimensions of Renée’s “sad old bag” were 16″ wide (left to right), 12″ tall (bottom to top), and 4″ deep (front to back). She wanted something a couple of inches larger in all dimensions. My objective was 18″ tall, 14″ wide, and 4″ deep. There are two ways to get depth in a bag. One is to have a front and back, and then sides and a bottom that match the depth measurement you want. Say I have a front that’s 10″ tall and 10″ wide and I want it to be 2″ deep. I would either make a bottom that’s 2″ wide and 10″ long. Then I would have two side panels that were 10″ tall and 2″ wide. The side panels would be sewn to the front and back panels along the 10″ side. The bottom panel would be sewn to the front and back on the 10″ sides and to the side panel along the 2″ sides. (Note: seam allowances would have to be added to all dimensions before cutting out the fabric. Another way to achieve the same result is to have two side/bottom panels that measure 15″ tall and 2″ wide. You would join those two panels along one 2″ seam allowance, give you a 2″ wide strip that’s 30″ long. You would then sew the strip to the left side, bottom side, and right side of the front and back panels. After all that sewing, you’ll have a “box” that’s 10″ tall and 10″ wide, with a depth of 2″.
The other way, which I prefer, but is harder to visualize, is “boxing” the bottom of the bag. This is accomplished most easily by cutting a square out of the two bottom corners of the flat front and back pieces. The sides and bottom are sewn, ignoring those cut-out squares. Then the corners are opened up, making the bottom seam and the side seam “kiss.” Sew diagonally across the bag, joining those two raw edges, which now form a straight line with the kissing seams in the center. When that is done and you turn the bag right-side out, you have a “box” similar to the results of the sewing in the previous paragraph. To me, it’s an easier method. When you sew the side panels to the front and bottom panels of the first method, you cannot sew all the way to the end of the seam. If you have a ½” seam allowance, you sew the ½” seam down to exactly half an inch from the end of the seam. Then you remove the bag from the sewing machine and refold your pieces, sewing the bottom from ½” in from one side to ½” in from the opposite side. And then repeat the refolding and sewing up the side from ½” in to the end of the seam at the top edge. It’s very tricky, where the boxing method just has you sew a diagonal seam across the bottom corners.
<Techie discussion off>
 Anyway, I visualized the bag, I drew the amateurish illustration, and I cut the fabric. I inserted the exterior zippered pouch, using a zipper-by-the-yard for the first time. And when I clipped the sides and bottom together to see how it looked, I realized my math was faulty and it was nowhere near as tall as Renée wanted the finished bag to be. So I cut two strips of the rainbow fabric about 1½” wide and as long as the front and back pieces were wide. I cut two more strips of the waxed cotton several inches tall and the same width as the front and back pieces and sandwiched and seamed them together at the top raw edge, leaving a cool little strip of the rainbow stripe protruding from that joining seam. I love the look!
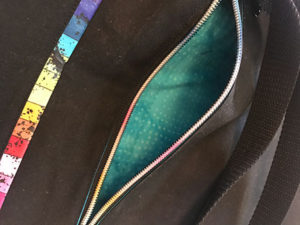
 Now, about the interior. Another goal for this bag was that it be very sturdy and easy to clean. I treated this beautiful rainbow stripe fabric with Odicoat, which is a waterproofing solution. The instructions are to apply three coats (north/south; east/west; and diagonal) to the fabric, allowing at least an hour of drying time between each coat, then let it sit and cure for at least 24 hours before heat-setting with an iron, placing a non-stick pressing cloth on the fabric before ironing. (Here’s a video from Sara Lawson of Sew Sweetness on the use of Odicoat.) Odicoat gives the fabric a shiny, plastic-feeling finish, which is waterproof. It’s ideal for cosmetic cases, or for bags that need to be easy to clean because they’re going to get lots and lots of use.
 I made each of the pockets out of bright scraps of fabric. One was a turquoise batik with lighter turquoise dots; another was a purple and violet dotted ombré, so that the back of the pocket is darker than the front of the pocket; and the slip pocket is lined with a bright lime solid. It’s like there’s a little secret surprise in each pocket.
 The side of the interior had a D-ring protruding about midway down one seam. As do I, Renée has a swivel hook on her key ring. She can hook her keys to the inside of the bag when she gets out of the car, and be able to easily find them without digging when her shopping trip is finished.
 The adjustable crossbody strap is about 54″ long and can be shortened to about 30″ if she just wants to sling it over her shoulder. It’s a nylon webbing rather than fabric, again aiming for longevity and strength.
 So what were the final dimensions? When standing up on its flat bottom, it’s 15″ tall and 8″ wide at the bottom. The boxed corners are about 5&half”, making the bottom surface a 5&half” x 8″ rectangle. If you were to lay the empty bag down on its side on a flat surface and measure it, it would be almost 18″ tall. The important part is the volume—it can hold 660 in3 or about .38 ft3.
My greatest happiness about this bag is that I was able to gather up all I’ve learned about bagmaking over the past two+ years and put it all together in a bag that came out of my brain. To me, that’s something!
[Note: When I put the bag in my studio box to take photos, every spot of dust or thread on that waxed cotton shone! If you want to see what it looks like in normal light, notice the final photo above, that Jas took in our bedroom with the bag positioned near the north-facing window. Not as bad as the well-lighted photos!]
[Enquiring Minds Want to Know: I almost forgot to give you the details.
Exterior fabric: 9.4 oz Waxed Cotton in Black – link as of 3/9/2020
Lining fabric: Stripe Rainbow from the Buzzin Around collection by Kim Schaefer for Andover – link as of 3/9/20
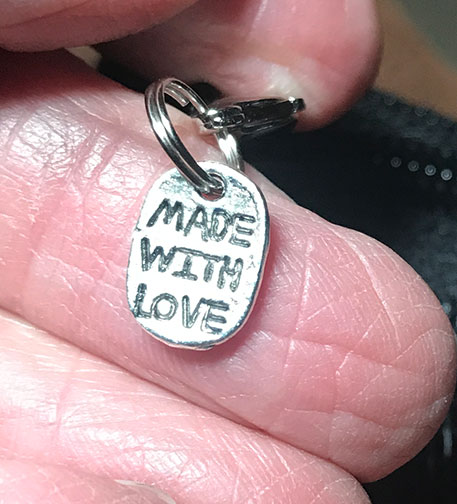
Zipper Pull Charm: I love these “Handcrafted” charms from Emmaline Bags in British Columbia. Much of my hardware also comes from Emmaline.
Odicoat waterproofing: Available on Amazon.
Zippers-by-the-yard: Zippers in black with rainbow coil. Gunmetal rectangular drop pull.]


 Those hours add up. Pretty soon you’re talking about a whole bag! (Photo: the front of the large Clydebank Tote from Sew Sweetness sewing patterns.) Link to Clydebank Tote pattern.


 So, even though I hadn’t initially been attracted to this bag, I told Donna about it and we both signed up.
 The pattern is designed for you to be able to use a different fabric on the side panels. Many people use the fabulous relatively new cork fabric that is imported from Portugal. Others use leather or vinyl. I had lots of this Bali batik, so decided to just quilt some of the batik to the foam that is used in the construction to make a sturdier tote. I love how that looks. My second bag uses cork for the side panels.