 Up-front warning: If you’re already a knowledgeable dyer, this post will be of minimal interest to you. I’ve written it with a lot of explanation for my friends who are not fiber-addicts or have never thought about dyeing fabrics beyond the occasional box of Rit from the grocery store.
Are you saying to yourself, WTF is shibori? Glance at this blog post, discovered while writing this post. xo to Erica, executive editor of HonestlyWTF.com.
Some of you know that I’m traveling in late June to the International Shibori Symposium in Japan. I’m mostly self-taught in fabric dyeing and shibori techniques. I’m at the experimenting and dyeing stage. I have not moved to the chemistry stage, where I treat the preparation of the fabric in a more scientific fashion, weighing the fabric to determine the required amounts of dye and other chemicals. Right now, I’m still in the hobbyist phase.
My Bali travel partner, Tina, and I each have 4+ yards of “prepared for dyeing” (PFD) cotton lawn to make pajamas for our Bali trip. She is very experienced and knowledgeable about shibori. (Visit her Etsy shop filled with gorgeous hand-dyed fabrics.) She has dyed her fabric and finished her jammies. On Sunday, while at a standstill on the duffle bag I’m making—in a distance sew-a-long with Tina—I dedicated time to dyeing the fabric for my jammies.
PFD cotton is natural cotton, after weaving and washing. It has had no sizing or finish applied, and is an off-white color like a light shade of ecru or cream.
For this learning exercise, I relied heavily on Lynne Caldwell’s “Shibori: A Beginner’s Guide to Creating Color & Texture on Fabric.”
I use Procion MX Fiber Reactive dyes, manufactured by Jacquard Products (or Dharma Trading’s equivalent house brand). Fiber reactive dyes are designed to work on cotton, silk, linen and rayon fabrics. They are colorfast, washfast, and lightfast and create a chemical bond with the fiber. They work with room temperature or warm water, and don’t require any special processing to set the colors. (An acid dye requires a steam bath to set the colors.) And if you live in Ohio or a midwest area that has a Pat Catan’s store, they stock a small selection of Procion MX colors. I can run pick up a bottle and get right to work, rather than having to order online.
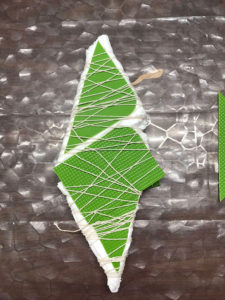 I wanted to try Itajime Shibori for the pajama top. I had cut the 4+ yards into two 2+ yard pieces, one for the pajama top, one for the bottoms. I have a Pinterest board for shibori ideas, which primarily amounts to resist techniques for dye application. I also have numerous books. But what I saw recently that inspired me was a different method of folding for the triangle application. I thought. And yesterday I folded and wrapped according to what I thought I saw. Instead of making one great big stack of folded triangles, I folded one continuous length of 3″-4″ folded fabric into triangles, then made two equal-thickness conjoined stacks.
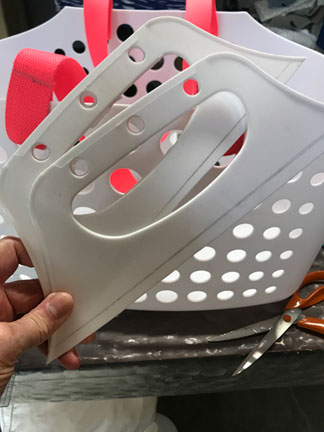
Once I had the fabric folded as I wanted, I needed a resist to force the dye solution to the folded edges of the stack of fabric. I had a very nice cutting mat I purchased in a set of four at Sur La Table. Then I sacrificed the vegetable mat in the great bat-trapping incident. Afterward, even with much scrubbing and bleaching, I knew the mat could never live in my kitchen again. (The bat? He revived quickly when I moved him outside. May he never return!) I was able to take my heaviest Fiskers upholstery shears and cut the mat into eight triangles that I could use in and on the stack for the resist. I needed a bucket of clamps that’s somewhere in my disorganized basement. When I couldn’t find the clamps, I grabbed some light twine and wrapped that around the conjoined stacks to hold the resist triangles in place. Looking at the stacks after I was done wrapping, I wished I had placed the two rectangles more centered across the “bridge” between the two stacks. But when one is experimenting, there are no errors.

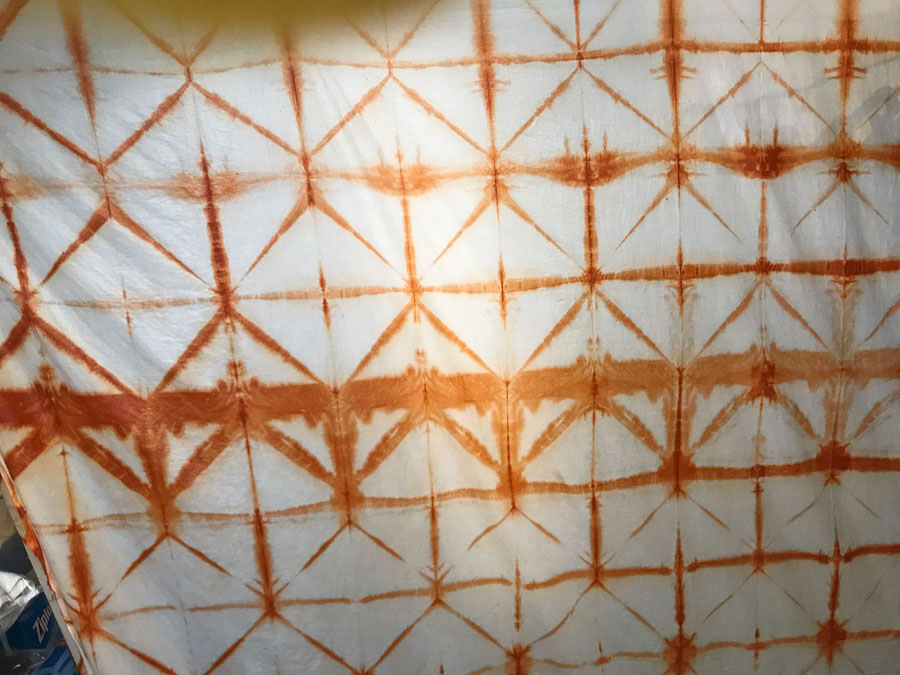
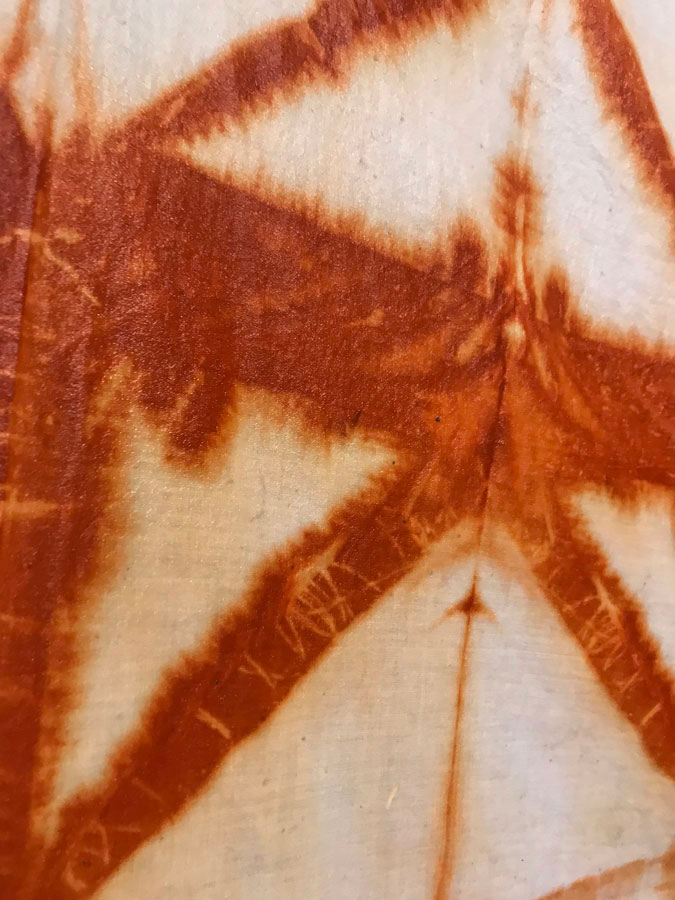
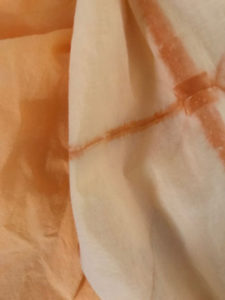
 For this piece of fabric, I wanted the edges of the triangles to be an orange-rust shade. Then I would dye a second time with a lighter, orange-yellow shade. For the orange-rust, I used Procion MX Rust Orange, 16. For the orange-yellow overdye, I used 50:50 Procion MX Soft Orange, 5, and Golden Yellow, 10. What you see in these two pictures is the Rust Orange. The white is where the triangle-shaped resists prevented the dye from penetrating the fibers.
After rinsing the fabric with Synthrapol to remove any excess dye that had not bonded with the fabric (and to prevent bleeding on subsequent washings), I prepared the second dye bath. I wanted a yellow between the rust bars. There are numerous steps one must complete when dyeing fabric: wet the fabric and “scrub” it (if it’s not PFD) to prepare the fibers to accept the dye; immerse the fabric in the dye bath; after half an hour, add a soda ash solution to further open up the fibers to absorb the dye; rinse until the water runs clear; run through a short washing machine cycle with Synthrapol. The amount of dye powder used in the dye bath depends on how saturated a color you want. If you want a light shade, use one teaspoon of dye powder in one cup of water. Medium, 3 teaspoons. Dark, 6 teaspoons. My rust bath was dark—6 teaspoons of dye powder dissolved in a cup of water, mixed into the two gallons of water required to fully immerse the fabric. For the overdye I used one teaspoon of Soft Orange and one teaspoon of Golden Yellow.
After removing the overdyed fabric from the dye bath, rinsing it in my big cast iron sink, and throwing it into the washer with the Sythrapol, I turned around to the work table and saw my measuring cup of soda ash solution waiting to be added to the dye bath. Oops. How much of the dye would still be on the fabric after the Synthrapol rinse removed the excess?
Look for the good. The beauty of this inadvertent error was that my dye bath was still usable for my second piece of fabric. Because I had this great geometric print on the top, I decided to just scrunch the fabric into the dye bath for a mottled look. I put it in, let it sit for fifteen minutes, then picked the whole mass up and turned it over, letting it sit for another fifteen minutes. Then I pulled it aside, stirred in the soda ash solution, and shoved the mass back into the dye/soda ash liquid. After about ten minutes, I squeezed some of the dye out, put it in the big sink, and rinsed it several times.
The first piece was sitting in the washer, waiting for its partner to get out of the bath. By this time, the first piece had been through two Synthrapol rinsings. The rinsed second piece was placed on top and a kitchen towel I had been using to wipe up spills was thrown in on top, then I ran another short cycle with another teaspoon of Synthrapol. When that was complete, I ran a full cycle with detergent.
Returning an hour later, I stretched it on my basement clothesline for pictures. I was a little sad to see that more of the rust lines had dissipated, so that the grid wasn’t as prominent to the design. Compare the second grid picture, above, pre-overdyeing, to the top picture, post-overdyeing, after three Synthrapol rinses.
I spent about fifteen minutes in various parts of the house trying to get true-color photos. We had a rare day with bright sun. Note to self: must set up a corner in the basement where I can get decent photos.
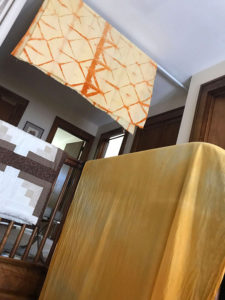
 (I think this picture I just took this morning shows the colors the best.)
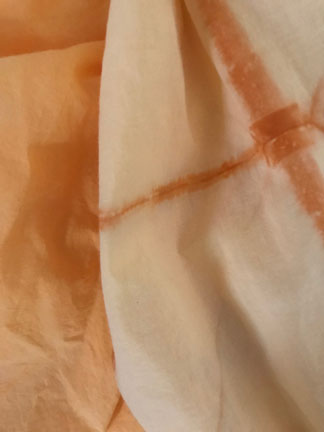
So what do I think of my results? I’m happy to see the difference with and without the soda ash. Without the soda ash to open up the fibers, the spaces “under” the grid are sort of a flan color—you know, a good housemade Mexican flan. The piece that was treated with soda ash is more pale butterscotch. It’s a richer shade than the sans-soda ash piece.
Am I pleased? Yes, I’m very pleased. I love the colors, and I love the fact that when I hung them on the line after the final wash, they hardly wrinkled. Very soft. Perfect for pajamas for a hot and humid climate. In the day or two before my missing parts for the duffle bag arrive, I’m going to get started on my pajamas.
Shibori Photo Gallery


 You know how I get when a trip is upcoming; I want to sew-sew-sew and wear all me-made garments on the trip.
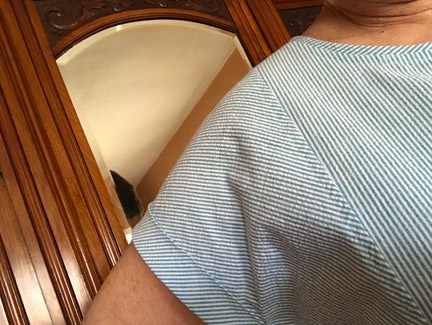
  I dug through my pattern stash and chose StyleArc’s Courtney top to make in the seersucker. It sews up quickly and as soon as it was done, I threw it on with a pair of white cropped knit pants. I was instantly in love.
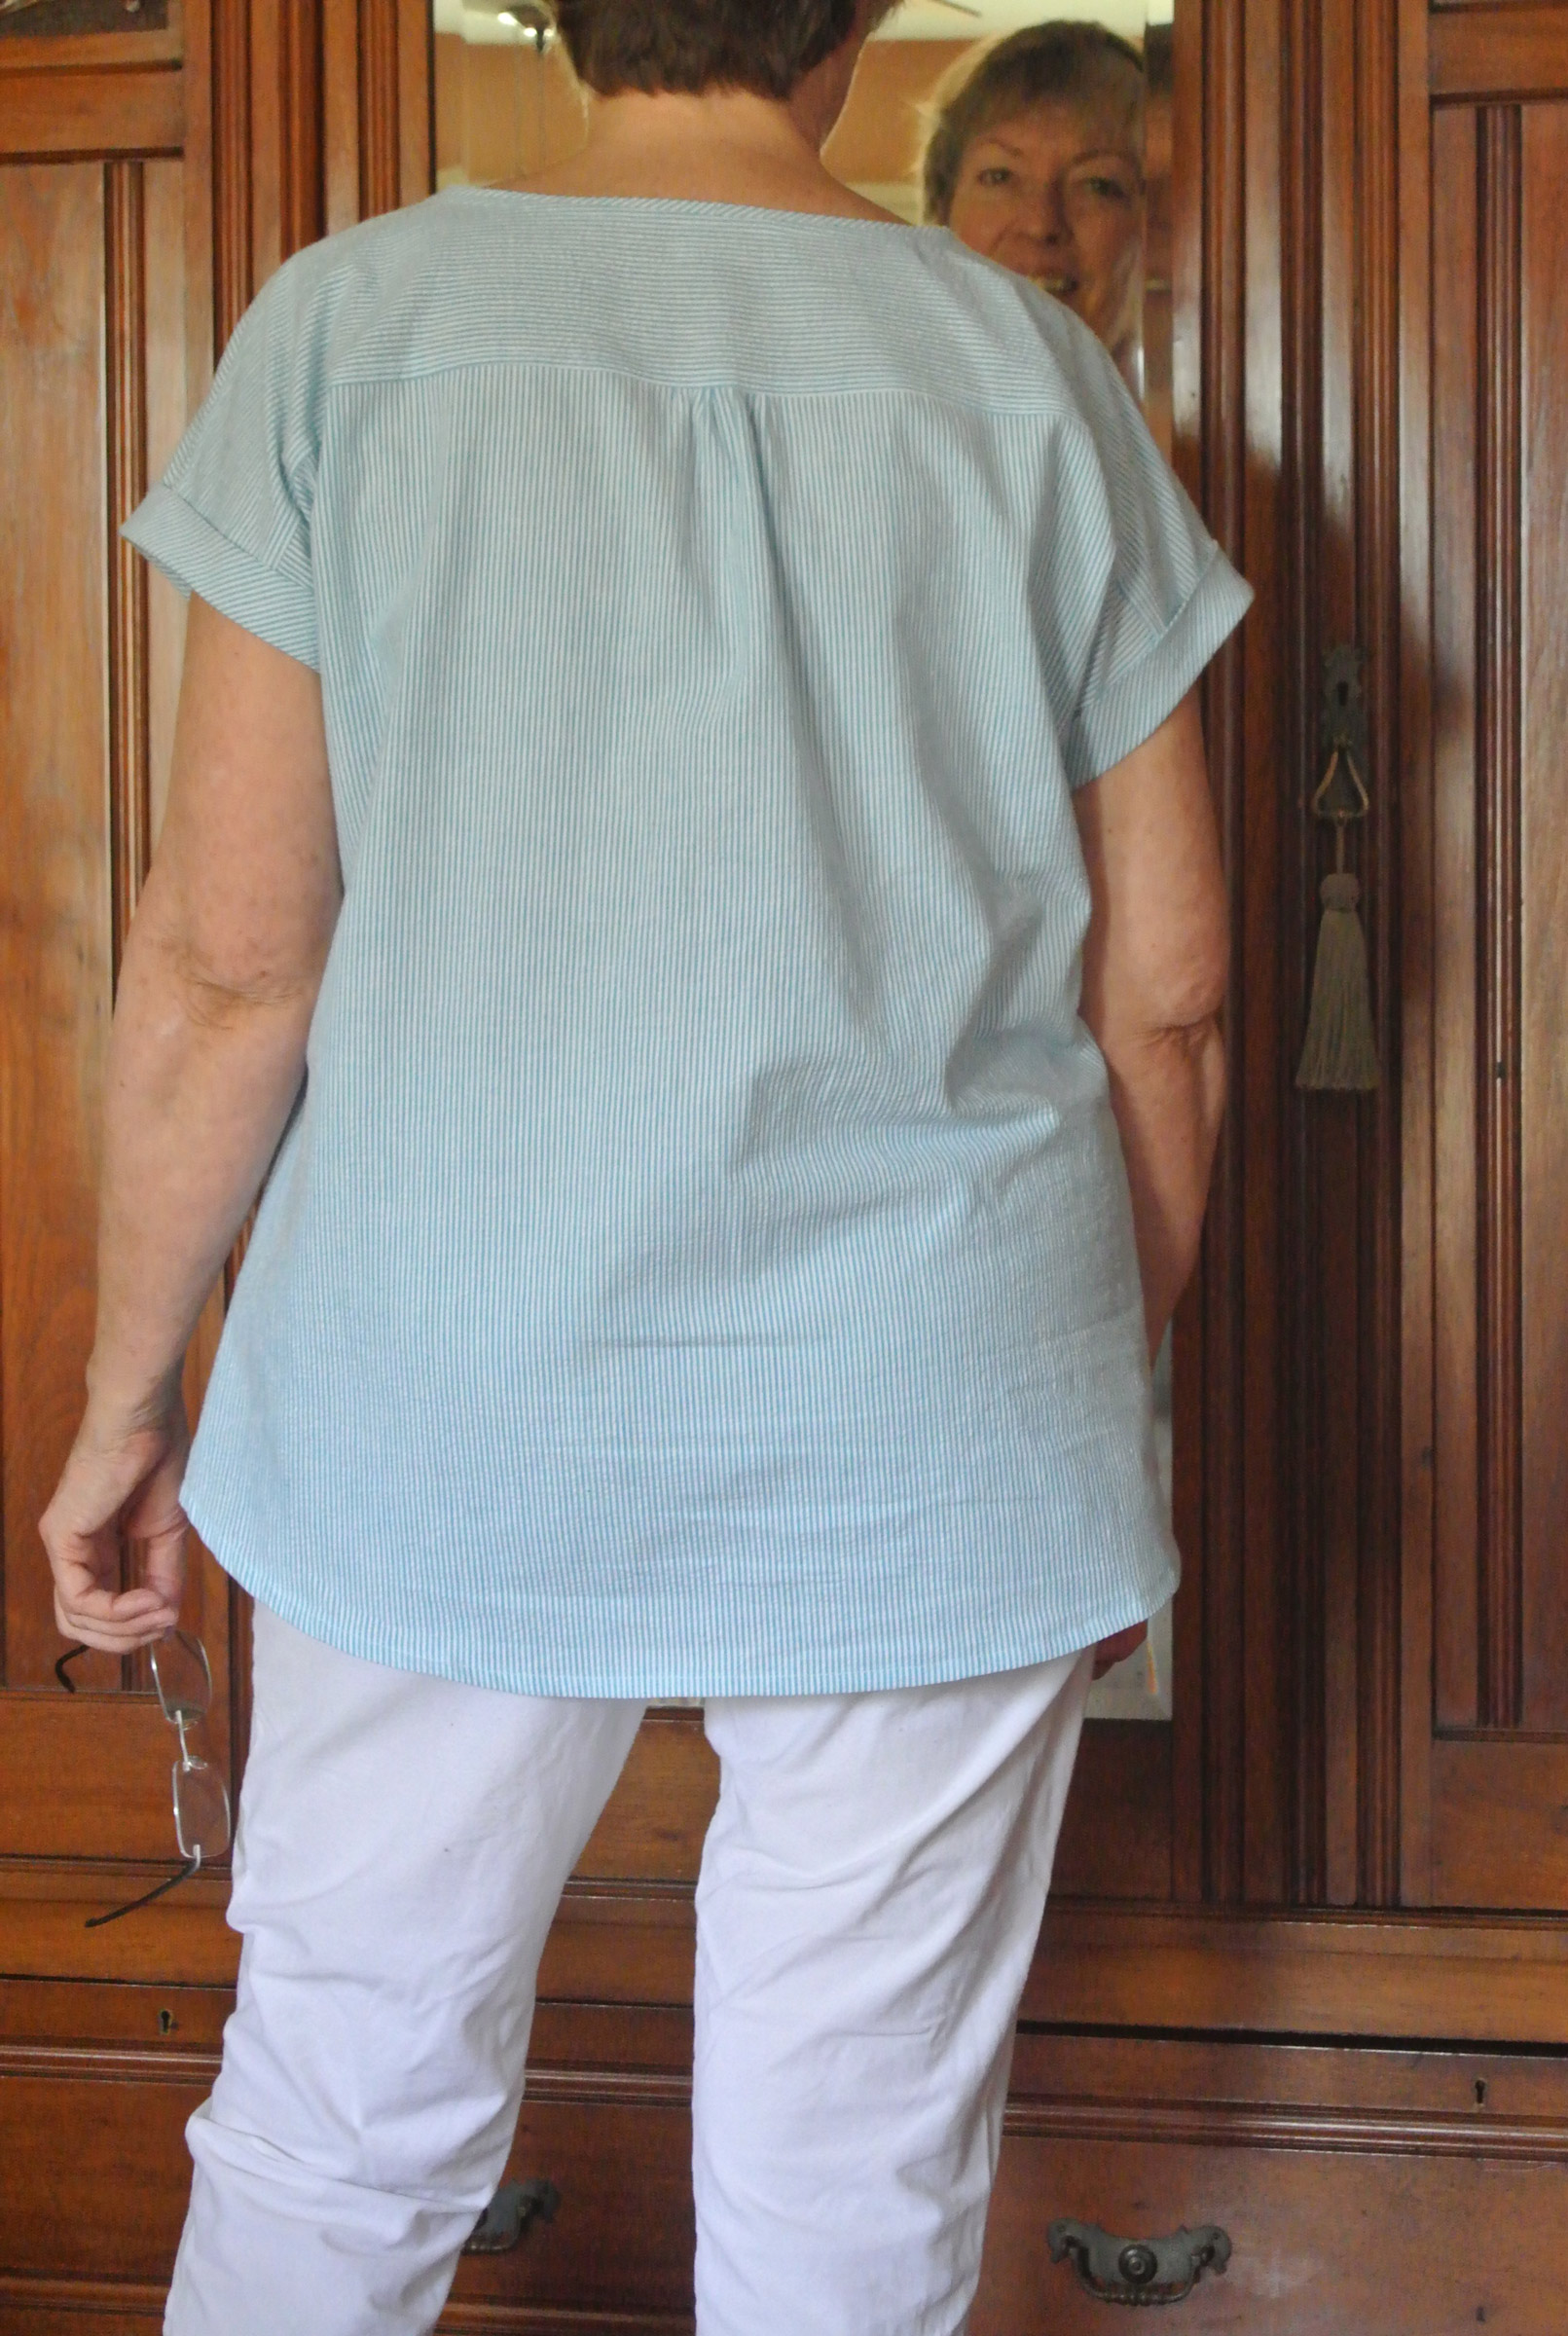 What did you particularly like or dislike about the pattern? The design lines on the top front and the cut of the neckline make for a very flattering top.