 A year ago I had started a new job and was overwhelmed carrying my iPad plus binders of music back and forth from home to school. I made a Swoon Patterns “Alice” bag out of music-themed fabric to keep everything together and manageable.
Sidenote: As I was pulling the Swoon link for “Alice,” I noticed it was a free pattern. If you’re thinking a bag like this would be fun to make, here’s a great way to start Swooning. There’s a private Facebook group you’ll want to join, as Swooners are really nice people and sewists who like to share their knowledge and excitement. You’re welcome.
 When I made my first musical “Alice,” I was three months into playing from an iPad. I use the ForScore app and was finding it very easy to manage all the repertoire for several voice students, plus the Opera Workshop class I accompanied, plus the opera chorus and the Young Artists program of Opera Western Reserve. Alice seemed to be the perfect bag. (The other benefit of playing from an iPad and using the AirTurn pedal is I no longer need a pageturner. My left foot controls the page turns. Very cool!)
I followed the instructions closely and was pleased with the result. (Here’s my post for Musical Alice I.) However, once I loaded it with all my needs, the first problem was the stitches on the diagonal handles starting to pop. The second problem was that the increased seam allowances on the lining—to encourage the lining not to pop out—caused the top of the bag not to lie flat, but rather to pull severely to the inside. I knew if I ever made the bag again I would just use ½” seam allowances all around.
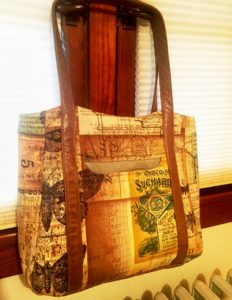
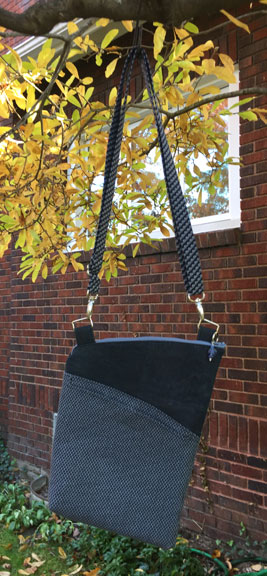
Two days before the end of the spring semester, I was walking to class with all my gear when the handle broke free from the side seam. At that instant, plans for a new bag began.
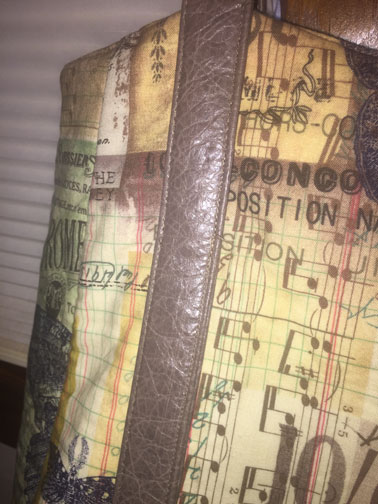
I had a  cool subtle musical/French fabric called Melange (Westminster Fabrics, Eclectic Elements, designed by Tim Holtz).
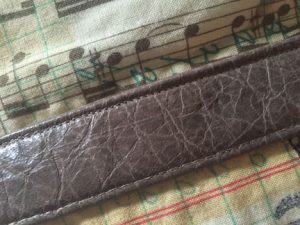
 A road trip to Tandy Leather in Cleveland yielded some pieces of leather on sale. One of those, in a taupe-y shade, was perfect for the base and handles.
To supplement the Melange and leather, I dug into my stash of hand-dyed quilting cottons, which I’ve collected since around 2000. While living in Tucson, I bought gorgeous hand-dyes from Desert Dyeworks (who appears not to be making and selling them any more, but one can always hope …) and from Janet A. Smith, who had a website at textileart(dot)com. Alas, that site is now inactive, and I can’t find out anything about Janet A. Smith, as I’d love to own more of her beautiful work. But …, I did find a Janet Jo Smith, who is also a hand-dyer. Her work appears to be just as beautiful as Janet A.’s was. Check out DyeSmithy.
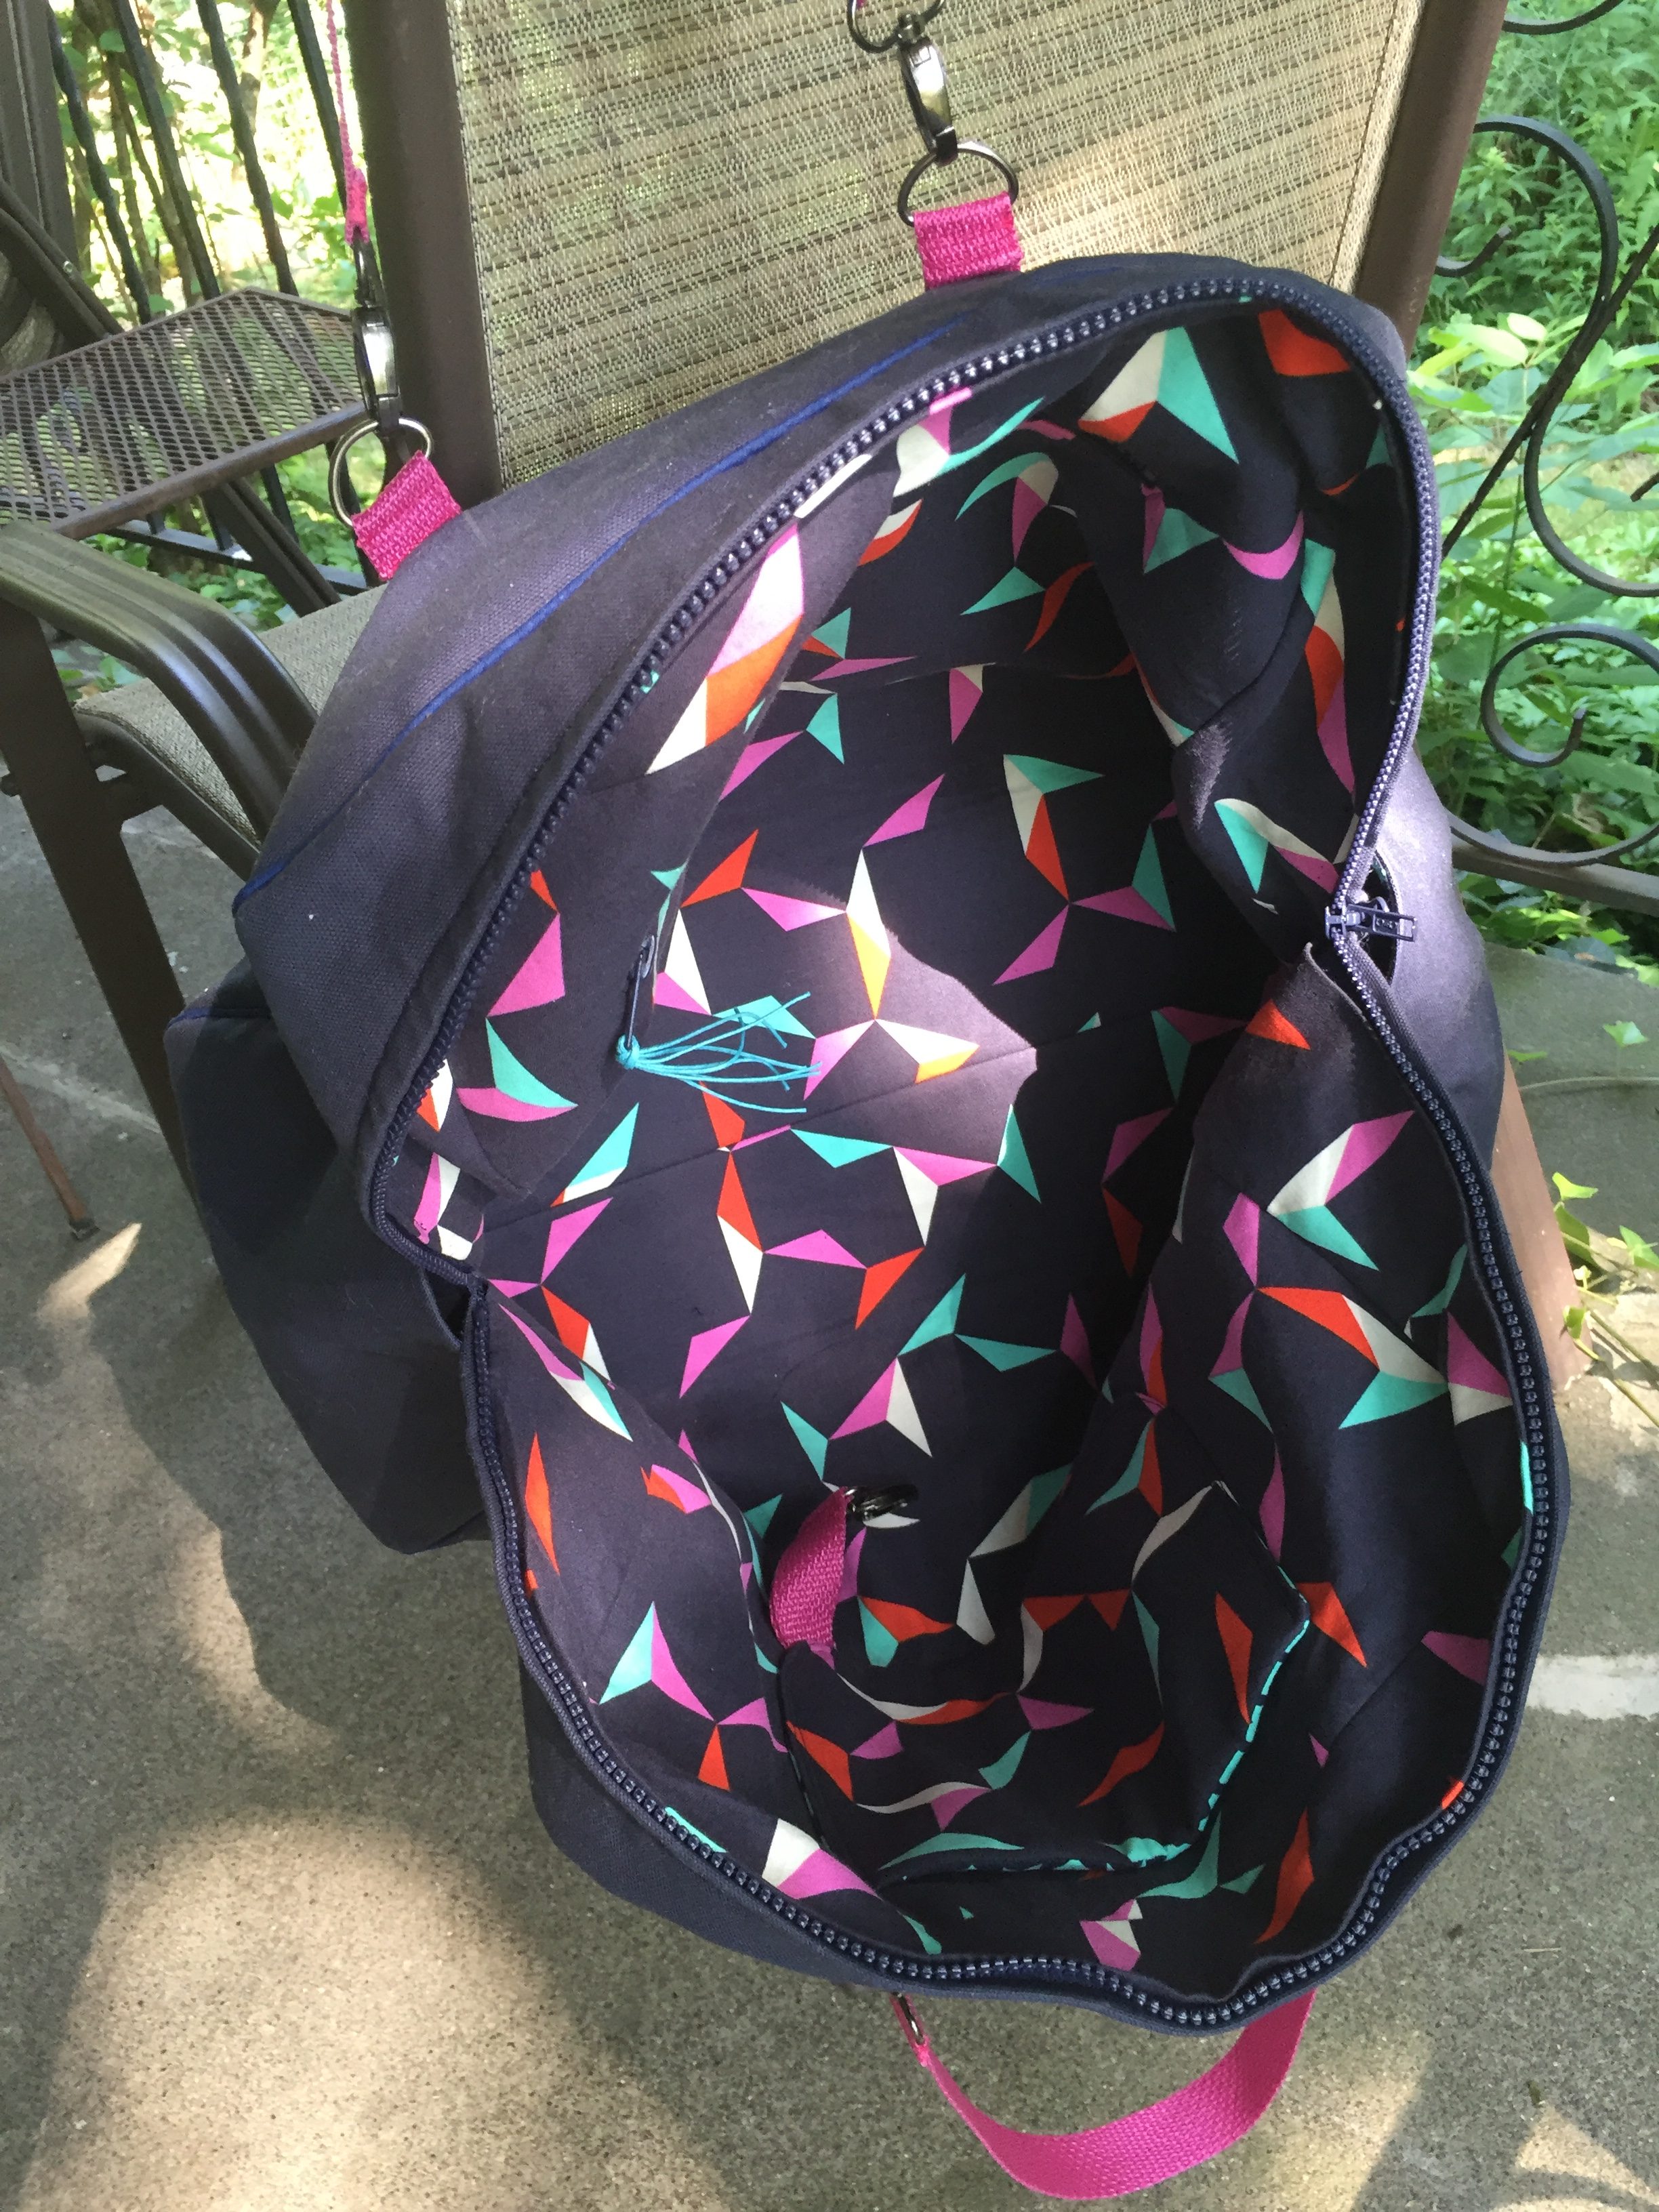
 In my TextileArt hand-dyes stash, I had a gradation of greens that went beautifully with the Melange. I used it for the outside pocket, the inside pocket, and the inside and base panels. I believe I used three different shades from the gradation. I love it.
Okay, my oopses, to give you a few giggles:
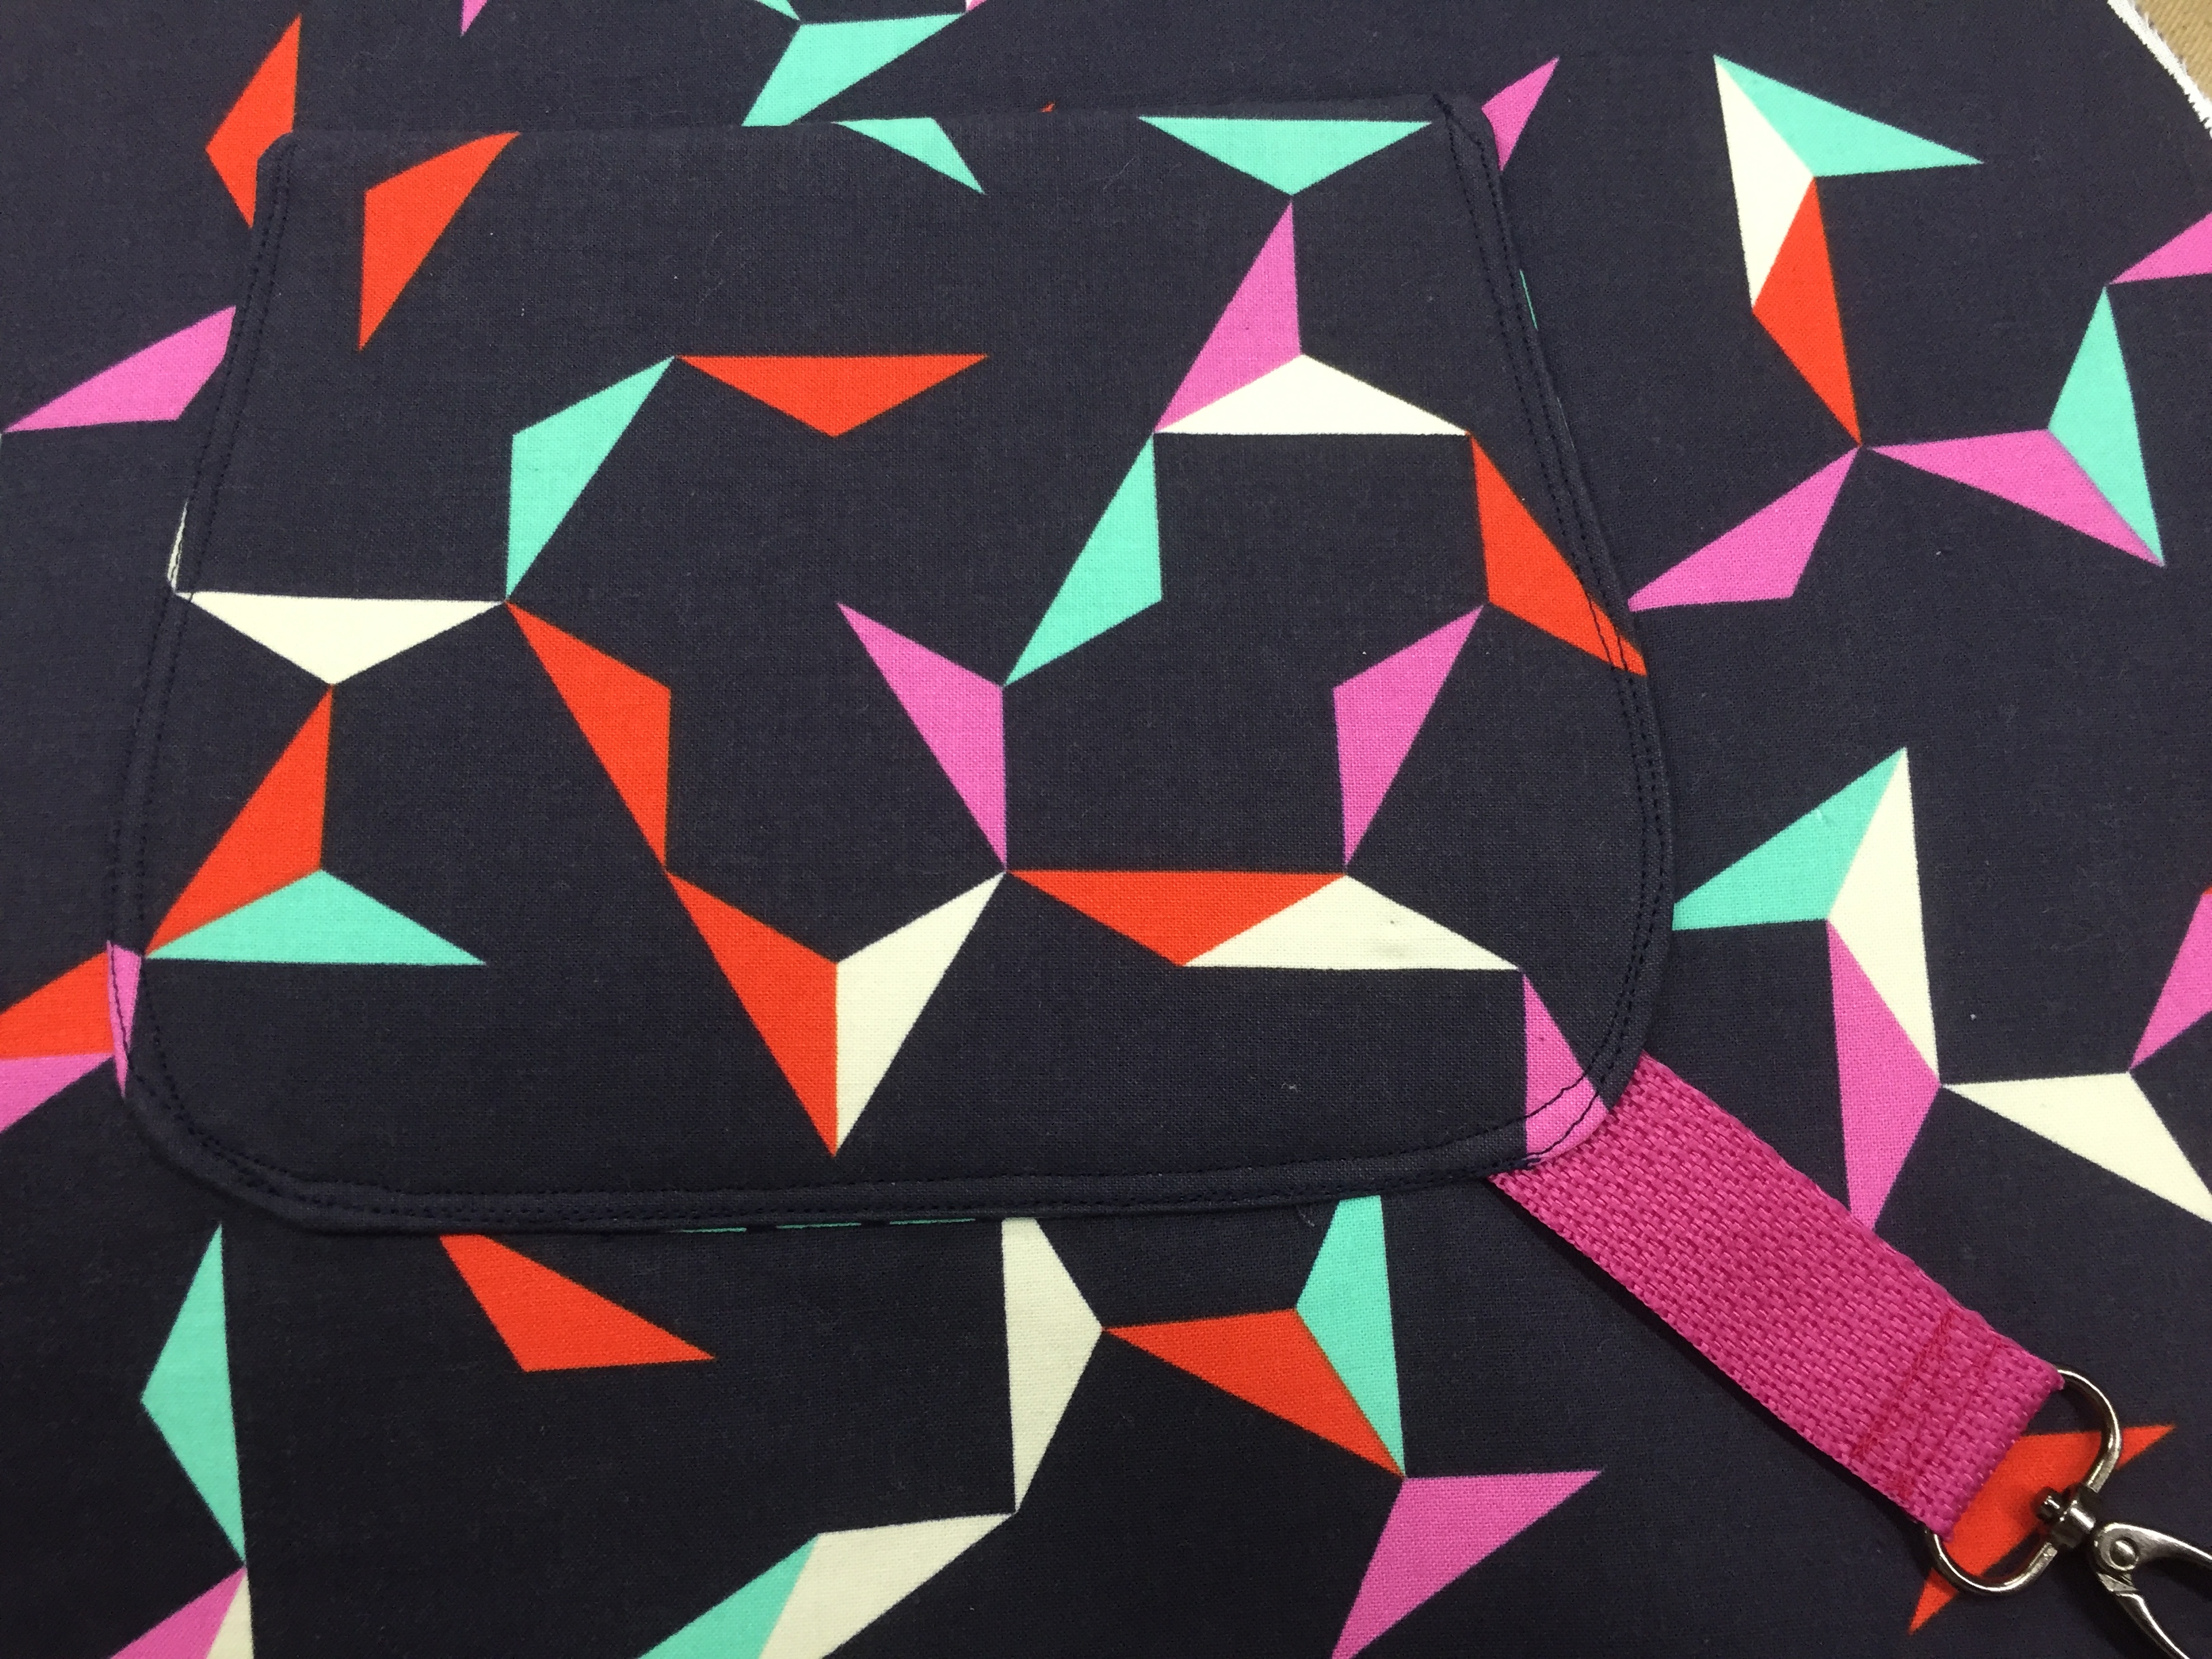
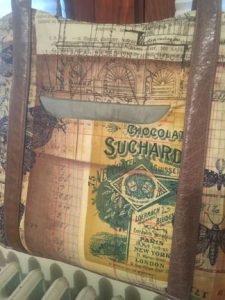
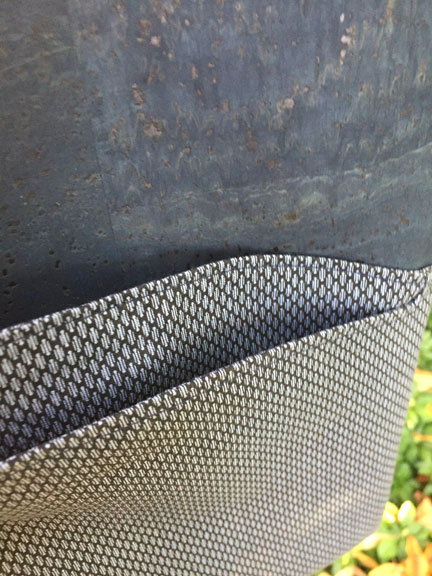
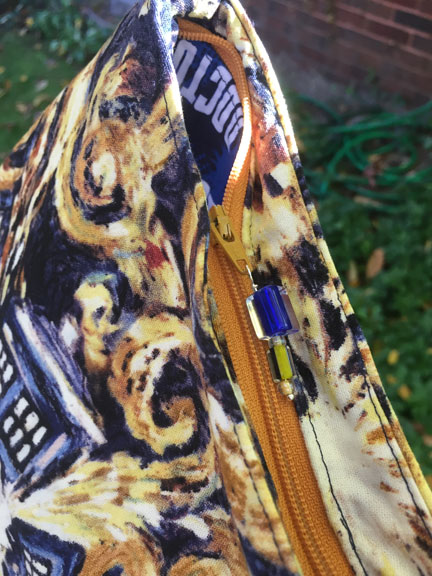
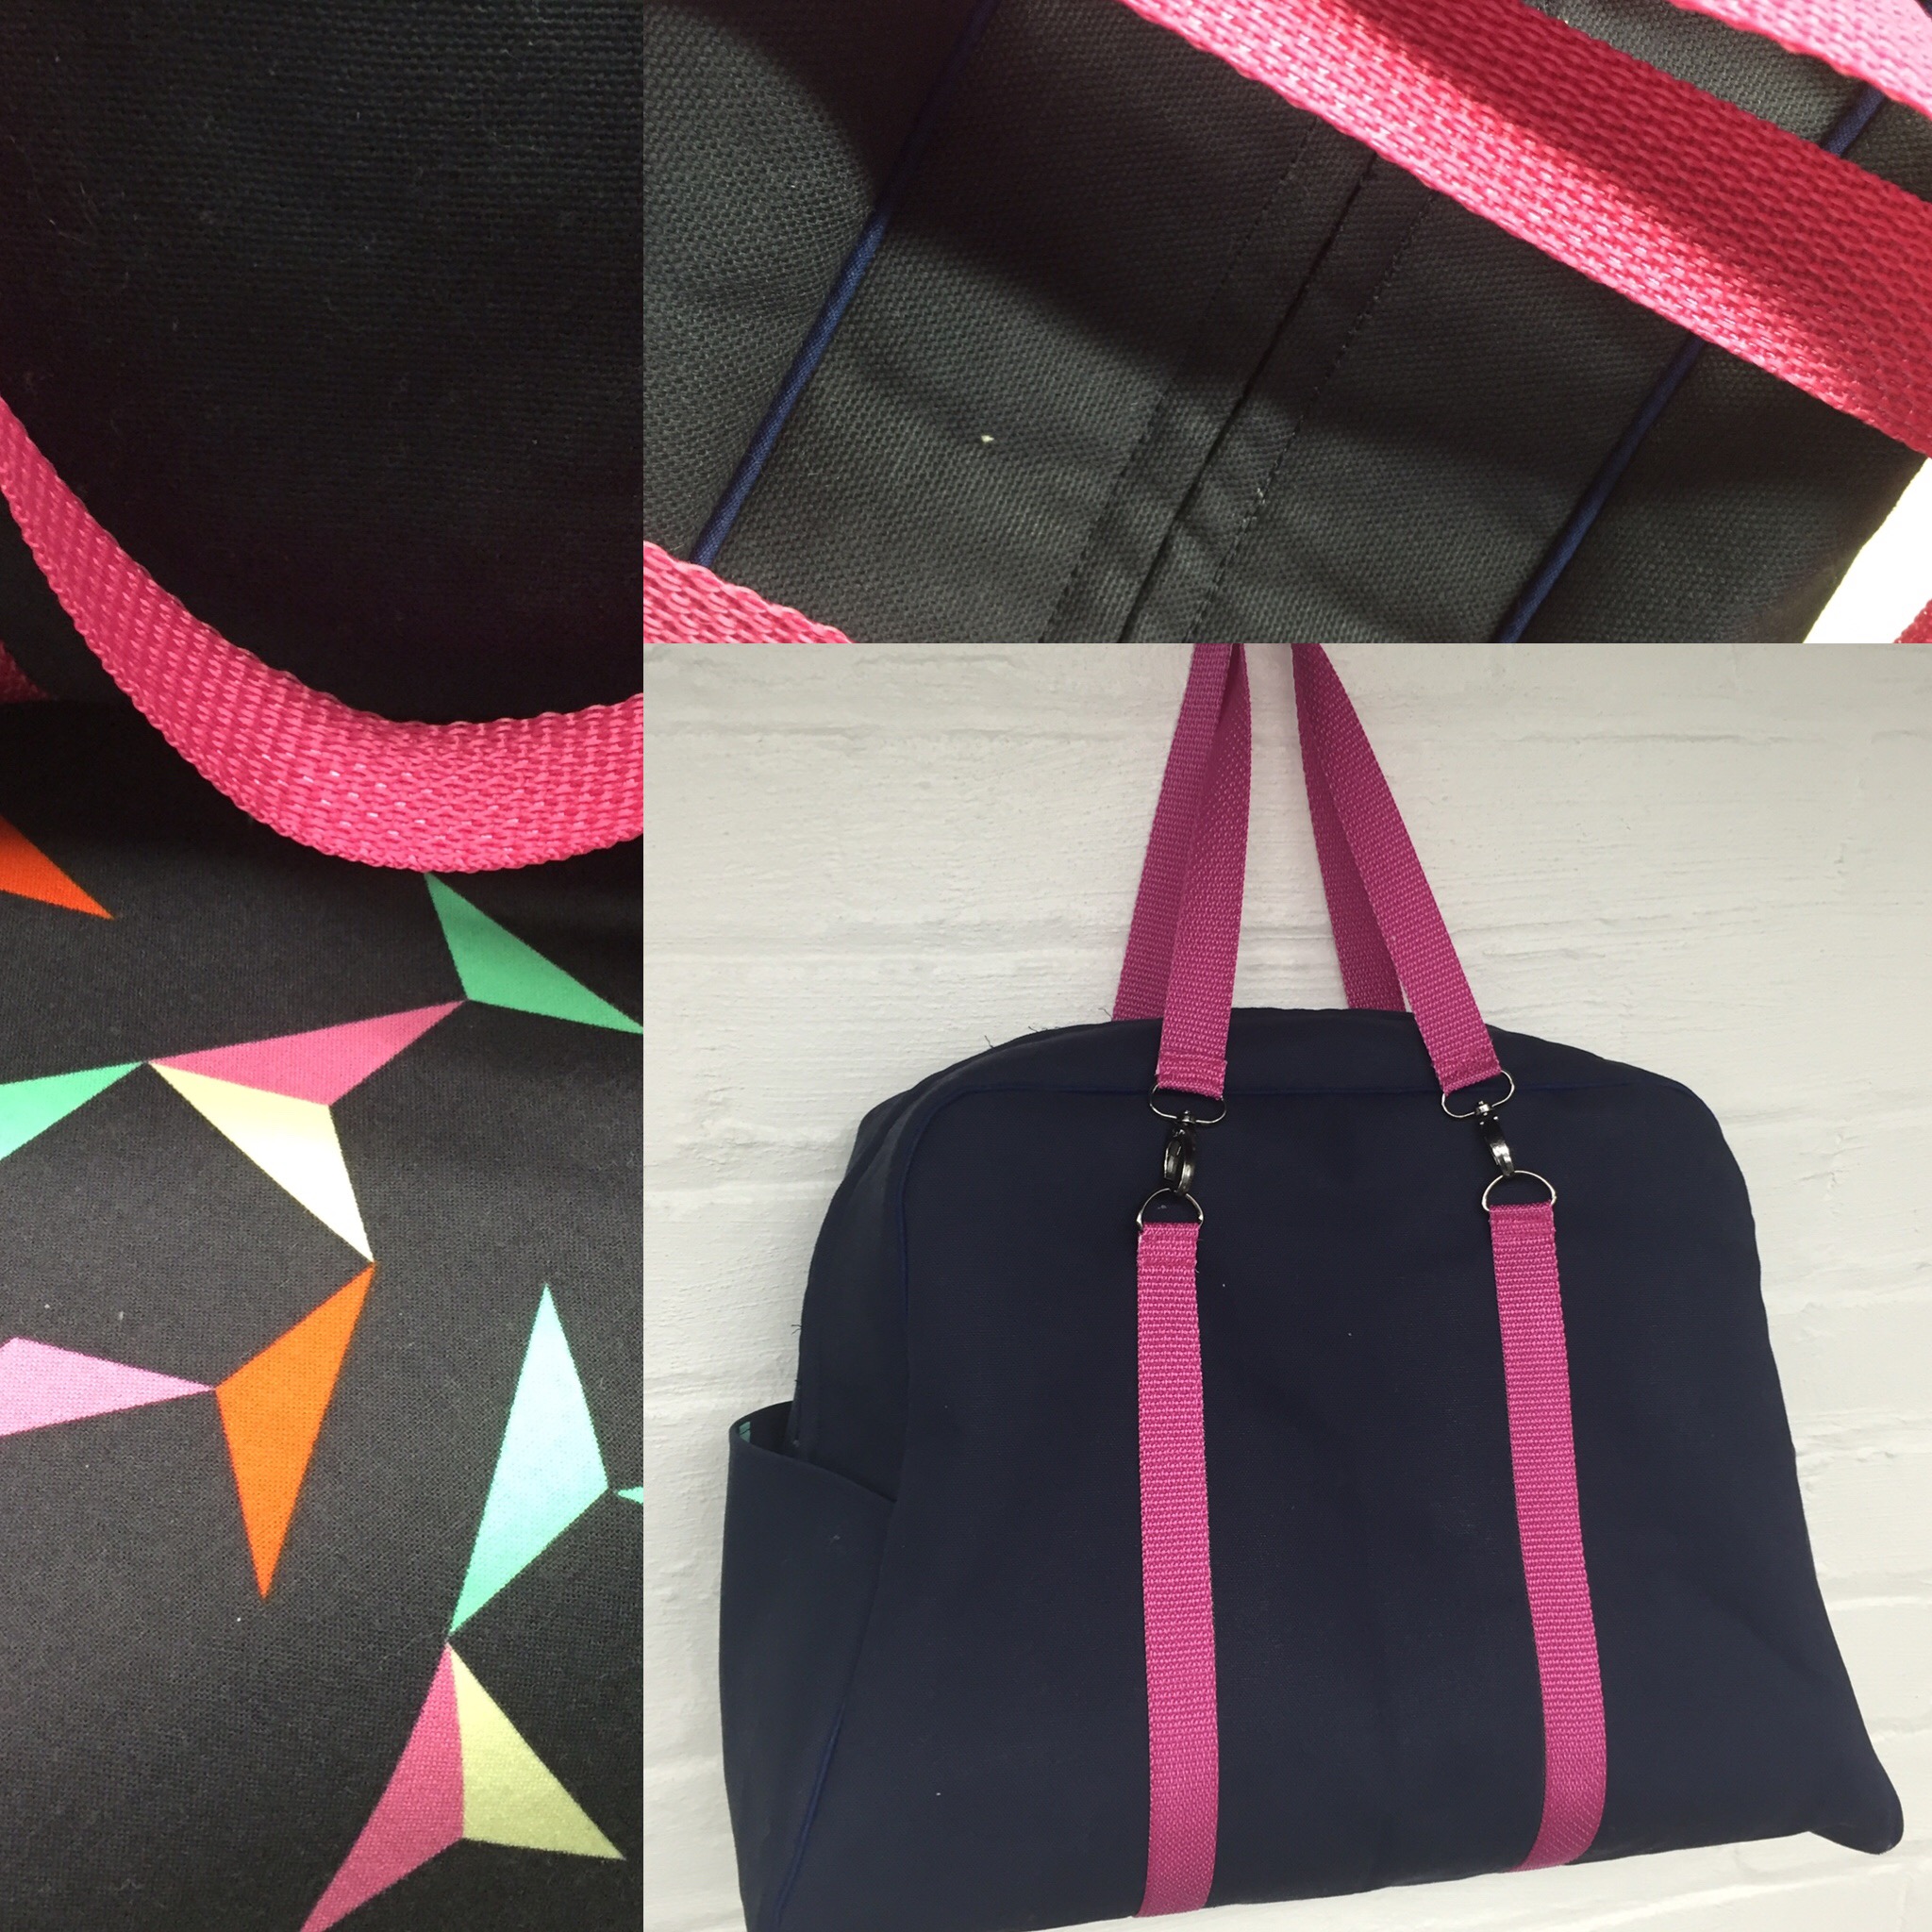
1) When inserting the exterior pocket, I was so concerned with making sure the size was going to fit between where I wanted the straps/handles, that I forgot to edge-stitch the bottom curve of the opening before finishing the pocket. I found a cherished piece of hand-dyed embroidery floss in a lush shade of copper and hand sewed the edge-stitching—¼” down from the finished edge of the opening, ¼” stitches with ¼” between the stitches. It was a happy fix for me. (Click on the second picture above where you see the straps and the pocket opening. That will enlarge the picture so you can see the hand edge-stitching.)
The Alice pattern illustration for finishing the exterior pocket clearly shows the top curves.
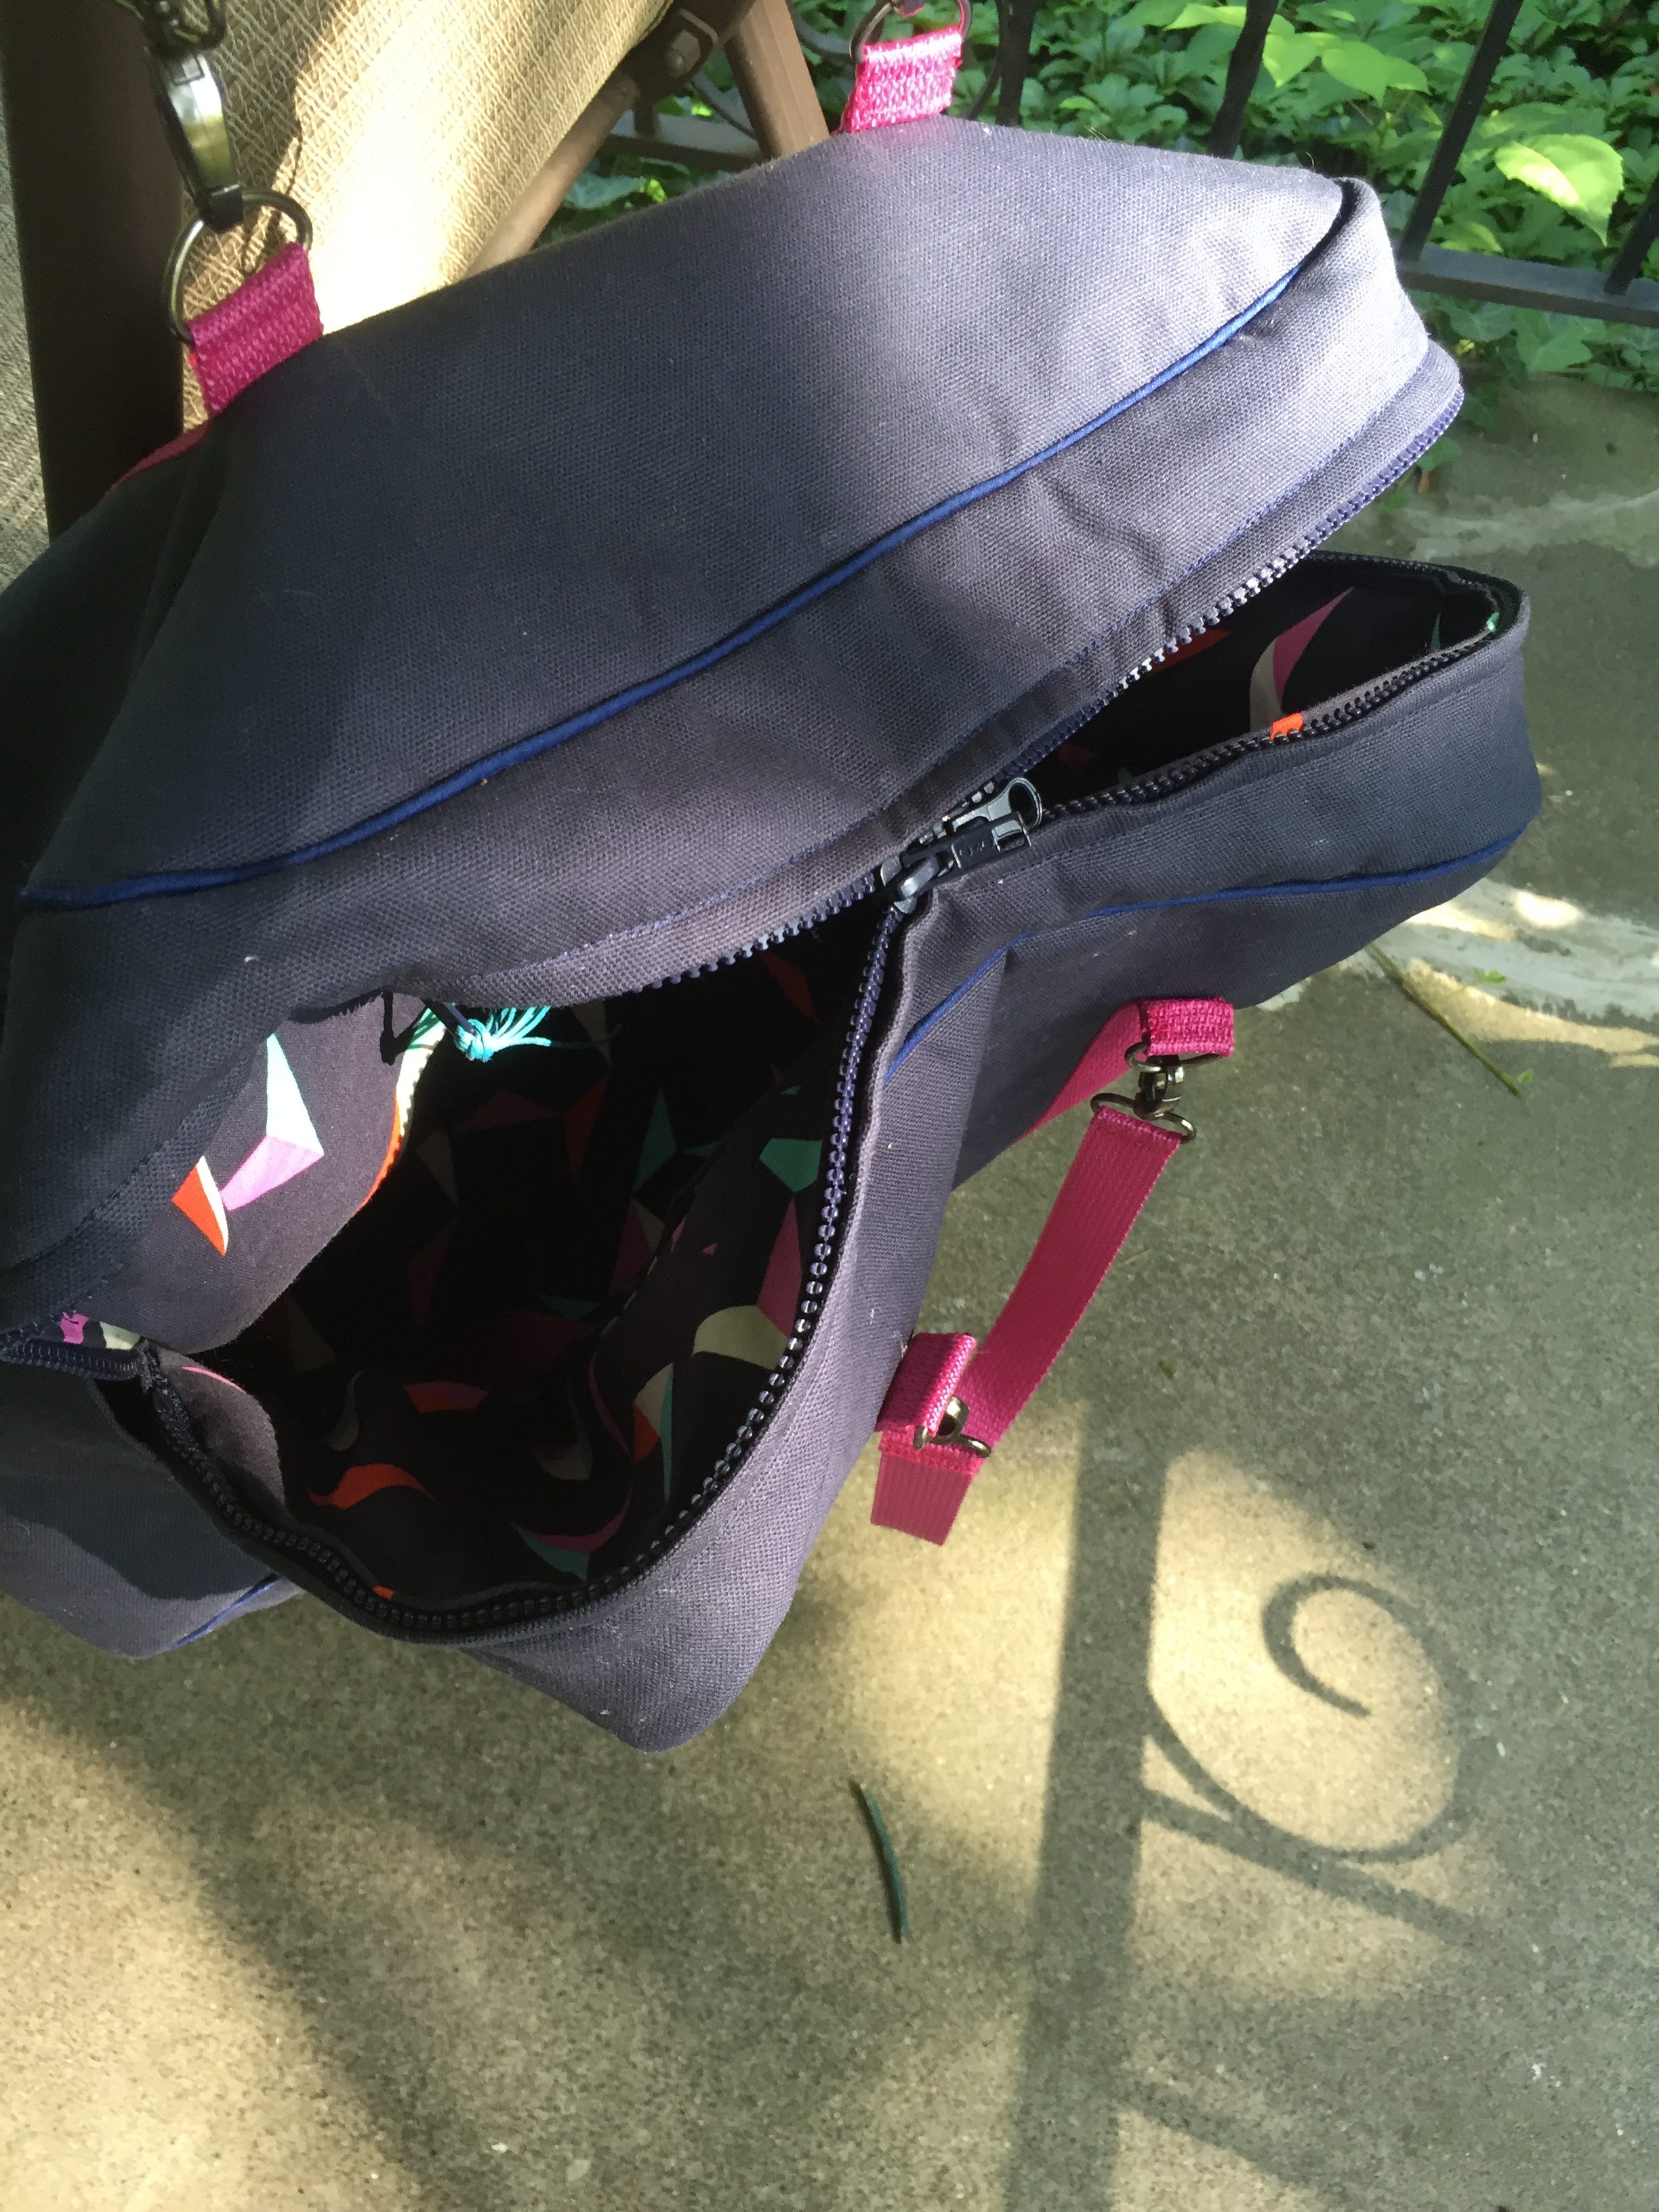
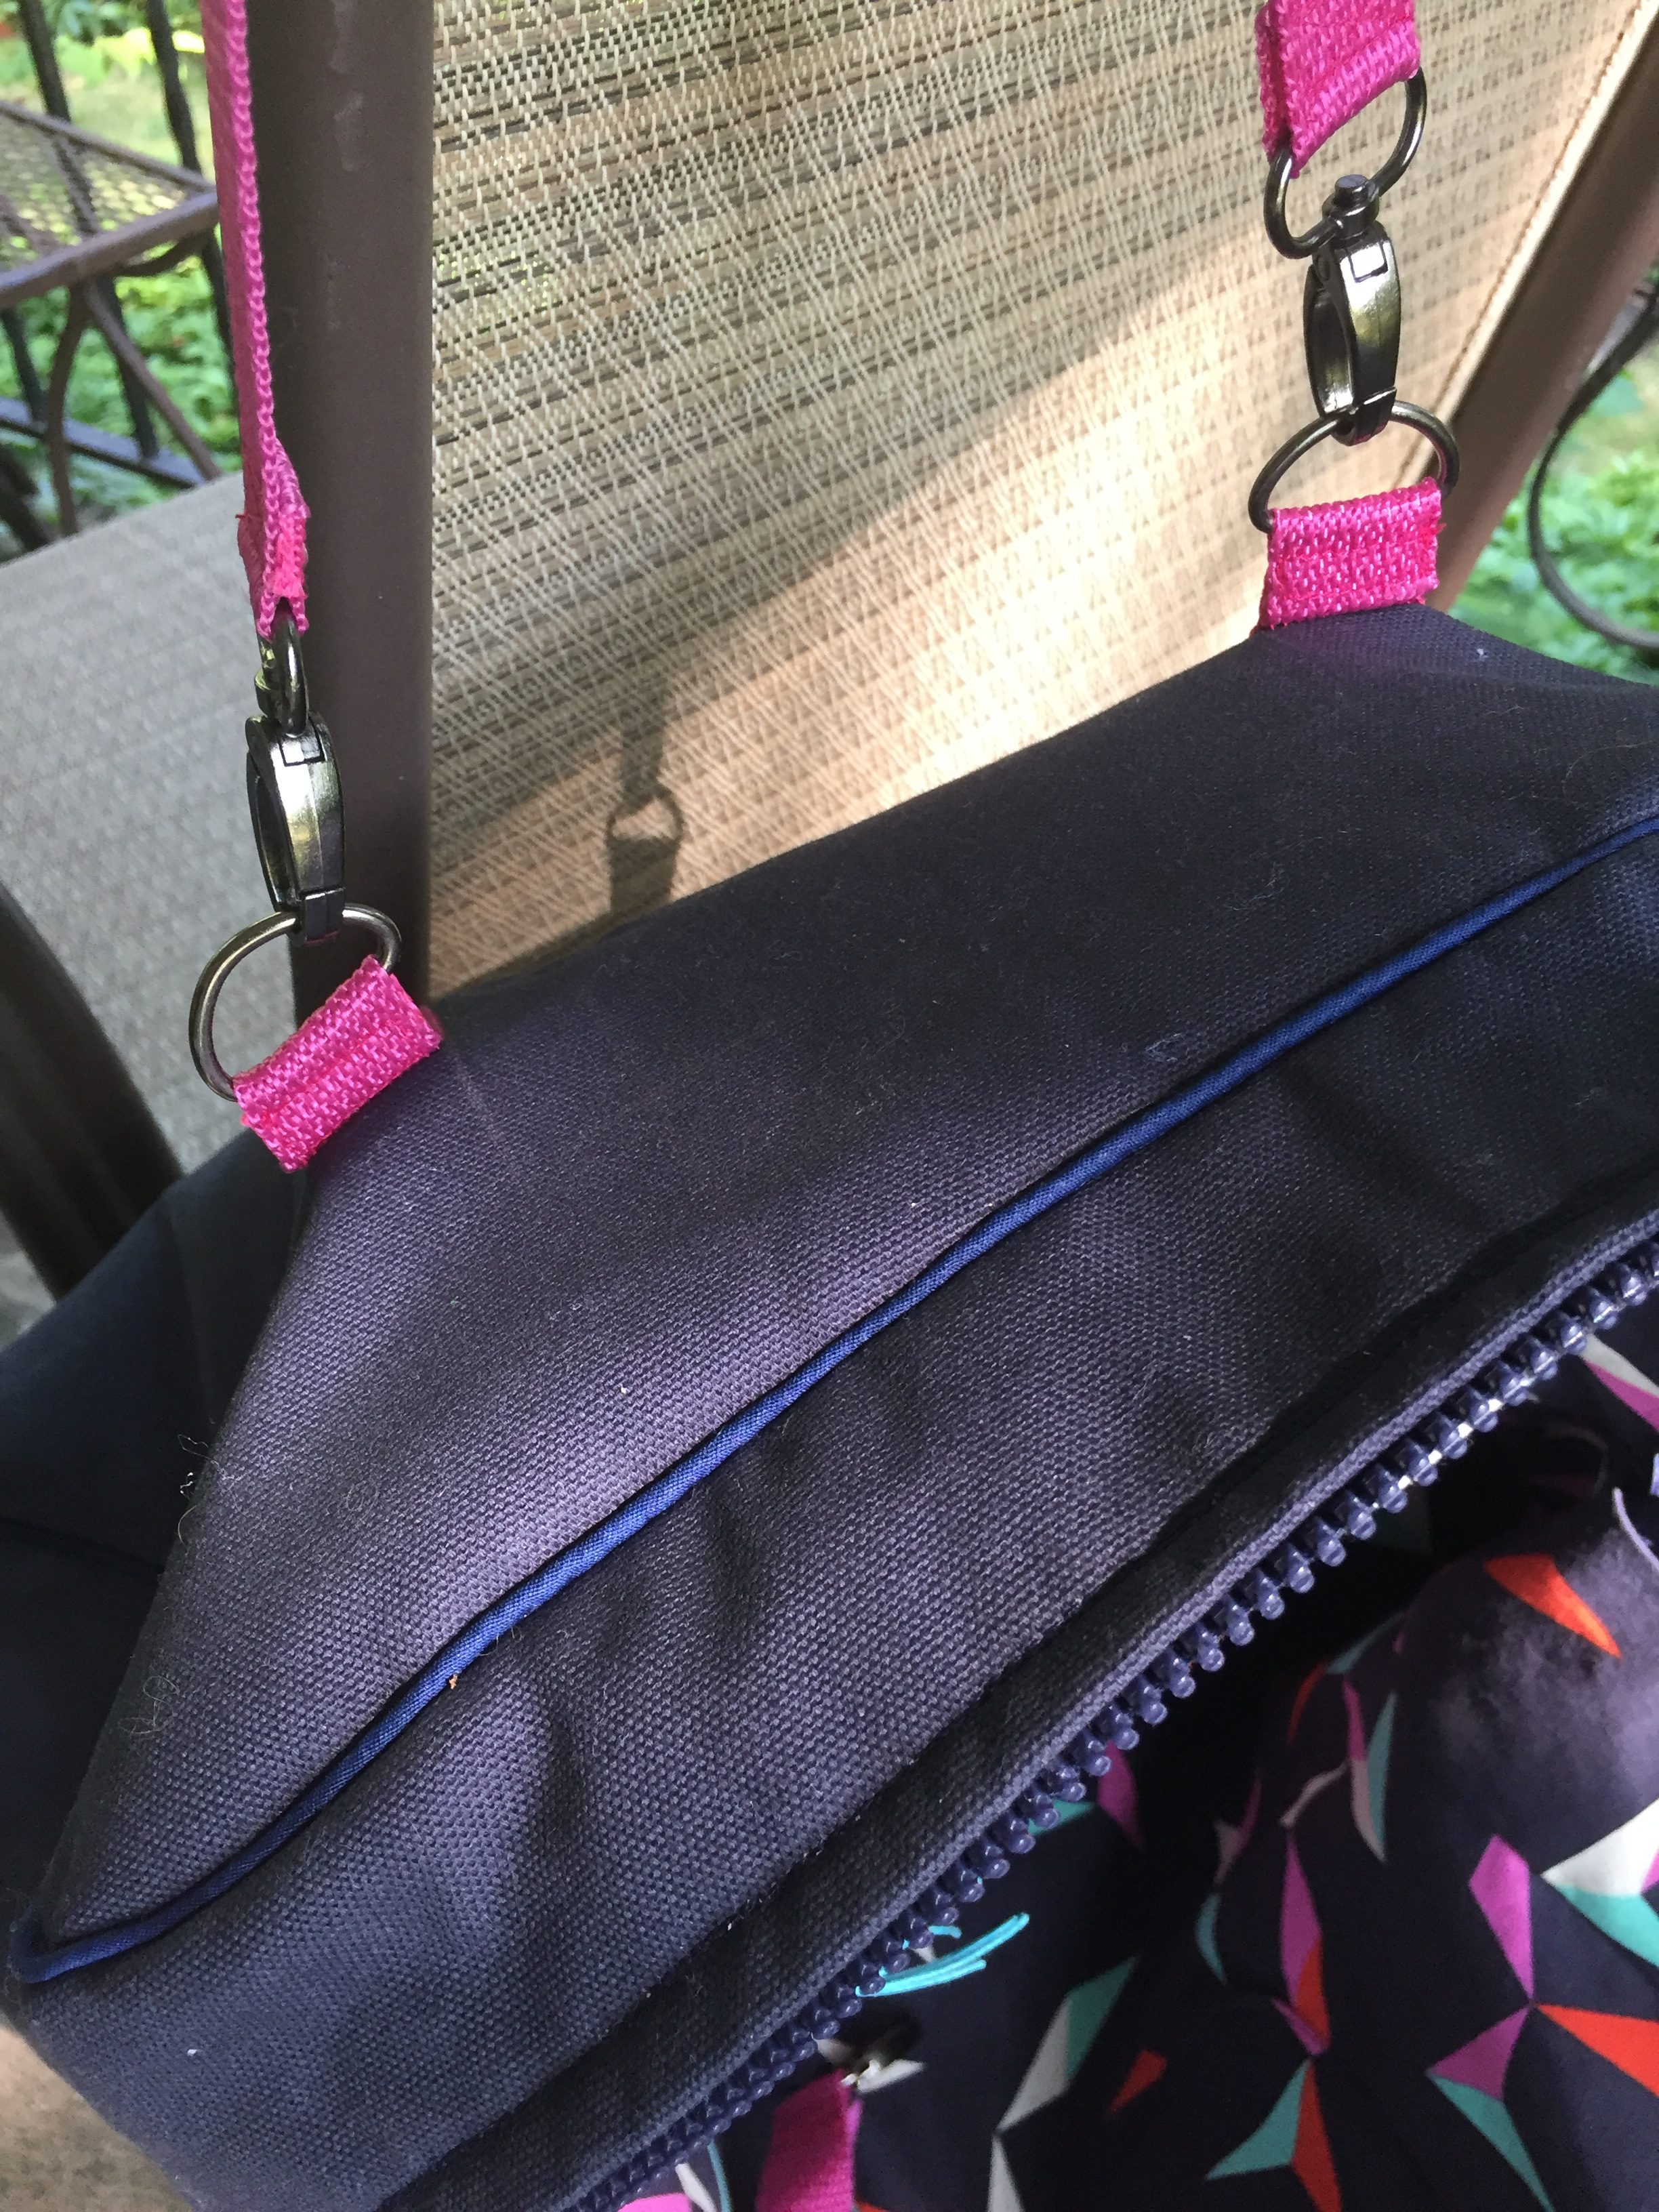
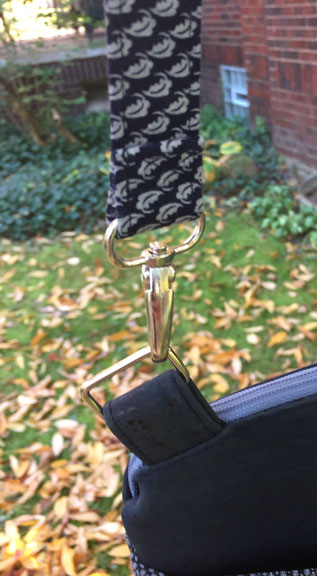
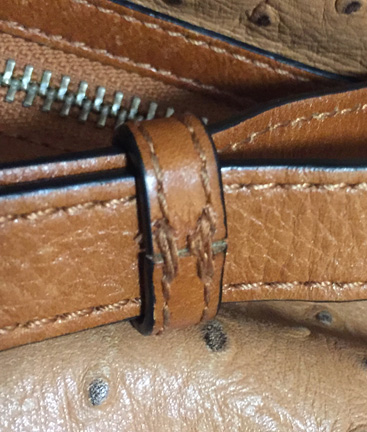
2) I wanted vertical straps supporting the handles to give more stability to my weighty contents. I positioned the straps in the center of the curve along the top edge of the bag. When the exterior bottom and side panels were attached to the front and back panels, the straps were caught in those seams.
3) When sewing the curves on the exterior bottom, I accidentally had part of the seam allowance of the leather base tuck under and I sewed through it. If you haven’t sewn on leather yet, let me warn you—those needle holes never close up. (Thank you, Photoshop, for letting me hide the holes on the photographs.
Only three oopses, and one “I’m thrilled out of my mind”:
 A local quilt store (LQS) in Warren, OH, went out of business recently. As the owner was liquidating all the contents of the store, I picked up a new sewing machine. (That would be #4 in my inventory.) I told her I was having trouble getting my 20yo Bernina 1630 to do the edgestitching on bags, which requires even stitches through between four and eight layers of fabric. She said the Elna 720 eXcellence she was selling from her classroom was the perfect machine for my needs.
 The closer I got to the last steps in finishing the bag, the more excited I was about trying the Elna on the top edge. Hoo boy!!!! Am I a happy sewist?! Yes!! That Elna ran the needle right through all those layers as if they were butter. Of all the bags I’ve made over the past ten years, this is the best finishing edgestitch I’ve ever gotten.
 I’m over the moon!!
And as one more sidenote, machine #5 joined my little family yesterday. A local woman (who also happens to be a musician and who has a daughter pursuing a master’s degree in French horn at the university where I work) was downsizing and selling her grandmother’s Singer Model 201. Her mother had made all her own coats and dresses on this machine, which several websites tout as the workhorse of the Singer line. It dates from around 1950 (a good year), and is now visiting the sewing machine hospital in Warren to get a full check-up. What I hear from the Facebook group I’m in of Swoon Bag aficionados is that these old machines—long pre-dating all the computer stuff that’s in the new machines—are unflinching when it comes to top-stitching. Can’t wait to bring it home and try it out.
I’ve enjoyed these last few sews. Does summer really have to end and school begin again??


 I’m having a special party on Sunday. My new-to-me sister is coming to Ohio for Christmas with her granddaughter. My children, grandchildren, and our circle of friends are gathering at my home to meet my sister, her eldest daughter, and her younger daughter’s daughter and son-in-law.
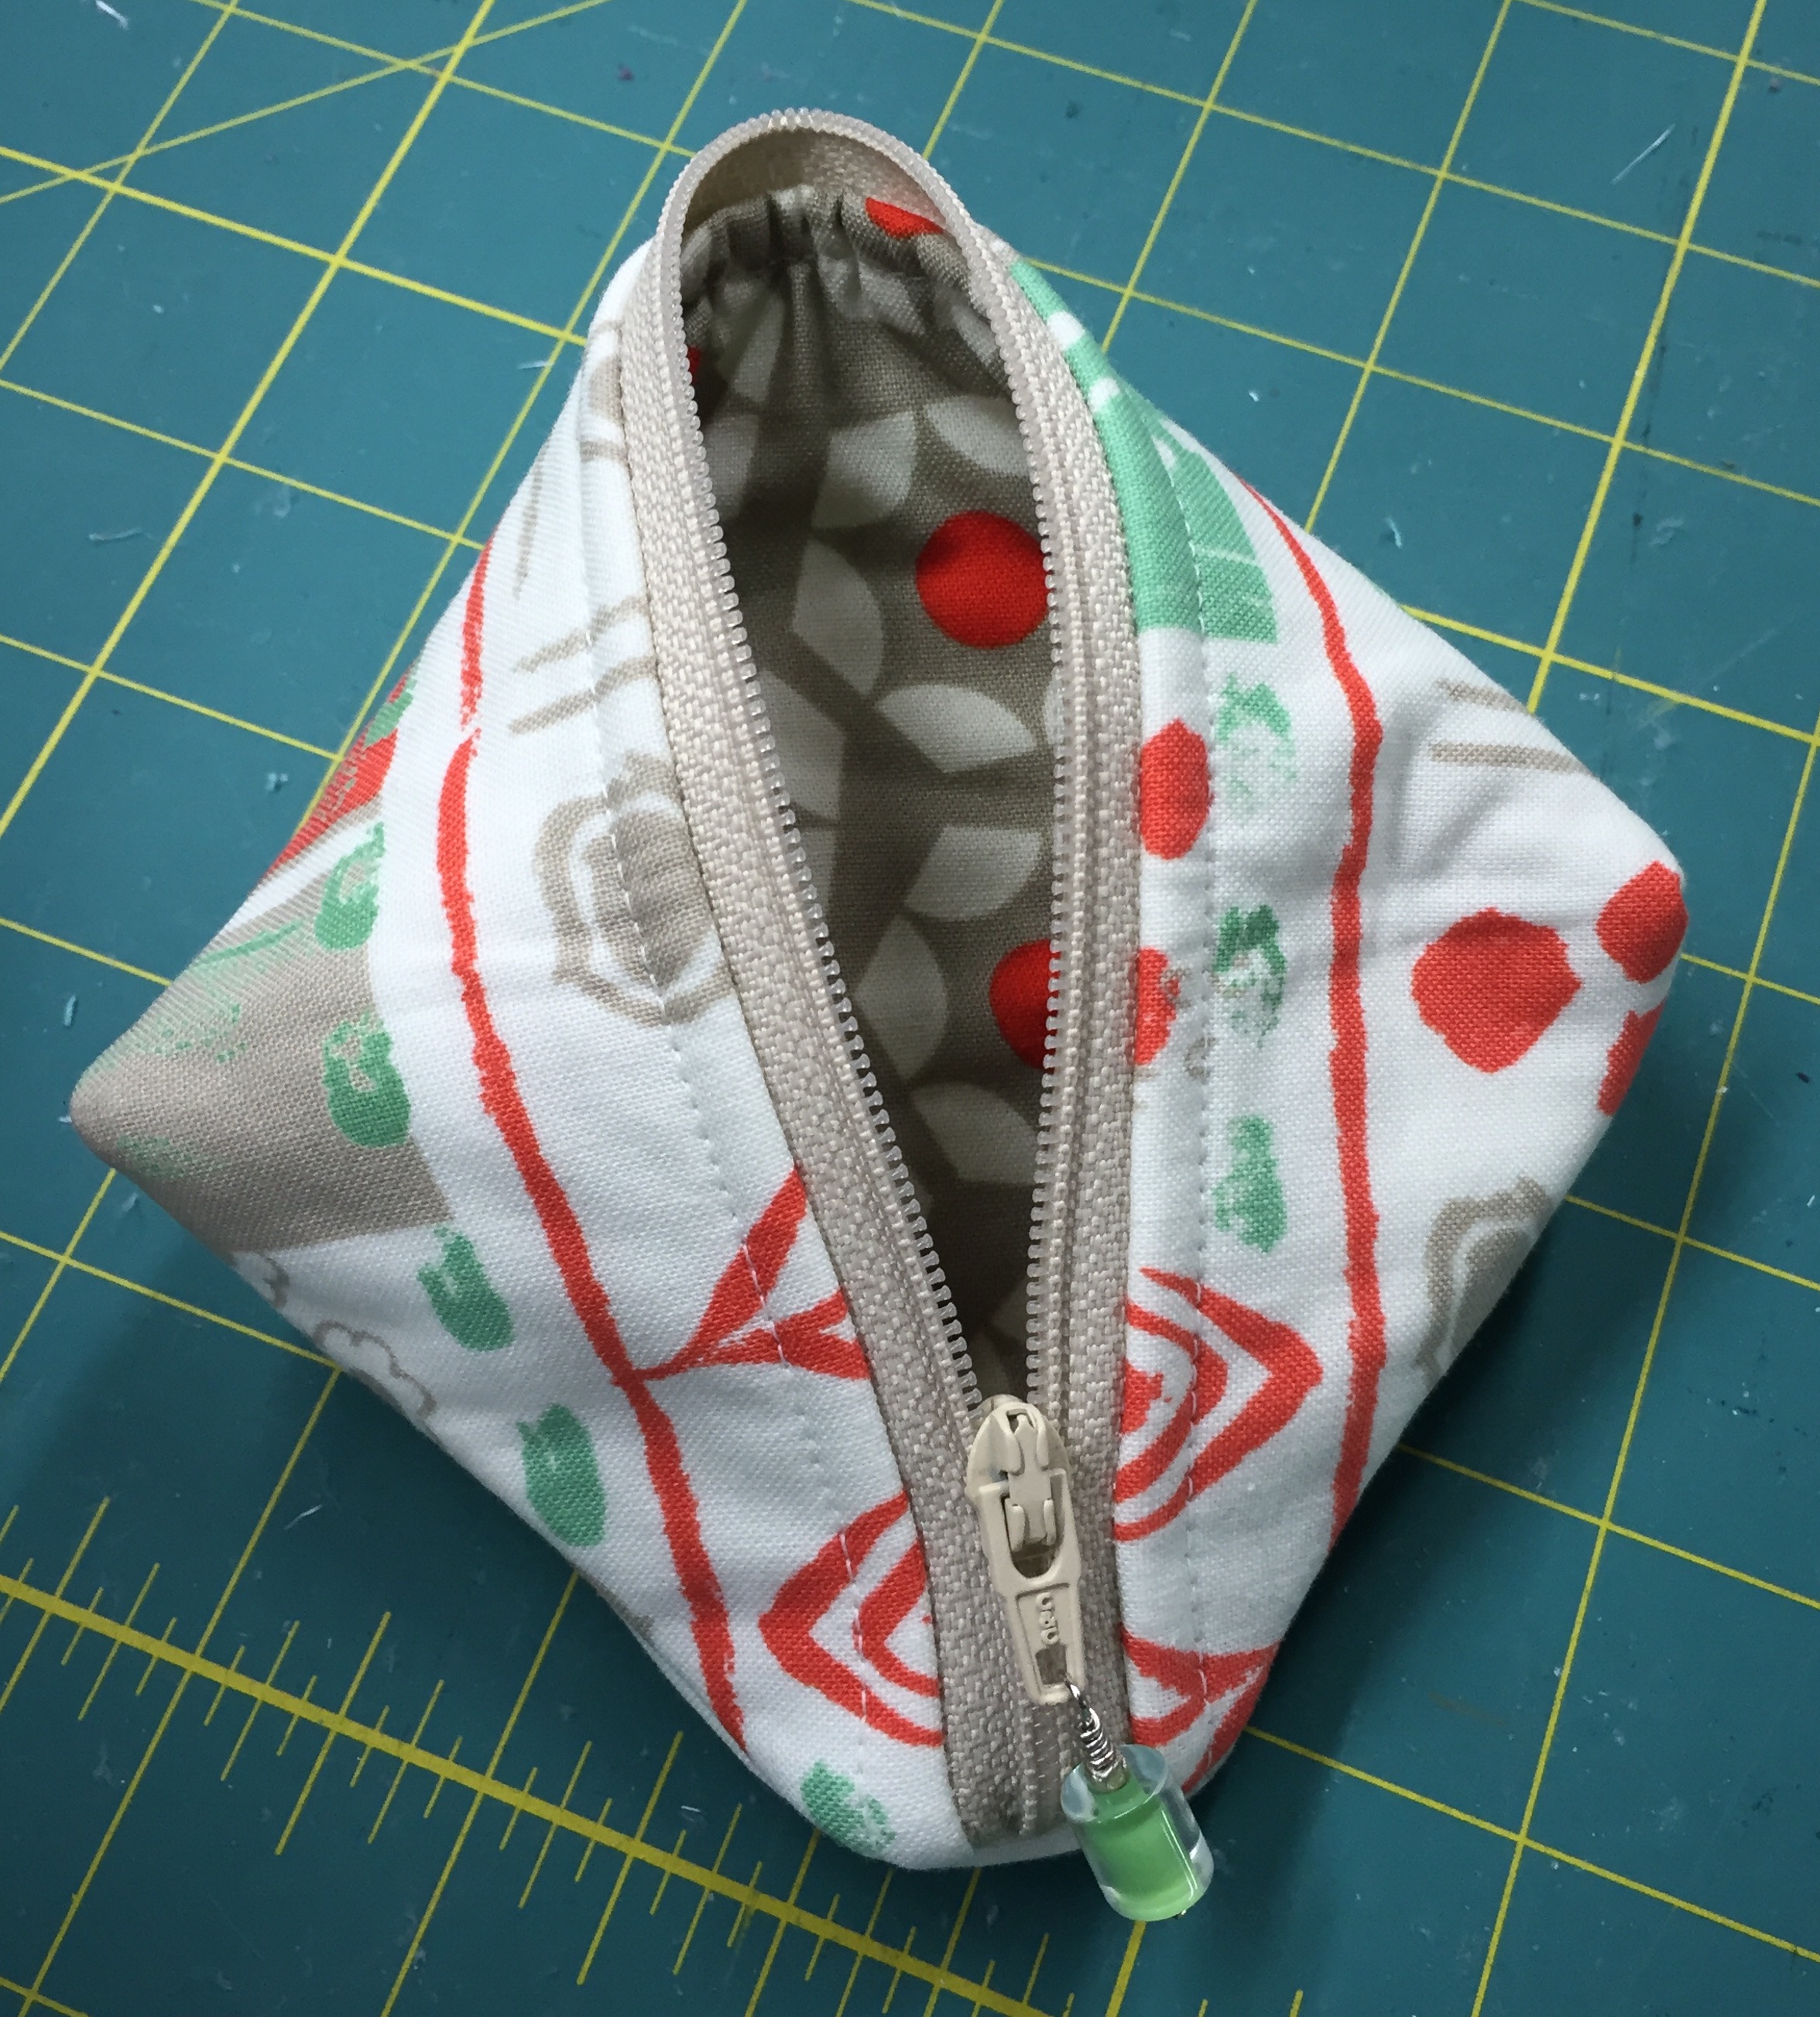
 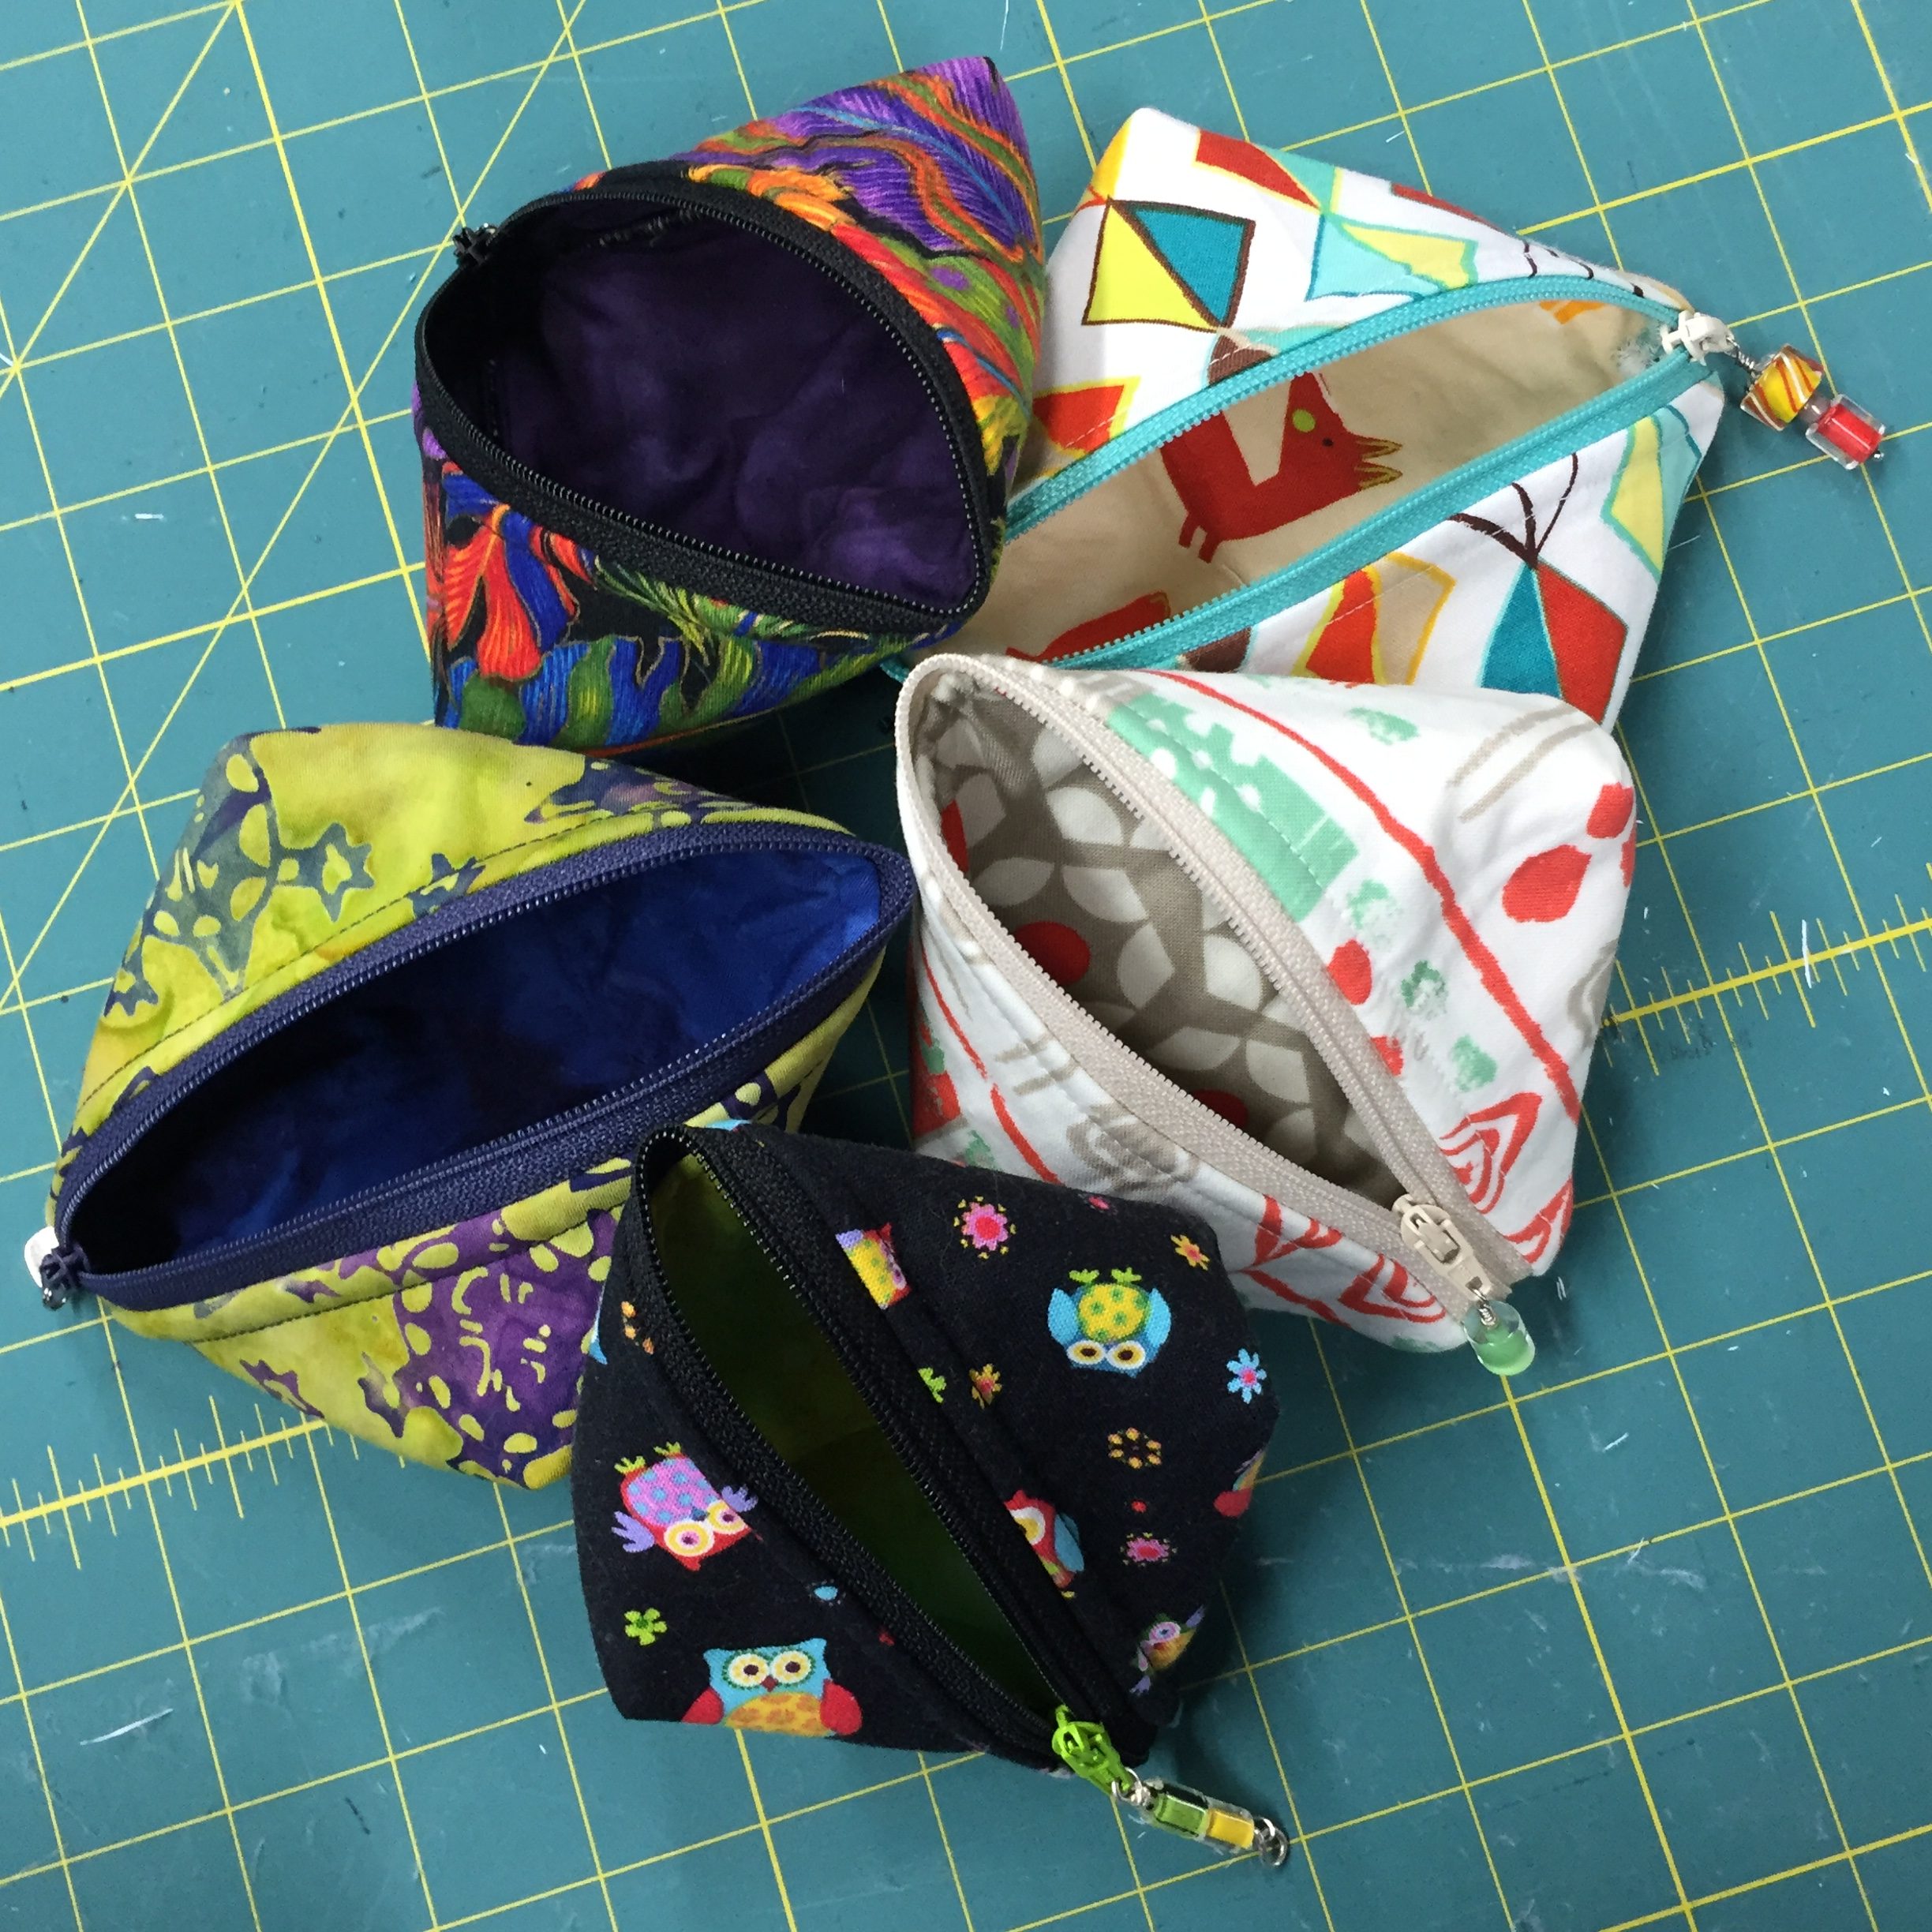 The thing about the Bendy Bag is there’s some waste—like two triangles that, together, would equal a 10″ square of fabric, already bonded to fleece. Hmmm. What does one do with all those valuable triangles? Joan Hawley may be a Lazy Girl, but she’s no dummy girl. She designed the Sweetpea Pod pattern, which deftly uses up all those extra triangles of fabric. And I was happy to see the pattern used the half-zip technique.
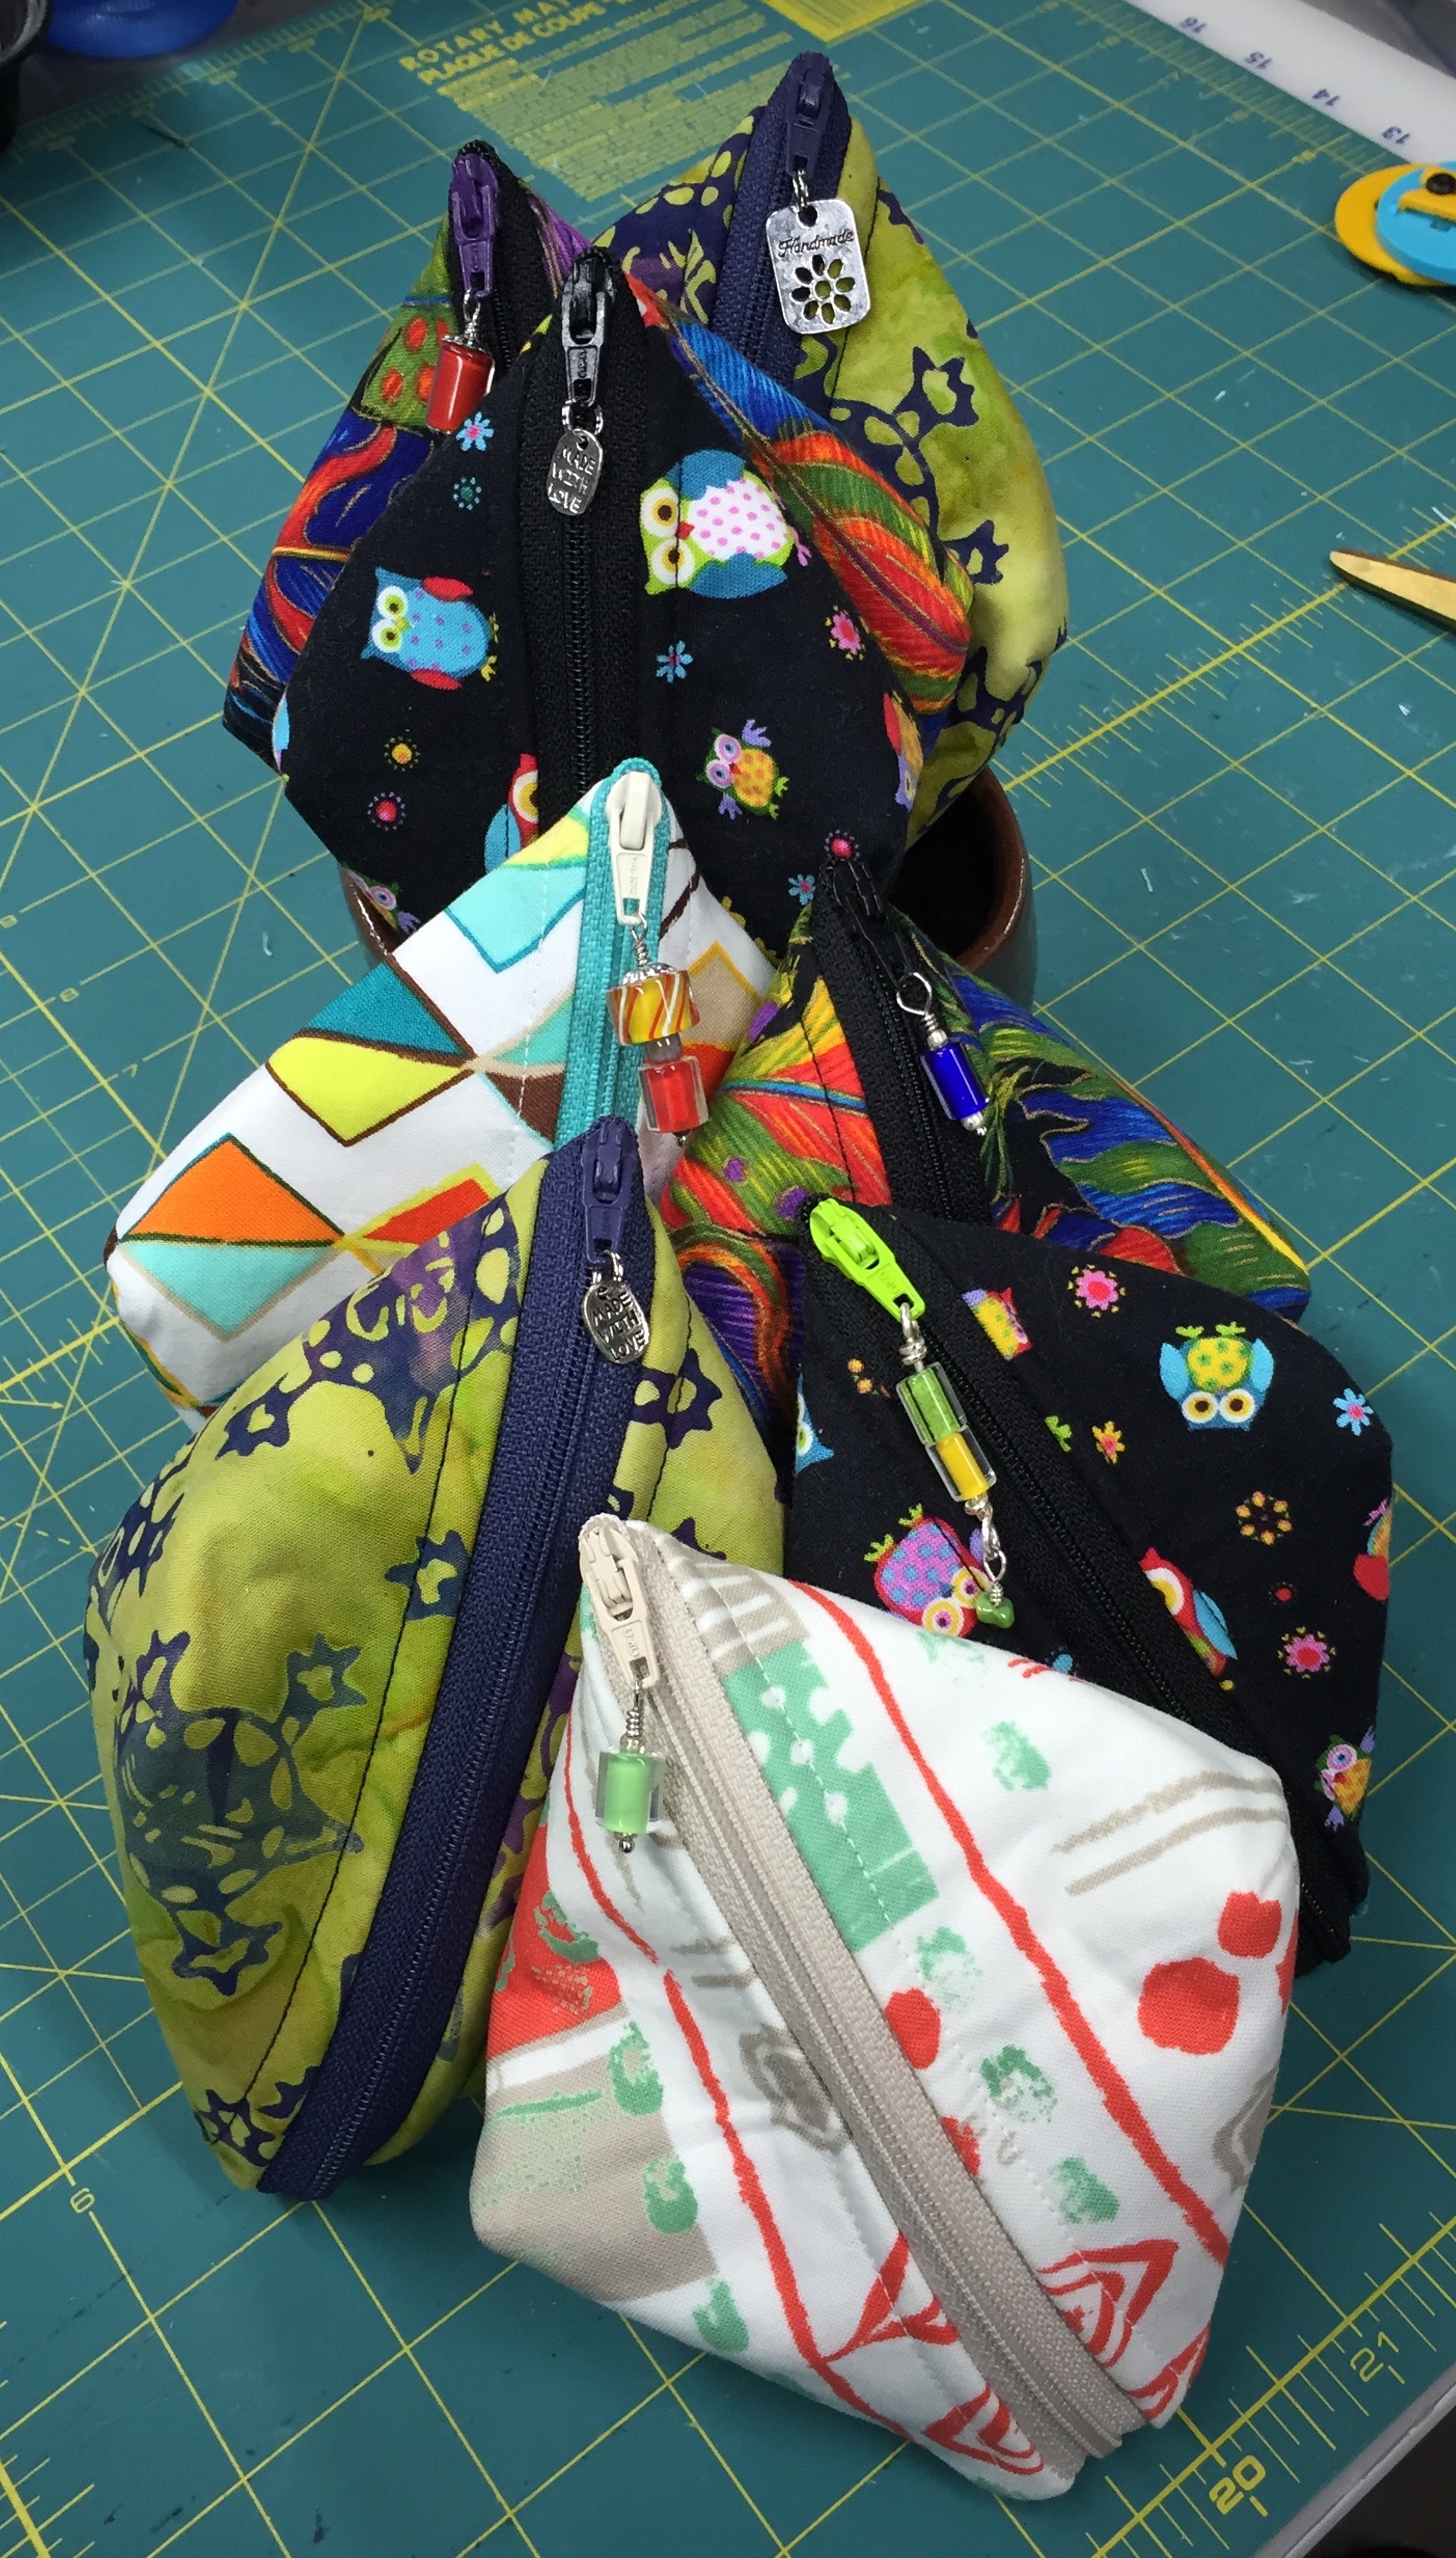 Honestly, these little pods are genius. Think of all the uses! If there are any leftovers after Sunday’s party, I’m going to snag one to hold earbuds in my purse. It could easily be made with a hook to attach to your keyring. Put your driver’s license, a $10 bill, and a lipstick in the pod, and you’re good to go.


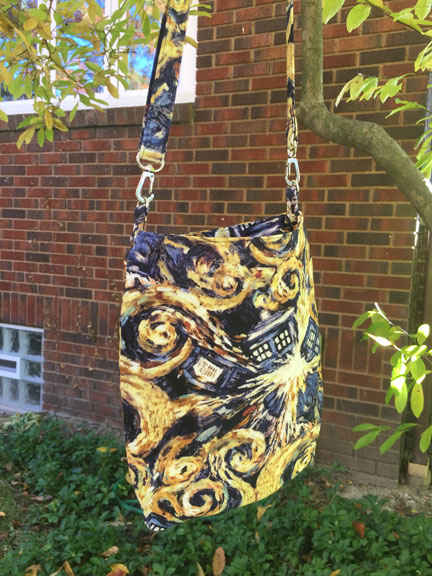


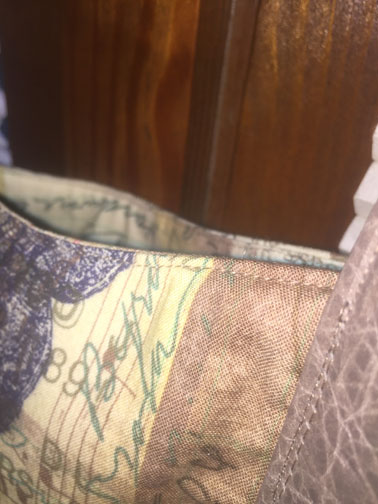


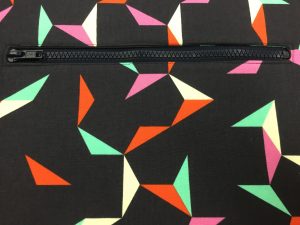 I put in the zippered pocket, and it was the finest zippered pocket I had ever inserted into any bag. Until I looked at the pattern again and realized it belonged on the inside of the bag, not the outside. If my knees weren’t so riddled with arthritis, I would have kicked myself! (Really—just look at that zipper. Look at the topstitching. Now it’s got to hide on the inside of the bag.)