A Pineapple for You

You know that feeling of joy and satisfaction when you finally finish a project that took a lot of thinking? I have that feeling this morning. I have just finished a bag for a student who played Fräu Schneider in “Cabaret.”

The Youngstown State University production of “Cabaret,” for which I served as rehearsal accompanist, closed just over two weeks ago. That was just in time for Thanksgiving week, the last week of the semester, and finals/juries week.

<Sidenote On>
If you’re not a musician who had applied music lessons in college, you might not know the term “jury” as it is used in college music departments. When you take voice or piano or oboe or … lessons, instead of having a final exam, you sing or play some or all of the repertoire you studied during the semester in front of a panel of instructors or professors in your particular instrument. For YSU voice students, you are allowed to choose the song you wish to sing first, then the various instructors on the panel tell you what to sing next. Stressful? Yes, stressful. Very. And you do this the same week you’re taking all your finals in your other classes, either required academic classes or music classes. I’m spending my week practicing all of my accompanees’ repertoire, and hold one or more practice sessions with each of them. I let them schedule with me as many times as they want at no extra charge, as I want them confident when they walk into the classroom for that performance.
<Sidenote Off>

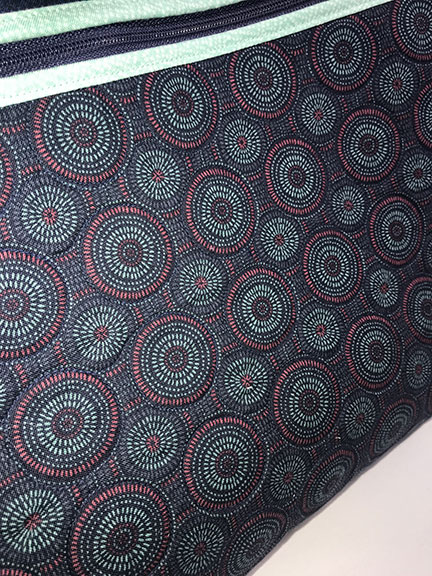
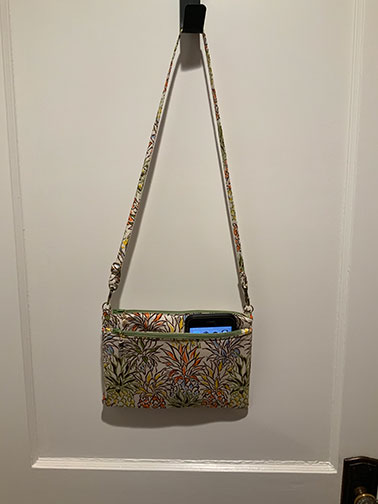
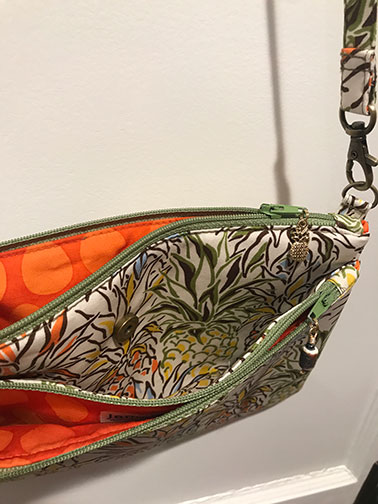
What is the significance of this bag to that beloved student? The elderly landlady falls in love with her elderly tenant, Herr Schultz, who runs a fruit market in Berlin. When he is beginning to court her, he brings her a pineapple as a token of his affection. She is touched by his generous gift, and they sing, “It Couldn’t Please Me More” (The Pineapple Song) Our student who played Fräu Schneider, Ace Lowry, is one of my accompanees and I love them dearly. Talent oozes from their every pore. I wanted to do something special for them, so I searched every fabric website I could think of and came up with “Hawaiian Colorful Pineapple – Beige” from Trans-Pacific Textiles (fabric .com). For the lining I chose a batik, “Island Batik Fresh Pick’ins Large Eggs – Nasturtium.”

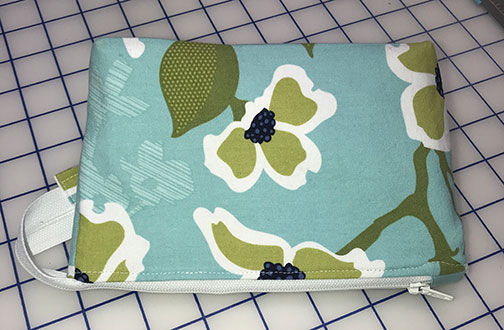
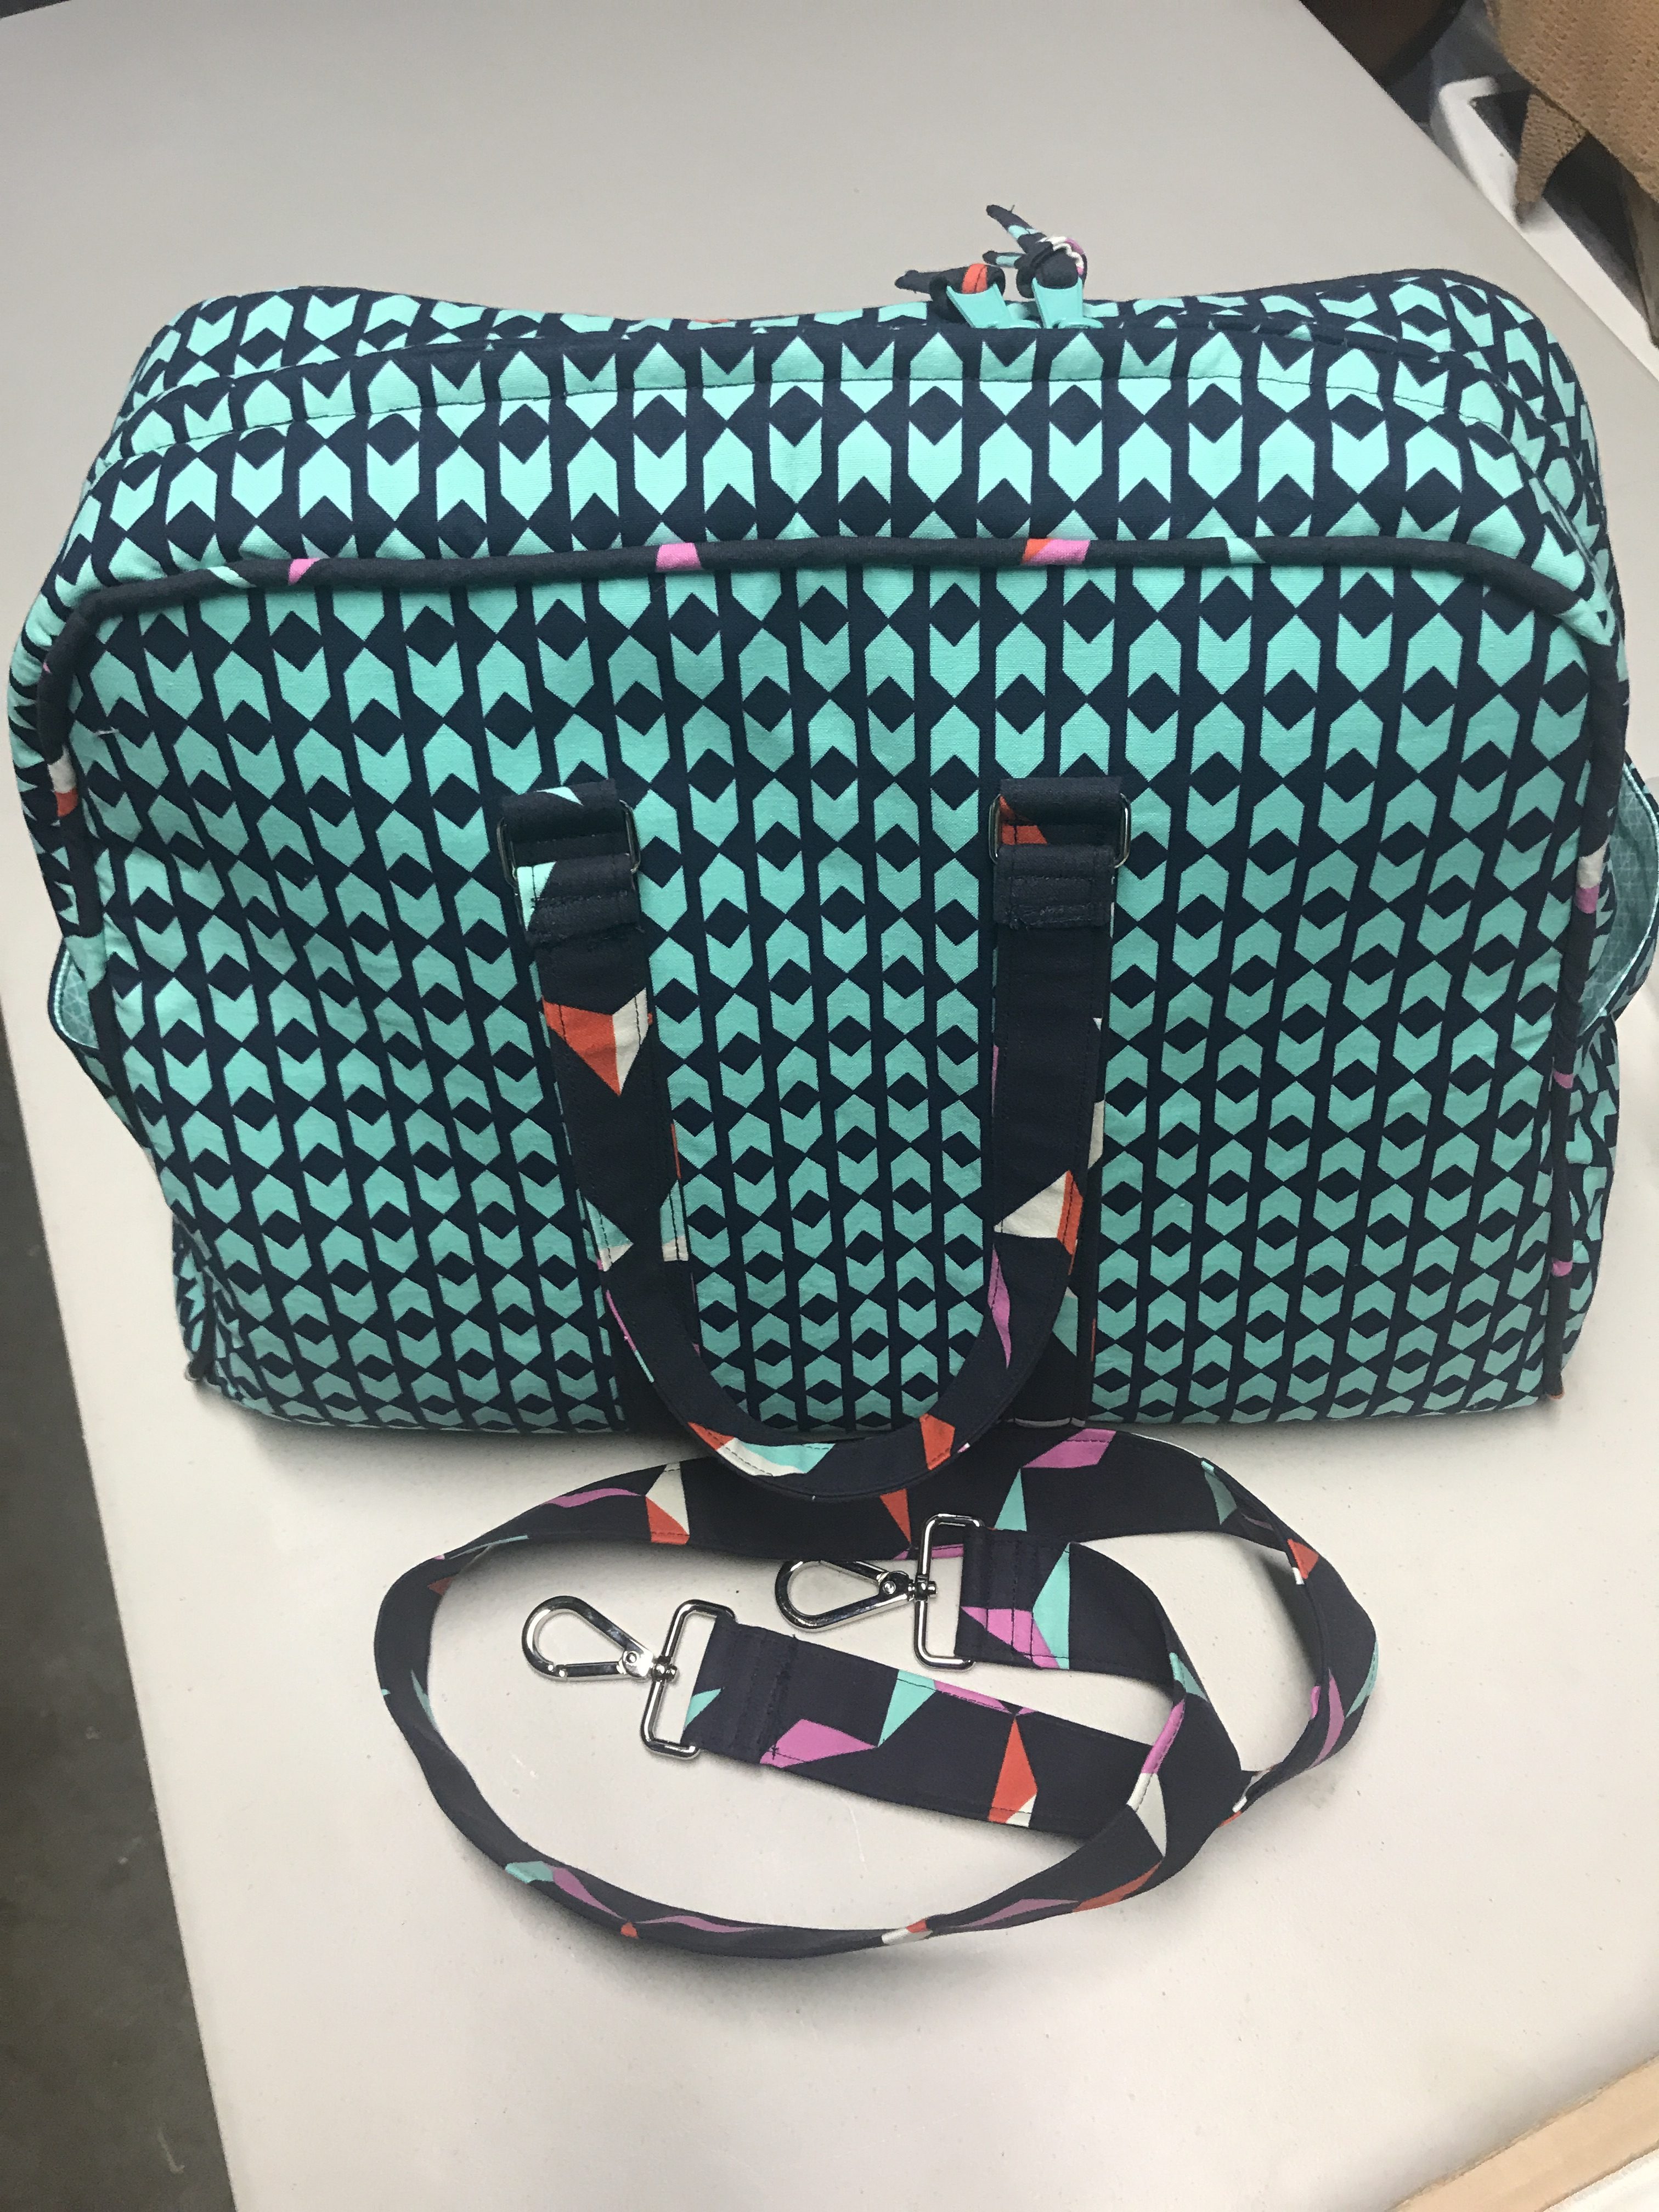
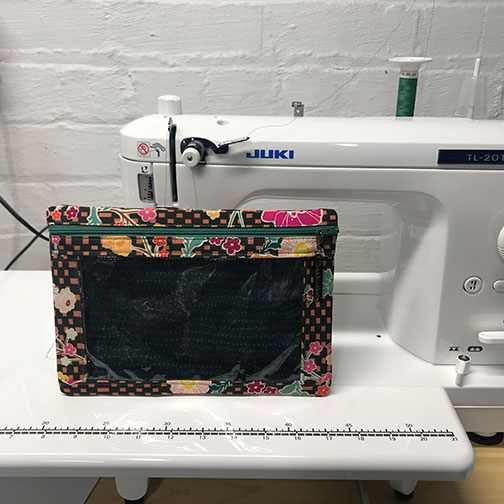
I snuck 15 minutes here and 30 minutes there to make this Sew Sweetness Metro Double-Zip Pouch, which is part of designer Sara Lawson’s Minikins Season Two set of thirteen patterns that use a minimum of bag hardware and are quick sews and fairly easy for beginners. (Let the record show I am not a beginner bagmaker, but it’s always nice to be able to grab an easier pattern when one needs a quick gift.)

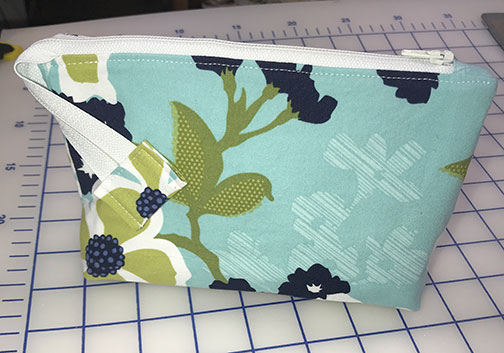
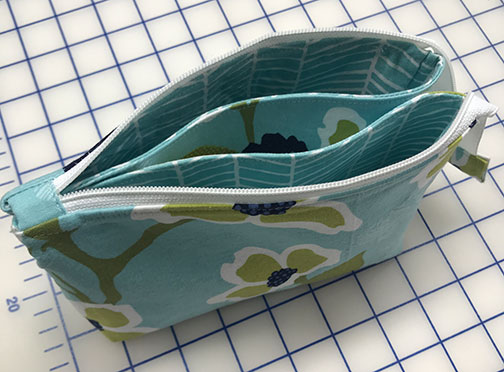
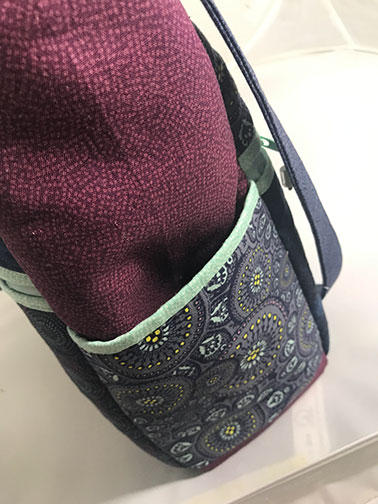
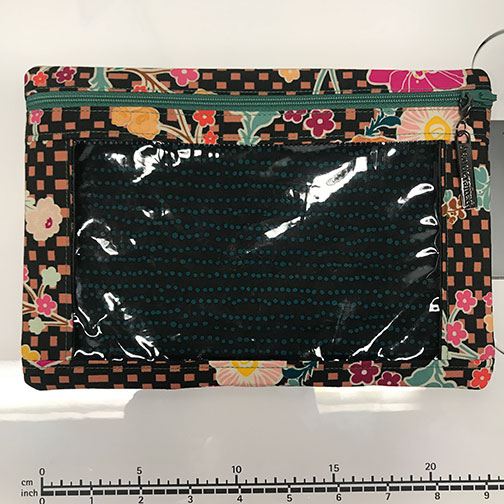
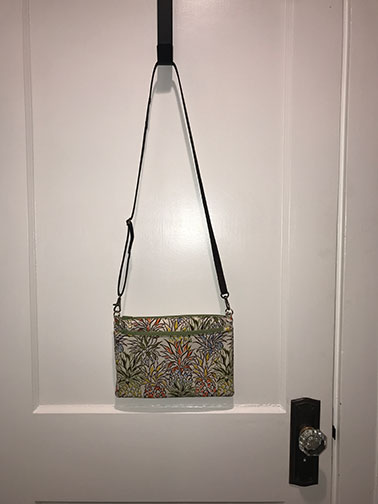
I had showed Ace two bags, without telling them about the pineapple fabric. They saw the Paladin Pouch and the Metro Double-Zip that I made for myself earlier this year as a travel bag. (Here’s my blog post of the group of Metros I made.) Ace chose the Metro, made with the pattern hack that creates a separate pocket between the two zippered pockets, and includes a crossbody strap.

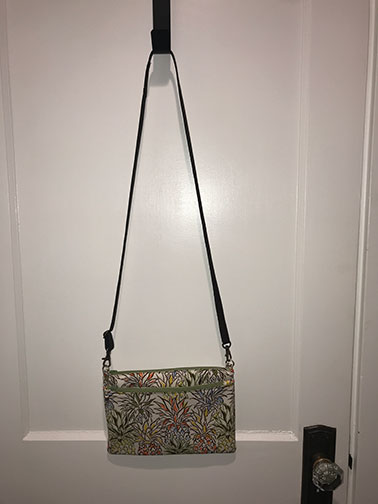
I made the crossbody strap out of the pineapple fabric, then realized it just wasn’t long enough, but would be a nice addition if they wanted to carry it over their shoulder rather than crossbody. Then I ordered some of Sara Lawson’s fabulous cork fabric to in brown to match the brown in the pineapple print. The cork that Sara stocks is the nicest cork fabric I’ve ever touched or sewn on. I will not buy cork from anyone else after this. (I had purchased some cork from a local store a while back. When I made a bag for a friend with it, the cork cracked. Not a good thing to happen!)

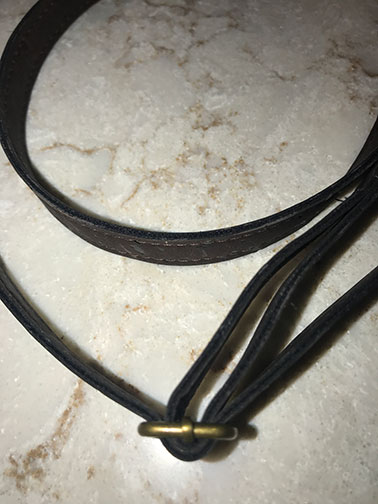
Using Sara’s video on adjustable straps, cut four pieces of cork, each ½” wide and the full length of my one yard of cork. I pieced two strips together using a diagonal seam, and top-stitched the seam allowance open. Then I stacked the two strips, being careful to offset the diagonal seams by about an inch, and adjusting the total length accordingly. (My total length for each pieced strip was about 45″.) I laid one strip wrong side up, attached a &quarter;” strip of Wonder Tape (water soluble tape for sewing) to that strip, then place the second strip wrong side down, carefully aligning the edges. Then I topstiched all the way around the strip at about ⅛”. And for the final touch, I grabbed a pair of rubber gloves and a small paintbrush and applied Fiebing’s Black Edge Kote all the way around the strap. Here’s Sara’s video about Edge Kote, which I only just found—I wish I had watched it before I applied the Edge Kote. Knowledge is a good thing!

Today I’m practicing with Ace and will give them the bag then. I’m hoping they feel the love I poured into this bag.

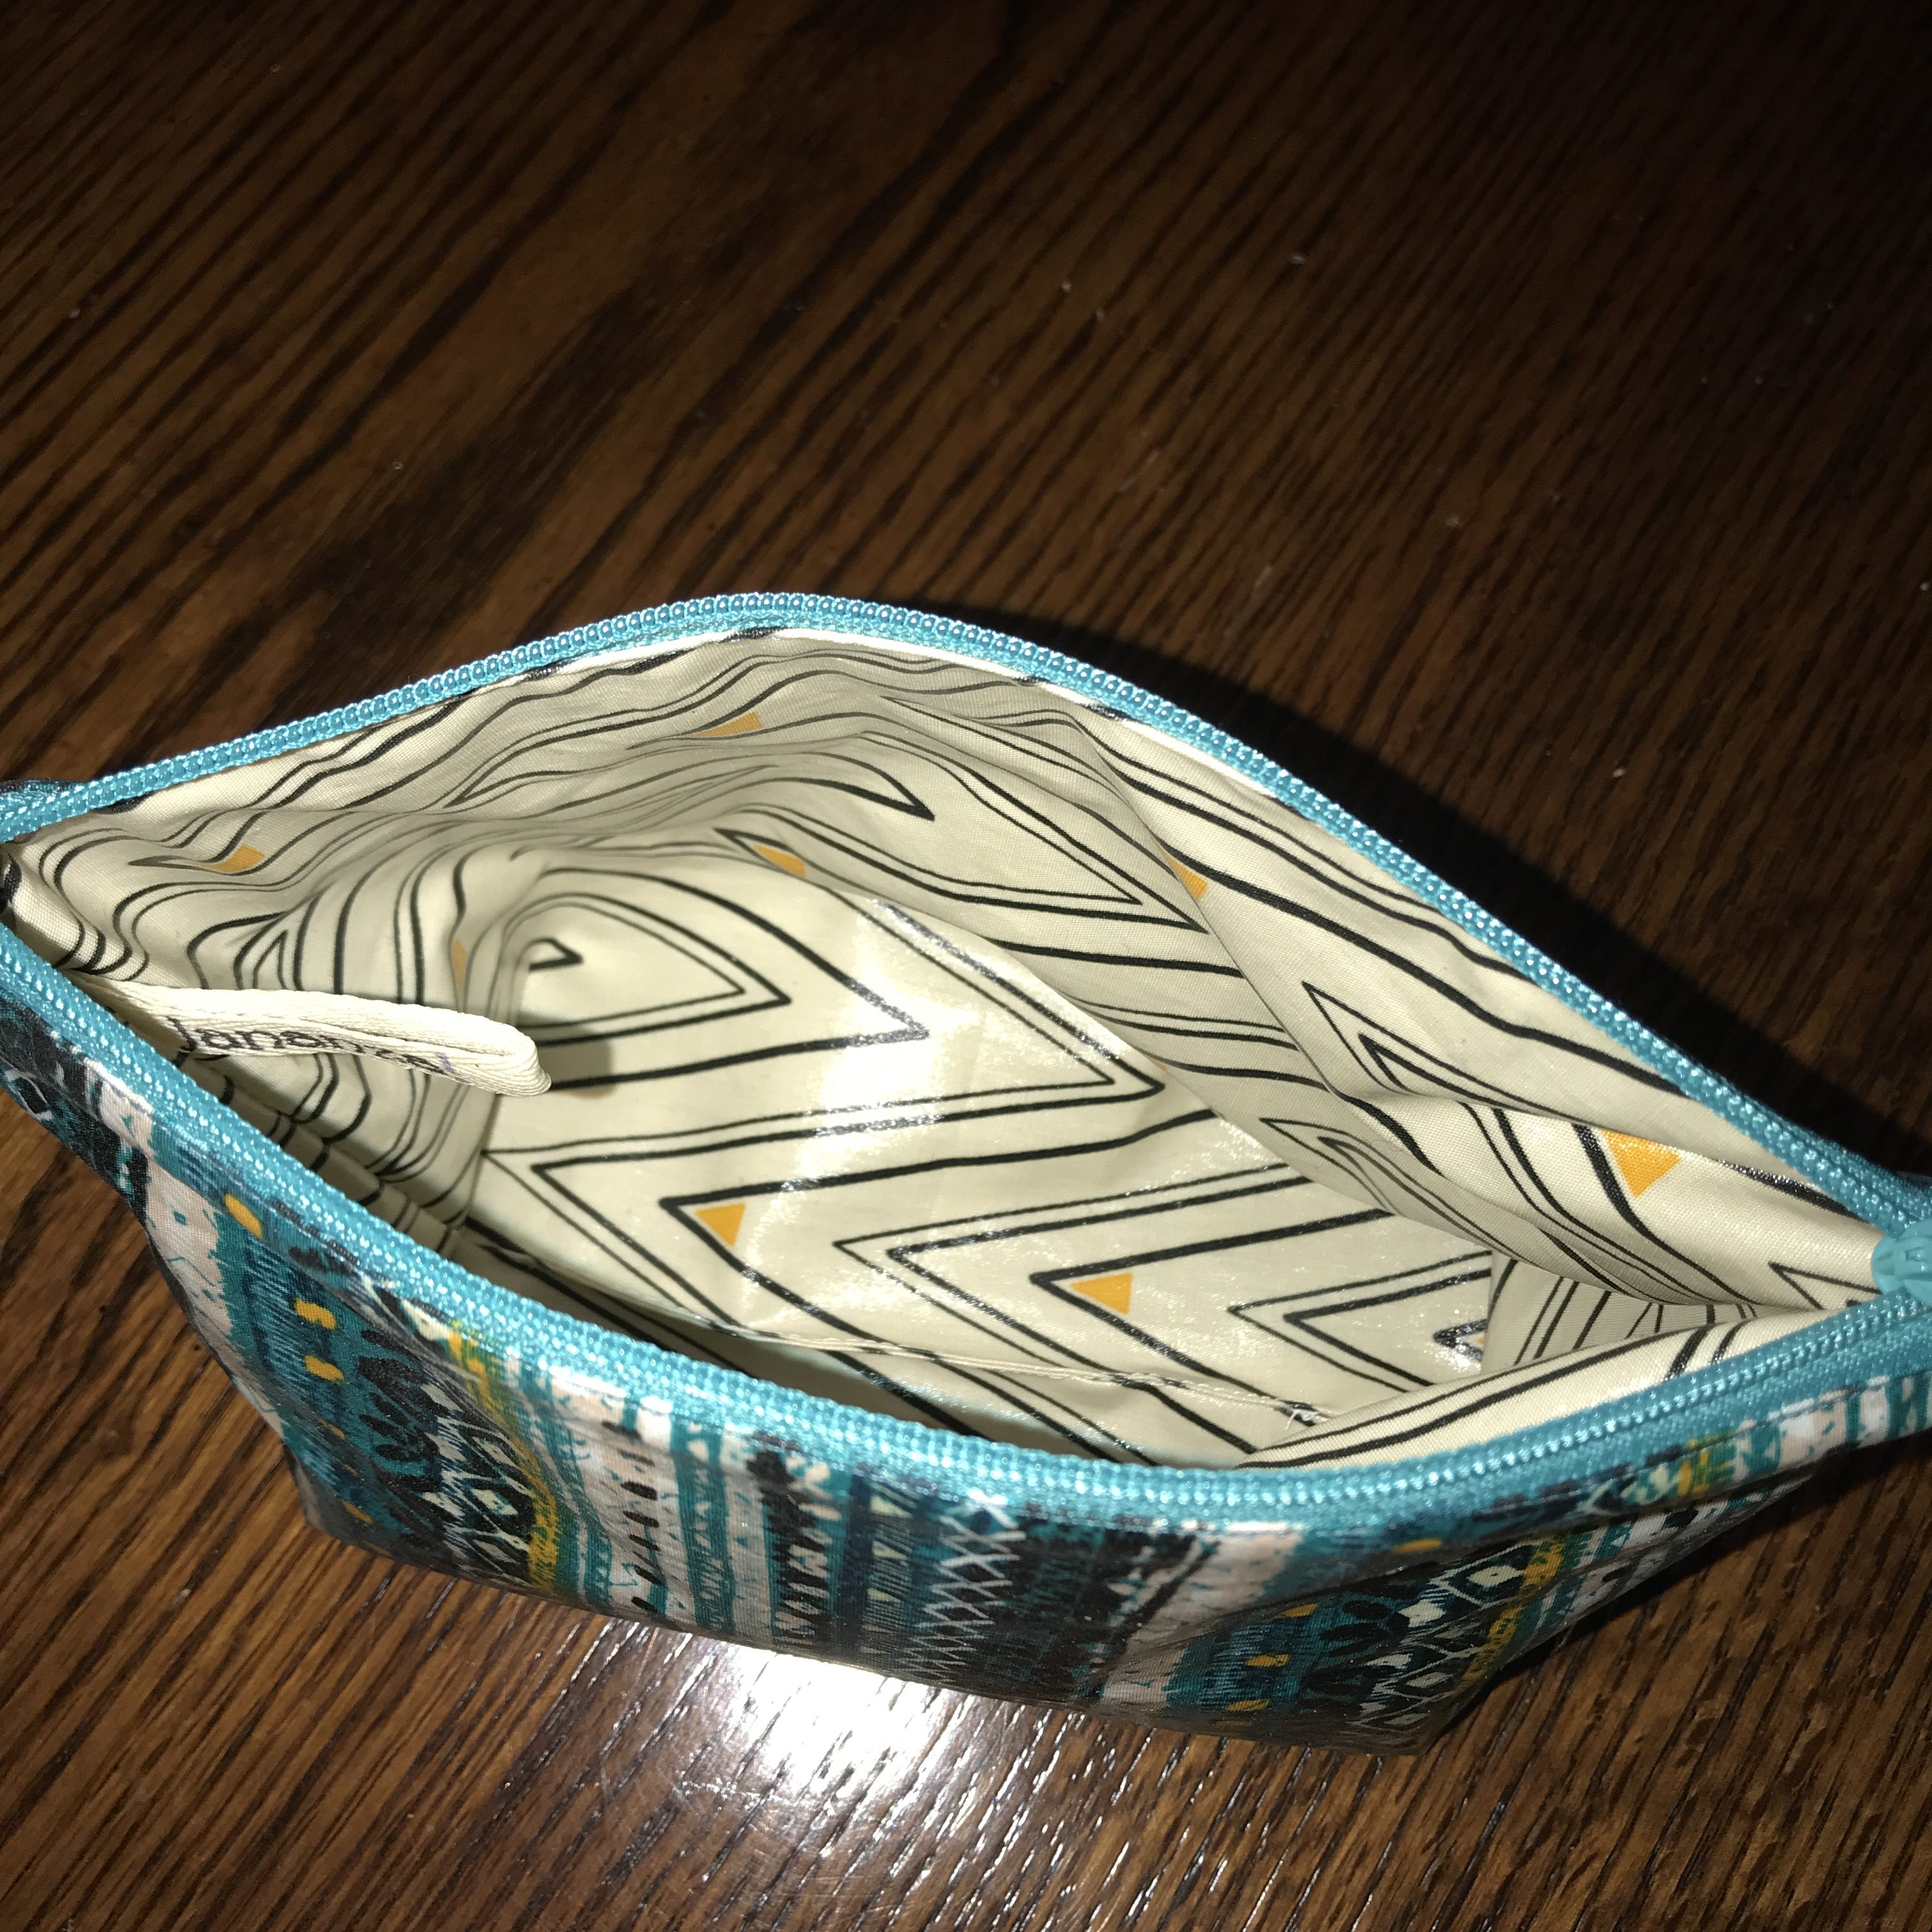
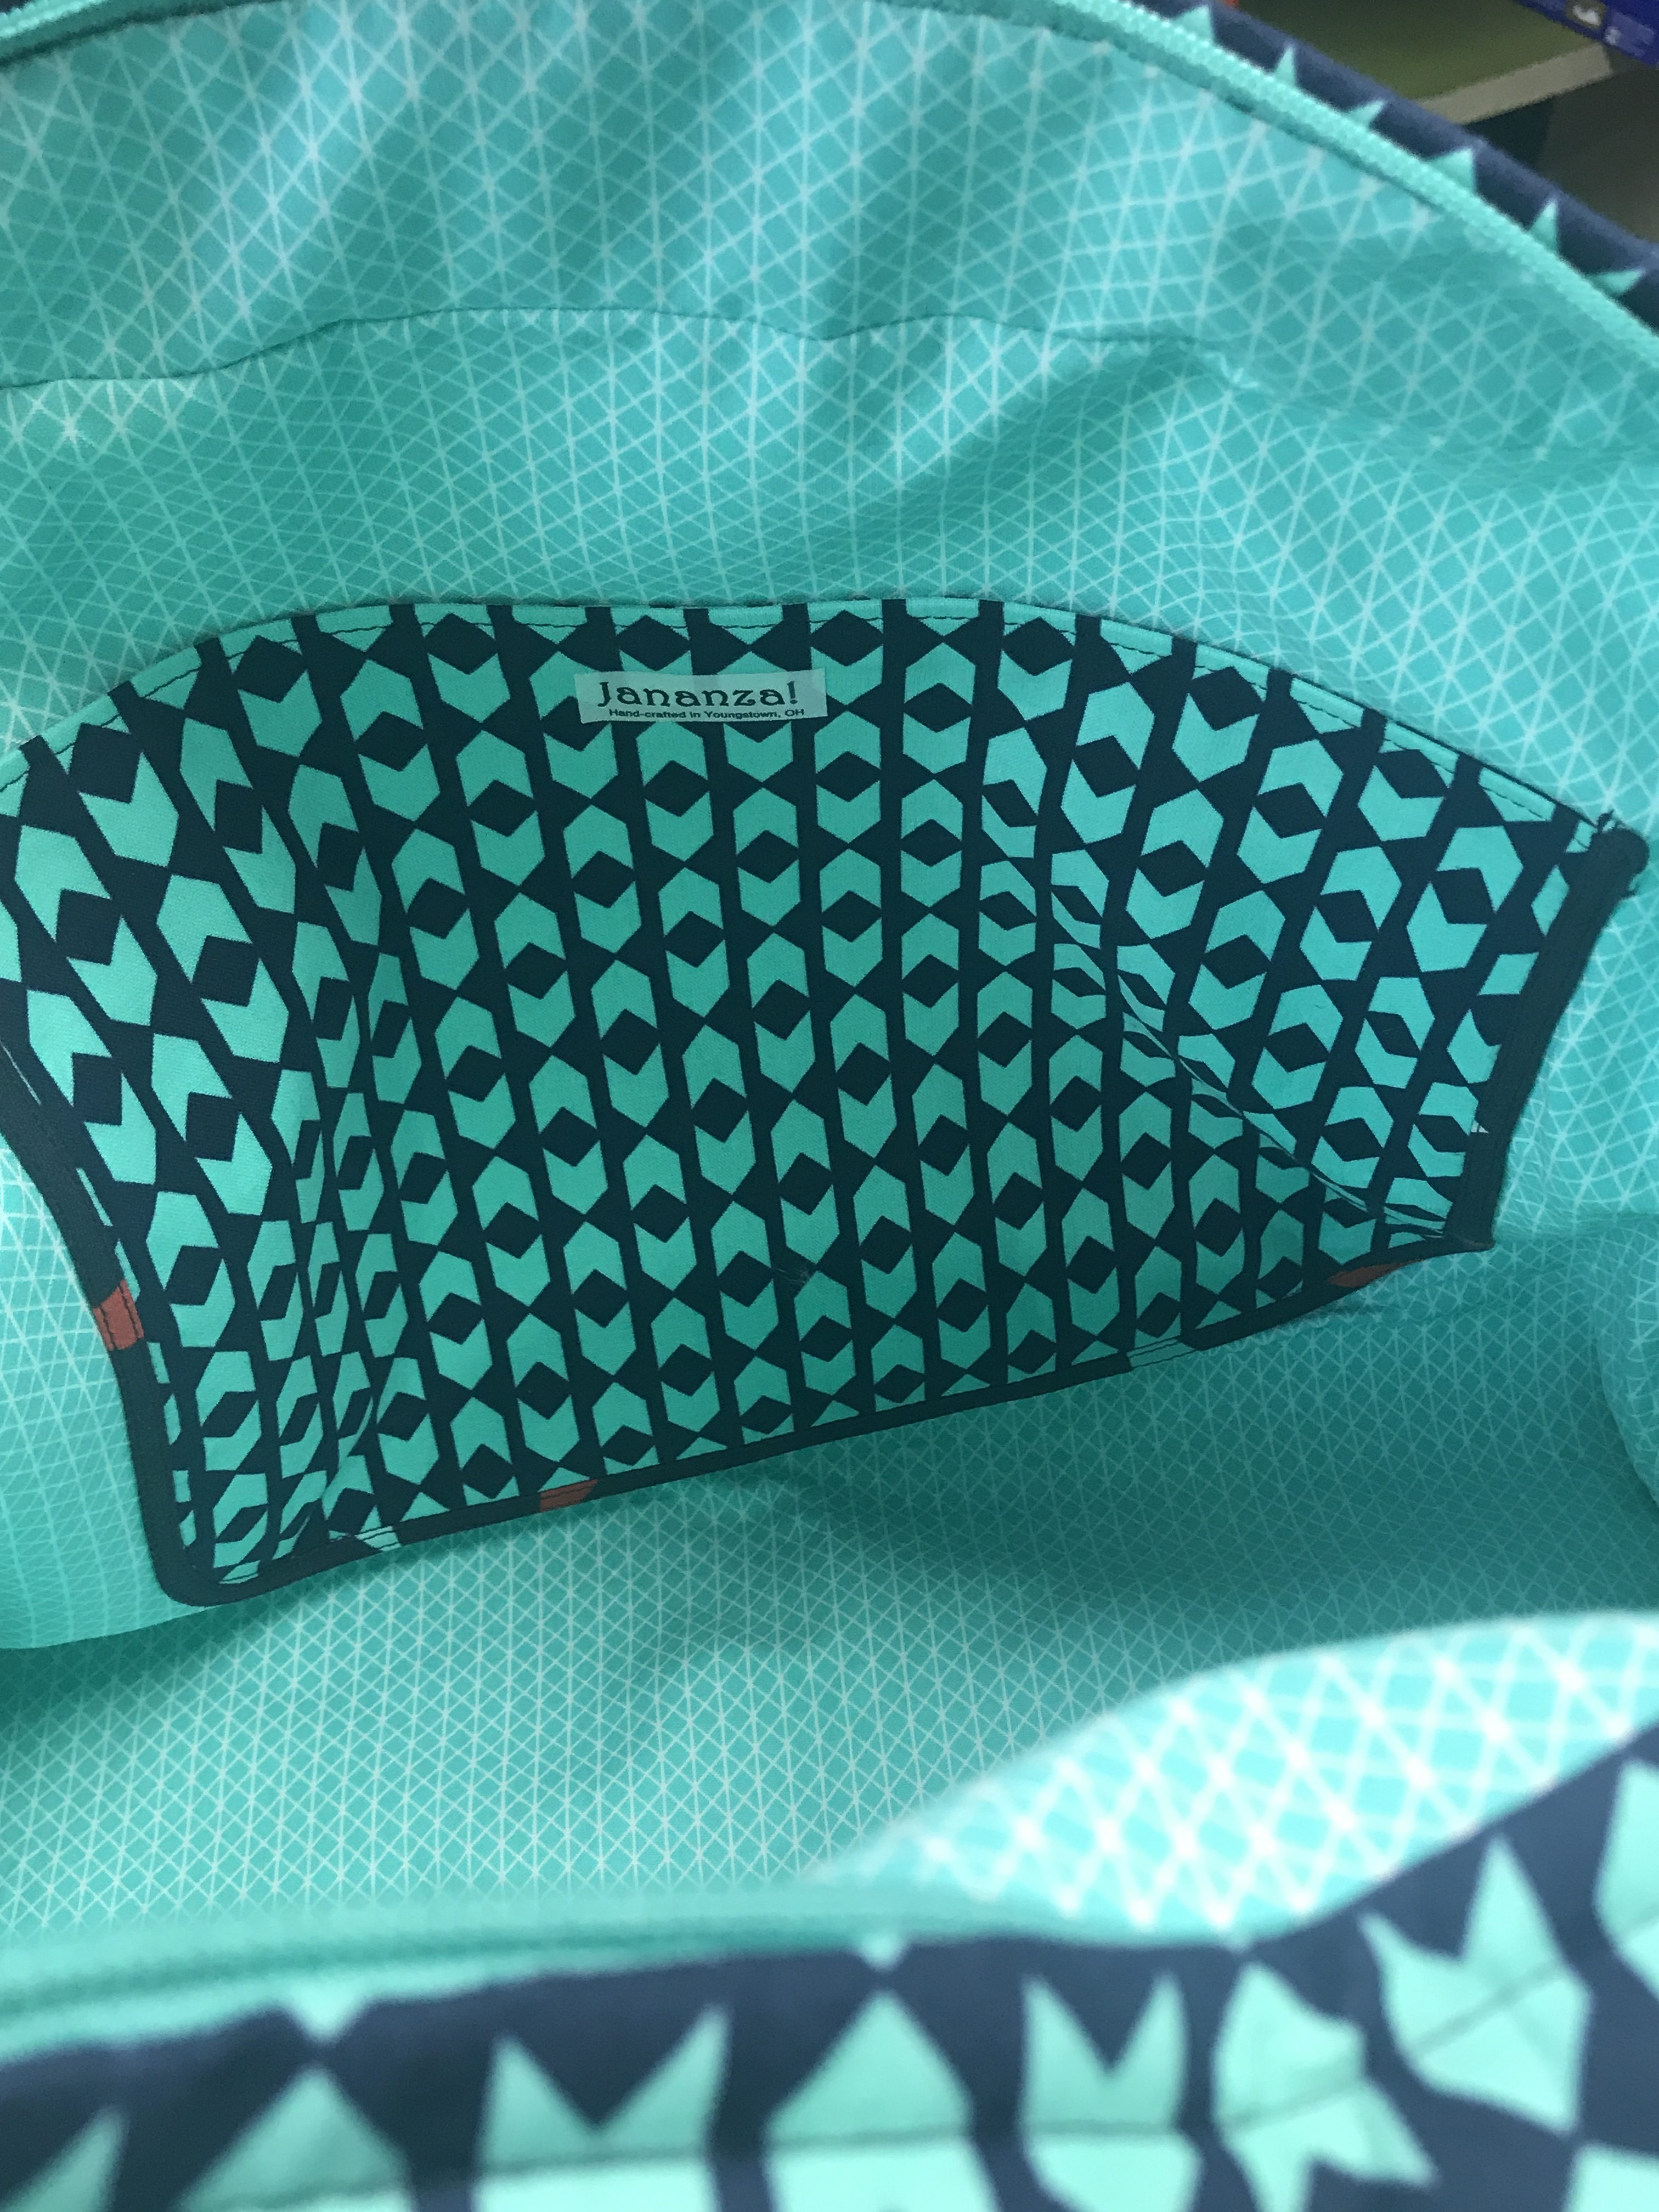
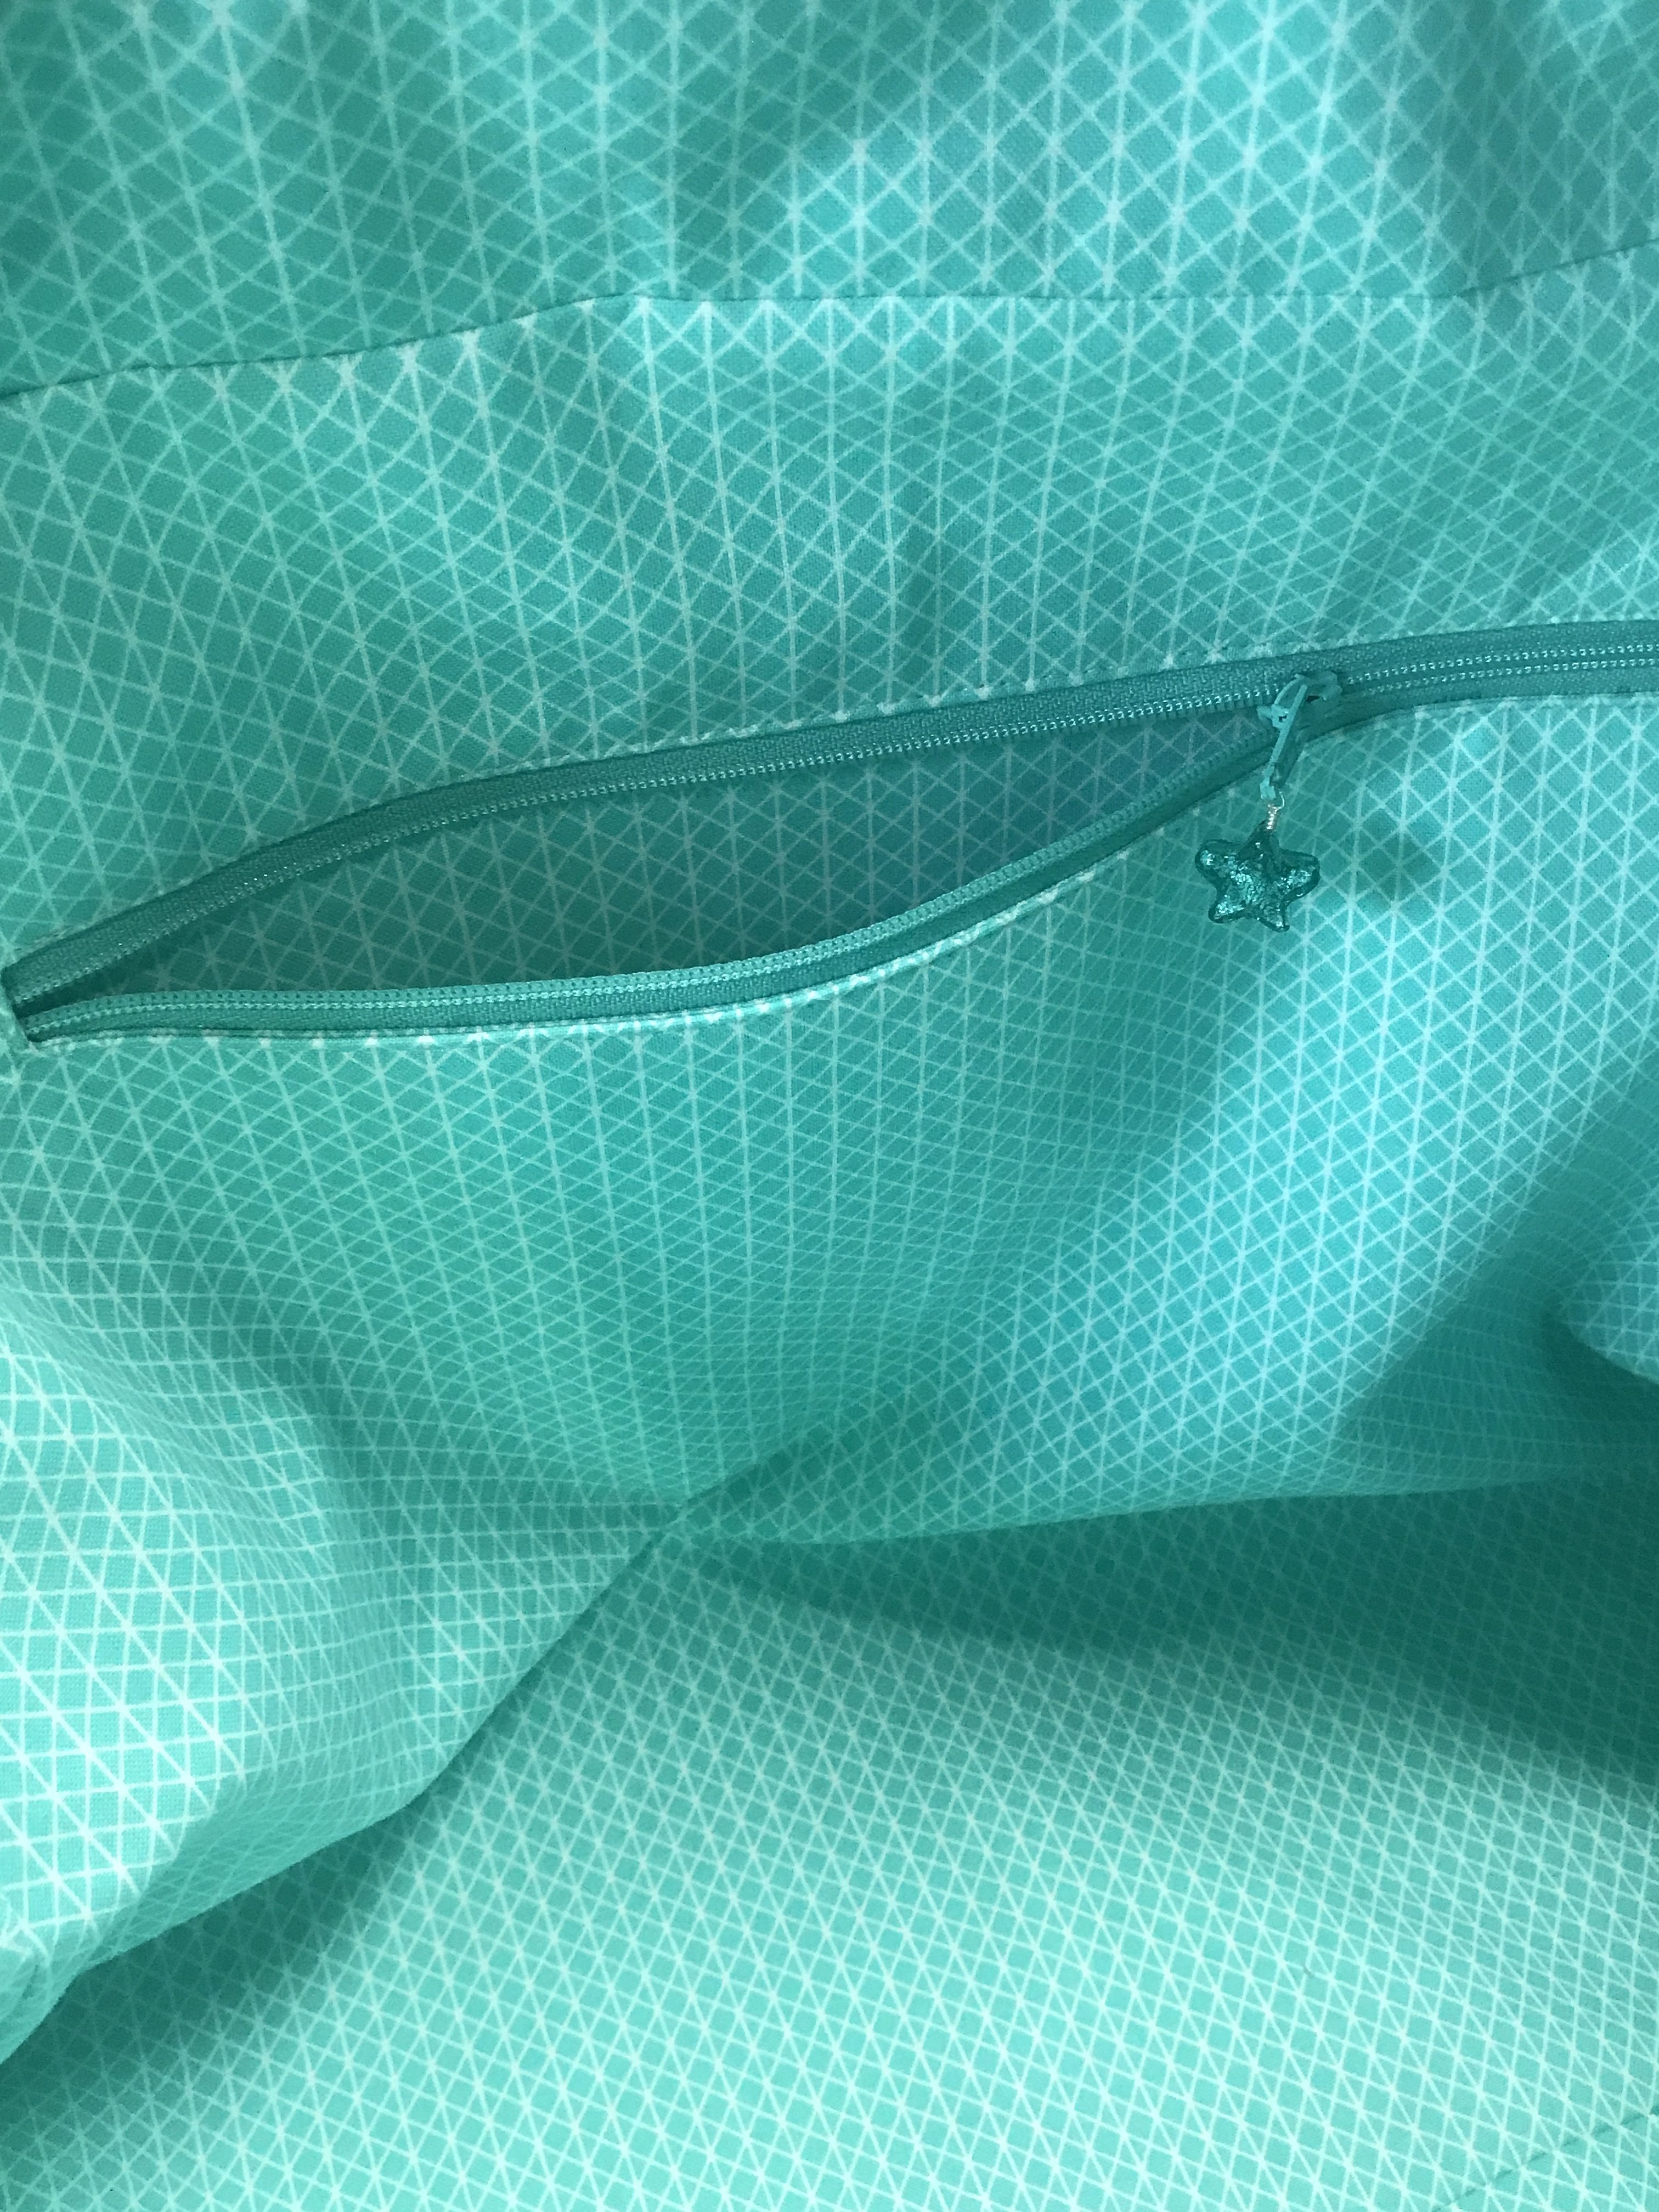
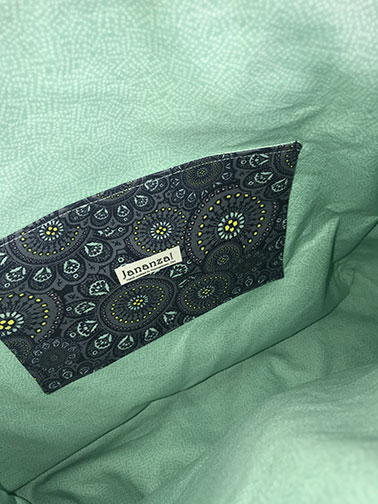
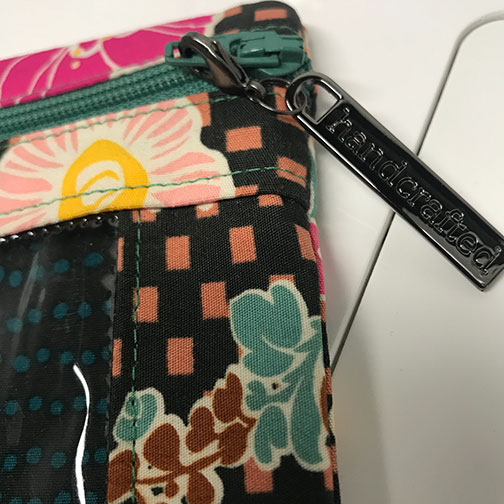
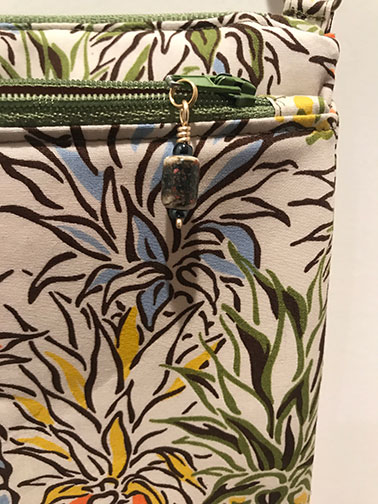
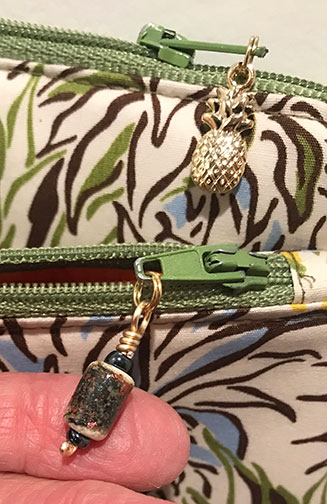
Special touches: The lampwork bead attached to the zipper on the front pocket it one I made when i lived in Tucson and was trying my hand at torching beads. Note the zipper pull on the top zipper—a pineapple, of course. My bags are all marked with tags that say “Jananza!,” the name my youngest granddaughter gave me (with help from her mom) when my younger son married her mom. The bags are lovingly handcrafted in Youngstown, Ohio.

Something New: Odicoat

I’ve been hearing about Odicoat in several Facebook groups recently and decided it was my turn to try it. I actually ordered a container before I had the water leak in my sewing room about six months ago. When I moved everything out to get the plumber in, I somehow misplaced the jar. When I realized there was no way I was going to find it during the school year (i.e. lack of time), I ordered another off Amazon. Here’s the link so you’ll know what I’m talking about. Odif coating

Sidenote: There are two products I see on Amazon, and I can’t tell if they’re the same thing in different containers, or what the deal is. The one above is what I got. Here’s the other one.

I make a lot of Sew Sweetness bags. The owner and designer, Sara Lawson, creates frequent videos for her thousands of followers. (Her Facebook group currently has more than 45,000 members!) She recently created a video explaining what Odicoat is and how to use it. If you’re interested in experimenting with Odicoat on your own, you might like to watch Sara’s video.

I treated some fabric on successive nights last week after getting home from rehearsals. You paint three layers of the coating on the fabric, waiting at least an hour between coats. Per Sara’s instructions, I painted the first one horizontally, the next vertically, and the last diagonally across the fabric. After the final coat, you wait 24 hours before pressing. I think I waited 48 hours. You wrap the coated fabric in parchment paper to press it.

A close-up look at the treated fabric. (Also look at the lining fabric in the previous photo.)

When you’re ready to sew, you cut it just as you would untreated cotton fabric. You just have to be careful with pressing.

I made my favorite gift-in-a-hurry bag, the zipper pouch from the JediCraftGirl blog tutorial. This tutorial is my go-to for quick gifts. Thanksgiving is around the corner, and we’re headed to Columbus to the Jazzman’s niece’s house for dinner. I need four bags to take along for all the ladies who will be here (plus a spare, so they can choose their favorites). So I killed two birds with one stone—experimenting with the treated fabric and making a waterproof cosmetic bag for one of the college-age great-nieces.

My zipper pull is a furnace glass bead. It has a large hole, so I slid three small turquoise beads on the head pin before adding the larger bead. The smaller beads inside the hole keep it from wiggling on the head pin. Pulls like this always make me happy I learned to wire-wrap while living in Tucson.

Meet the Paladin

As I started writing this post featuring my newest bag-make, I wondered where Sara Lawson, the owner and bag-designer of Sew Sweetness Patterns, got the name Paladin. Google tells me that, over time, it has come to refer to high-level officials in imperial, majestic and royal courts. Here’s my spin—high-level court officials need to keep a lot of information under wraps, to not let their subjects know what’s going on behind the scenes. Paladin hides three pockets under one zipper, giving you a lot more room than you think you have when you first pick up the bag. It’s a handy little—or not-so-little—bag. The pattern comes in three sizes: small–7” long x 5” tall x 2½” deep, medium–9” long x 6½” tall x 3” deep, and large–10½” long x 8” tall x 3½” deep.

I put the Paladin Pouch together in 15 minute snatches of time during a two-three week period when I was in final preparations for a cabaret show with about 20 musical theatre students, a three-rehearsal gig for a semi-staged version of “South Pacific,” and near-final rehearsals for “Cabaret,” along with keeping up with the repertoire and rehearsal needs of my eleven students, musical theatre or classical voice students at the local university. I didn’t sit down and watch Sara’s entire video, which would have helped. I didn’t sit and read through the pattern before starting. I just cut, fused, and sewed. I made a couple of mistakes, but it’s done and it’s okay.

The bag has three pockets that are contained under one long zipper that extends beyond the edge of the bag, giving you the ability to open the bag wide so you can access everything in all three pockets. The middle pocket has a clever bit of stitching that makes it a smaller pocket. You can put change or a lipstick or some folded paper money or coins in that pocket. It’s a versatile design!

I will make the two larger sizes once I’m out from under the workload I’m currently carrying. These would be nice holiday gifts for shoppers to buy. I have a stash of great fabric that will make them good additions to a couple of consignment shops near me.

The fabric in this bag is designed by Joel Dewberry for Free Spirit. I believe the collection is Modern Meadow. The exterior fabric is Dogwood Bloom; the lining fabric is Herringbone. The color name for both is Pond. You can find several vendors on Etsy who still carry this fabric. Or you can search for it on Google and find a few shops who have done a good job with populating their fabric databases. 😉 (Once a geek, always a geek.)

I’ll enjoy using or gifting this bag, and will look forward to a freer schedule so I can make more.

Another Carry-On Bag

Three years ago I cut out and prepared the pattern pieces for a Swoon Vivian carry-on bag. I carefully and adeptly inserted the interior zippered pocket, when I realized I had placed it on the exterior. Rather than just go with the flow, I determine that fabric would become the lining rather than the exterior, and I would buy some more fabric for the exterior. I went to JoAnn’s and got some navy cotton duck, and this became that bag. I used it a few times, then decided I didn’t really love it. Little things were not right, but when I showed it to a friend and said I didn’t want to keep it, she lovingly and willingly provided it a home.

A few weeks ago, I found the pattern pieces I had cut out and never used, and decided to take that bag out of the Works-in-Progress stack. I think I followed the directions as written. The lining uses the drop-in lining method, which I don’t care for. If I make this bag again, I think I’ll leave the pocket bottom open and turn it through that hole.

I planned to use the bag as my carry-on for a recent trip to Dallas to hang out with my son. Alas, I like to have lots of clothing options when I travel, even for a four-day trip, so it was to small for my needs. But the next time I head up to Lake Erie to our friends’ lake house, this will be my go-to.

I used three different but coordinating prints from Cotton+Steel, when they were still being distributed by RJR. Pieces of this fabric can still be found on Etsy. I love the high quality that the C+S designers have insisted on for their fabrics. It has a wonderful hand to it, and lasts like, well, steel! My Spousal Equivalent didn’t love the print I chose for the straps, handle, and piping, but I thought it added some pizzazz. I like the looks of the piping, and will keep attempting piped bags until someday when I can get it right!

My son, who will turn 46 in a couple of months, plays “Beer League” hockey. I’d travel anywhere to watch him play. He lives in Lewisville, Texas, and plays on two teams. This game was in West Plano. The teams started together and ended together, which is what I tell my students when one of us messes up someplace in the middle of a song. All that matters is starting and ending together.

It’s a Surprise!

You probably know how I love trying new bag patterns, and how I love a bargain. Well, let me start this off by saying that I receive too many email newsletters (i.e. “come-ons”) from fabric stores. One that I have liked over the years is Connecting Threads. They’re located in Vancouver, Washington, and they have a beautiful, color-filled catalog that they occasionally send to my home for me to dream over. The trouble began when they had a sale. In their weekly newsletter, they offered me a kit to make a nice-looking bag for fifteen or twenty percent off the regular price. Okay, so they didn’t offer it just to me, but I heard them calling my name.

I answered the call and ordered the kit, which included all the fabric I would need and the pattern. The bag is called the “Surprise Bag.” Why? Because, according to the pattern description, the designer was “surprised by how much it holds.” As I’m writing this post, I’ve looked back at the pattern instructions and I notice, on page 2, a disclaimer by the Connecting Threads owners: “these patterns have not been independently tested by Connecting Threads.” First error. If any of their bag-making customers or staff members had tried making this bag before it was added to the catalog and website, I’m pretty sure it would never have made the cut.

Before I move forward, let me remind you that I’ve made a lot of bags in my sewing lifetime. I may have made over a hundred bags. I’ve seen very good patterns. I’ve seen so-so patterns. I’ve never seen a pattern this odd.

Now one of the main tenets by which I live is “be kind.” And I hesitate to denigrate all the work the designer, “Sewing Sue,” put into this bag. I’m sure she spent many hours designing the bag, making test versions, and documenting her work for the instruction sheet. But this bag is a major fail as it is written. It took me many hours of stitching and ripping, during the time in which I was having serious problems with my Bernina 330, to arrive at a finished bag. If I had not spent $30 or so on this bag kit, I probably would have thrown it in the trashcan. More than once.

See the two photos in the previous paragraph? So how beautifully that first bag is standing? That’s the photo I saw before purchasing the bag kit. See how, in the second photo, the bag is slouching. It’s the kind of bag to which Grandma would call out, “Stand up straight!” That’s your first clue. A bag that is properly interfaced and reinforced should not slouch like that. At least this type of bag. A bag that’s designed to be slouchy? Slouch all you want. Skimp on the interfacing. That’s okay. This is not okay. Compare those two photos from Connecting Threads’ website to the first two photos of my finished bag. Please tell me you can recognize the difference.

Notice how I quilted the lower front exterior piece to the fleece. You don’t want to know how long that took!

As I began reading the cutting instructions, I noticed the only fabric other than the quilting cotton was fusible fleece. Fleece interfacing is used in bag construction to give it some padding, to protect the items you’re going to carry around inside. Fleece is for blankets and jackets, not for sturdy bags. I use Pellon SF101, tradename “ShapeFlex”, to give the bag some shape! Sometimes I use fusible fleece along with the ShapeFlex, depending on whether the bag is going to carry my phone or my iPad. To NOT use ShapeFlex or a similar weight interfacing on a bag is asking for a disaster, for a useless bag. One other point: when I purchase fabric for a bag, it is high quality quilting cotton. It has some oomph to it. I do not buy a lower-priced soft cotton like I might use to make a blouse. I want my bags to last for years, to stand up to heavy useage. I pay more for my fabric and I get what I pay for. The fabric that came in this kit was not high quality quilting cotton. It needed interfacing.

As I began cutting out the pattern pieces, I made sure to interface each one, in addition to the fleece that I fused to the pieces that called for fleece.That’s the first Big Deal.

My second “What the Hell?” moment came when I made the zippered pockets on the outside. As I followed the designer’s zipper insertion instructions, I had to sew and rip several times before I said to myself, “This will not do.” I scratched my head, thought back to numerous (at least a hundred) zippers that I’ve installed, and made it work.

Another bit of quilting, this time on upper front.

I continued on through the instructions, interrupted over the months by rehearsals for “Into the Woods” and voice students’ lessons and performances and end-of-semester juries; by a quick road trip to Newport, Kentucky, to meet some of my closest cousins (per DNA); by the last-minute decision to go work at Interlochen Arts Camp in the dance department for three weeks; by the vagaries of my Bernina when it comes to bag construction; and by the decision, while at Interlochen, to take advantage of a Juki sewing machine sale at the Sew Deja Vu fabric store in Worthington, Ohio. Now I’m settled in with my new Juki TL-2010Q. It is a simple straight-stitch machine that is dedicated to bag making. And this bag maker is very happy.

An interior slip pocket. My phone will fit there or in one of the small exterior zippered pockets.

I have a couple of commissions waiting to be started, one for a Crews cousin in Georgia, and one for a musical friend in the next county over in Pennsylvania. Before I dug into those, I wanted to clean off my sewing table, which involved finishing up this “Surprise Bag.” The state in which I had left it before I drove to northern Michigan was with the lining of the side panels half done. Why half done? Because I couldn’t figure out what in the hell Sewing Sue’s instructions meant. I stared at the bag repeatedly and finally fiddled around with the unsewn seam and some pins and hand sewed it in place. Then all that was left to do was the top edges where D-rings would be placed for connection to the adjustable strap. Again, I stared and fiddled and finally made it work. (Channeling Tim Gunn here. ❤️)

For the past few days, as I’ve been doing my mental wrangling with this bag, I wondered what I would do with it. Would I put it on my Etsy shop to hopefully sell? Would I just post it on Facebook for my friends to see and tell them the first person to make a $30 gift to their favorite charity could own the bag?

The side pocket. It’s just large enough for a water bottle.

And last night I finished it and took pictures. The fall semester at YSU began yesterday, and now I’m in the throes of getting twenty or so singers ready for their auditions for the fall production of “Cabaret.” I had always wished my music bag that I made about three years ago had a shoulder strap, but I never made that modification. And as I was finishing this bag yesterday, I realized that, as much as I detest this pattern and wonder about Sewing Sue’s background as a bag designer, the description of this bag is correct. It’s going to hold a whole lotta stuff! It’s going to be able to carry my iPad Pro, my page-turn peddle, all my chargers, my semester organizer, and my music glasses (mid-range of my trifocals, designed to enable me to easily read the music on the music stand). One of the small pockets on the back can hold granola bars and other such snacks. The other small pocket can hold my iPhone. And when I’m walking in from the parking deck to Bliss Hall, I can either wear it crossbody or over my shoulder, using the great adjustable strap.

I traveled, really from yesterday morning to last night, from a despondency (Why did I waste so much time with this damned bag?) to Wow! (Look at this great new bag that’s going to ease my life.) Sorry, all of my Facebook friends who thought they were going to get a great new bag for the price of charity. It’s M*I*N*E!!!

P.S. Disclaimer: If I were choosing the fabric for this bag, would I have chosen this collection of fabrics? No, probably not. (Definitely not, when considering the “hand” of this collection.) I’d love to see a similar bag in a couple of companion batiks, even those batiks I brought back from Bali last year. But this was a learning exercise, so it is what it is. And what it was was a very painful learning exercise. But I survived. Oh, and let me repeat, “It’s M*I*N*E!”

Edited 9/13/2019, after using this bag to carry all my collaborative pianist “equipment” in it for almost a month. I LOVE the size, shape, and capacity of this bag. I still can’t recommend anyone use this pattern, but if you’re a wannabe bag pattern designer, figure out how to make this bag without the wonky side pieces, with more logical zipper instructions, and with all the extra interfacing and foam I used in mine, and you’ll have a winner.

Digging Into the Singapore/Bali Stash

Tessuti patternLast summer (2018) was spent traveling, including two weeks in Bali, bookended by a couple of days in Singapore, and a couple of weeks in Japan. The time in Bali included significant fabric shopping. The time in Singapore included one wonderful visit to Poppy Fabric, which is one of my favorite fabric shops in the world.

A few days ago, I saw a blog post for Tessuti Fabrics’ Eva dress pattern, which I have made a couple of times. I still don’t feel like I’ve mastered it, and I do like to have #success experiences when sewing. Seeing that blog post and remembering I had made it several years ago made me want to make it again. When I looked in my Bali box, I remembered my Poppy purchase of a silk ikat from India.

Tessuti EvaNote: One of the things I learned in Bali was that ikats from Bali are cotton and ikats from Japan and India are almost all silk. This silk yardage from India doesn’t feel like silk—it doesn’t feel “silky.” It could easily be mistaken for a lightweight linen or a cotton. But it’s a lovely, very wearable silk.

Over the weekend, I was able to carve out the time to dig into Eva. I finished it early this morning and put it on for photos. I love it! I have yet to figure out how to style it, but that will be the fun part. I love this dress! And when my oh-so-chic daughter-in-law saw it on Instagram this morning, she immediately declared her love for it and said she needed one. I love this woman so much that I will definitely be making one for her after I finish a couple of commissions.

It appears I have my sewing mojo back. Now, once I get my fall semester schedule, can I keep carving out sewing time? I hope so.

My Mojo is Back!

I’ve been having sewing machine problems for about a year now. The most frustrating thing in a sewist’s life is walking into your sewing room with a hankering to sew. You sit down, put the pedal to the metal, and nothing good happens. Argh! I took my main machine in to the dealer and she just said, “User error.” I call bullsh*t on her. I’ve been sewing since I was 13 years old. I know what I’m doing, and this machine had a problem. (It’s known in the jargon as “birds’ nests.” My Spousal Equivalent even knows the term now, after all my complaining over the past year. When I came up to show him this first make on the new machine, he was almost asleep, but he looked at me and asked, “No birds nests?”)

From late-June into early-July, I worked at Interlochen Arts Camp in Northern Michigan to accompany dance classes for three weeks and took no sewing machines with me. It was a good break for me—a break from the sewing insanity, the disruption of my passion. When I got back, a small fabric store in Worthington, Ohio, was having a sale on the sewing machines they stock, and I was able to order the machine I had my eye on for 15% off. I placed the order, then started looking around for items I could sell to raise the money for the machine. I had a bunch of antique jewelry and silverware and several pocket watches that had been unintentionally passed down from my birthmother (here’s that story) that I’d been needing to take action on. I took it to a local gold and silver buyer, and when I walked out, I had a sizeable check to be able to split with my half-sister and pay for almost half the machine with my portion. I grabbed a couple of gigs off the Facebook “Pianists of Northeast Ohio” group, and posted fourteen old presser feet from a machine I no longer own. And now, two weeks later, I only owe $300 on the new machine, and I’ve already learned how to use it and have made my first bag. Happy, happy.

All the accessories for the machine (presser feet, bobbins, oil, and so on) came in a plastic ziploc bag. Of course that wasn’t good enough for this sewist. So I decided my first make on this machine would be a special bag to hold those goodies. Sew Sweetness designer, Sara Lawson, makes the best bag patterns I’ve found, so I opened her website. What I chose was the I-Spy Pouch. This pattern, which includes directions for three sizes, is part of the Minikins Season One collection of small easy-sew, minimal-hardware bags. I had recently fallen in love with the fabrics in the “Legendary” collection designed by Pat Bravo for Art Gallery Fabrics. I had seen one of these fabrics in a bag my cousin, with whom I share a love of sewing, had posted in the Sew Sweetness Facebook group. It caught my eye, and I had ordered a bundle of fat quarters from this collection from an Etsy vendor. I sorted through that collection while standing next to my zipper stash to find a nice match.

I-Spy PouchThe I-Spy Pouch has a clear vinyl window in the front so you can see what’s inside the bag. I always keep the bags in which sheets and mattress pads and other similar household goods are packed when purchased. I grabbed a small one and took it apart. It had just the right amount of vinyl for this medium-sized bag. I laid the vinyl on the ironing board, turned the iron on to the nylon setting, laid a Teflon pressing sheet over the vinyl, and proceeded to carefully remove the wrinkles in the vinyl. Thumbs up! Then I took it to my cutting table and cut the size I needed. I cut all the fabric and interfacing, fused the interfacing to the fabric, and set out on the inaugural journey.

I turned on a movie in my little sewing room television, and when the movie was over, my bag was finished. I proudly showed it to my granddaughter and her girlfriend, who are staying with me for a couple of weeks, and then ran upstairs to show my S.E. Thumbs up all the way around!!

JukiSo what do I think of my machine? I absolutely love it. It sews through the multiple layers of fabric and interfacing as if it were butter. My sense after completing my first bag with this machine is that I absolutely made the right move in purchasing it.

The one thing I didn’t say about the Juki TL 2010q is that it’s a straight stitch machine. There’s no zigzag feature. There are no multiple stitches from which to choose. It can’t make buttonholes or sew on buttons. It a semi-industrial machine that does one thing and does it well. It sews many layers of fabric together with a straight stitch.

Smart choice, Crewser!

A Jumper for Camp

I hate that it’s been so long since I posted here about any sewing projects. I don’t hate that I didn’t post. I hate that I haven’t had time so sew any garments. I tried to buy a jumper for camp, but couldn’t find any anywhere online or in bricks&mortar stores. And then I saw the Grainline Uniform Tunic pattern and had a great aha moment. Add to that the fact that JoAnn’s actually had the perfect fabric for this jumper. The cotton/spandex blend navy pinwale corduroy had just the right amount of stretch to make a jumper that I could be comfortable sitting on a piano bench for an hour or more at a time. #win!!!

I was leaving home early on Thursday, 6/20, to drive to Interlochen. I had houseguests two nights the previous week and had worked playing the piano for six days the previous week. And our kitchen reno had just been completed and we were trying to frantically get everything put back in place before our houseguests arrived.That all adds up to no time to sew. Oh, and there had been a leak in the return water pipe that put rusty water all over the floor of my sewing room, so fabric and supplies were strewn all over the basement. And my machine had been misbehaving on the last four bags I made, so I had no confidence it was going to behave for this jumper. BUT IT DID!!! And now I’m at camp wearing my wonderful new jumper. When my daughter-in-law, who choreographs for junior musical theatre at Interlochen each summer, saw the jumper last night, she immediately said, “I want one of those.” Of course she does. It’s a wonderful jumper.

Here’s the review:
Pattern Description:
From the pattern webpage: The Uniform Tunic is designed as a choose your own adventure sewing pattern. While we have provided four options for you, the possibilities are endless as all of the design features are mix and match! Choose your favorite neckline and skirt, decide between sleeves or sleeveless, add pockets — you can’t go wrong!

Pattern Sizing: 0-18, bust size 32-44. I cut a 16.

Did it look like the photo/drawing on the pattern envelope once you were done sewing with it? Yes.

Were the instructions easy to follow? Very easy.

What did you particularly like or dislike about the pattern? Disliked only that I didn’t have enough time in my schedule to make another one before camp started. LOVE.LOVE.LOVE this pattern and will be making it over and over again.

Fabric Used: From JoAnn’s (shocker for me): A really nice cotton/spandex pinwale corduroy. In navy blue, of course, for my job as a collaborative pianist at Interlochen Arts Camp.

Pattern alterations or any design changes you made: Added 5.5″ to the length. I’m 5’8″ and needed it to be knee length – well, sorta. I actually love the length it ended up at, and I wear it with cropped leggings and ABSOLUTELY LOVE IT. (With leggings, my knees don’t show. The Uniform Police will leave me alone.)

I only put one pocket in because I got kinda scared off when reading the pocket construction instructions in the Madder book. I used a scrap of Guatemalan ikat I got three years ago at Common Threads, Uncommon Fabrics in Taos. Both front and back of the pocket are ikat which gives it enough substance to hold my phone without distorting the line of the skirt. Next time I’ll insert both pockets and will again use a substantial fabric like this ikat.

Would you sew it again? Would you recommend it to others? Yes, yes, yes. I love this jumper – oh, did I mention that?

Conclusion: A great pattern for creatives of all sewing skill levels. There are neckline options and sleeve options and length options. Whatever your uniform or tunic needs, this is One Great Pattern!!!