The Dress From Hell

DFHThis post could have many titles. I considered “Oh, Gawd”‘ “Love/Hate”,”Give Me Back My Premenopausal Body” … you get my mindset?

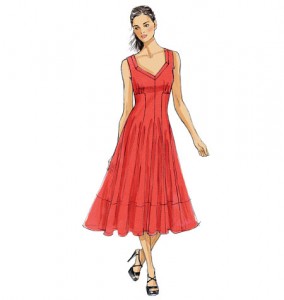
Let me just begin by saying that I have the utmost respect for the person who designed Vogue 8920. The pattern illustrations indicate a truly lovely dress. My praise stops there.

Pattern Description: MISSES’/MISSES’ PETITE DRESS: Pullover, lined dress (close-fitting through bust) has neck band, side front and side back seams, side godets, and narrow hem. A and B: raw edge finish on sleeve hems. B: hem band. (Are you *#%^ing kidding me? After everything else you go through on this dress, you leave the sleeve hems raw? Hmmm.)

Pattern Sizing: Combinations: Y(XSmall-Small-Medium), ZZ(Large-XLarge-XXLarge) I cut a Large.

Did it look like the photo/drawing on the pattern envelope once you were done sewing with it? After a fashion/Loosely.

Were the instructions easy to follow? Somewhat.

What did you particularly like or dislike about the pattern?

Like: The semicircle skirt is fun.

Dislike:

  1. The dress is lined, I guess because of the recommendation of a sheer knit for the body. However, the dress is constructed with the right side of the lining to the wrong side of the dress. Again, I’m assuming this is because of the sheer knit. I would much rather see a clean inner garment. I went over and over this in my mind, but the under-bust seam and the construction methods made it impossible to change this. (In retrospect, I wish I had skipped the lining.)
  2. If I have a skirt where the bottom circumference is more than 4 yards, I believe it makes much more sense to hem the band first and then sew it on. I seamed the bottom band, biascut ½”-wide strips of a light interfacing, fused the strips to the bottom of the band, folded up that ½” hem and pressed, then double-needle stitched the hem in place. That process took 1½ to 2 hours. Really.
  3. Then there’s the issue of the ruffle at the bottom of the lining. I have one word for that: Why?! This dress is lined with tricot lining fabric. It has no body, by design. If I had used a sheer knit for the body of the dress, as suggested, this ruffle would still have added nothing to the dress. Tricot does not a crinoline make!
  4. When I got to the end of the instructions – the final step was to seam the ruffle together (four ~60″ 11.5″-wide panels of tricot), then gather and seam it onto the bottom of the lining) – the instructions ended. There was not one single word about the hem of the lining. Am I supposed to leave it raw? Okay, then tell me I’m supposed to leave it raw. This pattern is marked Easy!!! You’ve got to talk to me like I’m a sewist who will tackle an “Easy” pattern. Tell me, overtly, explicitly, that I can leave the lining unhemmed as the tricot will not fray.

Fabric Used: Lovely weight of knit in a Klimt-esque print from Vogue Fabrics. It’s either rayon/lycra or poly/lycra. I can’t remember, nor can I find it on Vogue Fabrics’ site. (It’s so pretty it’s sold out.) But it’s beautiful and feels nice. I wish I had used it for something else, like another great Marcy or Katherine Tilton top.

Pattern alterations or any design changes you made: Added cap sleeves.

Shortened the hem band/ruffle because I ran out of the main fabrics. There was only enough fabric for 7.5″ bands rather than 11.5″ bands. I made a muslin and the neckline seemed a little low, so I raised it by about ½”.

Would you sew it again? Would you recommend it to others? NoNoNoNoNoNoNo.

Conclusion: Wasted about $60 of fabric on this one. But I’m gonna pull up my big girl Spanx and wear it to a family wedding tomorrow anyway. (This was written before a night-long rain.)


I saw this pattern when Vogue introduced the Fall 2013 patterns. I thought it looked lovely—flowy and feminine. While googling to see if anyone had constructed and reviewed the pattern, I noticed that T. Sedai, in her “Sew Skate Read” blog said, “V8920 – I feel like this is a few rhinestones short of being ready for dancing with the stars….” Undaunted, I set out to prove her wrong, to prove that this was a lovely and wearable dress.

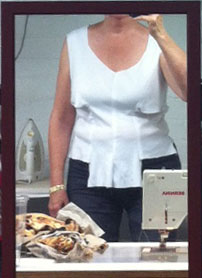
In concept, the dress is flattering. But when I put it on and look in the mirror, all I see is a 15-pounds-overweight post-menopausal woman. [Sad Face Emoticon] And I spent my week on this dress, rather than spending every morning at the gym.

Gathering that damned ruffle onto the lining reminded me of this awful gathering process for
Ridley’s fairy princess costume several years ago.

I finished the dress at 11:00 p.m. on Friday night. Slipped it on in front of the sewing room mirror, and noticed I could see lining hanging down in places. Grabbed scissors and started whacking away at the lining. Came upstairs, slipped on the chosen shoes-to-accompany-dress, woke the Jazzman up where he sat—remote firmly gripped in right hand—in front of talking heads. Stood in front of the family room mirror and shook my head as I noticed that the hem droops on the left side. Then I heard him say he could see the lining in the back. Today’s activity will involve putting the dress onto my dress form and whacking off more of the ruffle. Or the entire damned ruffle.

WTF. Honestly, just WTF!!

Listen, Vogue designers and editors, if a pattern will ONLY work with a specific weight of fabric, tell us!! We pride ourselves on taking your patterns and making them our own. I’ll bet lots of sewists will look at this pattern and see a knit they think will look pretty on them. Tell them not to do it!

And while we’re on the topic, charmeuse?! Really? You’re going to take a lightweight, sheer KNIT and attach a WOVEN band of charmeuse to the bottom. On a pattern marked “Easy”? This is a recipe for disaster!

Okay, I’m almost out of steam here. I just want to say about my asymmetric hems on a garment designed with symmetric hems: I don’t know where these came from. I refuse to believe this is user error. I put those godets in perfectly. The saggy hem must be a function of too-heavy fabric. I guess. I don’t know where else to assign blame.

And to add insult to injury, it has rained all night. The rain should stop by noon. The wedding is outside at 4:00 p.m., a mile from Lake Erie. The shoes I need to wear with this dress are patent slingback platform pumps. Soggy ground and those shoes do not compute. I will not wear this dress.

I think today I’ll wear the same thing I wore for my mother’s 100th birthday party in May. With old black flats that I don’t care if I ruin in the wet grass.

Was there joy in making this dress? There was the joy of anticipation, of the vision in my head of what the dress would look like finished and on me, of the compliments I’d get when wearing it. There was the joy of half an hour of handwork while stitching the lining to the neckband.

Will I ever wear the dress if I don’t wear it today? I’m not sure. After I finish the next five garments listed on my sewing room To Do whiteboard, I may lay a couple of tunic patterns out over it and see if there’s enough fabric to turn it into something else. I do love the fabric!

I’m not sure what lesson I learned from this project. I guess maybe the “knit muslin” lesson will be enough.

Oh, yeah, and that not every garment is going to be a success.

Knit Muslin. An oxymoron?

MuslinFrontA few months ago a new Vogue dress pattern, 8920, came out that caught my eye. When there was a Club BMV sale, I grabbed it. V8920When we were invited to a family wedding (that takes place this weekend), I started obsessing about what to wear. While working the Original Sewing and Quilt Expo in Pittsburgh a few weeks ago, I saw the most beautiful soft knit in the Vogue Fabrics booth. This fabric reminded me of Gustav Klimt’s painting, “The Kiss.” The colors were like caramel ice cream topping, and the fabric is so soft you just want to throw it on the floor and roll around on it. Pure yum all around.

The more I thought about cutting into this lovely fabric to make a pattern I’d never made before, the more anxious I got. I didn’t want to waste the fabric. I loved the look of this dress and thought it would look good on me, but I was unsure about adding a Full Bust Adjustment (FBA) to it. So I went to Jo-Ann’s and bought a yard of a cheap cotton-blend knit. I figured I’d cut the four main pattern pieces as long as I could – get as much out of this yard of fabric as I could.

[I’ve heard people talk about just pinning the front and back pattern pieces together and holding it up to your body to see how it fits, but that’s never really been a true measure for me. And when you’re working with a knit and need to take the amount of stretch into account, it really wouldn’t work, right?]

MuslinBackI sewed all seams except the underbust seam (the seam with the gathering). And the “muslin” fit around my body nicely. The underbust seam area appeared to be a little short, but when I tested the lengthwise stretch of the “muslin” fabric (0% stretch) against the fashion fabric (>0% stretch), I figured I’d be okay.

So I’m moving forward. I cut the fabric out last night and assembled everything to the shoulder seams today. The tricot lining arrived today and has been washed and dried, ready to be cut out.

Let me say a word about the tricot lining: I’m not sure I need it. The pattern envelope suggests a mesh or sheer knit, which would—of course—need to be lined. But this is a substantial knit that doesn’t need lining. However, if I line it, I won’t have to wear a slip. It will, in effect, have a slip built in. So I guess I’m gonna go ahead and line it.

I have about six hours to work on it tomorrow before I have to get my grandkids for a sleepover with Grandma. That leaves Friday to finish up. We leave at noon Saturday to drive up to Lake Erie west of Cleveland for the outdoor wedding. The forecast for Saturday is mid-60s. Hmmm. I’m making the sleeveless view. I guess a little black shrug will be okay, if I don’t find the time to finish the chocolate brown bouclé shawl.

Why, yes, I do think I’m Superwoman!


And while I was getting ready to publish this post, the Jazzman got home from a hard day on the railroad. I was telling him about the muslin and then slipped the dress on in its current state—shoulder seams pinned, underbust seam not yet sewn. I lovelovelove it!!!! I’m not a dancer, but this dress is going to make me want to dance. Or at least sashay!!

Define: Design

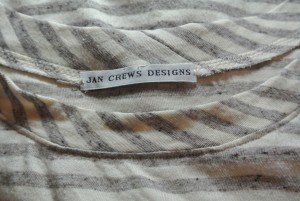
HemlockNeckThe Spousal Equivalent and I had a discussion the other evening after I finished my new shirt. I showed him my beautiful neckband and my personalized label inside.

He looked at it, said it was nice, then commented, “Shouldn’t that be ‘Jan Crews Creates’ rather than ‘Jan Crews Designs’?”

I did not take offense at his words, as that same question has run through my mind any number of times since I had the labels made.

What makes a designer? Is the designer only the person who imagines and drafts the pattern for the garment or accessory? Or does my envisioning the finished garment from the pattern illustration and choosing fabric and notions to bring the vision to life constitute designing?

I haven’t designed any patterns, although I have two in my brain right now that I’m wanting to bring to paper. Then I’ll really be a designer.

But look at my body of work. Am I designer now, without printed and published patterns?

I’m looking forward to learning what you think on this issue.

It Was Free!!

HemlockFrontNever in my life have I a) sewn with a downloaded pattern, or b) sewn with a free pattern. You get what you pay for, right? So free must not be very good. The Grainline Studio Hemlock Tee puts that myth to bed!

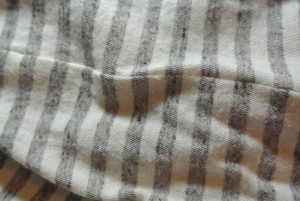
HemlockFabI don’t remember at all how I happened upon this site and this pattern. I do nose around Pinterest quite a bit, and I think I probably saw it there. You know how I love Eileen Fisher garments, and when I read “boxy tee” in descriptions of this pattern, I thought I might like to try it. I had recently stashed a bit of rayon/lycra stripe knit from MarcyTilton.com. Honestly, this is one of the cuddliest, softest, jammiest rayons I’ve ever touched. I want more-more-more!

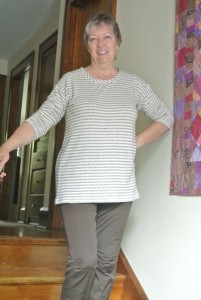
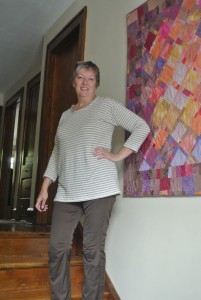
As I was working on it and slipping it over my body in various unfinished states, I didn’t think I was going to like it. Ah, the waste of 1½ yards of fabric. HemlockStripesBut once I got the sleeves attached and the side seams sewn, I tried it on once more before quitting for the night. Love. And the next morning, after figuring out what I wanted to do with the neckband and finishing it, pure unadulterated garment love!!

Oh, and while you’re at it, how about those perfectly matched stripes?!

Here’s the story…


Pattern Description: Boxy t-shirt provided by Grainline Patterns in a free download. Print on your home printer, tape together, and trace on pattern paper.

Pattern Sizing: One size fits all. I typically wear 12-14, and it fit like it was made for me.

Did it look like the photo/drawing on the pattern envelope once you were done sewing with it? Yes.

Were the instructions easy to follow? The instructions are designed for serger construction. I don’t have a serger, so I just used straight stitch, then the Honeycomb stitch (Bernina 1630) to finish the edges. (Okay, I have a serger, but haven’t learned how to use it in the 15 years I’ve owned it.)

What did you particularly like or dislike about the pattern? LOVELOVELOVELOVELOVE. Three pattern pieces plus the neckband. I typically dislike dropped shoulders, but these are very flattering on me. Zipped together in an instant.

Fabric Used: Rayon/lycra über-soft stripe from MarcyTilton.com. So soft you’ll want to buy another length to make pajamas! For everyone you know!!

Pattern alterations or any design changes you made: I’m 5’8″ and overly endowed, so added 1″ to the length. Also, drawing on Marcy Tilton’s “Not Your Ordinary T-Shirt” article in a Threads Magazine from years ago, I cut 1″ bias strips of a lightweight woven fusible interfacing and applied them to the bottom edges (sleeves, hem). This made the folding and pressing easy and precise, and made the double-needle stitching flawless! Haven’t done this before, and will do it from now on for all soft knits.

Would you sew it again? Would you recommend it to others? Yes and Yes. Planning on getting a soft sweater knit (think Eileen Fisher merino sweaters) to make a top for a November trip to Germany and France.

Conclusion: Download this pattern and fall in love!


A couple more pictures to whet your appetite for this pattern:

HemlockNeck

This is the neckband, which I cut 3″ wide on the bias. with ⅜” seams, so the finished band was 1⅛” wide. Seamed, then seam allowance stitched with honeycomb stitch. Pressed toward garment and topstitched about ⅛” away from the seam.

The original picture from the designer shows the neckband cut horizontally (with the stripes). Her neckband is narrower than mine, and her application gives a nice little red stripe around the seam. Expert fabric alignment on her part!

HemlockFront3

One more look, with the sleeves shoved up. Worn with Marcy Tilton’s Vogue 8859 skinny pants and Naot Afrodita in Champagne Leather.

A Study in Contrasts and Placement

BrownFrontI was cleaning off my cutting table—okay, I’ll admit, I was trying to clean off my cutting table. Someday I’m going to be successful. I hope that day is soon!

Anyway, I found a brown jersey I remember buying at the old Buttons ‘n’ Bolts in Tucson about 10 years ago. At the time I was going to make a long tank dress as the canvas for a brown art-to-wear jacket that existed in my mind. Neither ever got made.

Now I’m making lots of knit tops, so I grabbed the brown jersey (probably pima cotton, shot with black, deliciously soft and comfortable) to make another version of Katherine Tilton’s Vogue 8817, view C/D. (To refresh your memory, here are versions 1 and 2. And here are posts of both views A/B and C/D. All of ’em.)

Now look at this geometric print top. See that funky felty lace that I used for the neckband and the sleeve embellishment? That’s what I thought I’d use for the accent inset on the upper front and for the sleeve insets on this top. But when I held it up next to the brown jersey, I didn’t like it at all. They weren’t the same brown, but they weren’t compatibly different browns, either. I dug through my scrap knits box and realized I had enough of the geometric print knit from Mood Fabrics to use for the insets.

BrownDetailHere’s where I did okay, but could have done much better. You’ll notice on the sleeves of the finished dress (top photo, above – click to enlarge) that the insets are easy to see. However, on the upper front, you only see the white circles and the turquoise blob (photo on right). Above the circles, there is a band of brown with caramel dots. But there is not enough contrast between the brown-with-caramel and the brown jersey above it.

In retrospect, I should have been more careful in my placement of the top inset pattern piece to ensure that the patterns underneath it were going to have enough contrast to the brown jersey. Then it would have been perfect (she smiles).

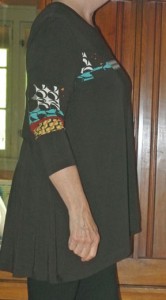
BrownSideAnother point I want to make on this third go-round is the difference in length between the front and the back.

I think I’d like a little less difference. I like the length of the back, and maybe the front could be a little longer. Why isn’t it? Because I’m a little too busty. My large cup size takes up some of the length. If you’re a B cup, your side view will be like the side view on the pattern illustration. But if you’re greater than a B cup, there’s going to be a bigger difference in the front and back—possibly as much as an inch per cup size (i.e. C cup = -1 inch; D cup = -2 inches, etc.).

If you wear a larger cup size, consider lowering the center front by an inch or two and gently tapering it up from the side seam. A French curve ruler would be an excellent tool to use when drawing the tapered line. Or, you can do a vertical Full Bust Adjustment (FBA) as my cyberfriend, the brilliant and inspiring sewist Shams details on her blog.

To finish our little discussion of contrasts, look at the black leggings with this top. When I finished the top, I reached for my white piqué Eileen Fisher cropped pants. But they’re white, and the circles in the inset are off-white. Nope, wouldn’t do. So I dug in the drawer and pulled out a pair of brown leggings. But brown is such a fickle color. The browns were different and there was no way I could put them together and hold my head up in public. I even thought of using the remaining brown jersey to make a matching pair of brown leggings. But then I envisioned that and immediately said shouted “No – too matchy-matchy.” So I grabbed one of several pair of trusty black leggings, and I think it works.

While it makes for a very dark outfit, I think the shoes (Yippee! – new Naot Matai’s in Copper Leather) bring enough brightness to offset all the darkness.

Next time – more care with pattern placement when adding accent fabrics.

And tomorrow: something new. I downloaded a free t-shirt pattern!

Mindful Knitting

image(Woke up with a medium-sized headache, and lay in bed with my iPad surfing sewing and knitting blogs.) Boy, can I chew up a lot of time on the Internet reading what other people are doing and creating?! So let me tell you about my latest creation…

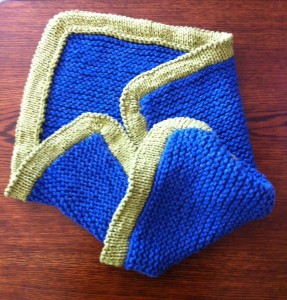
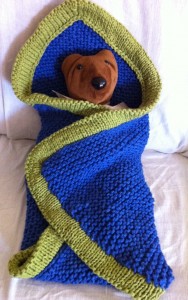
For our vacation last week, I chose the Spud & Chloe Bulky Baby Blanket. The colors I chose were Wave for the Outer and Grass for the Sweater. I opted for the garter stitch version, as I’ve been asked by several people if I could teach them to sew, and I think garter stitch is the place to start.

The Outer yarn is soft and cushy and wonderful. But before I discovered that, I started with the Sweater yarn. Follow your guts, people. If it seems to you like something’s wrong, it probably is!

I had knitted a couple of cotton washcloths on the trip, so was in knitting mode and anxious to get started as we headed from Portland to Boothbay Harbor. I reached into the Jimmy Beans bag and pulled out a hank of yarn, balancing it around by knees to wind it into a ball. I didn’t think. I didn’t look. I just did! Mistake!! My lovely ball of lime worsted weight wool/cotton was ready to go, and so was I. I pulled out my size 15 circs and started casting on. I knit about 6 rows, and thought, “This isn’t right. I must have cast on too loosely.” So I unknitted the whole thing and tried again. Crap. Same result. Over the next two days I picked it up and added a few more stitches. “It must be the needles,” I thought. I really don’t like bamboo needles.

As I mentioned in the trip post, I made a new friend who suggested insisted I visit Halcyon Yarn in Bath, ME. I walked in and asked the helpful salesclerk if she had any Addi 15 circs. “My bamboos just aren’t working for this project.” She didn’t have Addis but had Knitter’s Pride interchangeables which I happily took off her hands – both 15s and 13s and a 40″ cable.

Back in the car, the Jazzman drove toward Freeport and I quickly pulled out and assembled the 15s and started casting on. Again I knit several inches before thinking there must be something wrong with the pattern or the yarn. (Certainly not the knitter. God forbid!!) I reached into my bag to pull out the size 13 needles. Maybe if I used the smaller needle the gauge would correct itself. As I blindly felt around in the bag for the other needles, my hand touched the soft and cushy Outer yarn. The yarn for the blanket itself, not the yarn for the edging. Huh?

I pulled the bag into my lap and pulled each item out, mentally cursing my stupidity. The blanket is knit with Bulky weight yarn on 15s. The edging is knit with two strands of Worsted weight yarn on 13s. Dumb. Dumb. Dumb!

Extracting the needle from my third try with the Sweater, and opening the first hank of Outer, I frogged the Sweater and rolled it back into a ball, then balanced the Outer on my knees and rolled that ball. I cast the Outer onto the 15s and began knitting. Like buttah. Like lightning!!!

I added a few rows to the blanket over our two days in Massachusetts, then whipped through the other three hanks with only about six rows left to knit by the time we reached home on Saturday evening. The next morning, between trips to the basement to do the vacation laundry, I finished the Outer, changed needles, and started the stockinette stitch border.

I had never knit a border like this in my limited knitting life (Limited, relative to every other knitter I know.) I wasn’t really sure where it was going until I finished the purl row and the succeeding knit row and then started trying to logic it out. Aha! You fold at the purl row and knit the edges together. Brilliant!

But, again, something didn’t feel quite right. At this point I had finished nine of the ten rows that comprise the border (each row has no fewer than 240 stitches). I looked back at the instructions and realized the increase rows said “k1, make 1 right …, make 1 left, [repeat four times]”. Repeat the k1 four times also, Dummy, not just the make 1s! The mitered corners that should have been beautiful were a knitted mess. Sad face. Very sad face!

So I put on a two hour movie and started frogging. Yes, I could have taken the needles out and just started over from scratch, but I thought this was better, not realizing I was going back to the first row after the picked-up stitches around the edge. Ho hum. (By now you’re saying, “This girl has a lot fewer brains than I credited her with.”)

So, as I was saying, I pulled out each of the double-strand stitches, keeping the strands together and letting them pool in the “cup” created by the circular needle around the edge.

Two hours and more than 2000 stitches later, I began row two again. Friday night, the Jazzman out drinking with his buds, I watched crap TV and knitted the stockinette border. I noticed my yarn dwindling. And when I got to about the 170th stitch of the bind-off, I realized I was out of yarn.

Pulling the doubled Sweater yarn from the cup of spaghetti in my lap, rather than having rolled it all back into two separate balls before restarting the border, made for a looser knit. And made me run our of yarn about 3 yards too soon.

Extreme feeling of despondency.

This is not cheap yarn. The yarn alone for the blanket was [please don’t tell anyone that I spent that much on a project just to satisfy my own curiosity and keep myself from being bored on vacation!!!] I would now spend another $17+ for a hank of yarn to knit about 70 stitches.

Thankful feelings for books like “One Skein Wonders.” And a second thankful feeling that lime is my favorite color, and I’ll have about 157 yards of this lovely superwash wool to play with. Maybe I can even take it on my November trip to Europe as an antiboredom project.

Orrrr, I could buy four more hanks of Outer and one more hank of Sweater and do it correctly, from the start, this time!

A Study in Stretch

ReptileFrontThis pattern, Katherine Tilton’s Vogue 8817, ReptileFabrichas become a favorite TNT (Tried ‘n’ True) for me. I love both views—View A/B, the T-shirt with a back inset, and View C/D, the tunic. When I saw the delicious colors of this poly/lycra reptile print at Gorgeous Fabrics, I grabbed it. I actually grabbed enough so that DGD could also make a top for herself out of this. ReptileMeshAnd while I was at it, I grabbed some black mesh to use with the ssssnake print on this shirt.

Here are the two interesting lessons learned from this project:

  1. Mesh vs. Solid: I used the mesh in four places on this top: In the inset on the upper back; for a ½” embellishment in the underbust seam; in a band about 1″ from the bottom of each sleeve; and for the neck binding. ReptileDetail Click on the detail photo at the right to see a close-up of these embellishments. What I love the most is the neck binding. You notice—on all the photos—how it doesn’t scream *b*l*a*c*k* at you? The mesh in two layers over the base print just creates a subtle “here’s the edge of the neck” delineation. Subtle. Chic. Love it!
  2. Changing the amount of stretch: I cut two pieces crosswise—the lower front and the back inset. The stretch on this knit, as on most knits, is crosswise. ReptileBothReptileBackWhen you cut a pattern piece crosswise on a knit, you’re robbing yourself of the stretch around the body. So the lower front piece having less stretch meant that piece would hug my body more than the side pieces would. And this shirt would be snugger than a similar shirt with all pieces cut lengthwise on the fabric. Look at the two other shirts out of this pattern: Poster City and Love at First Sight. I don’t know the exact percentage of stretch in the other two knits, which are rayon rather than polyester. Ann Steeves at Gorgeous Fabrics lists this fabric as having 40% stretch. I didn’t take the time yesterday to dig back through my scraps and compare the other two. But I love how this shirt fits. I wore it for a quick Nordstrom-run to Cleveland yesterday, where three sales associates admired the shirt. (“Thank you. I just finished it this morning.”)

I’m normally loathe to buy polyester, but one hears so much about the new polyester knits now available on the market. I loved the print so much, I just had to try it. I’m so glad I did—as is DGD, who can’t wait to get started on her new ssssnake top.

A Top to Bring Fall Into the Picture

B5891FrontB5891Front2Most of Katherine Tilton’s patterns have appeared in Vogue Patterns until this past spring, when two new patterns were published in Vogue’s sister publication, Butterick Patterns. When I saw Katherine’s new top with vest and jacket views, Butterick 5891, I ordered the pattern immediately and started imagining how I could decrease my fabric stash with this pattern. First I made the jacket view in a hand-dyed silk shantung, but I’ll tell you about that another day. Today we’re going to talk about the vest.

Before deciding what to do with the pattern, I read the six reviews on PatternReview.com. Several people complained that the pattern had 15—count em, 15—pattern pieces. And while I agree that it is a pain to cut 15 pattern pieces for one little vest, the result was definitely worth the effort. I love this garment beyond words!

(Click on any photo to view larger version.)


Pattern Description: Loose-fitting top has collar variations, side pockets (left side A, B), and shaped hemline. A and B: raised neckline, mock neck/lower bands, front pleated peplum and narrow hem. C and D: folded, single layer collar, and stitched hems. Wrong side shows on hemlines and collar C, D.

Pattern Sizing: Misses 8-24. I believe I cut a 16.

Did it look like the photo/drawing on the pattern envelope once you were done sewing with it? Yes.

Were the instructions easy to follow? Pretty much – there were a couple of times I had to scratch my head and reread a couple of times, but for the most part, if you can apply logic and common sense to a problem, they were easy to follow.

What did you particularly like or dislike about the pattern? The neckline. Wow – how flattering! The subtly asymmetrical hem is out-of-the-box without going too far for my rather conservative tastes. And the off-center back seam is unique and interesting.

I disliked the lack of finishing detail suggestions for the inside. I love creating garments that don’t have a raw edge showing on the inside, and that was challenging.

Fabric Used: A lightweight rusty brown linen that’s been in my stash for about 12 years. Because of the color, I believe I’ll be able to wear this into the fall with the black lightweight t-shirt underneath.

Pattern alterations or any design changes you made: I am 5’8″ tall. I added 2″ to the length on every piece that had “shorten or lengthen here” lines. Next time, I’ll increase that by an inch or two.

I didn’t love the tucks in the peplum when I was almost done and tried it on, so just unsewed them. The peplum hangs down below the top, mirroring the lines of the top.

Would you sew it again? Would you recommend it to others? Yes, I’ll probably sew it again. Yes, I’d recommend, but not to beginners.

Conclusion: An hour after finishing the top, I threw it on over my fave Eileen Fisher silk jersey crew neck long-sleeve top for a quick trip up to Lake Erie for an end-of-summer pot luck with friends. Once we got up there, the weather was warmer than expected, so I ducked inside the cottage and pulled off the t-shirt. I loved the look, whether as a sleeveless top or a vest. I felt chic and received compliments. I had no idea I would love this top the way I do.

I’m thinking another made of a sweater knit or a lightweight wool would be the perfect addition to my winter wardrobe.

Thanks, Katherine!!


B5891BackB5891asVestHere’s the back. My girlfriend told me to strike a pose before she clicked the shutter. If you like those slacks, here’s their story. Oh, I found recycled plastic buttons, Green Earth, a new line of product from La Mode.

And—oh, my gosh—look at that neckline. I just think it’s one of the most flattering necklines I’ve ever had frame my face. And doesn’t it look great with the t-shirt underneath?

Love at first wearing!